


 本文详细介绍如何在Vue前端和SpringBoot后端之间实现WebSocket通信。前端利用Vue框架结合WebSocket进行实时消息收发,后端则通过SpringBoot的WebSocket支持进行消息处理与推送。文章覆盖了代码实现、依赖配置及测试方法。
最近公司有需求集成websocket,前端使用vue,后端采用springboot,废话不多说,开鲁代码:
vue:
<template>
<div>
<input type="text" v-model="text">
<button @click="send()">发送消息</button>
<br>
<button @click="closeWebSocket()">关闭websocket连接</button>
<br>
<div>{{data}}</div>
</div>
</template>
<script>
export default {
name: 'Login',
data() {
return {
text: '',
data: '',
websocket: null
}
},
mounted() {
if ('WebSocket' in window) {
this.websocket = new WebSocket('ws://localhost:7900/websocket')
this.initWebSocket()
} else {
alert('当前浏览器 Not support websocket')
}
},
beforeDestroy() {
this.onbeforeunload()
},
methods: {
initWebSocket() {
//连接错误
this.websocket.onerror = this.setErrorMessage
// //连接成功
this.websocket.onopen = this.setOnopenMessage
//收到消息的回调
this.websocket.onmessage = this.setOnmessageMessage
//连接关闭的回调
this.websocket.onclose = this.setOncloseMessage
//监听窗口关闭事件,当窗口关闭时,主动去关闭websocket连接,防止连接还没断开就关闭窗口,server端会抛异常。
window.onbeforeunload = this.onbeforeunload
},
setErrorMessage() {
this.data = "WebSocket连接发生错误" + ' 状态码:' + this.websocket.readyState;
},
setOnopenMessage() {
this.data = "WebSocket连接成功" + ' 状态码:' + this.websocket.readyState;
},
setOnmessageMessage(event) {
this.data += "\n\r" + '服务端返回:' + event.data;
},
setOncloseMessage() {
this.data = "WebSocket连接关闭" + ' 状态码:' + this.websocket.readyState;
},
onbeforeunload() {
this.closeWebSocket();
},
//websocket发送消息
send() {
this.websocket.send(this.text)
this.text = ''
},
closeWebSocket() {
this.websocket.close()
}
}
}
</script>
后端 springboot:
Maven依赖:
<!-- websocket -->
<dependency>
   <groupId>org.springframework.boot</groupId>
   <artifactId>spring-boot-starter-websocket</artifactId>
</dependency>
WebSocket的配置
WebSocketConfig:
package com.itmuch.cloud.config;

import org.springframework.context.annotation.Bean;
import org.springframework.context.annotation.Configuration;
import org.springframework.web.socket.server.standard.ServerEndpointExporter;

@Configuration
public class WebSocketConfig {

    @Bean
    public ServerEndpointExporter serverEndpointExporter(){
        return new ServerEndpointExporter();
    }
}
WebSocketServer.class
WebSocketServer相当于ws协议的Controller,直接@ServerEndpoint("/websocket")@Component启用即可,代码如下:
package com.itmuch.cloud.controller;

import org.springframework.stereotype.Component;
import javax.websocket.*;
import javax.websocket.server.ServerEndpoint;
import java.io.IOException;
import java.util.concurrent.CopyOnWriteArraySet;

/**
 * websocket工具
 */
@Component
@ServerEndpoint("/websocket")
public class WebSocketServer {
    //静态变量,用来记录当前在线连接数。应该把它设计成线程安全的
    private static int onlineCount = 0;
    //concurrent包的线程安全Set,用来存放每个客户端对应的MyWebSocket对象
    private static CopyOnWriteArraySet<WebSocketServer> webSocketSet = new CopyOnWriteArraySet<WebSocketServer>();

    //与某个客户端的连接会话,需要通过它给客户端发送数据
    private Session session;


    /**
     * 连接建立成功调用的方法
     */
    @OnOpen
    public void onOpen(Session session){
        this.session = session;
        webSocketSet.add(this); //加入到set中
        addOnlineCount(); //在线数加1
        System.out.println("当前在线人数为" + getOnlineCount());
        try{
            sendMessage("连接成功");
        }catch(IOException e){
            System.out.println("websocket有异常");
        }
    }
    /**
     * 连接关闭调用的方法
     */
    @OnClose
    public void onClose(){
        webSocketSet.remove(this); //从set中删除
        subOnlineCount();
        System.out.println("有一连接关闭!当前在线人数为" + getOnlineCount());
    }

    /**
     * 收到客户端信息后调用的方法
     * @param message 客户端发送过来的消息
     */
    @OnMessage
    public void onMessage(String message,Session session){
        System.out.println("客户端的信息:"+message);
        //群发消息
        for(WebSocketServer item : webSocketSet){
            try {
                item.sendMessage(message);
            } catch (Exception e) {
                e.printStackTrace();
            }
        }
    }

    /**
     * 发生错误时调用
     * @param session
     * @param error
     */
    @OnError
    public void onError(Session session,Throwable error){
        System.out.println("发送错误");
        error.printStackTrace();
    }

    /**
     * 服务器的主动推送
     */
    public void sendMessage(String message) throws IOException{
        this.session.getBasicRemote().sendText(message);
    }

    /**
     * 群发自定义消息
     */
    public static void sendInfo(String message) throws IOException{
        for(WebSocketServer item : webSocketSet){
            try {
                item.sendMessage(message);
            } catch (Exception e) {
                continue;
            }
        }

    }
    public static synchronized int getOnlineCount(){
        return onlineCount;
    }
    public static synchronized void addOnlineCount(){
        WebSocketServer.onlineCount++;
    }
    public static synchronized void subOnlineCount(){
        WebSocketServer.onlineCount--;
    }
}
写一个bean,用来测试:
package com.itmuch.cloud.entity;

import java.math.BigDecimal;

import javax.persistence.Column;
import javax.persistence.Entity;
import javax.persistence.GeneratedValue;
import javax.persistence.GenerationType;
import javax.persistence.Id;

@Entity
public class User {

  public User(Long id, String username) {
    super();
    this.id = id;
    this.username = username;
  }

  public User() {
    super();
  }

  @Id
  @GeneratedValue(strategy = GenerationType.AUTO)
  private Long id;

  @Column
  private String username;

  @Column
  private String name;

  @Column
  private Short age;

  @Column
  private BigDecimal balance;

  public Long getId() {
    return this.id;
  }

  public void setId(Long id) {
    this.id = id;
  }

  public String getUsername() {
    return this.username;
  }

  public void setUsername(String username) {
    this.username = username;
  }

  public String getName() {
    return this.name;
  }

  public void setName(String name) {
    this.name = name;
  }

  public Short getAge() {
    return this.age;
  }

  public void setAge(Short age) {
    this.age = age;
  }

  public BigDecimal getBalance() {
    return this.balance;
  }

  public void setBalance(BigDecimal balance) {
    this.balance = balance;
  }
}
最后写一个Controller,想法是这样的,访问Controller的方法的时候,后端向前端推送数据,Controller代码如下:
package com.itmuch.cloud.controller;

import com.itmuch.cloud.entity.User;
import org.springframework.web.bind.annotation.RequestMapping;
import org.springframework.web.bind.annotation.RestController;


@RestController
@RequestMapping("/socketcenter")
public class WebsocketController {
    /**
     * 推送消息
     * @param message
     */
    @RequestMapping("socket/push")
    public void pushToWeb(String message){
        try {
            for(int i = 0; i <= 1000; i++){
                User user = new User();
                long k = i;
                user.setId(k);
                user.setName(i+"_zhang");
                WebSocketServer.sendInfo(user.toString());
            }

        } catch (Exception e) {
            e.printStackTrace();
        }
    }
}
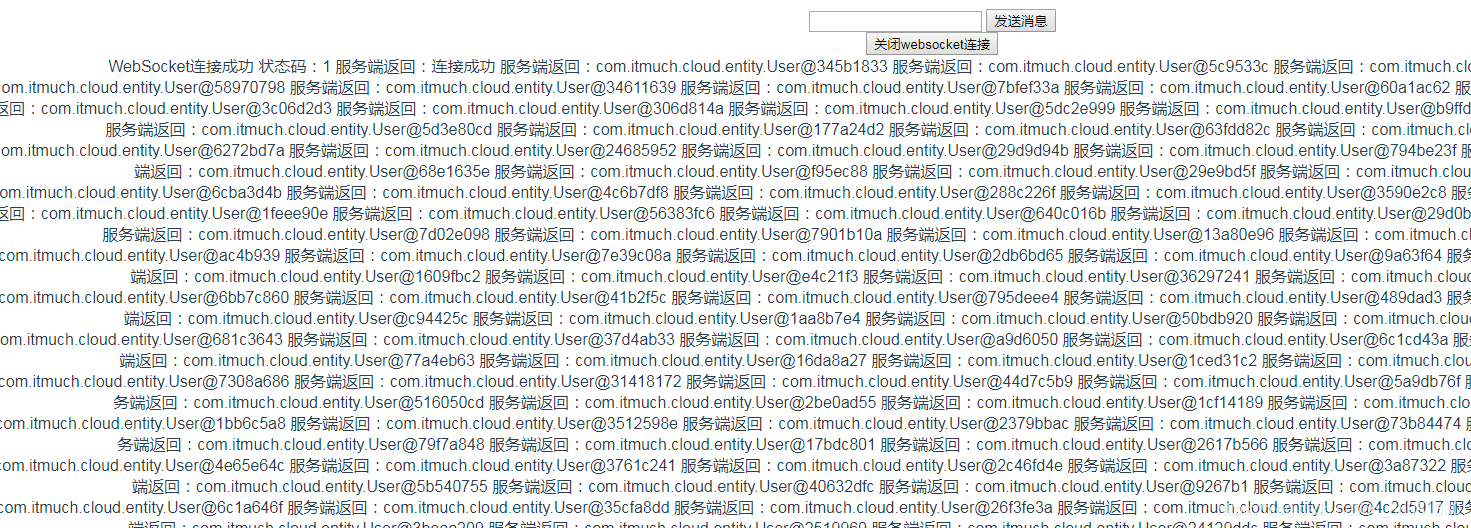
访问 http://localhost:7900/socketcenter/socket/push?message=aaa
可以看到前端推送的代码:


 894
894

 被折叠的 条评论
为什么被折叠?
被折叠的 条评论
为什么被折叠?
 到【灌水乐园】发言


