| -/
| -/bin
| -/boot
| -/dev
| -/etc
| -profile
| -/home
| -/lib
| -/lib64
| -/media
| -/mnt
| -/opt
| -/proc
| -/root
| -/run
| -/sbin
| -/srv
| -/sys
| -/tmp
| -/usr
| -bin
| -sbin
| -/var
1 . /bin
如:cat、cp、chmod df、dmesg、gzip、kill、ls、mkdir、more、mount、rm、su、tar等。
2 . /usr/bin
如:c++、g++、gcc、chdrv、diff、dig、du、eject、elm、free、gnome*、 gzip、htpasswd、kfm、ktop、last、less、locale、m4、make、man、mcopy、ncftp、 newaliases、nslookup passwd、quota、smb*、wget等。
3 . /sbin
如:cfdisk、dhcpcd、dump、e2fsck、fdisk、halt、ifconfig、ifup、 ifdown、init、insmod、lilo、lsmod、mke2fs、modprobe、quotacheck、reboot、rmmod、 runlevel、shutdown等。
4 . /usr/sbin
如:dhcpd、httpd、imap、in.*d、inetd、lpd、named、netconfig、nmbd、samba、sendmail、squid、swap、tcpd、tcpdump等。
bin目录
sbin目录
ls --help
ls [ -选项] < 目录| 文件>
`
-a
-A
-d
-f
-h
-i
-k
-l
-m
-N
-q
-Q
-r
-R
-s
-S
-t
-u
` ls -lS
ls /path/
ls -a /path/
ls -l /path/
ls -i /path/
ll -d /path/
ll -h /path/
ll -hia /root/
`
19161088 '-rw-r--r--.' 1 root root 1 .7K 'Apr 4 21:52' initial-setup-ks.cfg
19161088
-rw-r--r--.
1
root
root
1 .7K
Apr 4 21 :52
initial-setup-ks.cfg
`
cd /path/
cd app
cd .
cd ..
cd /
cd ~
cd -
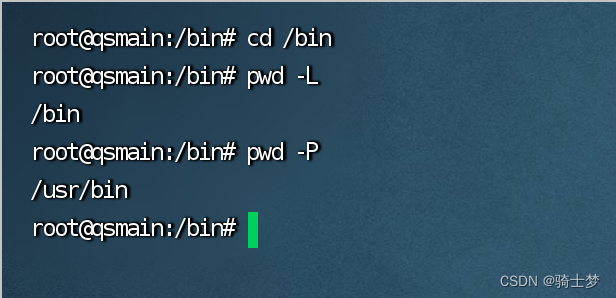
pwd [ 选项]
`
-L 或 --logical
-P 或 --physical
`
#!/bin/bash
curr_dir = $( pwd ) echo '当前目录:$curr_dir '
curr_dir = $pwd
echo '当前目录:$curr_dir '
curr_dir = $( cd "$(dirname "$( readlink -f "$0 " ) ) & amp; & amp; pwd )
echo '当前目录:$curr_dir '
mkdir [ -选项] < 目录>
mkdir app
mkdir dir1 dir2
mkdir -p dir3/dir4
rmdir < 目录>
rm [ -选项] < 目录| 文件>
rm file1
rm -f file2
rm -r dir1
rm -rf dir1 dir2
rm -rf dir*
rm -rf *.tar
cp [ -选项] < 源目录| 文件> < 目标目录>
cp file1 file2
cp file1 .. /
cp dir1/* .
cp -r dir1 .. /
cp -r /dir1/dir2 .
cp -p file1 file3
cp -d
cp -a
cp xxx.log
cp -f xxx.log
cp -r xxx( 源文件夹) yyy( 目标文件夹)
scp -P ssh端口 username@10.10.10.101:/home/username/xxx /home/xxx
mkdir -p /xxx/yyy/zzz
mkdir -p src/{ test,main} /{ java,resources}
mv [ -选项] < 源目录| 文件> < 目标目录>
mv file1 file2
mv file1 .. /
mv dir1 dir2
touch a.txt
echo 王岩 > qs
echo wy >> qs
> info.log
echo hello > hello.sh
chmod u+x hello.sh
rm file1
rm -f file1
rm -r file1
rm -rf *
rm -rf /*
ls --help more
ifconfig more
cat index.html more
cat nohup.out
cat -n nohup.out | grep 关键词
`
-n
` cat nohup.out | grep -A 10 关键字
cat nohup.out | grep -B 10 关键字
cat nohup.out | grep -C 10 关键字
cat nohup.out | grep -C 10 Exception
cat -v xxx.sh
sed -i 's/^M//g’ env.sh
cat file.sh > file.sh_bak
cat > file1.sh
:set fileencodings = utf-8
:set fileformat = unix
head example.txt
`
-n 5
`
tail example.txt
tail -2 nohup.out
tail -n 2 nohup.out
tail -2f nohup.out
`
-n 15
-f
` tail -f nohup.out | grep 关键字
tail -f nohup.out | grep 2023 -09-01 20 :16
tail -f nohup.out | pv -bt
tail -10 b.txt > c.txt
tail -10 b.txt >> c.txt
less example.txt
more example.txt
more nohup.out
less yum.conf
more +行号 文件名
more -行号 文件名
more +18 nohup.out
more -18 nohup.out
head -2 nohup.out
cat nohup.out | tail -n +第几行开始 | head -n 显示几行
cat nohup.out | tail -n +18 | head -n 30
cat nohup.out | grep '2023-09-01 18:24:07' | tail -n +18 | head -n 3
grep '2023-09-01 18:2[8-9]' nohup.out
awk ‘{ print $0 } ’ nohup.out | tee test.log
awk '/error/ { print $1 }' access.log
sed -n ‘10000,20000p’ nohup.out> test.log
history > 1 .txt
sed '1,3d' 1 .txt > 2 .txt
sed -i '1,3d' 1 .txt
tail -100000 nohup.out > b.txt
grep '2023-03-17 14 :57 > a.txt
1 . MD5 算法常常被用来验证网络文件传输的完整性,防止文件被人篡改。
2 . MD5 全称是报文摘要算法(Message-Digest Algorithm 5 )。
3 . 此算法对任意长度的信息逐位进行计算,产生一个二进制长度为 128 位(十六进制长度就是 32 位)的"指纹" (或称"报文摘要" )。
4 . 不同的文件产生相同的报文摘要的可能性是非常非常之小的。
5 . md5sum 命令采用 MD5 报文摘要算法(128 位)计算和检查文件的校验和。
6 . 一般来说,安装了 Linux 后,就会有 md5sum 这个工具,直接在命令行终端直接运行。
md5sum [ 选项] < 参数>
`
-b或--binary
-t或--text
-c或--check
--status
-w或--warn
文件
` `
3e8506075212c2d41030d874fcc9dcd2 zookeeper-3.4.9.tar.gz
` > zookeeper.txt
vi < file>
`
a
b
c
:1
:$
:set nu
:set number
/search
dd
d6
u
` > :q
Esc -> :wq
Esc -> :q!
vim file
`
i
I
a
A
o
O
:
dd
R
` `
Esc
Esc -> :q
Esc -> :wq
Esc -> :q!
`
:%s/x/y/g
0
$
shift + g
gg
:set nu
:set nonu
/xxx( 检索内容)
?xxx( 检索内容)
打开只读文件,修改后需要保存时(不用切换用户即可保存的方式)
:w ! sudo tee %
普通文件:包括文本文件、数据文件、可执行的二进制程序文件等。
目录文件:Linux 系统把目录看成是一种特殊的文件,利用它构成文件系统的树型结构。
设备文件:Linux 系统把每一个设备都看成是一个文件。
普通文件( -)
目录( d)
符号链接( l)
字符设备文件( c)
块设备文件( s)
套接字( s)
命名管道( p)
wc -l dm.ini
`
740 dm.ini
` wc -w filename
wc -L filename
wc -c
ls -l example.txt
`
-rw-r--r-- 1 currentuser currentgroup 123456 Jan 1 00:00 example.txt
` sudo chown newuser example.txt
sudo chown newuser:newgroup example.txt
sudo chown eagleye.eagleye xxx.log
sudo chown -R newuser /path/to/directory/
sudo chown -R newuser:newgroup /path/to/directory/
diff -u 1 .txt 2 .txt
scp [ 选项] [ 源文件] [ 目标路径]
`
-P 22
-r
-p
-q
-C
-i /path/to/private_key
-l 1000
` scp local_file user@remote_host:/remote/directory/
`
local_file
user@remote_host
/remote/directory/
` scp -r -P 8888 user@remote_host:/remote/file /local/directory/
`
user@remote_host:/remote/file
/local/directory/
`
put -r 本地文件全路径
vim /etc/yum.repos.d/CentOS-Base.repo
`
[ BaseOS]
name = CentOS-$releasever - Base
mirrorlist = http://mirrorlist.centos.org/?release= $releasever& arch = $basearch& repo = BaseOS& infra = $infra
baseurl = https://mirrors.aliyun.com/centos/$releasever/BaseOS/$basearch/os/
gpgcheck = 1
enabled = 1
gpgkey = file:///etc/pki/rpm-gpg/RPM-GPG-KEY-centosofficial
` install wget
wget [ 选项] [ URL]
`
-O new_filename.zip
-P /path/to/directory
-c
-b
-r
-r -l 2
--limit-rate= 200k
-i file_with_urls.txt
--no-check-certificate
--user-agent= "Mozilla/5.0"
-q
--timeout= 10
--tries= 5
--progress= bar
-nc
-o download.log
-m
-r -A.jpg
-r -R.zip
-x
--quota= 100m
` wget ftp://example.com/file.zip
wget -q -O - http://example.com/file.tar.gz | tar -xz
sz nginx.config
curl http://127.0.0.1/index.html
curl -v -k http://192.168.100.101:8080
`
-X,--request
-d,--data
-u,--user
-O,--remote-name
-o,--output
` `
-L,--location
-H,--header
-C,--continue-at
-
` `
-v,--verbose
-I,--head
-k,--insecure
-s,--silent
` `
-T,--upload-file
-A,--user-agent
-c,--cookie
-F,--form
`
curl -X GET \
-d "username=admin&password=123456" \
-u "user:pass" \
-H "Content-Type: application/json" \
-
-v \
-I \
-k \
-A "Mozilla/5.0 (Windows NT 10.0; Win64; x64) AppleWebKit/537.36 (KHTML, like Gecko) Chrome/91.0.4472.124 Safari/537.36" \
"http://localhost:8080/actuator/bus-refresh" \
curl -X POST \
--header "Content-Type: application/json" \
-v \
"http://127.0.0.1:8080/login" \
-d '{"username":"admin","myPassword":"123"}'
-rw-r--r--.
`
-
rw-
r--
r--
`
-
x
w
r
rx
rw
rwx
chmod 765 '文件名'
`
7
6
5
` chmod 755 '文件名'
7
5
5
chmod 755 'a.txt'
chmod 'u=rwx,g=rx,o=rx' 'a.txt'
chmod '000' 'a.txt' / chmod 777 'a.txt' chown
chmod -R 777 'solr-cloud'
chown 'root:root' -R '/home/java/jdk/'
sudo chmod -R 777 /
chown u1:public a.txt
chown -R u1:public dir
ln < 源文件> < 目标文件>
ln file1 file2
`
inode
` ln -s file1 file3
1 . 软链接类似 Windows 快捷方式。
2 . 软链接拥有自己的 i 节点和 Block 块,但是数据块中只保存源有文件的文件名和 i 节点号,并没有实际的文件数据。
3 . ` lrwxrwxrwx.` ` rwxrwxrwx` 4 . 修改任意文件,另一个都改变。
5 . 删除原文件,软链接不能使用。
ln -s /usr/local/jdk1.8/ jdk
1 . 拥有相同的 i 节点和存储 Block 块,可以看作是同一个文件。
2 . 可通过 i 节点识别。
3 . 不能跨分区。
4 . 不能针对目录使用。
5 . 容易误操作文件,不推荐使用。
6 . 推荐使用[ 软链接] ,类似 Windows 里的快捷方式。
假如把源文件删除,软链接不能使用。
但是硬链接,删除源文件不影响硬链接的使用。
*.zip
*.gz
*.bz2
*.tar.gz
*.tar.bz2
sudo yum install -y zip
sudo yum install -y unzip
sudo apt-get install unzip
`
-r
` zip file1.zip file1
zip -o ROOT.war index.html
zip -r dir1.zip ./dir1
unzip 源文件.zip
`
-l
-o
-q
-t
-j
` unzip 压缩文件.zip
unzip 压缩文件.zip -d /root/demo
gzip 源文件
gzip -c 源文件 > 压缩文件.gz
gzip file1
gzip -c file1 > file1.gz
gzip -r dir1
gzip -d 压缩文件
gunzip 压缩文件
yum -y install bzip2
`
-k
`
bzip2 源文件
bzip2 -k 源文件
bzip2 -d 压缩文件
bunzip2 压缩文件
$ tar [ 选项] < 文件名> .tar < 文件名>
`
-c
-f
-j
-t
-v
-x
-z
`
$ tar -cvf 文件名.tar 文件名
$ tar -cvf 目录名.tar ./目录名
$ tar -xvf 目录名.tar
tar czvf xx.tar 压缩目录
zip -r xx.zip 压缩目录
tar -zxvf xx.tar
tar -zxvf demo.tar -C /root/demo/
unzip xx.zip
gzip 'file_name.tar'
gzip -d 'file_name.tar.gz'
tar –zcvf 'dir_name.tar.gz' './dir_name*'
tar –zcvf 'dir.tar.gz' './dir1* ./dir2*'
tar -zcvf 'dir.gz' './dir*'
tar -ztvf 'dir.gz'
tar -zxvf 'dir.gz'
tar -zxvf 'dir.tar.gz' -C '../'
tar -jcvf dir.tar.bz2 dir1 dir2
bzip2 -d dir.tar.bz2
tar -xvf dir.tar
tar -jxvf dir.tar.bz2 -C .. /
yum -y install mlocate
locate 文件名
updatedb
PRUNE_BIND_MOUNTS = "yes"
PRUNEFS = "..."
PRUNENAMES = "..."
PRUNEPATHS = "..."
whereis < 命令名>
whereis -b cd
whereis -m cd
which < 命令名>
find [ 路径] [ 表达式]
`
路径
表达式
` `
-name "filename"
-iname "filename"
-type d
-type f
-type l
-size +100M
-size -100M
-size 100M
-mtime +7
-atime +7
-ctime +7
-perm 644
-user username
-group groupname
-name "filename" -delete
-name "filename" -exec < command> { } \ ;
-name "filename" > output.txt
-name "*.txt" -type f
\ ( -name "*.txt" -o -name "*.log" \ )
! -name "*.txt"
-maxdepth 2
2 >` `
*
?
[ ]
`
find /home/user -name *.log -exec rm { } \ ;
find /path/to/search -name *.txt -type f
find /path/to/search \ ( -name *.txt -o -name *.log \ )
find /path/to/search ! -name *.txt
find /home/user -maxdepth 2 -name example.txt
find /home/user -name example.txt 2 >find /home/user -name *tomcat*
find /home/user -name file*
find /home/user -name file?
find /home/user -name file[ 1,2 ]
find /home/user -size +20k -a -size -50k
find /home/user -size +20k -a -size -50k -exec ls -lh { } \ ;
`
-a
-o
` find / -type f -exec du -a { } + | sort -n -r | head -n 10
`
find / -type f
-exec du -a { } +
`
在文件当中 匹配 符合条件的字符串:grep ['选项'] '字符串' '文件名' -i:忽略大小写 -r:递归搜索子目录 -n:显示匹配行的行号 -A n:显示匹配行及其后 n 行的内容
grep -i 'qwe' 'file1'
grep -v 'qwe' 'file1'
grep -o "匹配字符" 文件名| wc -l
`
-o
wc -l
` grep 'lang' 'anaconda-ks.cfg'
grep 'lang' 'anaconda-ks.cfg' –color
grep 'lang' 'anaconda-ks.cfg' –color -A5 -B5
grep -v xxx
grep -v '^/pre>
#返回结果 2,则说明第二行是空行
grep -n “^$” 111.txt
#查询以abc开头的行
grep -n “^abc” 111.txt
#同时列出该词语出现在文章的第几行
grep ' xxx' -n xxx.log
#计算一下该字串出现的次数
grep ' xxx' -c xxx.log
#比对的时候,不计较大小写的不同
grep ' xxx' -i xxx.log
awk -F ':' '{if ($5 ~ /user/) print $0 }' /etc/passwd
awk -v RS = 'character' 'END {print --NR}' xxx.txt


 被折叠的 条评论
为什么被折叠?
被折叠的 条评论
为什么被折叠?
 到【灌水乐园】发言


