


 本文介绍了如何使用Eclipse创建Spring Cloud的多模块项目,包括父工程的建立、paymentmain子模块的添加及功能实现,order子模块的创建,以及公共模块的构建。在每个步骤中,详细阐述了从pom.xml配置、数据库交互、YAML配置到启动类、实体类、DAO、Service、Controller的编写过程,以及如何进行模块间的访问和公共模块的打包引用。
1.创建父工程
新建maven工程

选择简单工程

打包方式选择pom

成功,修改pom文件,按需添加依赖
<properties>
   		<project.build.sourceEncoding>UTF-8</project.build.sourceEncoding>
        <project.reporting.outputEncoding>UTF-8</project.reporting.outputEncoding>
        <java.version>1.8</java.version>
        <!-- Environment Settings -->
        <java.version>1.8</java.version>
        <project.build.sourceEncoding>UTF-8</project.build.sourceEncoding>
        <project.reporting.outputEncoding>UTF-8</project.reporting.outputEncoding>
       	<maven.compiler.source>1.8</maven.compiler.source>
       	<maven.compiler.target>1.8</maven.compiler.target>
       	<junit.version>4.12</junit.version>
       	<log4j.version>1.2.17</log4j.version>
       	<lombok.version>1.16.18</lombok.version>
       	<mysql.version>8.0.12</mysql.version>
       	<druid.version>1.1.16</druid.version>
       	<mybatis.spring.boot.version>1.3.1</mybatis.spring.boot.version>
    </properties>


<!-- 子模块继承之后,提供作用:锁定版本,子moudle不用写groupid和version -->
	<dependencyManagement>
	  <dependencies>

	  <dependency>
		<groupId>com.seeker</groupId>
		<artifactId>commons</artifactId>
		<version>0.0.1-SNAPSHOT</version>
	</dependency>
	   <!--spring boot 2.2.2-->
            <dependency>
                <groupId>org.springframework.boot</groupId>
                <artifactId>spring-boot-dependencies</artifactId>
                <version>2.2.2.RELEASE</version>
                <type>pom</type>
                <scope>import</scope>
            </dependency>
            <!--spring cloud Hoxton.SR1-->
            <dependency>
                <groupId>org.springframework.cloud</groupId>
                <artifactId>spring-cloud-dependencies</artifactId>
                <version>Hoxton.SR1</version>
                <type>pom</type>
                <scope>import</scope>
            </dependency>
            <!--spring cloud alibaba 2.1.0.RELEASE-->
            <dependency>
                <groupId>com.alibaba.cloud</groupId>
                <artifactId>spring-cloud-alibaba-dependencies</artifactId>
                <version>2.2.0.RELEASE</version>
                <type>pom</type>
                <scope>import</scope>
            </dependency>

            <!-- MySql -->
            <dependency>
                <groupId>mysql</groupId>
                <artifactId>mysql-connector-java</artifactId>
                <version>${mysql.version}</version>
            </dependency>
            <!-- Druid -->
            <dependency>
                <groupId>com.alibaba</groupId>
                <artifactId>druid-spring-boot-starter</artifactId>
                <version>${druid.version}</version>
            </dependency>
            <!-- mybatis-springboot整合 -->
            <dependency>
                <groupId>org.mybatis.spring.boot</groupId>
                <artifactId>mybatis-spring-boot-starter</artifactId>
                <version>${mybatis.spring.boot.version}</version>
            </dependency>
            <!--lombok-->
            <dependency>
                <groupId>org.projectlombok</groupId>
                <artifactId>lombok</artifactId>
                <version>${lombok.version}</version>
            </dependency>
            <!--junit-->
            <dependency>
                <groupId>junit</groupId>
                <artifactId>junit</artifactId>
                <version>${junit.version}</version>
            </dependency>
            <!-- log4j -->
            <dependency>
                <groupId>log4j</groupId>
                <artifactId>log4j</artifactId>
                <version>${log4j.version}</version>
            </dependency>

	  </dependencies>
 	 </dependencyManagement>

 	 <build>
        <plugins>
            <plugin>
                <groupId>org.springframework.boot</groupId>
                <artifactId>spring-boot-maven-plugin</artifactId>
                <configuration>
                    <fork>true</fork>
                    <addResources>true</addResources>
                </configuration>
            </plugin>
        </plugins>
	</build>
2.添加paymentmain子模块
右键父工程选maven module
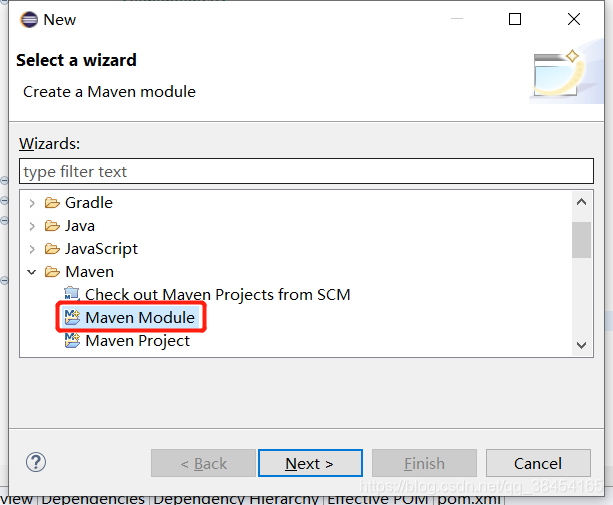
选简单工程
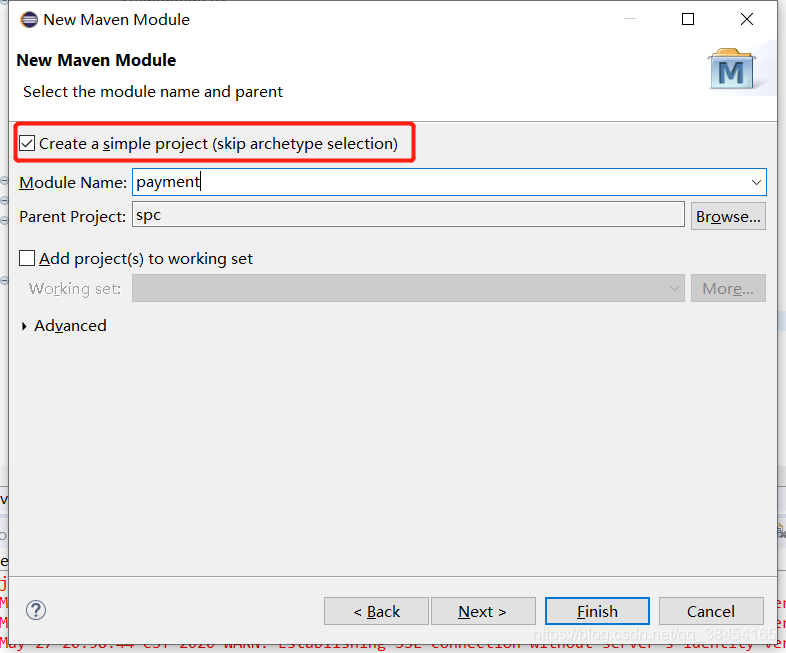
建成后会在父工程下生成子模块目录,但只有文件夹。同时在父工程同级会有一个子模块的工程出现,编码在此工程内完成。
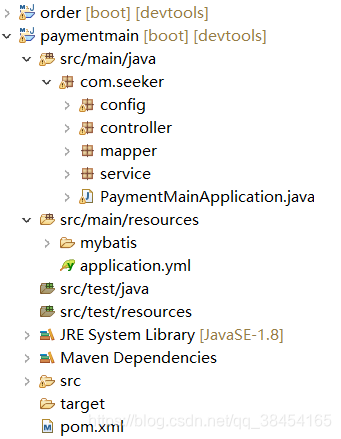
实现paymentmain功能
1.编辑pom.xml
<project xmlns="http://maven.apache.org/POM/4.0.0" xmlns:xsi="http://www.w3.org/2001/XMLSchema-instance" xsi:schemaLocation="http://maven.apache.org/POM/4.0.0 https://maven.apache.org/xsd/maven-4.0.0.xsd">
  <modelVersion>4.0.0</modelVersion>

  <parent>
    <groupId>com.seeker</groupId>
    <artifactId>spc</artifactId>
    <version>0.0.1-SNAPSHOT</version>
  </parent>

  <artifactId>paymentmain</artifactId>

  <dependencies>

  	<dependency>
		<groupId>com.seeker</groupId>
		<artifactId>commons</artifactId>
	</dependency>

  		<dependency>
			<groupId>org.springframework.boot</groupId>
			<artifactId>spring-boot-starter-web</artifactId>
		</dependency>
		<dependency>
			<groupId>org.springframework.boot</groupId>
			<artifactId>spring-boot-starter-actuator</artifactId>
		</dependency>
		<!-- mybatis-springboot整合 -->
            <dependency>
                <groupId>org.mybatis.spring.boot</groupId>
                <artifactId>mybatis-spring-boot-starter</artifactId>
            </dependency>
		<dependency>
			<groupId>org.springframework.boot</groupId>
			<artifactId>spring-boot-starter-jdbc</artifactId>
		</dependency>


            <!--spring cloud Hoxton.SR1-->
            <dependency>
                <groupId>org.springframework.cloud</groupId>
                <artifactId>spring-cloud-dependencies</artifactId>
                <version>Hoxton.SR1</version>
                <type>pom</type>
                <scope>import</scope>
            </dependency>
            <!--spring cloud alibaba 2.1.0.RELEASE-->
            <dependency>
                <groupId>com.alibaba.cloud</groupId>
                <artifactId>spring-cloud-alibaba-dependencies</artifactId>
                <version>2.2.0.RELEASE</version>
                <type>pom</type>
                <scope>import</scope>
            </dependency>

            <dependency>
            	<groupId>org.springframework.boot</groupId>
            	<artifactId>spring-boot-devtools</artifactId>
            	<optional>true</optional>
            </dependency>

             <dependency>
                <groupId>org.projectlombok</groupId>
                <artifactId>lombok</artifactId>
               </dependency>
            <!-- MySql -->

		<dependency>
			<groupId>mysql</groupId>
			<artifactId>mysql-connector-java</artifactId>
			<scope>runtime</scope>

		</dependency>

            <!-- Druid -->
            <dependency>
                <groupId>com.alibaba</groupId>
                <artifactId>druid-spring-boot-starter</artifactId>
            </dependency>

            <!--lombok-->
            <dependency>
                <groupId>org.projectlombok</groupId>
                <artifactId>lombok</artifactId>
            </dependency>
            <!--junit-->
            <dependency>
                <groupId>junit</groupId>
                <artifactId>junit</artifactId>
            </dependency>
            <!-- log4j -->
            <dependency>
                <groupId>log4j</groupId>
                <artifactId>log4j</artifactId>
            </dependency>

  </dependencies>
</project>
2.创建数据库
CREATE DATABASE /*!32312 IF NOT EXISTS*/`cloud` /*!40100 DEFAULT CHARACTER SET utf8 COLLATE utf8_unicode_ci */;
USE `cloud`;
/*Table structure for table `payment` */
DROP TABLE IF EXISTS `payment`;
CREATE TABLE `payment` (
`id` bigint(20) NOT NULL AUTO_INCREMENT COMMENT 'ID',
`serial` varchar(200) COLLATE utf8_unicode_ci DEFAULT NULL,
PRIMARY KEY (`id`)
) ENGINE=InnoDB AUTO_INCREMENT=5 DEFAULT CHARSET=utf8 COLLATE=utf8_unicode_ci;
/*Data for the table `payment` */
insert into `payment`(`id`,`serial`) values (1,'尚硅谷'),(2,'alibaba'),(3,'京东'),(4,'头条');
3.resource下新建application.yml,添加配置
server:
port: 8001
spring:
datasource:
# 数据源基本配置
username: root
password: 962464
driver-class-name: com.mysql.cj.jdbc.Driver
url: jdbc:mysql://localhost:3306/cloud?serverTimezone=GMT%2B8&
type: com.alibaba.druid.pool.DruidDataSource
# 数据源其他配置
initialSize: 5
minIdle: 5
maxActive: 20
maxWait: 60000
timeBetweenEvictionRunsMillis: 60000
minEvictableIdleTimeMillis: 300000
validationQuery: SELECT 1 FROM DUAL
testWhileIdle: true
testOnBorrow: false
testOnReturn: false
poolPreparedStatements: true
# 配置监控统计拦截的filters,去掉后监控界面sql无法统计,'wall'用于防火墙
filters: stat,wall,log4j
maxPoolPreparedStatementPerConnectionSize: 20
useGlobalDataSourceStat: true
connectionProperties: druid.stat.mergeSql=true;druid.stat.slowSqlMillis=500
# schema:
# - classpath:sql/department.sql
# - classpath:sql/employee.sql
# initialization-mode: always
devtools:
restart:
enabled: true #是否支持热部署
mybatis:
config-location: classpath:mybatis/mybatis-config.xml
mapper-locations: classpath:mybatis/mapper/*.xml4.添加启动类 PaymentMainApplication.java
package com.seeker;

import org.springframework.boot.SpringApplication;
import org.springframework.boot.autoconfigure.SpringBootApplication;
import org.springframework.context.annotation.ComponentScan;

@SpringBootApplication
public class PaymentMainApplication {

	public static void main(String [] args) {
		SpringApplication.run(PaymentMainApplication.class,args);
	}
}
5.添加实体类
Payment.java
package com.seeker.entity;

import java.io.Serializable;

import lombok.AllArgsConstructor;
import lombok.Data;
import lombok.NoArgsConstructor;

@Data
@AllArgsConstructor
@NoArgsConstructor
public class Payment implements Serializable{

	private Long id;
	private String serial;
}
CommonResult.java 封装返回内容
package com.seeker.entity;

import lombok.AllArgsConstructor;
import lombok.Data;
import lombok.NoArgsConstructor;
/**
 * 封装Json体
 * @author seeker
 *
 * @param <T>
 */
@Data
@AllArgsConstructor
@NoArgsConstructor
public class CommonResult<T> {
	private Integer code;
	private String message;
	private T data;

	public CommonResult(Integer code,String message) {
		this(code,message,null);
	}
}
6.添加dao层mapper
package com.seeker.mapper;

import org.apache.ibatis.annotations.Mapper;

import com.seeker.entity.Payment;

@Mapper
public interface paymentMapper {

	public int add(Payment payment);

	public Payment getPaymentById( Long id);
}
resource下新建mybatis/mapper文件夹,添加mapper映射PaymentMapper.xml
<?xml version="1.0" encoding="UTF-8"?>
<!DOCTYPE mapper PUBLIC "-//mybatis.org//DTD Mapper 3.0//EN" "http://mybatis.org/dtd/mybatis-3-mapper.dtd">
<mapper namespace="com.seeker.mapper.PaymentMapper" >

	<insert id="add" parameterType="com.seeker.entity.Payment" useGeneratedKeys="true" keyProperty="id">
		insert into payment (serial) values (#{serial})
	</insert>

	<select id="getPaymentById" parameterType="Long" resultMap="BaseResultMap" >
		select * from payment where id = #{id}
	</select>
	<resultMap id="BaseResultMap" type="com.seeker.entity.Payment">
		<id column="id" property="id" jdbcType="BIGINT"/>
		<id column="serial" property="serial" jdbcType="VARCHAR"/>
	</resultMap>

 </mapper>
7.添加service
package com.seeker.service;

import org.springframework.beans.factory.annotation.Autowired;
import org.springframework.stereotype.Service;

import com.seeker.entity.Payment;
import com.seeker.mapper.paymentMapper;


@Service
public class PaymentService {

	@Autowired
	paymentMapper paymentDao;

	public int add(Payment payment) {
		return paymentDao.add(payment);
	}

	public Payment getPaymentById( Long id) {
		return paymentDao.getPaymentById(id);
	}
}
8.编写controller
package com.seeker.controller;
import org.springframework.beans.factory.annotation.Autowired;
import org.springframework.web.bind.annotation.GetMapping;
import org.springframework.web.bind.annotation.PathVariable;
import org.springframework.web.bind.annotation.PostMapping;
import org.springframework.web.bind.annotation.RequestBody;
import org.springframework.web.bind.annotation.RequestMapping;
import org.springframework.web.bind.annotation.RestController;
import com.seeker.entity.CommonResult;
import com.seeker.entity.Payment;
import com.seeker.service.PaymentService;
import lombok.extern.slf4j.Slf4j;
@RestController
@Slf4j
public class PaymentController {
@Autowired
PaymentService paymentService;
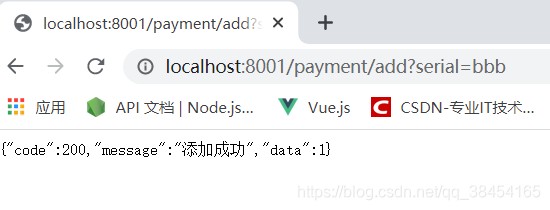
@PostMapping("/payment/add")
public CommonResult add(@RequestBody Payment payment) {//@RequestBody可以自动封装提交的内容
int result = paymentService.add(payment);
log.info("####添加结果####"+result);
if(result>0) {
return new CommonResult(200,"添加成功",result);
}else {
return new CommonResult(444,"添加失败",null);
}
}
@GetMapping("/payment/get/{id}")
public CommonResult getPaymentById(@PathVariable("id") Long id) {
Payment payment = paymentService.getPaymentById(id);
log.info("####查询结果#####"+payment);
if(payment == null) {
return new CommonResult(444,"没有对应记录"+id,null);
}else {
return new CommonResult(200,"查询成功",payment);
}
}
}
9.浏览器测试
get请求
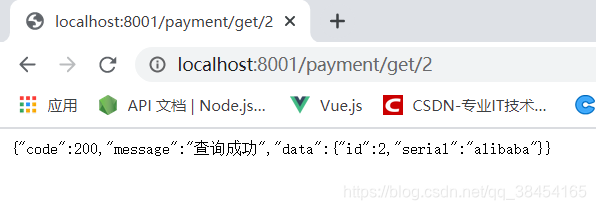
get请求,测试时将postMappi改为了getMapping
新建order子模块
创建方法和paymentmain一样
1.改pom
<project xmlns="http://maven.apache.org/POM/4.0.0" xmlns:xsi="http://www.w3.org/2001/XMLSchema-instance" xsi:schemaLocation="http://maven.apache.org/POM/4.0.0 https://maven.apache.org/xsd/maven-4.0.0.xsd">
  <modelVersion>4.0.0</modelVersion>
  <parent>
    <groupId>com.seeker</groupId>
    <artifactId>spc</artifactId>
    <version>0.0.1-SNAPSHOT</version>
  </parent>
  <artifactId>order</artifactId>

<dependencies>
	<!-- 引入commons -->
	<dependency>
		<groupId>com.seeker</groupId>
		<artifactId>commons</artifactId>
	</dependency>
  		<dependency>
			<groupId>org.springframework.boot</groupId>
			<artifactId>spring-boot-starter-web</artifactId>
		</dependency>
		<dependency>
			<groupId>org.springframework.boot</groupId>
			<artifactId>spring-boot-starter-actuator</artifactId>
		</dependency>

            <dependency>
            	<groupId>org.springframework.boot</groupId>
            	<artifactId>spring-boot-devtools</artifactId>
            	<optional>true</optional>
            </dependency>


            <!--lombok-->
            <dependency>
                <groupId>org.projectlombok</groupId>
                <artifactId>lombok</artifactId>
            </dependency>
            <!--junit-->
            <dependency>
                <groupId>junit</groupId>
                <artifactId>junit</artifactId>
            </dependency>
            <!-- log4j -->
            <dependency>
                <groupId>log4j</groupId>
                <artifactId>log4j</artifactId>
            </dependency>

  </dependencies>
</project>
2.添加application.yml,修改端口号,添加启动类
server:
  port: 80
3.添加配置类ApplicationContextConfig .java,实现模块间访问
RestTemplate提供了多种便捷访问远程Http服务的方法,
是一种简单便捷的访问restful服务的模板类,是spring提供的用于访问Rest服务的客户端模板工具集
package com.seeker.config;

import org.springframework.context.annotation.Bean;
import org.springframework.context.annotation.Configuration;
import org.springframework.web.client.RestTemplate;


@Configuration
public class ApplicationContextConfig {
	@Bean
	public RestTemplate getRestTemplate() {
		return new RestTemplate();
	}
}
4.添加controller
package com.seeker.controller;

import javax.annotation.Resource;

import org.springframework.web.bind.annotation.GetMapping;
import org.springframework.web.bind.annotation.PathVariable;
import org.springframework.web.bind.annotation.RestController;
import org.springframework.web.client.RestTemplate;

import com.seeker.entity.CommonResult;
import com.seeker.entity.Payment;

@RestController
public class OrderController {

	public static final String PAYMENT_URL = "http://localhost:8001";

	@Resource
	private RestTemplate restTemplate;

	@GetMapping("/consumer/payment/add")
	public CommonResult<Payment> add(Payment payment){
		return restTemplate.postForObject(PAYMENT_URL+"/payment/add", payment,CommonResult.class);
	}

	@GetMapping("/consumer/payment/get/{id}")
	public CommonResult<Payment> getPayment(@PathVariable("id") Long id){
		return restTemplate.getForObject(PAYMENT_URL+"/payment/get/"+id, CommonResult.class);
	}

}
自行测试
创建公共子模块
1.改pom
<project xmlns="http://maven.apache.org/POM/4.0.0" xmlns:xsi="http://www.w3.org/2001/XMLSchema-instance" xsi:schemaLocation="http://maven.apache.org/POM/4.0.0 https://maven.apache.org/xsd/maven-4.0.0.xsd">
  <modelVersion>4.0.0</modelVersion>
  <parent>
    <groupId>com.seeker</groupId>
    <artifactId>spc</artifactId>
    <version>0.0.1-SNAPSHOT</version>
  </parent>
  <artifactId>commons</artifactId>

  <dependencies>
	<!-- <dependency>
       	<groupId>org.springframework.boot</groupId>
       	<artifactId>spring-boot-devtools</artifactId>
       	<optional>true</optional>
      </dependency> -->
       <!--lombok-->
     <dependency>
         <groupId>org.projectlombok</groupId>
         <artifactId>lombok</artifactId>
     </dependency>

      <dependency>
     	<groupId>cn.hutool</groupId>
     	<artifactId>hutool-all</artifactId>
     	<version>5.1.0</version>
     </dependency>

	</dependencies>
	 <build>
	 	<plugins>
		<plugin>
            <groupId>org.apache.maven.plugins</groupId>
            <artifactId>maven-jar-plugin</artifactId>
            <version>2.4</version>
            <configuration>
                <archive>
                    <manifest>
                        <addDefaultImplementationEntries>true</addDefaultImplementationEntries>
                    </manifest>
                </archive>
            </configuration>
        </plugin>

        </plugins>
	</build>
</project>
2.将其他模块的实体类复制过来,并删除其他实体类
将commons打包到本地,操作:
右键 commons的pom.xml,run as选择 maven build,这样写
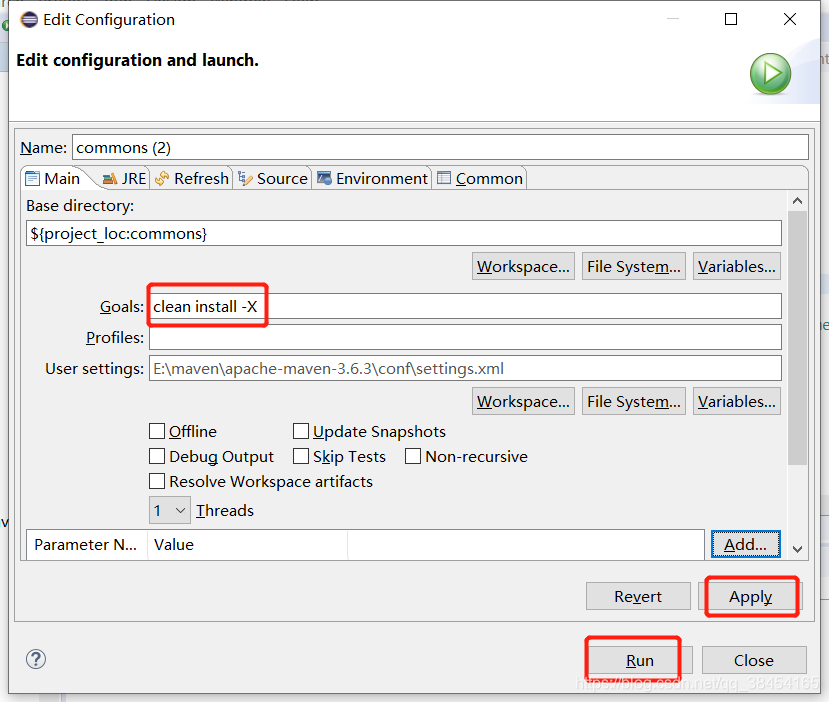
然后将commons的依赖添加进要引用它的子模块中即可。


 被折叠的 条评论
为什么被折叠?
被折叠的 条评论
为什么被折叠?
 到【灌水乐园】发言


