示例1:
表单里有图片/文件的上传 一定要设置form enctype属性
<form enctype="multipart/form-data" method="post">

<input type="file" name="uploadfile"/>

</form>
multipart/form-data 是上传二进制数据
form里面的input的值以2进制的方式传过去,所以这里要明白,使用这种格式以后,后台request就获取不到数据了。
enctype属性是设置提交数据的格式,指定将数据回发到服务器时浏览器使用的编码类型。
enctype值:
application/x-www-form-urlencoded:窗体数据被编码为名称/值对。这是标准(默认)的编码格式。
multipart/form-data:窗体数据被编码为一条消息,页上的每个控件对应消息中的一个部分。
text/plain:窗体数据以纯文本形式进行编码,其中不含任何控件或格式字符
后台servlet提交照片并存储数据库
package Util;

import java.io.File;
import java.io.FileOutputStream;
import java.io.IOException;
import java.io.InputStream;
import java.io.RandomAccessFile;
import java.sql.Connection;
import java.sql.PreparedStatement;
import java.sql.ResultSet;
import javax.servlet.http.HttpServletRequest;

public class upImgUtil {

    /**
     * 思路 1、从request当中获取流信息
     *  2、新建一个临时文件,用输出流指向这个文件
     *  3、关闭流
     * @param request
     * @param path       pic/目录下的  lost 还是   found  文件
     * @param name       文件名字
     * @throws IOException
     */
    public static void keepFile(HttpServletRequest request , String path ,String name) throws IOException {

        // 1、从request当中获取流信息
        InputStream fileSource = request.getInputStream();

        /*
        * 临时文件的存储路径(我们在webContent下新建一个temp文件夹,发布项目的时候很可能因为temp为空,
        * 没在tomcat中建立一个文件夹,到时候自己在发布的项目中添加一个即可)
        */
        String tempFileName =request.getServletContext().getRealPath("/") +"pic/"+path+"/tempfile.txt";

        //    2、新建一个临时文件,用输出流指向这个文件
        //    建一个文件
        File tempFile =new File( tempFileName );

        //    用输出流指向这个文件

        FileOutputStream outputStream = new FileOutputStream( tempFile );

        //我们就每次读写10K,我们的文件小,这个就已经够用了
        byte[] b = new byte[1024*100];

        int n = 0 ;

       //读写文件,-1标识为空
        while( (n =fileSource.read(b) ) != -1 ) {
            outputStream.write(b, 0, n);
        }

        //    3、关闭流
        fileSource.close();
        outputStream.close();


        RandomAccessFile randomFile = new RandomAccessFile(tempFile,"r");
        randomFile.readLine();//先读取一行
        String str = randomFile.readLine();//读取第二行
        System.out.println("这是第二行内容:"+str);
        int beginIndex =str.lastIndexOf("filename=\"") + 10;//定位到文件名开始的地方
        System.out.println("beginIndex开始索引+10之后的:"+beginIndex);
        System.out.println("定位的字符:"+Character.toString(str.charAt(beginIndex)));
        int endIndex =str.lastIndexOf("\"");//定位到文件名结尾的地方

        String filename =str.substring(beginIndex, endIndex);

        //判断文件名是全路径名还是只是文件名(google和火狐是只是文件名,微软系列是全路径名)
        endIndex = filename.lastIndexOf("\\")+ 1;
        if( endIndex > -1 ) {
            filename =filename.substring(endIndex);
        }
        //经过上面的这几步,我们就已经获取到了文件名,我们还需要解决一下中文名乱码的问题

        //解决上传文件中文名字乱码
        filename = new String(filename.getBytes("ISO-8859-1"), "UTF-8");
        String[] filesz=filename.split("\\.");
        filename = name +"."+ filesz[1];
        System.out.println("filename:" + filename );

        //第二部分 2、获取文件的内容
        //重新定位文件指针到文件头
        randomFile.seek(0);
        long startPosition = 0L;//正文开始的位置
        int i = 1;
        while( ( n = randomFile.readByte() )!= -1 && i <=4 ) {
            if( n == '\n') {
                startPosition = randomFile.getFilePointer();
                i++;
            }
        }
        //
        startPosition =randomFile.getFilePointer() - 1 ;

        //获取文件内容,结束位置
        randomFile.seek(randomFile.length());//指针定位到尾部
        long endPosition =randomFile.getFilePointer();
        int j = 1;
        while( endPosition >= 0 && j <=2 ) {
            endPosition--;
            randomFile.seek(endPosition);
            if(randomFile.readByte() == '\n') {
                j++;
            }
        }

        endPosition = endPosition - 1;

        //第二部分 3、保存文件
       //设置保存上传文件的路径,我们好保存到temp中
        String realPath ="E:\\eclipse\\项目\\lostandfound\\WebContent\\" + "pic\\"+ path;
        //E:\编程必备\tomcat\apache-tomcat-8.5.31\wtpwebapps\Demo\pic\lost
        File saveFile = new File(realPath,filename);
        RandomAccessFile randomAccessFile =new RandomAccessFile(saveFile,"rw");
        //
        //从临时文件当中读取文件内容(根据起止位置获取)
        randomFile.seek(startPosition);
        while(startPosition < endPosition) {
           randomAccessFile.write(randomFile.readByte());
            startPosition =randomFile.getFilePointer();
        }
        //
        //关闭输入输出流、删除临时文件
        randomAccessFile.close();
        randomFile.close();
        //tempFile.delete();

        //数据库存储
    	Connection con=null;
    	PreparedStatement psta=null;
    	ResultSet re=null;
    	/*
    	 * FieldTypeComment
    	IDvarchar(25)
    	wayvarchar(10)
    	pathvarchar(100)
    	 * */
    	//获取照片id

    	//获取way   看path
    	//获取照片路径
    	String  lastpath=realPath+"\\"+filename;
    	System.out.println("lastpath:"+lastpath);
    	if(path=="lost") {
    		String ID=(String)request.getSession().getAttribute("lostpic");
        	String sql = "INSERT INTO pic VALUES (?,?,?)";
        	try {
    			con=JdbcUtil.getConnection();
    			psta=con.prepareStatement(sql);
    			psta.setString(1,ID);
    			psta.setString(2,"lost");
    			psta.setString(3,lastpath);
    			psta.executeUpdate();
    			request.getSession().setAttribute("msg", "照片上传成功!");
    		} catch (Exception e) {
    			e.printStackTrace();
    			request.getSession().setAttribute("msg", "照片上传失败!");
    			System.out.println("照片上传输错!  id:"+ID);
    		} finally {
    			JdbcUtil.close(con, psta, re);
    		}

    	}else if(path=="found") {
    		String ID=(String)request.getSession().getAttribute("foundpic");
    		String sql = "INSERT INTO pic VALUES (?,?,?)";
        	try {
    			con=JdbcUtil.getConnection();
    			psta=con.prepareStatement(sql);
    			psta.setString(1,ID);
    			psta.setString(2,"found");
    			psta.setString(3,lastpath);
    			psta.executeUpdate();
    			request.getSession().setAttribute("msg", "照片上传成功!");
    		} catch (Exception e) {
    			e.printStackTrace();
    			request.getSession().setAttribute("msg", "照片上传失败!");
    			System.out.println("照片上传输错!  id:"+ID);
    		} finally {
    			JdbcUtil.close(con, psta, re);
    		}

		}

	}

}
后续问题–图片显示问题
浏览器出于安全问题,不让直接访问硬盘文件!
首先,图片和工程不在一个盘符下。图片也不能放到工程下。
在JSP 文件中 <img src="C:/Users/fx/Pictures/test.jpg"/> 这样是引不到图片的。因为,JSP页面在引图片的时候是在页面解析的路径是:<img src="http://localhost:8080/test/images/1.jpg">。也就是说JSP在引图片的时候是先去你的工程目录下找的。
所以如果要在JSP中引入其他盘符的图片,有两种方法可以解决:
使用虚拟路径来配置:
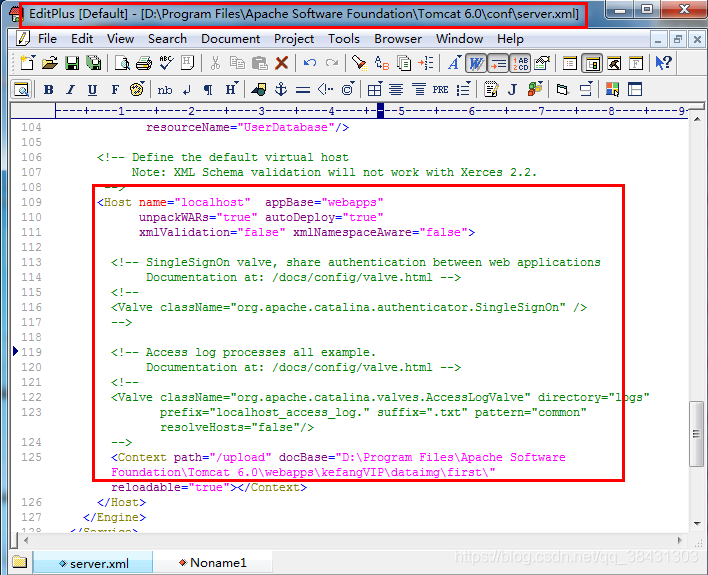
在tomcat下的conf/server.xml中增加一个代码 在<Host></Host>中间
或者
在eclipse的工作空间下,Server文件下找到server.xml 在<Host></Host>中间
如下:
<!--增加的--path="/虚拟名" docBase="虚拟路径" ->
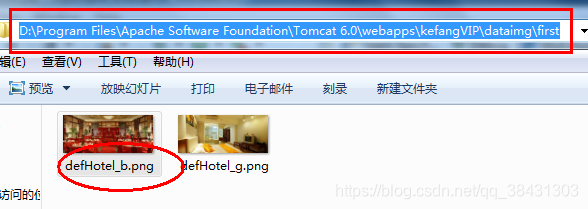
<Context path="/upload" docBase="D:\louyuimage\upload\"  reloadable="true"></Context>
配置好以后,在JSP文件中为:
<img alt="" src="/upload/kuaidaowanlilai0605.jpg">
图片就显示出来了。
1、

2、


 929
929

 被折叠的 条评论
为什么被折叠?


