


 本文记录了使用Spring Boot实现页面国际化的步骤。首先创建Spring Boot项目并引入Thymeleaf,接着创建页面和3个国际化文件,在配置文件中配置国际化文件。还介绍了不同开发工具的处理方式,以及改变语言显示的原理和处理请求区域信息的类,最后提及了HTML页面实现。
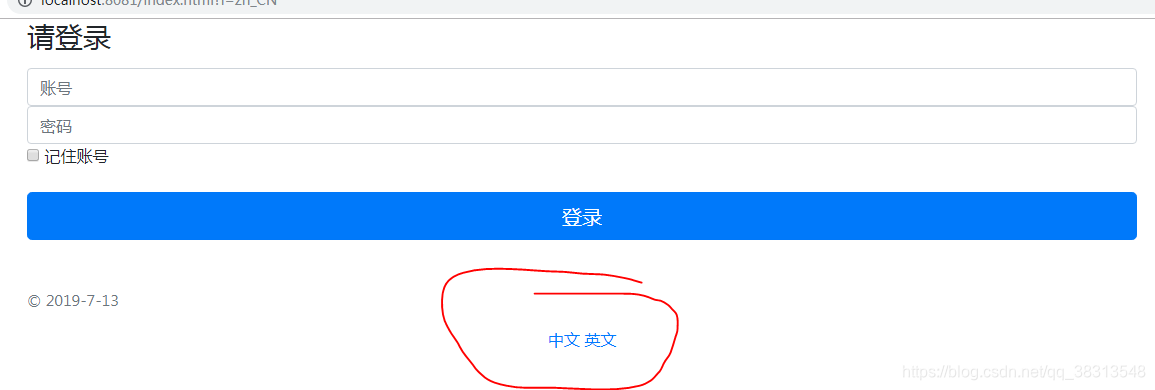
效果:
点击相应的语言改变页面显示的语言

步骤:
1.创建springboot项目,引入thymeleaf
<dependency>
            <groupId>org.springframework.boot</groupId>
            <artifactId>spring-boot-starter-thymeleaf</artifactId>
        </dependency>
2.创建页面login,使用thymeleaf:
具体语法查看,thymeleaf语法教程。
<!DOCTYPE html>
<html lang="en" xmlns:th="http://www.thymeleaf.org">
<head>
    <meta charset="UTF-8"/>
    <title>Title</title>
</head>
<body>
</body>
</html>
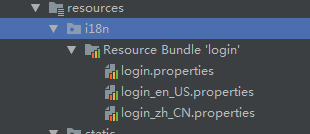
3.创建3个国际化文件,如下图:
在resource文件夹下创建i18n文件夹(i18n文件夹放在resource文件夹之下),专门用于存放国际化文件。
login.properties:未设置语言时默认显示的内容
login_zh_CN.properties:选择为中文时显示的内容
login_en_US.properties:选择为英文是显示的内容。
如果使用IntelliJ IDEA 开发,工具会自动识别当前文件为国际化文件,自动关联3个文件,进行国际化设置。如下:
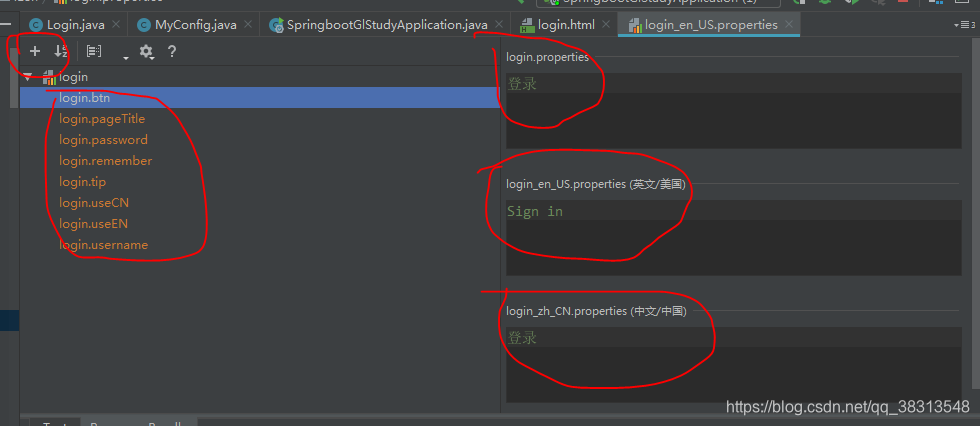
注意:国际化的文件中设置值的形式为key-value;创建的key的作用是页面中根据key来识别显示内容。
如果使用的是eclipse开发,则需要自己手动一个个文件的编写键值对。
4.在配置文件application.properties中配置国际化文件
# i18n.login:i18n为文件夹,login为标识
spring.messages.basename=i18n.login
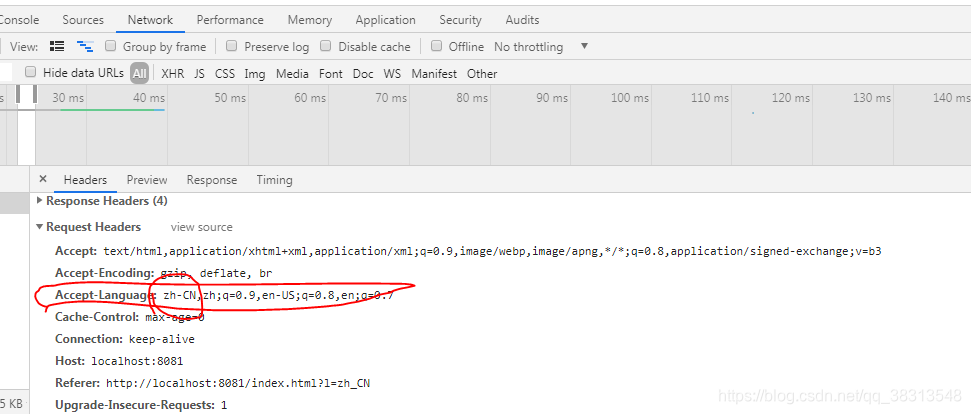
5.改变语言显示的原理就是springboot获取浏览器请求数据中的区域信息该找到对应的国际化文件。
6.创建一个类MyLocal作为一个组件,专门处理请求的区域信息:
package com.zhangxiaosan.top.Config;

import org.springframework.web.servlet.LocaleResolver;
import org.thymeleaf.util.StringUtils;

import javax.servlet.http.HttpServletRequest;
import javax.servlet.http.HttpServletResponse;
import java.util.Locale;

/**
 * 自定义区域信息,zh_CN   en_US
 * */
public class MyLocal implements LocaleResolver {

    //解析区域信息
    @Override
    public Locale resolveLocale(HttpServletRequest httpServletRequest) {
        String l =  httpServletRequest.getParameter("l");
        Locale locale = Locale.getDefault();
        if(!StringUtils.isEmpty(l)){//检查传递的l是否为空
            String[] split = l.split("_");
            locale = new Locale(split[0],split[1]);
        }
        return locale;
    }

    @Override
    public void setLocale(HttpServletRequest httpServletRequest, HttpServletResponse httpServletResponse, Locale locale) {

    }
}
7.创建一个自定义的配置类 MyConfig,用@Bean注解将组件MyLocal加入容器中
package com.zhangxiaosan.top.Config;

import org.springframework.context.annotation.Bean;
import org.springframework.context.annotation.Configuration;
import org.springframework.web.servlet.LocaleResolver;
import org.springframework.web.servlet.config.annotation.EnableWebMvc;
import org.springframework.web.servlet.config.annotation.ViewControllerRegistry;
import org.springframework.web.servlet.config.annotation.WebMvcConfigurerAdapter;

/**
 * 使用自定义 WebMvcConfigurerAdapter 扩展SpringMVC的功能
 *
 * */
@Configuration
//@EnableWebMvc  //全面接管springMVC
public class MyConfig extends WebMvcConfigurerAdapter {
    //所有的WebMvcConfigurerAdapter组件全部都会一起起作用
    /**
     * 该功能主要用于每个控制器的访问项目根目录或者项目根目录下的index.html页面时显示登录页面
     *
     * */
    @Bean  //将组建配置到容器中
    public WebMvcConfigurerAdapter addViewController() {
        WebMvcConfigurerAdapter  Adapter = new WebMvcConfigurerAdapter() {
            public void addViewControllers(ViewControllerRegistry registry) {
                registry.addViewController("/").setViewName("Admin/login");  //访问项目根目录显示的页面。
                registry.addViewController("/index.html").setViewName("Admin/login");//访问index.html显示的页面。
            }
        };
        return Adapter;
    }


    /**
     * 添加区域解析器,实现国际化切换
     * */
    @Bean
    public LocaleResolver localeResolver(){
        return  new MyLocal();
    }

}
8.html页面实现:
<!DOCTYPE html>
<html lang="en" xmlns:th="http://www.thymeleaf.org">
<head>
<meta charset="UTF-8"/>
<title th:text="#{login.pageTitle}">Title</title>
<link rel="stylesheet" type="text/css" th:href="@{/webjars/bootstrap/4.3.1/css/bootstrap.css}"/>
</head>
<body>
<div class="container">
<form class="form-signin">
<h1 class="h3 mb-3 font-weight-normal" th:text="#{login.tip}">Please sign in</h1>
<label th:text="#{login.username}">UserName</label>
<input type="text" id="inputUserName" class="form-control" placeholder="UserName" th:placeholder="#{login.username}" required autofocus />
<label th:text="#{login.password}">Password</label>
<input type="password" id="inputPassword" class="form-control" placeholder="Password" th:placeholder="#{login.password}" required />
<div class="checkbox mb-3">
<label>
<input type="checkbox" value="remember-me"/> <span th:text="#{login.remember}">Remember me</span>
</label>
</div>
<button class="btn btn-lg btn-primary btn-block" type="submit" th:text="#{login.btn}">Sign in</button>
<p class="mt-5 mb-3 text-muted">© 2019-7-13</p>
<center>
<a th:href="@{/index.html(l='zh_CN')}" th:text="#{login.useCN}"></a>
<a th:href="@{/index.html(l='en_US')}" th:text="#{login.useEN}"></a>
</center>
</form>
</div>
</body>
</html>


 9230
9230

 被折叠的 条评论
为什么被折叠?
被折叠的 条评论
为什么被折叠?
 到【灌水乐园】发言


