


前言
发现网上大多是webscoket加 http形式的例程,很少有https的例程。
亲自操作了一遍,总结一下如何使用建立https形式的websocket,最关键的是https必须通过网页访问,所以增加了前端例程。代码放到最后面了。
websocket使用ssl很简单。只需要以下步骤:
1. 通过openssl生成证书
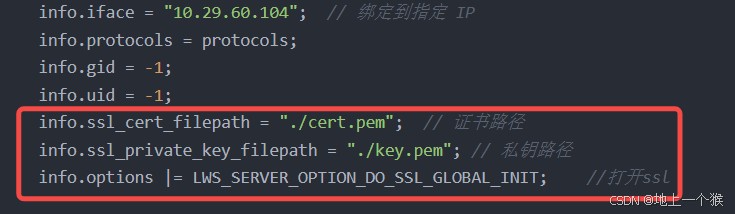
openssl req -x509 -newkey rsa:4096 -keyout key.pem -out cert.pem -days 365 -nodes2. 在后端代码中代码中增加 证书、私钥路径,并打开ssl
3. 在编译时增加 -lssl -lcrypto
gcc -o websocket_server webss.c -lwebsockets -lssl -lcrypto4. 在前端用wss打开
const socket = new WebSocket("wss://10.29.60.104:8080", "ws-protocol");具体操作过程如下:
1. 编译安装libwebsocket.so
mkdir webs
cd webs/
apt install git
git clone https://github.com/warmcat/libwebsockets
cd libwebsockets/
mkdir build && cd build
cmake .. -DLWS_WITHOUT_TESTAPPS=ON
make && sudo make install
2. 编译服务端程序
cd ..
touch webss.c
gcc -o websocket_server webss.c -lwebsockets -lssl -lcrypto

添加路径
sudo find / -name "libwebsockets.so*" 2>/dev/null
export LD_LIBRARY_PATH=/usr/local/lib:$LD_LIBRARY_PATH

生成证书
openssl req -x509 -newkey rsa:4096 -keyout key.pem -out cert.pem -days 365 -nodes

./websocket_server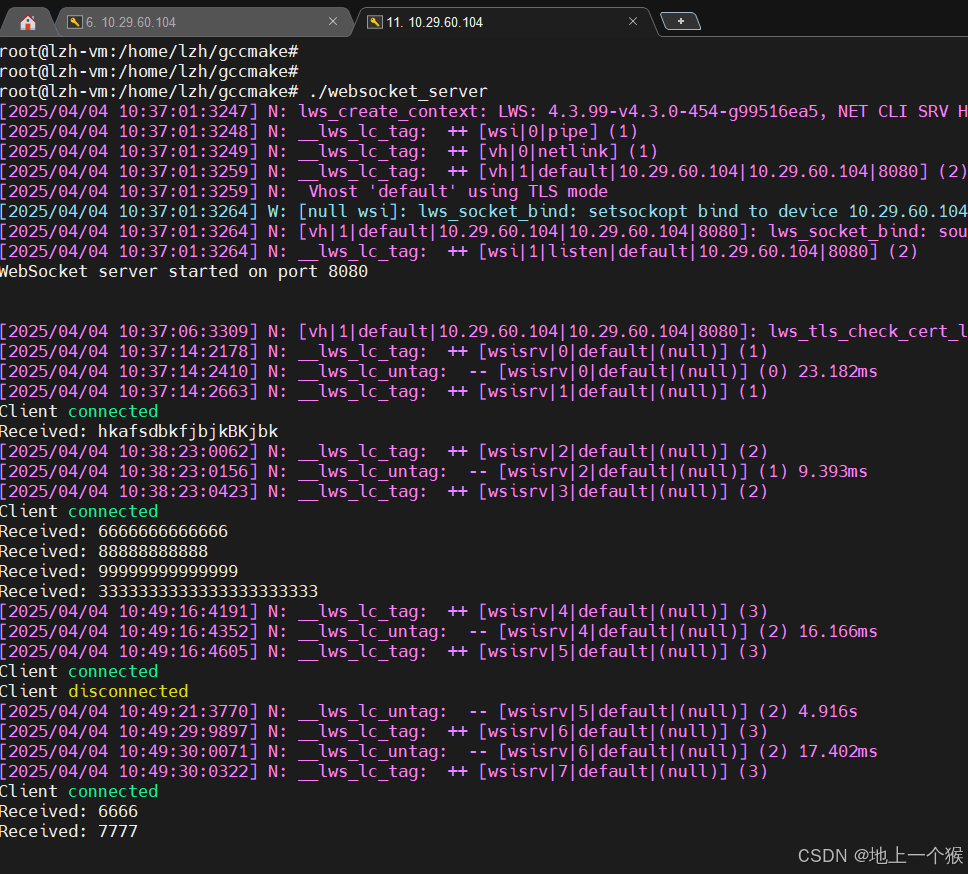
3. 前端
sudo npm install http-server -g
npm install -g http-server@0.12.3  # 兼容旧版 Node.js

#该处端口不能与后端websocket端口相同,后端例程使用8080

http方式
http-server  -p 8000

https方式
http-server --ssl --cert ./cert.pem --key ./key.pem -p 8000

指定路径https方式
http-server /home/lzh/gccmake/index.html --ssl --cert ./cert.pem --key ./key.pem -p 8000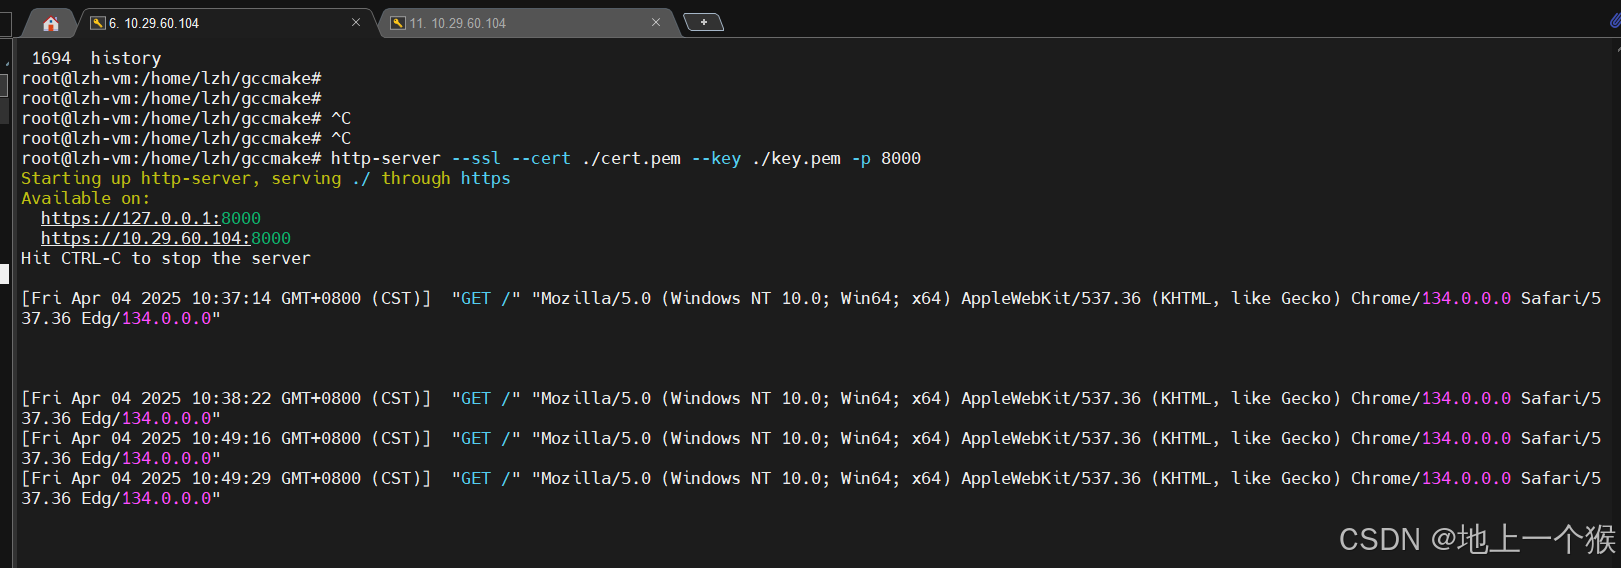
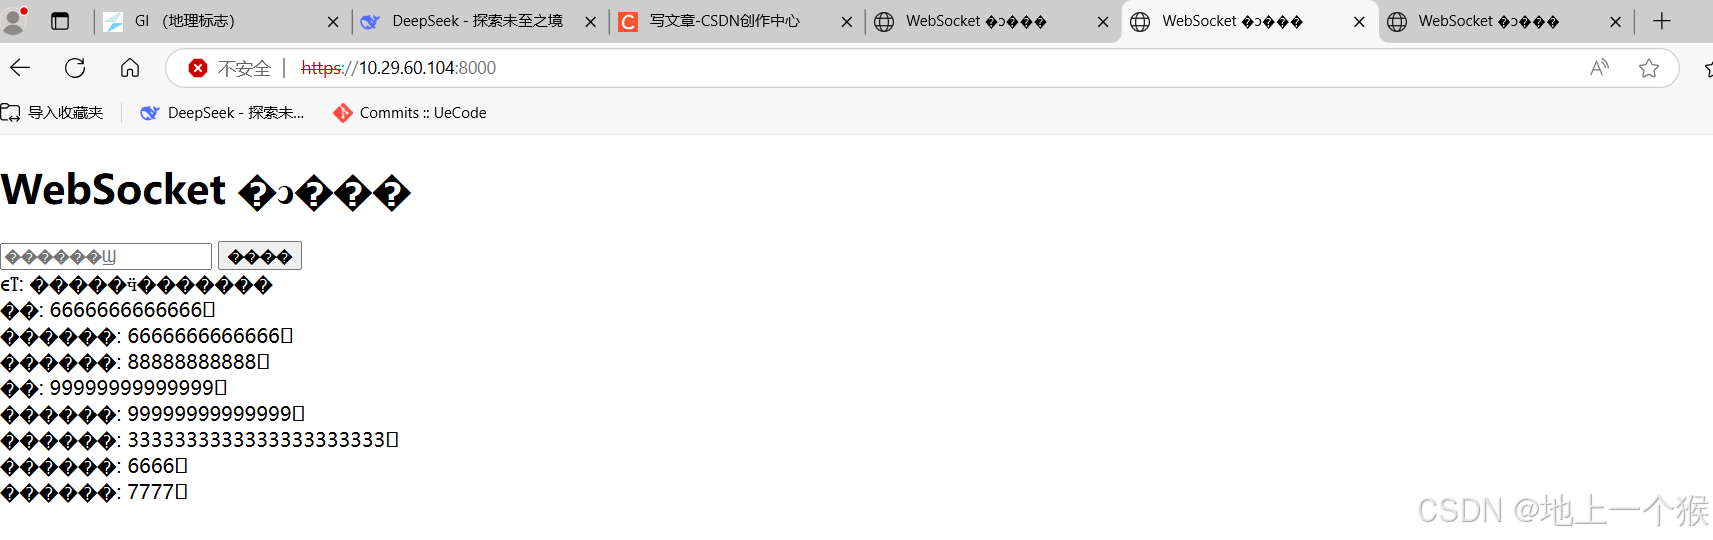
web
注意
1. 前端网页端口(示例中8000)和 webscoket端口(示例8080)不能一样
2. 内网ip证书无法生成可信任证书
3. 使用 OpenSSL 测试加密链路
openssl s_client -connect 10.29.60.104:8000 -servername example.com | grep "Cipher"
4. 8000/8080端口要确保没被占用,可以用任意未使用的端口
5. 修改适配只需要修改下面两个文件中网卡ip和端口即可。
6. 低版本http-server无法显示中文,若使用高版本http-server需要确保node.js版本支持
代码
webss.c
#include <libwebsockets.h>
#include <string.h>

#define PORT 8080

// 定义连接池
static struct lws *clients[10];
static int client_count = 0;

// WebSocket 协议回调
static int ws_callback(struct lws *wsi, enum lws_callback_reasons reason,
                       void *user, void *in, size_t len) {
    switch (reason) {
        // 新连接建立
        case LWS_CALLBACK_ESTABLISHED:
            printf("Client connected\n");
            clients[client_count++] = wsi;  // 添加到连接池
            break;

        // 收到消息
        case LWS_CALLBACK_RECEIVE:
            printf("Received: %s\n", (char *)in);
            // 广播消息给所有客户端
            for (int i = 0; i < client_count; i++) {
                //if (clients[i] != wsi)
                {  // 不发送给自己
                    lws_write(clients[i], in, len, LWS_WRITE_TEXT);
                }
            }
            break;

        // 连接关闭
        case LWS_CALLBACK_CLOSED:
            printf("Client disconnected\n");
            // 从连接池移除
            for (int i = 0; i < client_count; i++) {
                if (clients[i] == wsi) {
                    clients[i] = clients[--client_count];
                    break;
                }
            }
            break;

        default:
            break;
    }
    return 0;
}

// 支持的协议列表
static struct lws_protocols protocols[] = {
    {
        "ws-protocol",    // 协议名(客户端需匹配)
        ws_callback,      // 回调函数
        0,               // 每会话内存大小
        0,               // 最大帧大小
    },
    { NULL, NULL, 0, 0 }  // 结束标记
};

int main() {
    struct lws_context_creation_info info;
    struct lws_context *context;

    memset(&info, 0, sizeof(info));
    info.port = PORT;
    //info.port = 443;
    info.iface = "10.29.60.104";  // 绑定到指定 IP
    info.protocols = protocols;
    info.gid = -1;
    info.uid = -1;
    info.ssl_cert_filepath = "./cert.pem";  // 证书路径
    info.ssl_private_key_filepath = "./key.pem"; // 私钥路径
    info.options |= LWS_SERVER_OPTION_DO_SSL_GLOBAL_INIT;    //打开ssl

    // 创建 WebSocket 上下文
    context = lws_create_context(&info);
    if (!context) {
        fprintf(stderr, "Failed to create WebSocket context\n");
        return 1;
    }

    printf("WebSocket server started on port %d\n", PORT);

    // 事件循环
    while (1) {
        lws_service(context, 50);  // 50ms 超时
    }

    lws_context_destroy(context);
    return 0;
}
index.html
<!DOCTYPE html>
<html>
<head>
    <title>WebSocket 客户端</title>
</head>
<body>
    <h1>WebSocket 客户端</h1>
    <div>
        <input type="text" id="messageInput" placeholder="输入消息">
        <button onclick="sendMessage()">发送</button>
    </div>
    <div id="messages"></div>

    <script>

        const socket = new WebSocket("wss://10.29.60.104:8080", "ws-protocol");

        socket.onopen = function(e) {
            console.log("[open] 连接建立");
            addMessage("系统: 已连接到服务器");
        };

        socket.onmessage = function(event) {
            console.log(`[message] 收到数据: ${event.data}`);
            addMessage(`服务器: ${event.data}`);
        };

        socket.onclose = function(event) {
            if (event.wasClean) {
                console.log(`[close] 连接关闭,代码=${event.code} 原因=${event.reason}`);
                addMessage(`系统: 连接已关闭 (${event.reason})`);
            } else {
                console.log('[close] 连接断开');
                addMessage('系统: 连接意外断开');
            }
        };

        socket.onerror = function(error) {
            console.log(`[error] ${error.message}`);
            addMessage(`系统: 发生错误 - ${error.message}`);
        };

        function sendMessage() {
            const input = document.getElementById("messageInput");
            const message = input.value+'\0';

            if (message) {
                console.log(`发送: ${message}`);
                socket.send(message);
                addMessage(`你: ${message}`);
                input.value = "";
            }
        }

        function addMessage(text) {
            const messages = document.getElementById("messages");
            const messageElement = document.createElement("div");
            messageElement.textContent = text;
            messages.appendChild(messageElement);
        }
    </script>
</body>
</html>


 1088
1088

 被折叠的 条评论
为什么被折叠?
被折叠的 条评论
为什么被折叠?
 到【灌水乐园】发言


