


最近公司可能会使用Netty 作为RPC的底层,提前做一下知识储备!后续会跟进我的学习进度,学到哪,写到哪!
一、准备环境
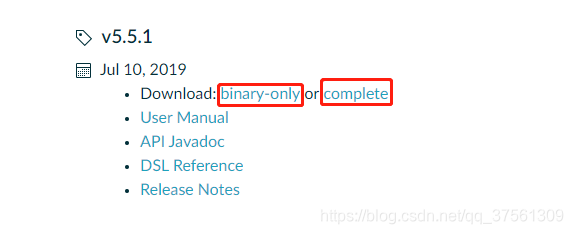
1.安装gradle
官网地址:https://gradle.org/releases/
2.配置环境变量
- GRADLE_HOME : GRADLE安装的根目录
- path : %GRADLE_HOME %\bin\
- 检验:gradle -v
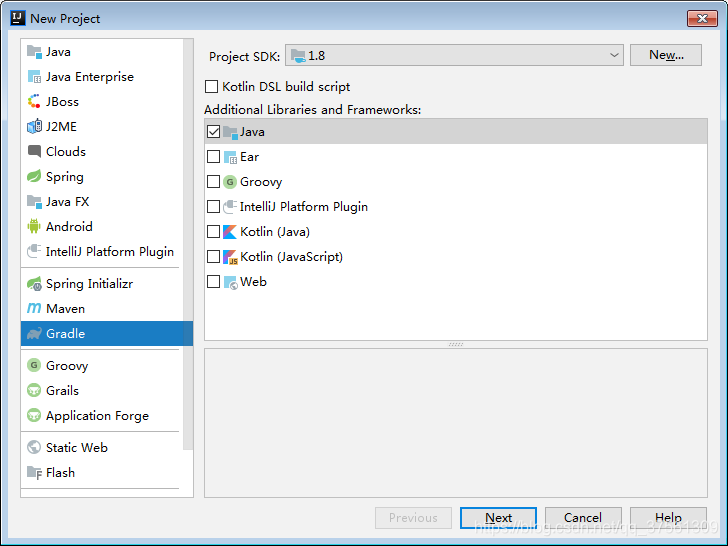
二、IDEA使用本地gradle构建项目
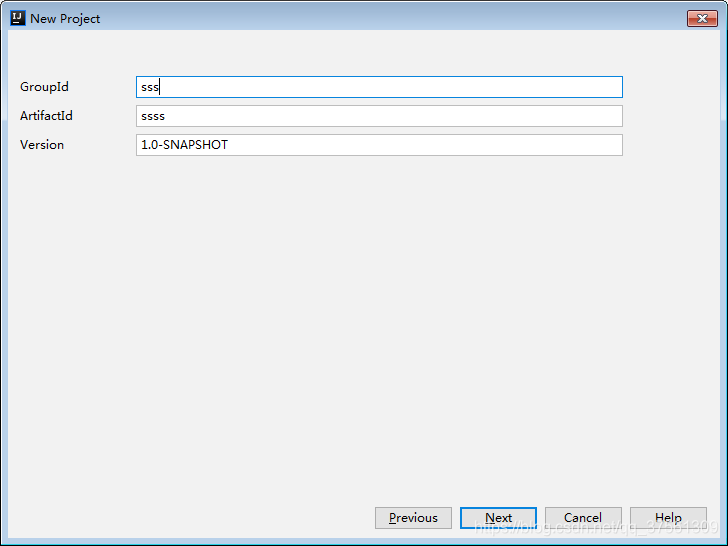
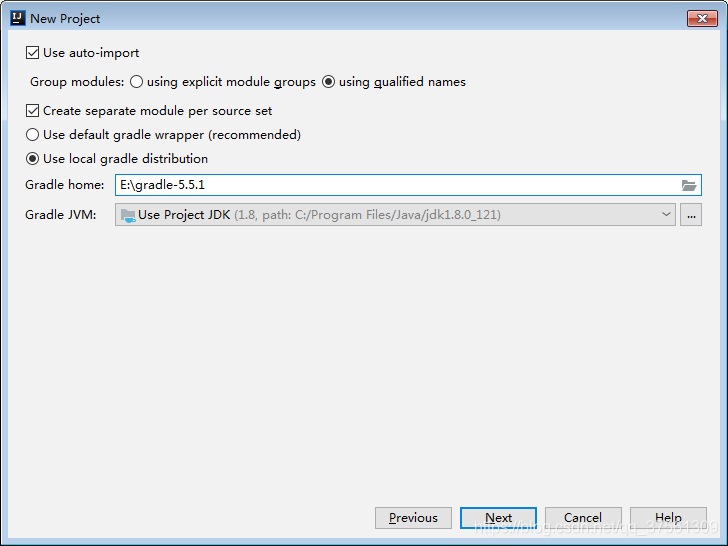
1.新建项目
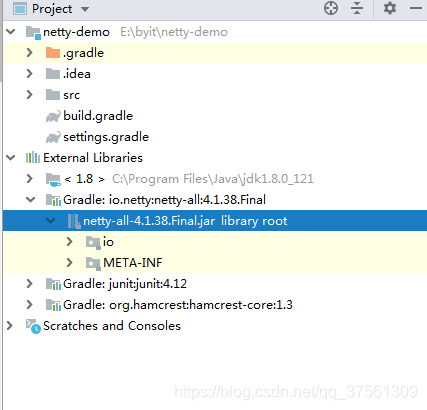
2.引入jar
1.build.gradle文件
dependencies {
 testCompile group: 'junit', name: 'junit', version: '4.12'
 // https://mvnrepository.com/artifact/io.netty/netty-all
 compile group: 'io.netty', name: 'netty-all', version: '4.1.38.Final'

}
2.等待构建完成
三、 Netty
1.能做的事(常见)
- 作为RPC通讯协议 做一个远程过程的调用
- 作为一个长链接的服务器,实现客户端与服务端的通信
- 作为一个Http通讯的协议(并没有遵循Http的协议规范)
2.Netty Hello World
2.1 服务端代码编写
自定义处理器代码编写
package com.demo.netty.firstexample;

import io.netty.buffer.ByteBuf;
import io.netty.buffer.Unpooled;
import io.netty.channel.ChannelHandlerContext;
import io.netty.channel.SimpleChannelInboundHandler;
import io.netty.handler.codec.http.*;
import io.netty.util.CharsetUtil;

/**
 * 处理器最终处理类
 * @author huangfu
 */
public class ServerChannelHandlerAdapter extends SimpleChannelInboundHandler<HttpObject> {

    @Override
    protected void channelRead0(ChannelHandlerContext ctx, HttpObject msg) throws Exception {
        if(msg instanceof HttpRequest){
            ByteBuf byteBuf = Unpooled.copiedBuffer("Hello World", CharsetUtil.UTF_8);
            //HTTP响应
            FullHttpResponse response = new DefaultFullHttpResponse(HttpVersion.HTTP_1_1, HttpResponseStatus.OK,byteBuf);
            //设置头信息
            response.headers().set(HttpHeaderNames.CONTENT_TYPE,"text/plain");
            //响应给客户端
            response.headers().set(HttpHeaderNames.CONTENT_LENGTH,byteBuf.readableBytes());
            ctx.writeAndFlush(response);
        }
    }

    //通道注册成功
    @Override
    public void channelRegistered(ChannelHandlerContext ctx) throws Exception {
        System.out.println("channel register...");
        super.channelRegistered(ctx);
    }

    /**
     * 自定义的Handler被添加,也就是在TestChannelnitializer的initChannel方法中,
     * pipeline.addLast("testHttpServerHandler", new TestHttpServerHandler());
     * 这行代码执行的时候,该方法被触发
     */
    @Override
    public void handlerAdded(ChannelHandlerContext ctx) throws Exception {
        System.out.println("handler added...");
        super.handlerAdded(ctx);
    }

    //通道处于活动状态,即可用状态
    @Override
    public void channelActive(ChannelHandlerContext ctx) throws Exception {
        System.out.println("channel active...");
        super.channelActive(ctx);
    }

    //通道处于不活动状态
    @Override
    public void channelInactive(ChannelHandlerContext ctx) throws Exception {
        System.out.println("channel inactive...");
        super.channelInactive(ctx);
    }

    //通道取消注册
    @Override
    public void channelUnregistered(ChannelHandlerContext ctx) throws Exception {
        System.out.println("channel unregister...");
        super.channelUnregistered(ctx);
    }

    /**
     * 异常捕获
     * @param ctx
     * @param cause
     * @throws Exception
     */
    @Override
    public void exceptionCaught(ChannelHandlerContext ctx, Throwable cause) throws Exception {
        cause.printStackTrace();
        ctx.close();
    }
}
通道初始化
package com.demo.netty.firstexample;

import io.netty.channel.ChannelInitializer;
import io.netty.channel.ChannelPipeline;
import io.netty.channel.socket.SocketChannel;
import io.netty.handler.codec.http.HttpServerCodec;

/**
 * 自定义的处理器
 * 其实他也是一个委托类 再次将请求委托给另外一个类
 * 它本身只做一个初始化的操作 添加各种Handler
 * @author 皇甫
 */
public class ServerChannelInitializer extends ChannelInitializer<SocketChannel> {
    @Override
    protected void initChannel(SocketChannel ch) throws Exception {
        //创建个管道的套接字
        ChannelPipeline pipeline = ch.pipeline();
        //将请求委托给真正的最终处理类  自定义
        pipeline.addLast(new HttpServerCodec());
        pipeline.addLast(new ServerChannelHandlerAdapter());
    }
}
服务端代码编写
package com.demo.netty.firstexample;

import io.netty.bootstrap.ServerBootstrap;
import io.netty.channel.ChannelFuture;
import io.netty.channel.EventLoopGroup;
import io.netty.channel.nio.NioEventLoopGroup;
import io.netty.channel.socket.nio.NioServerSocketChannel;

/**
 * 模拟Http服务器
 * @author 皇甫
 */
public class NettyHttpServer {
    public static void main(String[] args) throws InterruptedException {
        //启动服务引导 框架启动引导类 屏蔽网络通讯配置信息
        ServerBootstrap serverBootstrap = new ServerBootstrap();
        //创建线程池组
        //boss接收服务请求 但是并不处理而是将请求委托给worker
        EventLoopGroup boss = new NioEventLoopGroup();
        //真正的处理类
        EventLoopGroup worker = new NioEventLoopGroup();
        //将委托类和执行类关联至启动类
        serverBootstrap.group(boss,worker)
                .channel(NioServerSocketChannel.class)
                .childHandler(new ServerChannelInitializer());
        ChannelFuture sync = serverBootstrap.bind(8989).sync();
        sync.channel().closeFuture().sync();
        boss.shutdownGracefully();
        worker.shutdownGracefully();
    }

}
服务器访问 http://localhost:8989 应该会响应 Hello World 一个简单的Http服务器就完成了


 794
794

 被折叠的 条评论
为什么被折叠?
被折叠的 条评论
为什么被折叠?
 到【灌水乐园】发言


