


1、前言
1.1 软件环境
操作系统:Windows11
软件版本:nexus-3.75.1-01-win64、JDK17、maven3.3.9
2、离线部署操作步骤
2.1 下载安装包
下载地址:https://www.sonatype.com/

填写信息:
2.2 安装
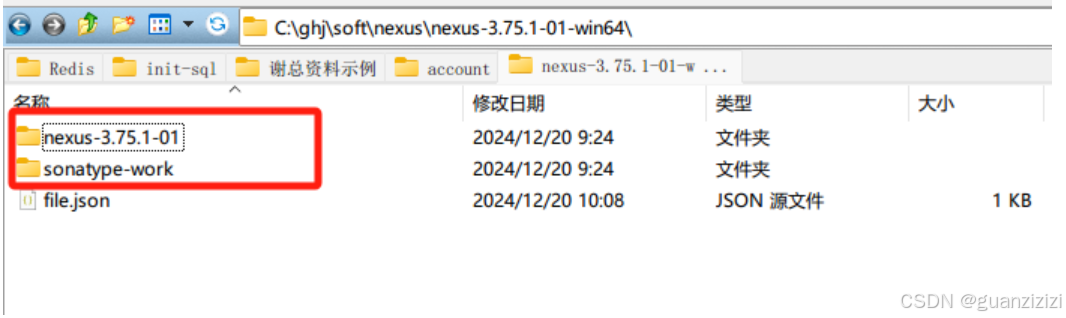
2.2.1 解压文件:
2.2.2 安装:
./nexus.exe /install

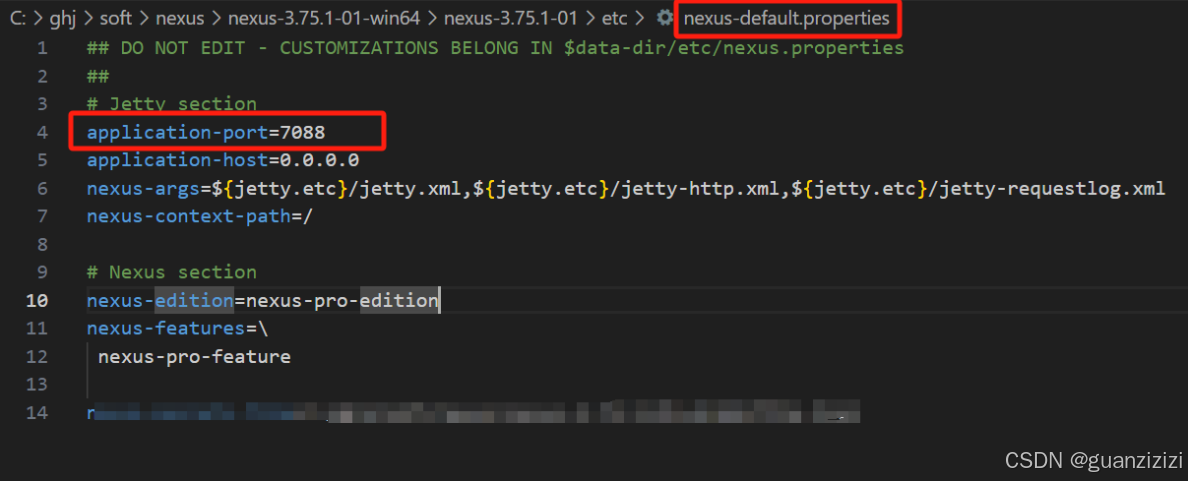
2.2.3 修改配置
2.2.4 启动
./nexus.exe /start 启动
./nexus.exe /restart 重启
./nexus.exe /status  查看状态
./nexus.exe /stop  停止

2.2.5 访问服务
1)服务地址:http://localhost:7088/#browse/welcome

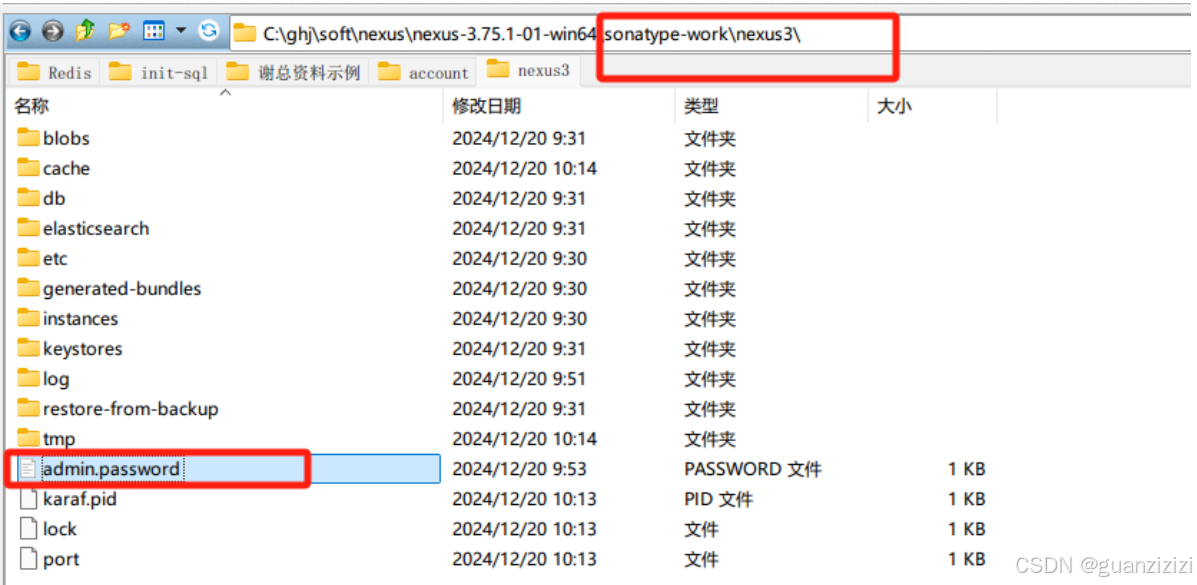
2)登录
默认密码在【C:\ghj\soft\nexus\nexus-3.75.1-01-win64\sonatype-work\nexus3\admin.password】
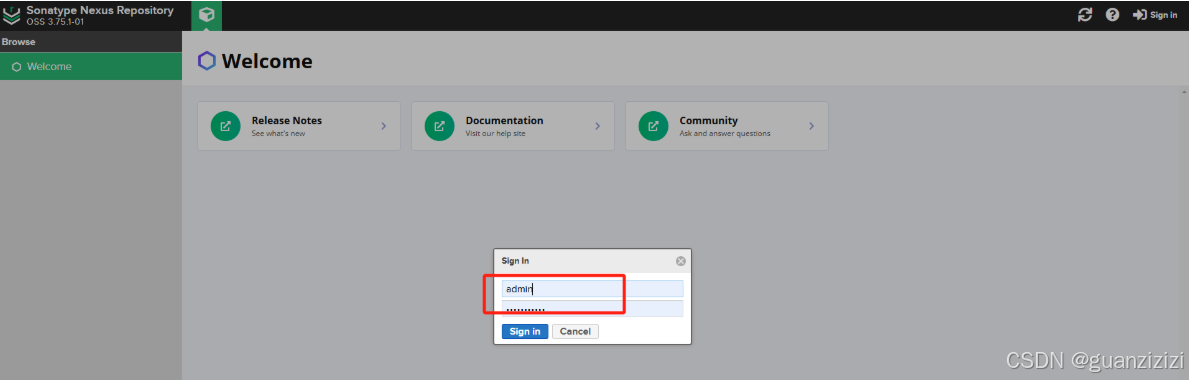
3)登陆后需要修改密码
4)解决登录后的警告问题:
Nexus was not configured with an encryption key and is using the Default key.

警告解决官网也有说明:
https://help.sonatype.com/en/re-encryption-in-nexus-repository.html
解决步骤:
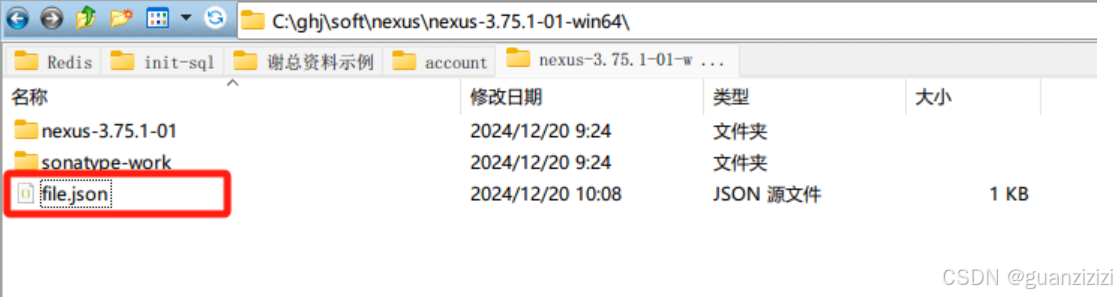
a. 创建json密钥文件:
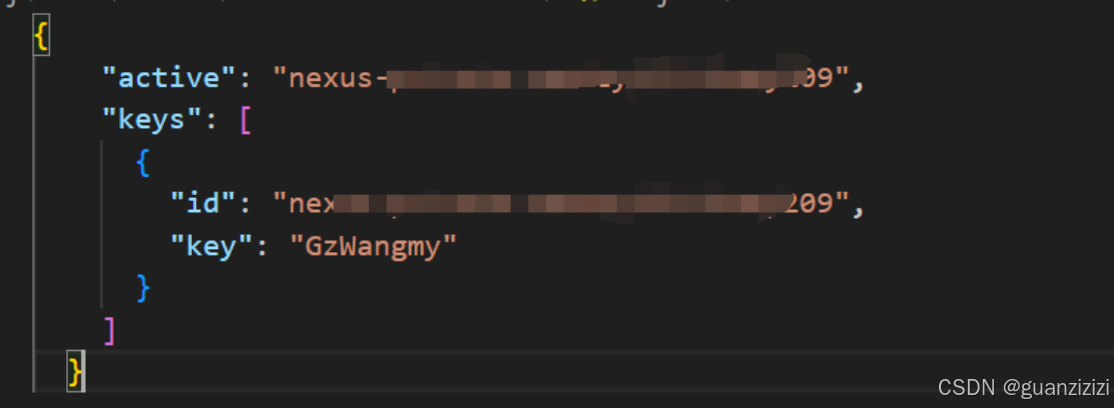
解释说明:

备注:active中的值必须要keys中的id要一致!!!
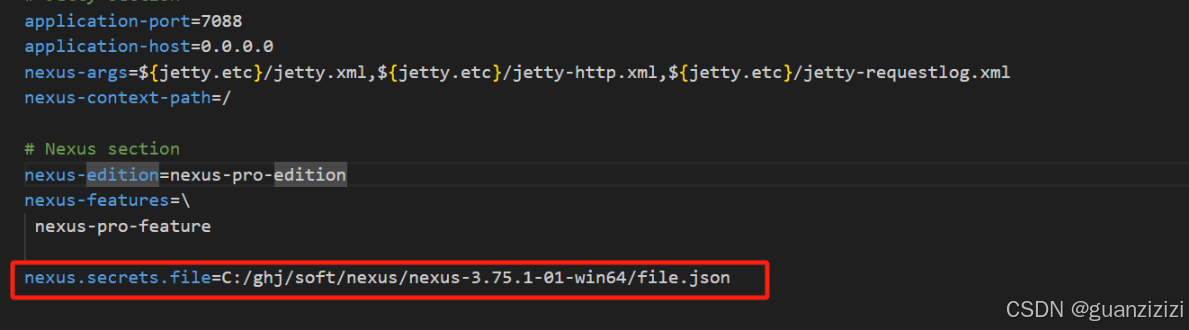
b. 启用重新加密,修改配置文件
nexus.secrets.file=C:/ghj/soft/nexus/nexus-3.75.1-01-win64/file.json
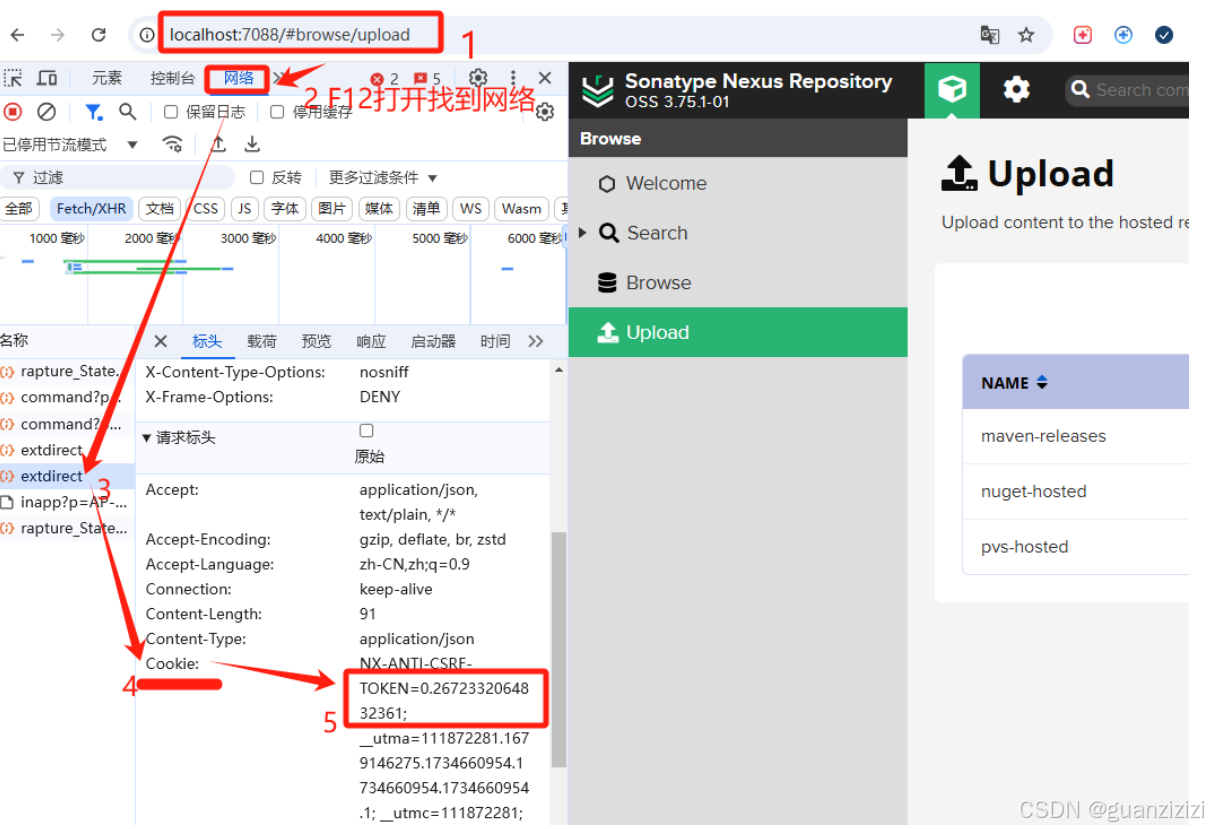
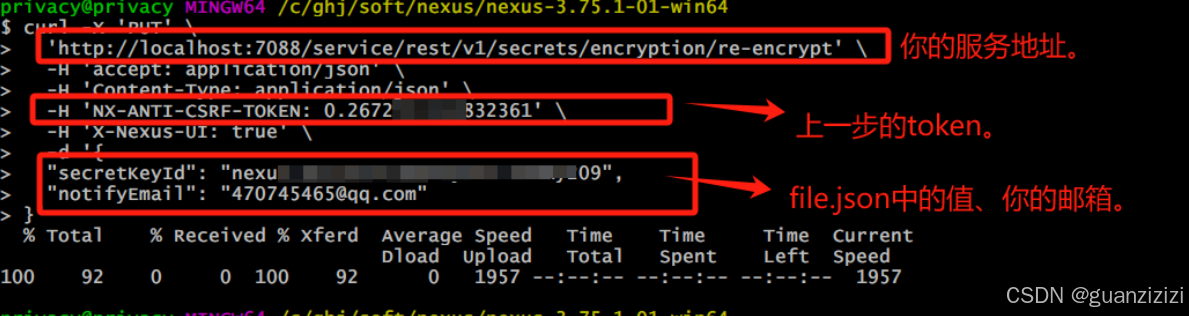
c.通过curl创建加密任务
curl -X 'PUT' \
'http://localhost:7088/service/rest/v1/secrets/encryption/re-encrypt' \
-H 'accept: application/json' \
-H 'Content-Type: application/json' \
-H 'NX-ANTI-CSRF-TOKEN: 0.2671236544832361' \
-H 'X-Nexus-UI: true' \
-d '{
     "secretKeyId": "上一步的file.json中的值",  "notifyEmail": "470745465@qq.com 你的邮箱"
}'
d. 重启nexus。
./nexus.exe /restart 重启
./nexus.exe /status  查看状态

e. 重新登录服务,发现警告消失

至此,安装已结束,接下来可以进行配置了。
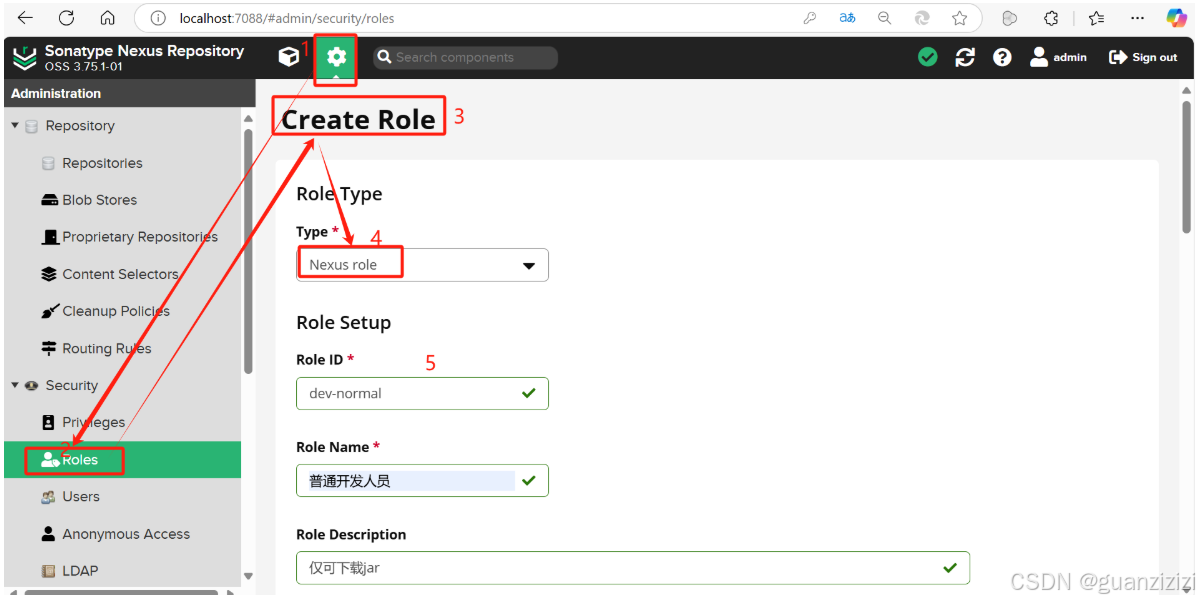
3、Nexus配置
3.1 配置权限
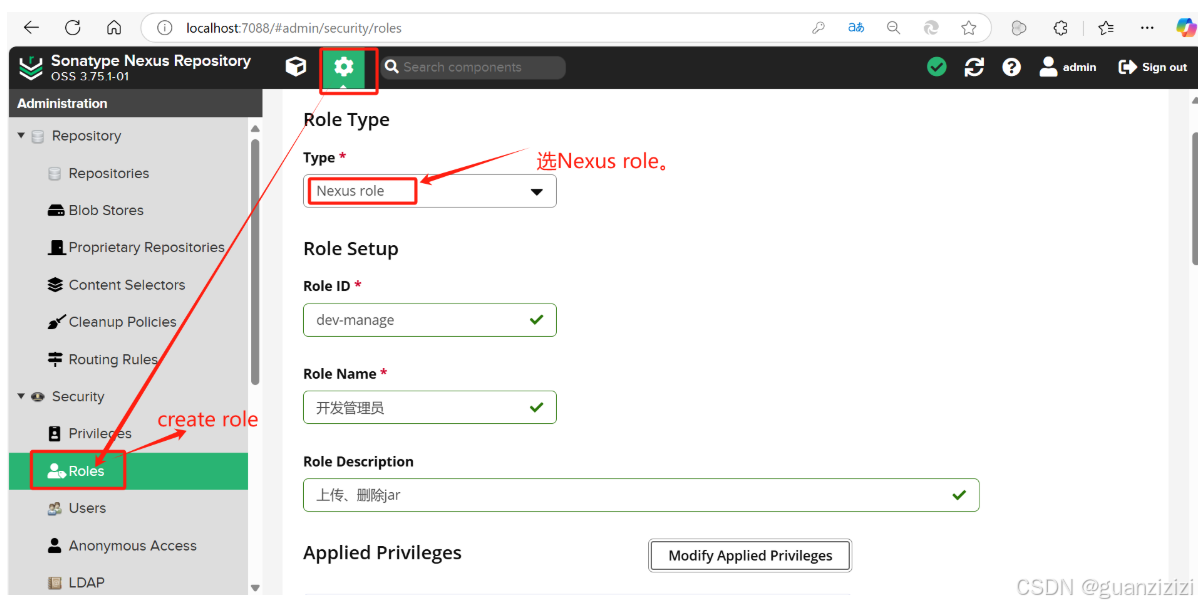
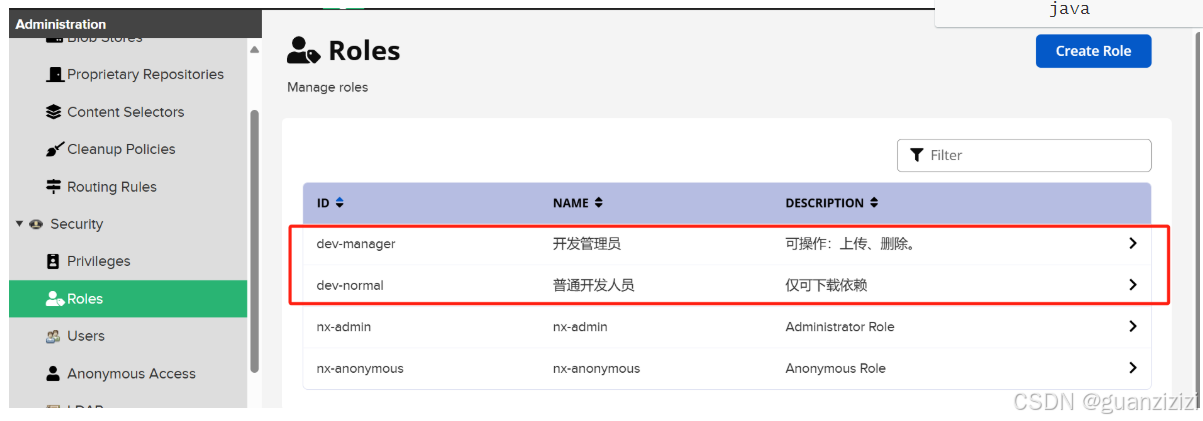
3.1.1 创建角色
1)dev-manage角色:上传、删除jar。
选择Applied Privileges,
Nx-repository-admin-maven2 类全部勾选
Nx-repository-view-maven2 类全部勾选
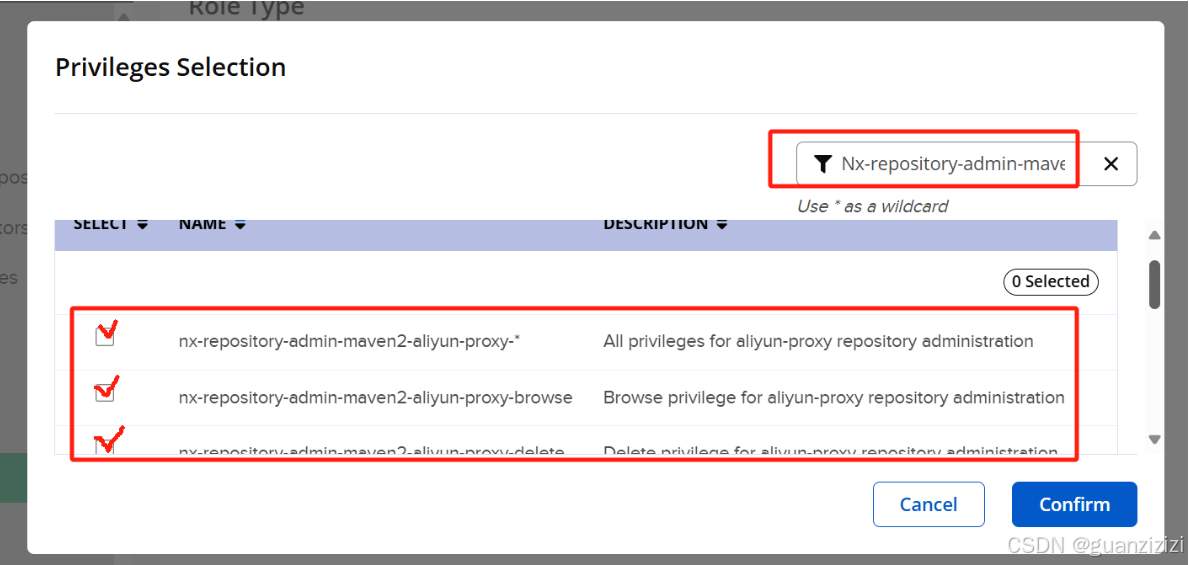
2)dev-normal角色:仅可下载jar
选择Applied Privileges,
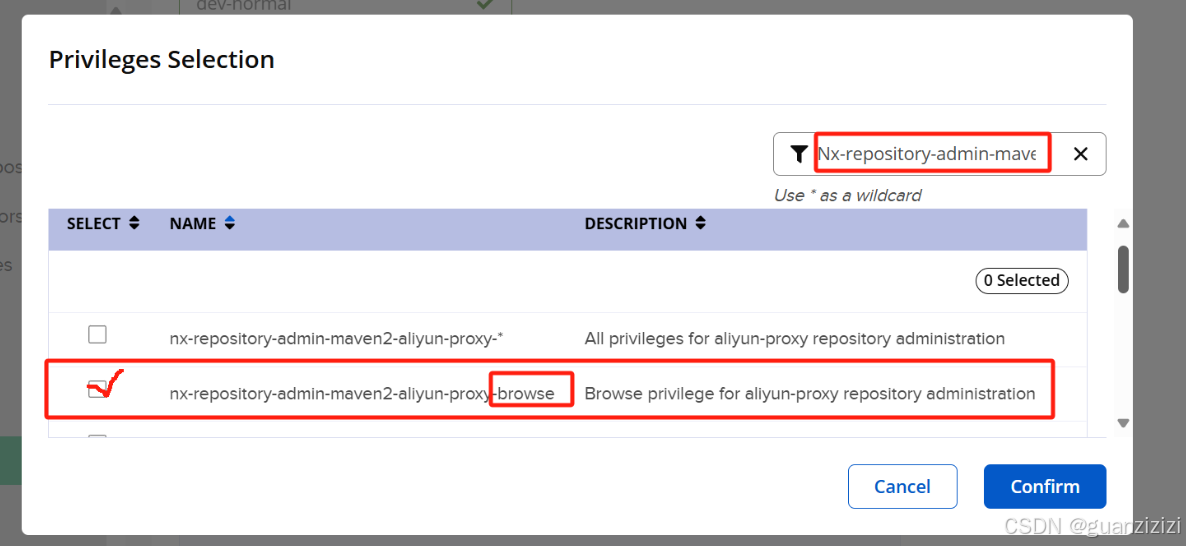
Nx-repository-admin-maven2 类只勾选 read 和browse 结尾
Nx-repository-view-maven2 类只勾选 read 和browse 结尾
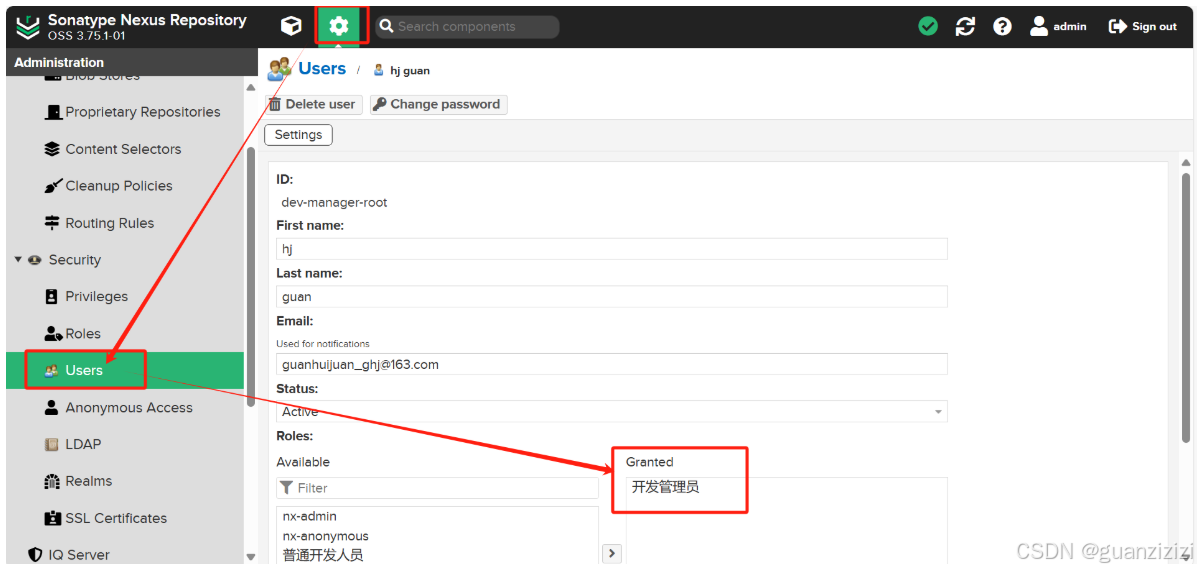
3.2 创建用户
分配角色:开发管理员。
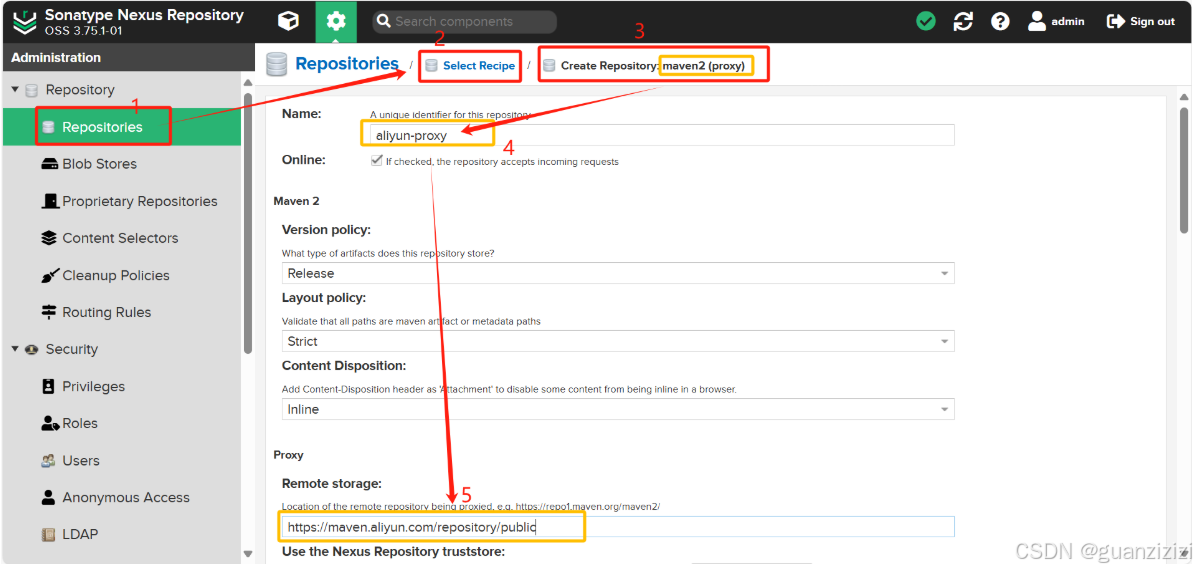
4、创建镜像代理仓库
4.1 阿里仓库创建
https://maven.aliyun.com/repository/public
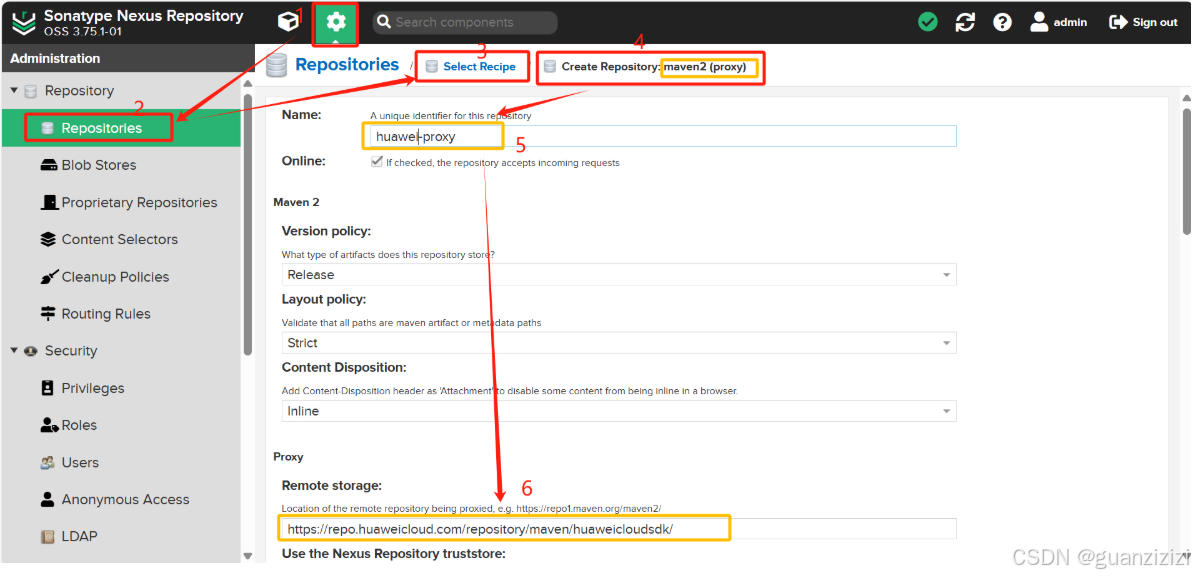
4.2 华为仓库创建
https://repo.huaweicloud.com/repository/maven/huaweicloudsdk/
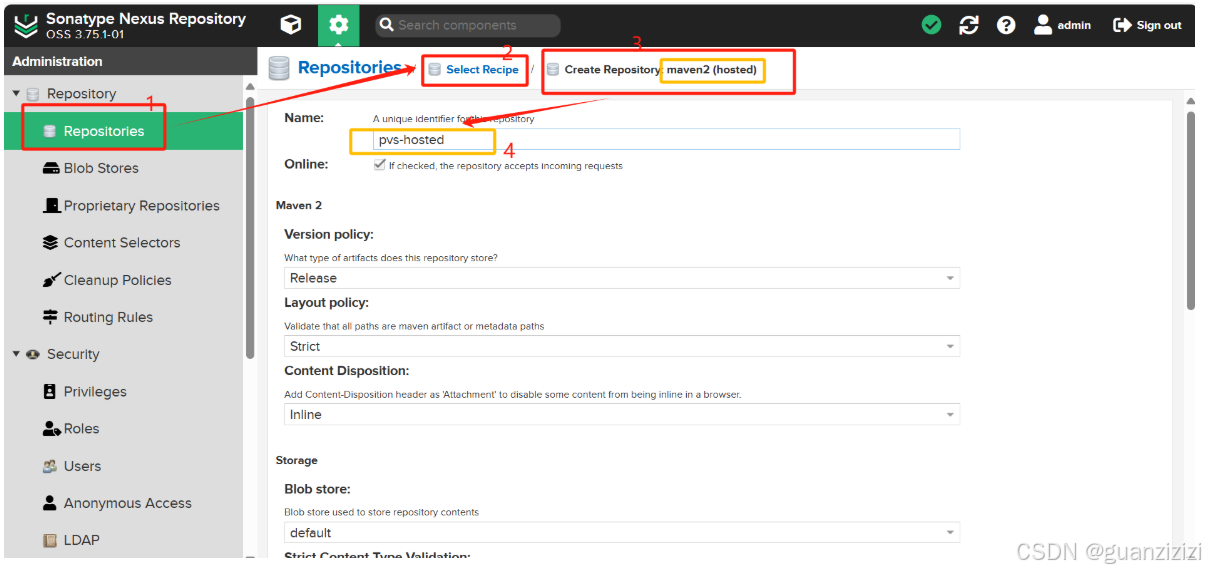
4.3 私有仓库hosted
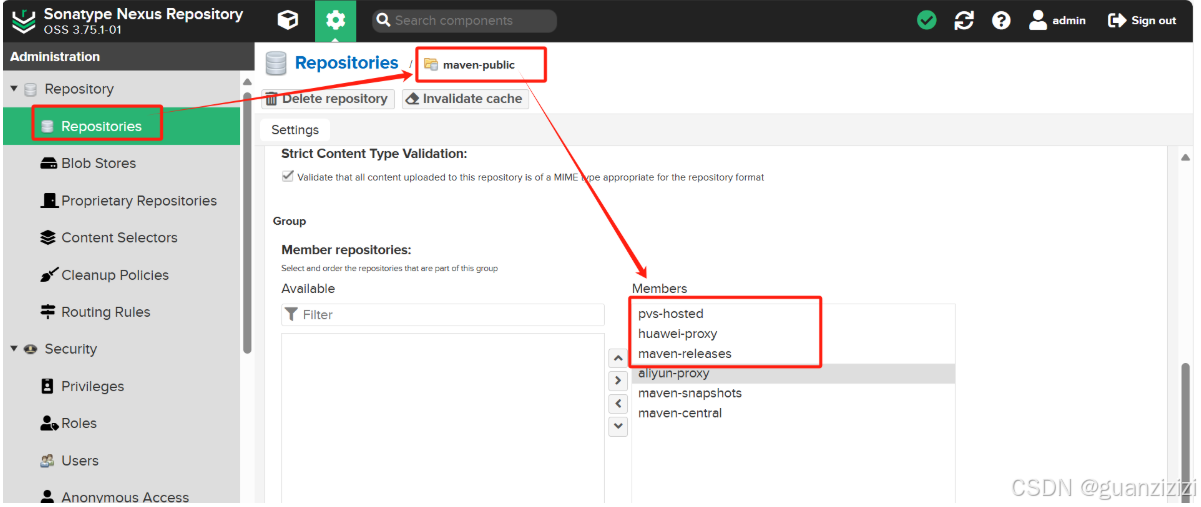
4.4 maven(group)仓库里挂在其他仓库
4.5 配置本地maven仓库
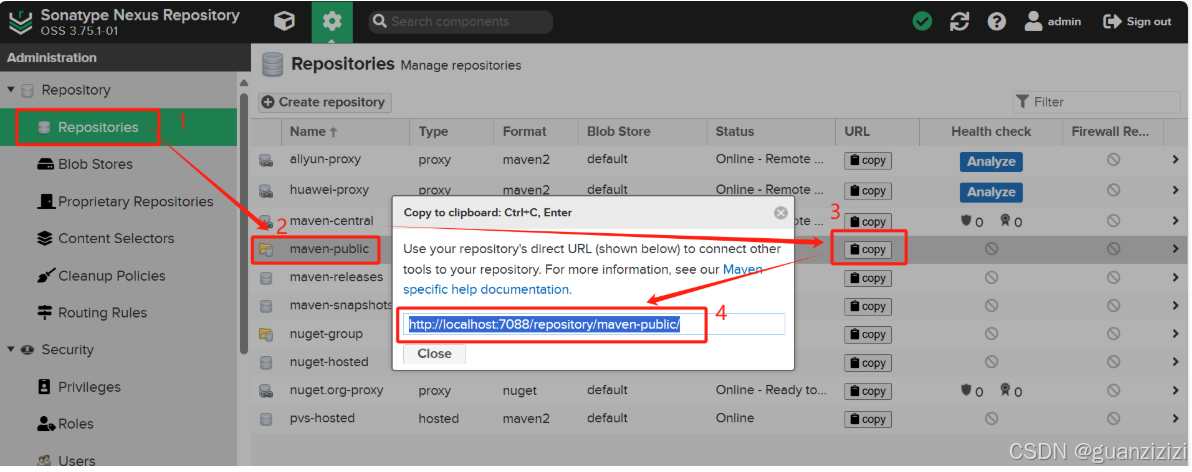
4.5.1 获取仓库地址
http://localhost:7088/repository/maven-public/
4.5.2 修改maven的配置文件settings.xml
server:
<server>
      <id>pvs-dev</id>
      <username>dev-manager-root</username>
      <password>G******9</password>
    </server>

mirror:
 <mirror>
		<id>pvs-dev</id>
		<mirrorOf>*</mirrorOf>
		<!-- <url>http://192.168.200.25:7088/nexus/content/groups/public</url> -->
		<url>http://localhost:7088/repository/maven-public/</url>
	</mirror>

profile:
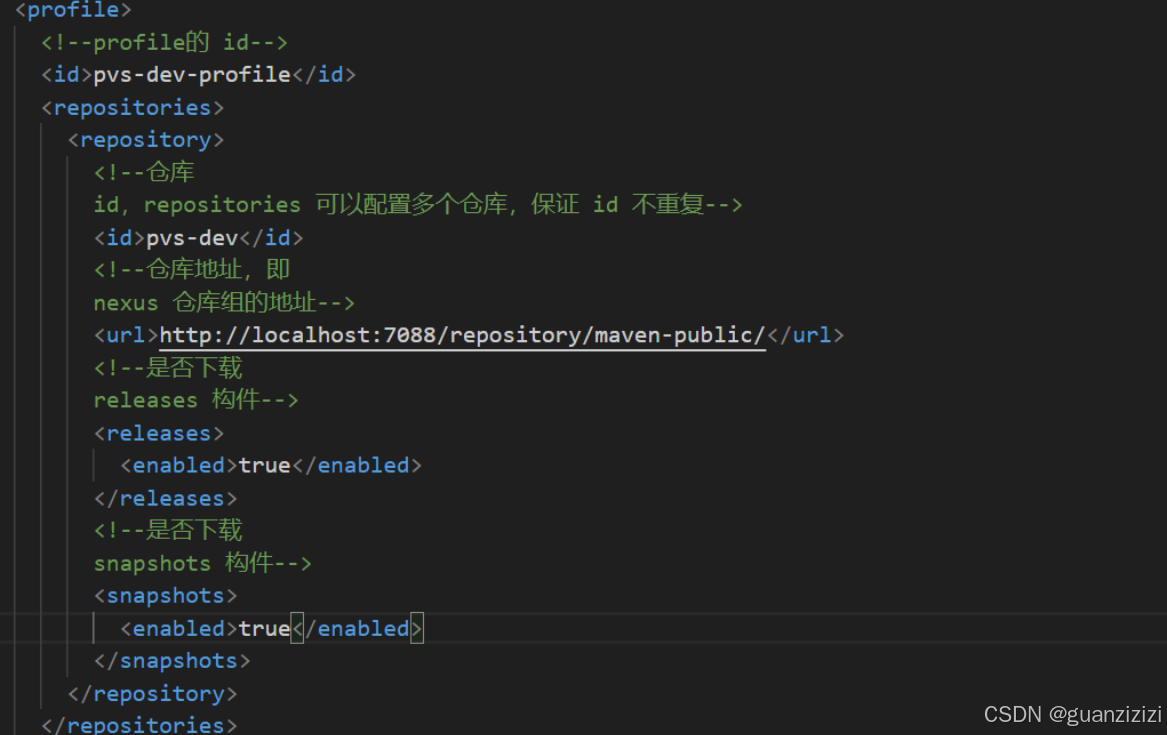
<profile>
<!--profile的 id-->
<id>pvs-dev-profile</id>
<repositories>
<repository>
<!--仓库
id,repositories 可以配置多个仓库,保证 id 不重复-->
<id>pvs-dev</id>
<!--仓库地址,即
nexus 仓库组的地址-->
<url>http://localhost:7088/repository/maven-public/</url>
<!--是否下载
releases 构件-->
<releases>
<enabled>true</enabled>
</releases>
<!--是否下载
snapshots 构件-->
<snapshots>
<enabled>true</enabled>
</snapshots>
</repository>
</repositories>
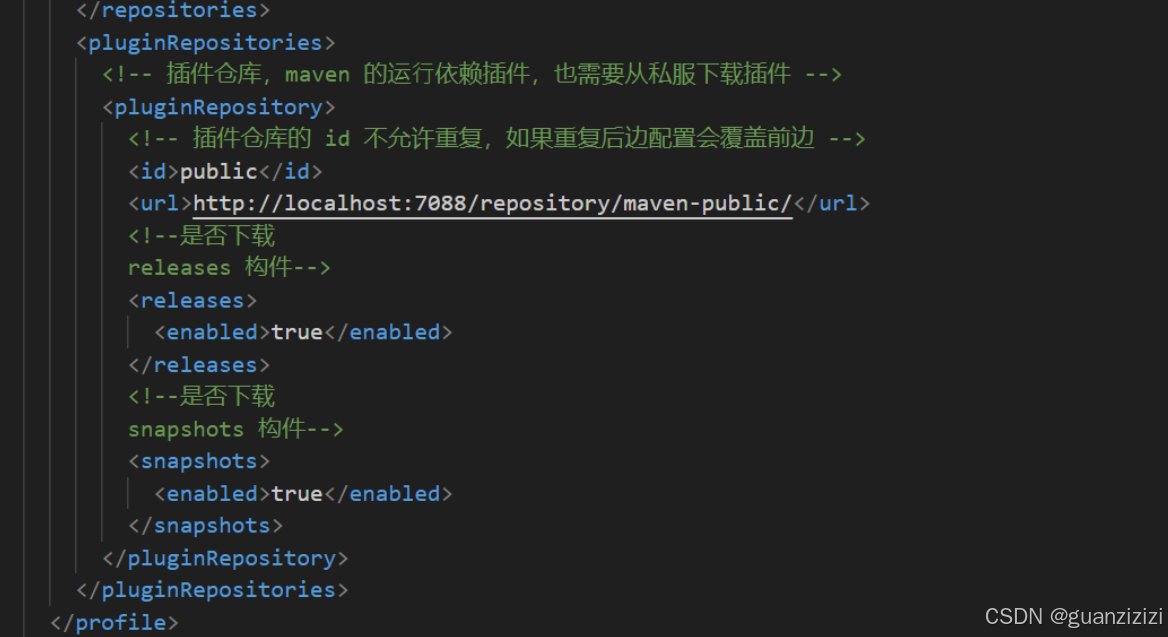
<pluginRepositories>
<!-- 插件仓库,maven 的运⾏依赖插件,也需要从私服下载插件 -->
<pluginRepository>
<!-- 插件仓库的 id 不允许重复,如果重复后边配置会覆盖前边 -->
<id>public</id>
<url>http://localhost:7088/repository/maven-public/</url>
<!--是否下载
releases 构件-->
<releases>
<enabled>true</enabled>
</releases>
<!--是否下载
snapshots 构件-->
<snapshots>
<enabled>true</enabled>
</snapshots>
</pluginRepository>
</pluginRepositories>
</profile>
5、结合项目进行测试
5.1 打开服务,上传一个jar
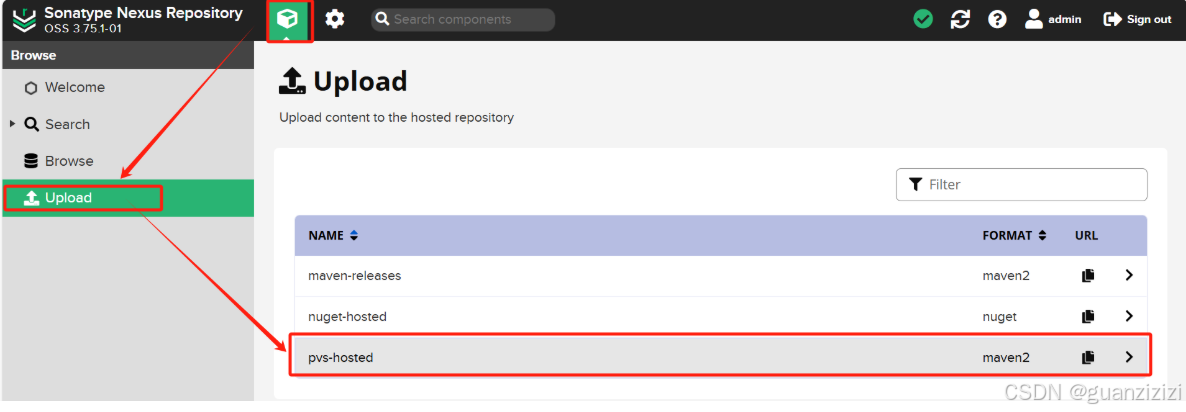
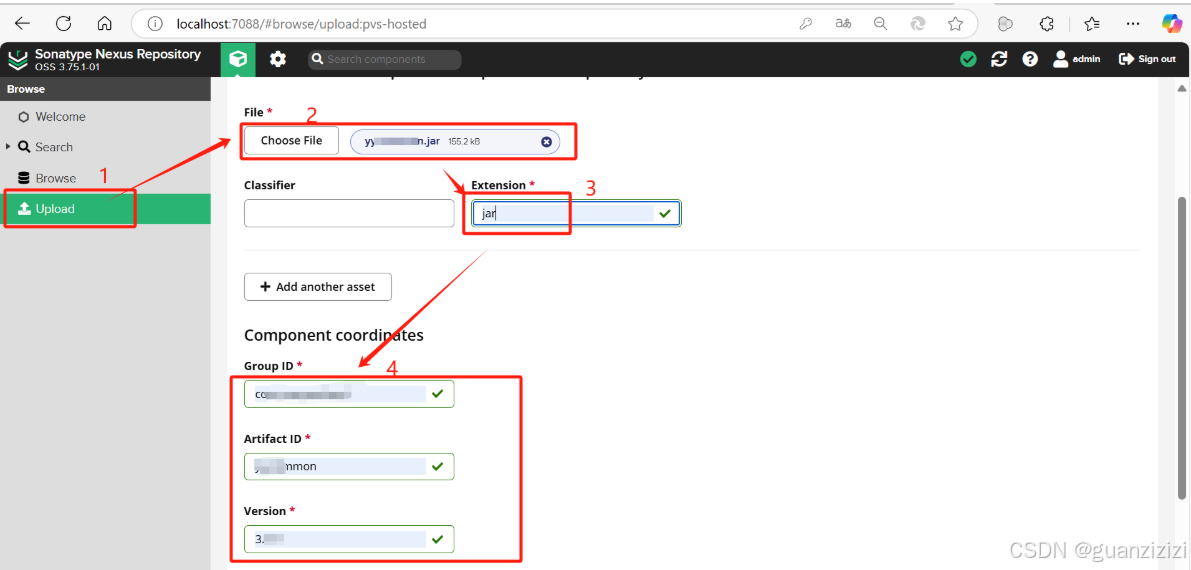
建议勾选"Generate a POM file with these coordinates",maven进行依赖解析和项目构建。

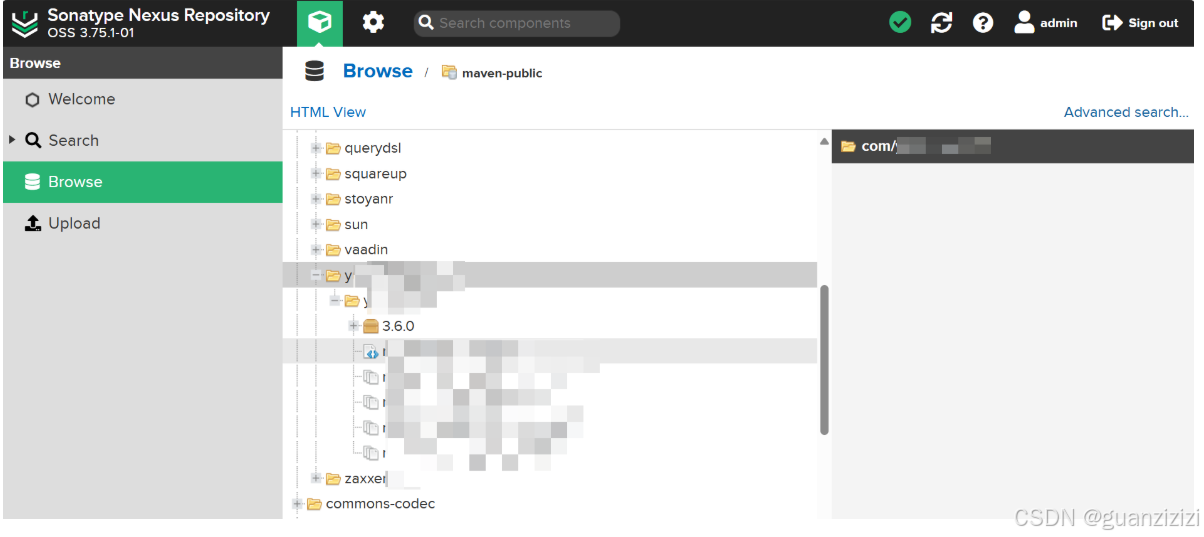
5.2 获取依赖

复制到你本地项目的pom.xml中,刷新下maven就可以自动下载到本地了。
5.3 idea中测试依赖


至此,Nexus的安装与配置 结束啦。。。


 1350
1350

 被折叠的 条评论
为什么被折叠?
被折叠的 条评论
为什么被折叠?
 到【灌水乐园】发言


