


一、下载nginx
使用的版本是:nginx-1.9.9.tar.gz
二、连接服务器
1、创建nginx目录:mkdir nginx
2、cd nginx
3、配置nginx安装所需的环境
yum install gcc-c++
yum install -y pcre pcre-devel
yum install -y zlib zlib-devel
yum install -y openssl openssl-devel
4、使用sftp传入压缩包
5、解压缩
tar -zxvf nginx-1.19.4.tar.gz
6、进入加压文件
解压之后,进入加压文件,即cd nginx-1.9.9
然后进行配置,
./configure --prefix=/home/isoftstone/software/nginx/nginx_install
7、编译安装nginx
首先在当前目录(/home/isoftstone/software/nginx/nginx-1.9.9)进行编译。输入make即可:
make
然后回车,如果编译出错,请检查是否前面的4个安装都没有问题。
编译成功之后,就可以安装了,输入以下指令:
make install
8、启动nginx
进入/usr/local/nginx/sbin目录,输入./nginx即可启动nginx
./nginx
如果启动报错:nginx: [emerg] bind() to 0.0.0.0:80 failed (98: Address already in use),说明80端口被占用,使用如下命令:
fuser -k 80/tcp
关闭nginx
./nginx -s quit 或者 ./nginx -s stop
重启nginx
./nginx -s reload
查看nginx进程
ps aux|grep nginx
9、设置nginx开机启动
只需在rc.local增加启动代码即可。
vim /etc/rc.local
按键盘 i 然后在底部增加:
/usr/local/nginx/sbin/nginx

三、部署
1、打开vue项目,在控制台输入
npm run build
2、在SecureCRT 进入nginx/html目录,打开sftp
先删除原来的index.html,再传输
3、把生成的dist目录下的静态资源传输到服务器
4、修改配置文件
此外,进入cd /usr/local/nginx/conf目录可修改nginx的配置文件:
vim nginx.conf
按键盘i进行编辑,编辑完成按 Esc,再输入 :wq
贴上一个完整版的,其中有序号标明的是注释说明,主要更改了server 的内容
| user root; worker_processes 1;
#error_log logs/error.log; #error_log logs/error.log notice; #error_log logs/error.log info; #pid logs/nginx.pid;
events { worker_connections 1024; } http { include mime.types; default_type application/octet-stream;
#log_format main '$remote_addr - $remote_user [$time_local] "$request" ' # '$status $body_bytes_sent "$http_referer" ' # '"$http_user_agent" "$http_x_forwarded_for"'; #access_log logs/access.log main; sendfile on; #tcp_nopush on; #keepalive_timeout 0; keepalive_timeout 65; #gzip on;
server { listen 8081; server_name 39.99.171.220;
location / { root /home/isoftstone/bcp_finarp_web/dist; index /index.html; try_files $uri $uri/ /index.html; } location /user/ { proxy_pass http://39.99.171.220:38089; } } # another virtual host using mix of IP-, name-, and port-based configuration # #server { # listen 8000; # listen somename:8080; # server_name somename alias another.alias;
# location / { # root html; # index index.html index.htm; # } #} # HTTPS server # #server { # listen 443 ssl; # server_name localhost;
# ssl_certificate cert.pem; # ssl_certificate_key cert.key; # ssl_session_cache shared:SSL:1m; # ssl_session_timeout 5m; # ssl_ciphers HIGH:!aNULL:!MD5; # ssl_prefer_server_ciphers on; # location / { # root html; # index index.html index.htm; # } #} } |
5、开放 8080 端口
1、检查防火墙状态
firewall-cmd --state
running 表示防火墙是开启的,如果你看到的是 not running,则表示防火墙关闭,需要开启 :
systemctl start firewalld.service
2、开放 8080 端口
firewall-cmd --zone=public --add-port=8080/tcp --permanent
3、重启防火墙
systemctl restart firewalld.service
4、重新载入配置
firewall-cmd --reload
6、重启nginx
在/nginx/sbin/目录下
重启:
./nginx -s reload
查看nginx进程:
ps aux|grep nginx
四、部署
1、nginx安装make编译时出错
- nginx编译报错src/core/ngx_murmurhash.c:37:11: 错误:this statement may fall through [-Werror=implicit-fallthrough=] h ^= data[2]
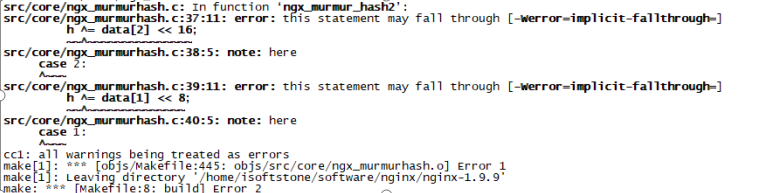
原因:将警告当成错误处理
解决错误1:进入到nginx-1.6.3目录下(解压的目录)
找到当前目录下找到objs文件夹,并进入,打开文件Makefile,找到有一下内容的这行:
CFLAGS = -pipe -O -W -Wall -Wpointer-arith -Wno-unused-parameter -Werror -g
-Werror: gcc将所有的警告当成错误进行处理把这行内容中的 “-Werror”去掉
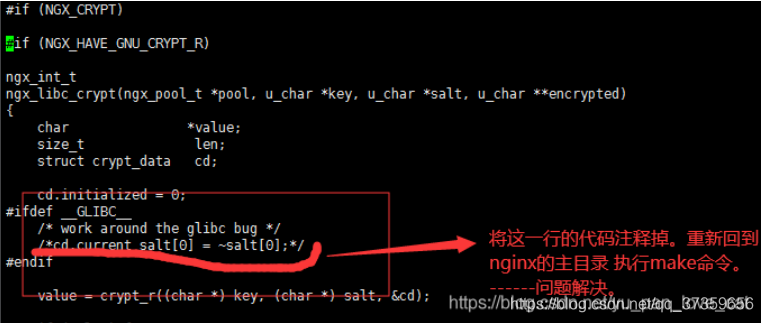
如果还是出错:
src/os/unix/ngx_user.c: 在函数‘ngx_libc_crypt’中: src/os/unix/ngx_user.c:36:7:
解决错误:src/os/unix/ngx_user.c 文件中 修改
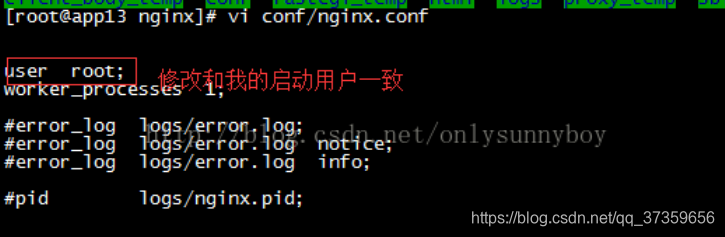
2、nginx安装make编译时出错
https://blog.youkuaiyun.com/qq_35843543/article/details/81561240
1.2将nginx.config的user改为和启动用户一致,
命令:vi conf/nginx.conf
3、前端接口请求跨越问题
| package com.isoftstone.reconciliation.filter;
|
4、部署刷新页面404错误
vi nginx.conf

输入命令 i 进入编辑模式,在指定位置添加代码

location / {
    root ...
    index ...
    try_files $uri $uri/ /index.html; ---解决页面刷新404问题
}


 853
853

 被折叠的 条评论
为什么被折叠?
被折叠的 条评论
为什么被折叠?
 到【灌水乐园】发言


