


一、背景
delete误删数据可以用my2sql和Binlog2sql等工具可以恢复,但只能回滚DML,DDL恢复不了,在这种情况下,要想恢复数据,有几种方案。 1、使用全量备份+加增量日志的方式了。这种方案要求线上有定期的全量备份,并且误删事务阶段的全量binlog存在。 2、使用工具来恢复。 本篇文章使用第1种方法来做恢复。
二、恢复流程
1.建议新建一个测试库进行数据恢复,生产最好不要覆盖;2.把最近一次全量备份恢复到测试库;3.从binlog日志里面取出这次备份时间点之后的日志;3.把日志除了误删数据的语句外,全部应用到临时库;
三、使用truncate误删数据
(一)环境准备
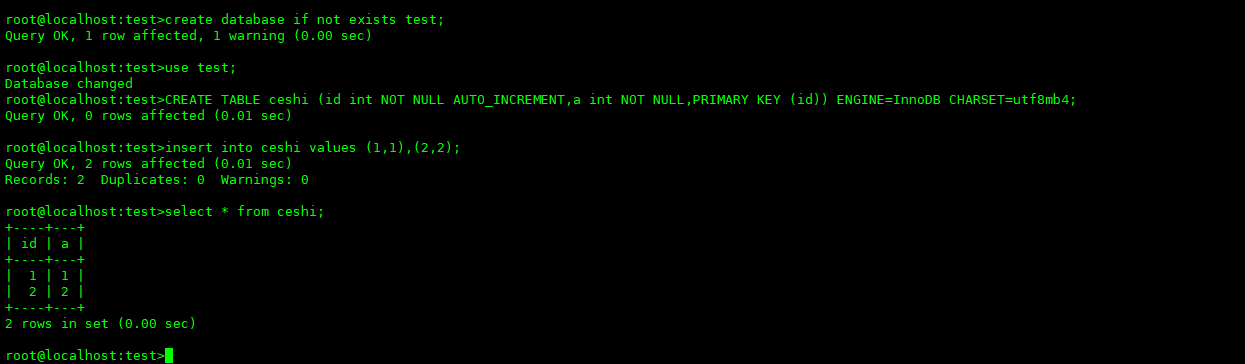
1、模拟新增数据
root@localhost:test>create database if not exists test;root@localhost:test>use test;root@localhost:test>CREATE TABLE ceshi (id int NOT NULL AUTO_INCREMENT,a int NOT NULL,PRIMARY KEY (id)) ENGINE=InnoDB CHARSET=utf8mb4;root@localhost:test>insert into ceshi values (1,1),(2,2);root@localhost:test>select * from ceshi;
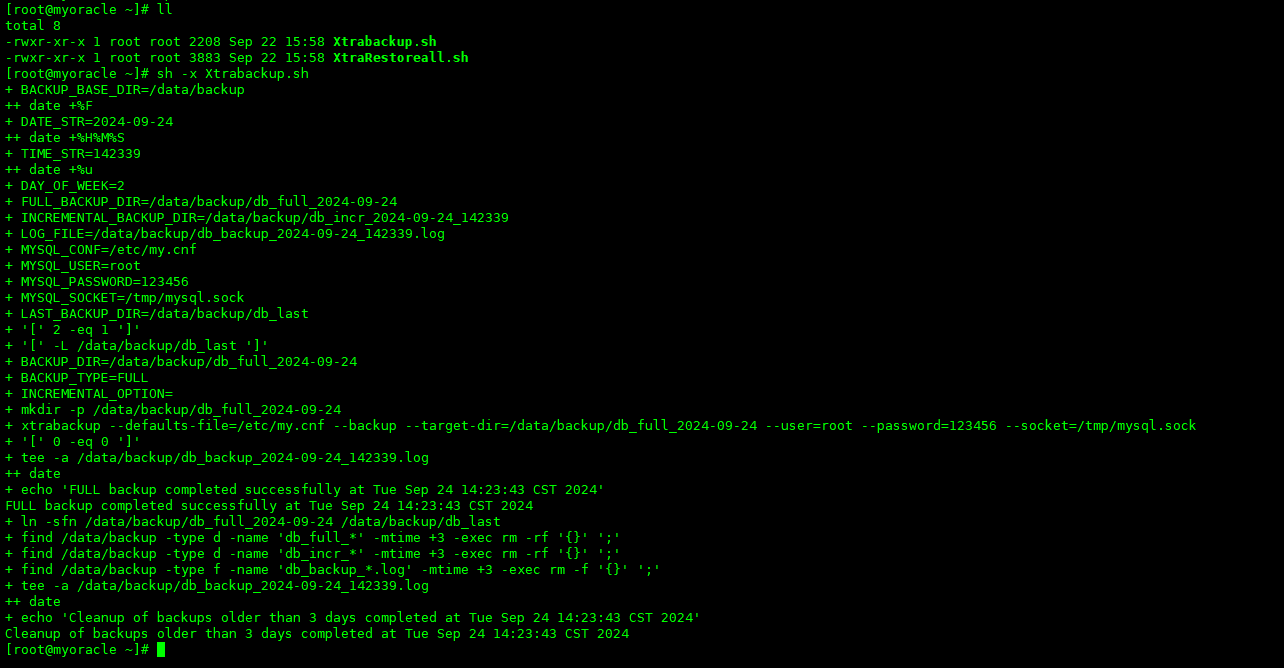
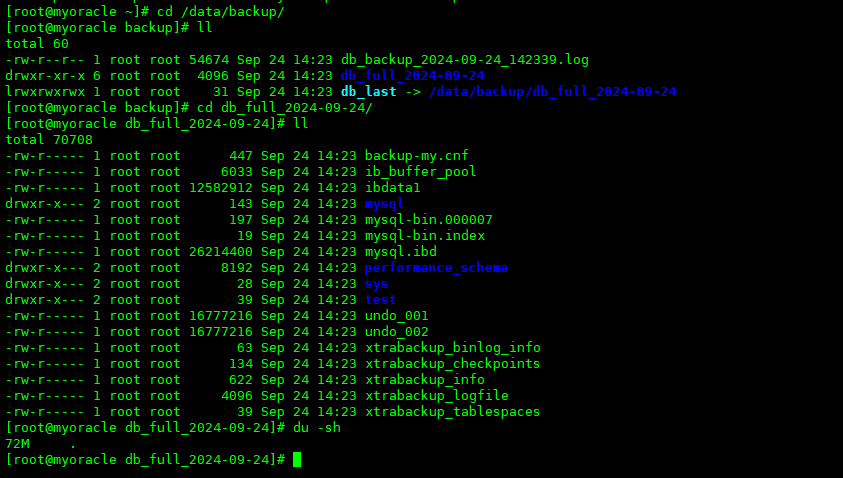
2、模拟进行全量备份
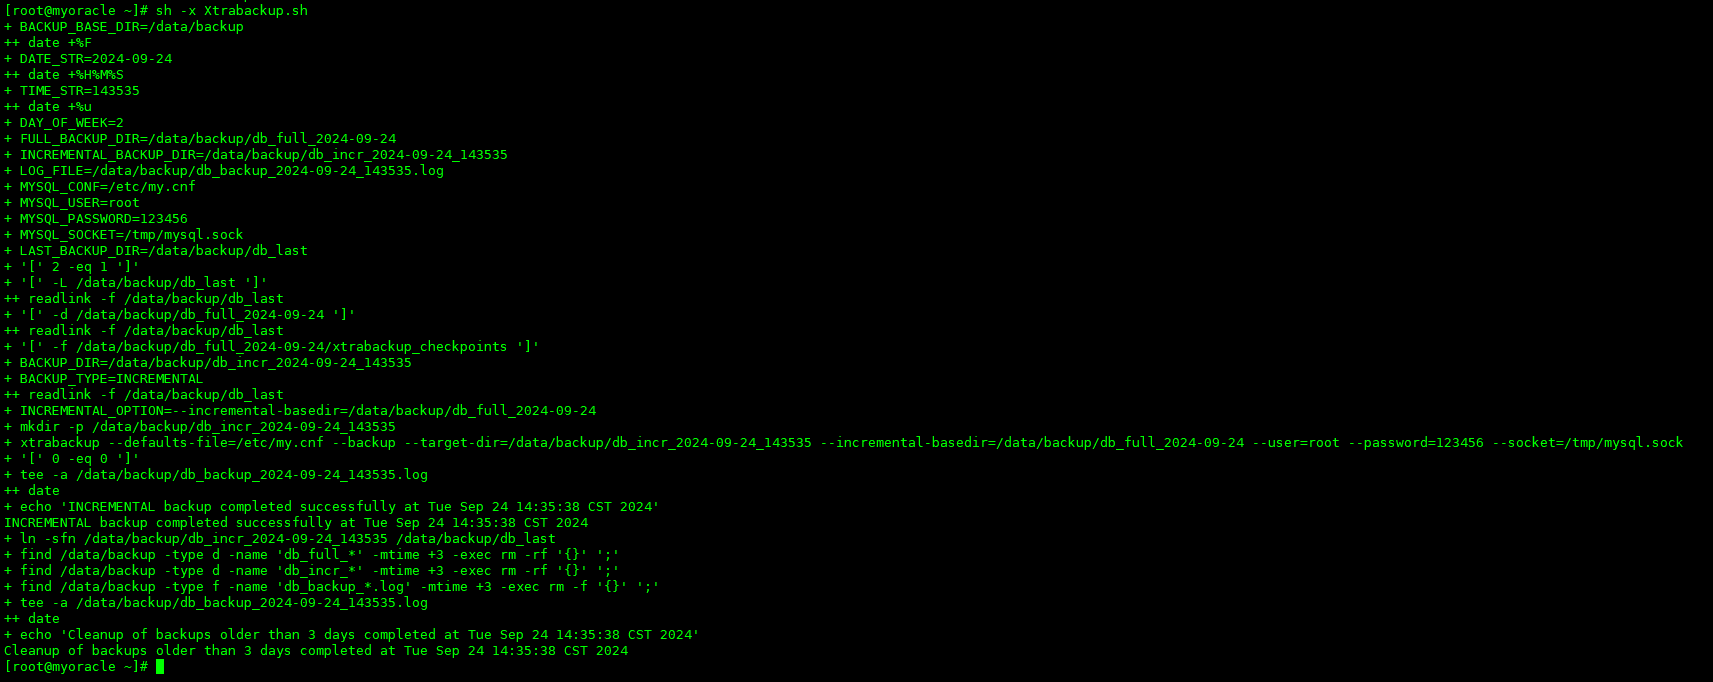
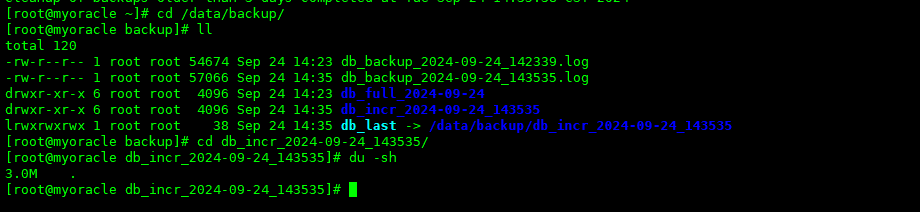
[root@myoracle ~]# sh -x Xtrabackup.sh
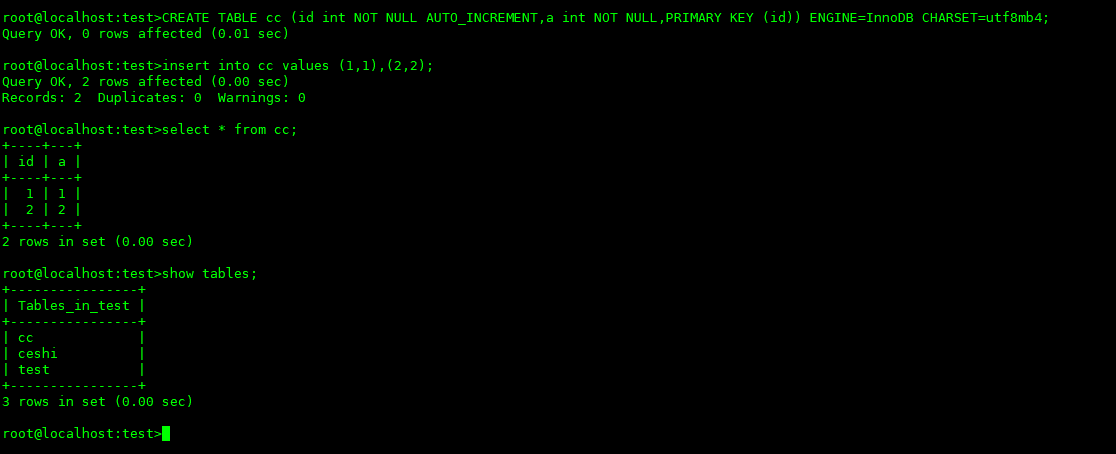
3、模拟新增数据进行增量备份
root@localhost:test>CREATE TABLE cc (id int NOT NULL AUTO_INCREMENT,a int NOT NULL,PRIMARY KEY (id)) ENGINE=InnoDB CHARSET=utf8mb4;root@localhost:test>insert into cc values (1,1),(2,2);root@localhost:test>select * from cc;root@localhost:test>show tables;
[root@myoracle ~]# sh -x Xtrabackup.sh
4、再次模拟新增数据
这个操作主要是验证没有备份的数据怎么去恢复
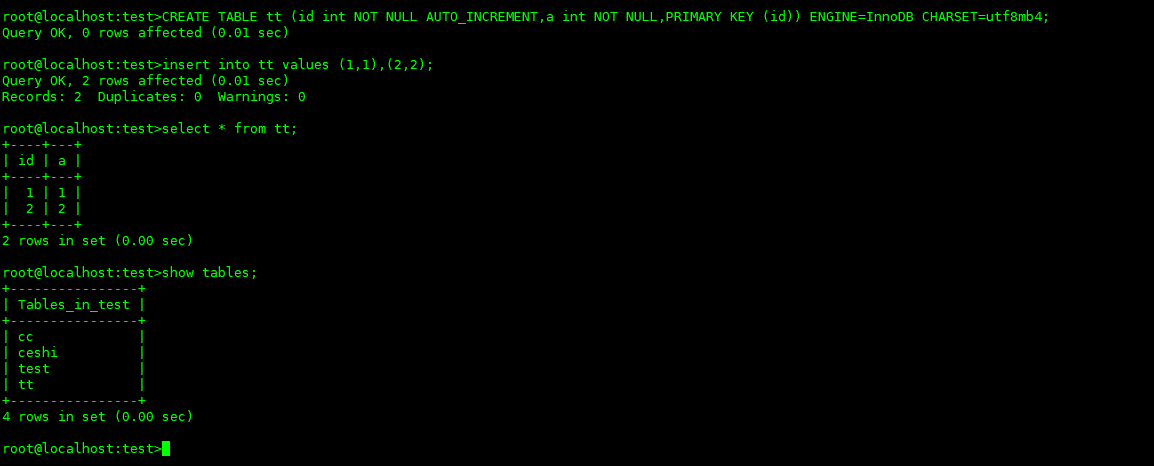
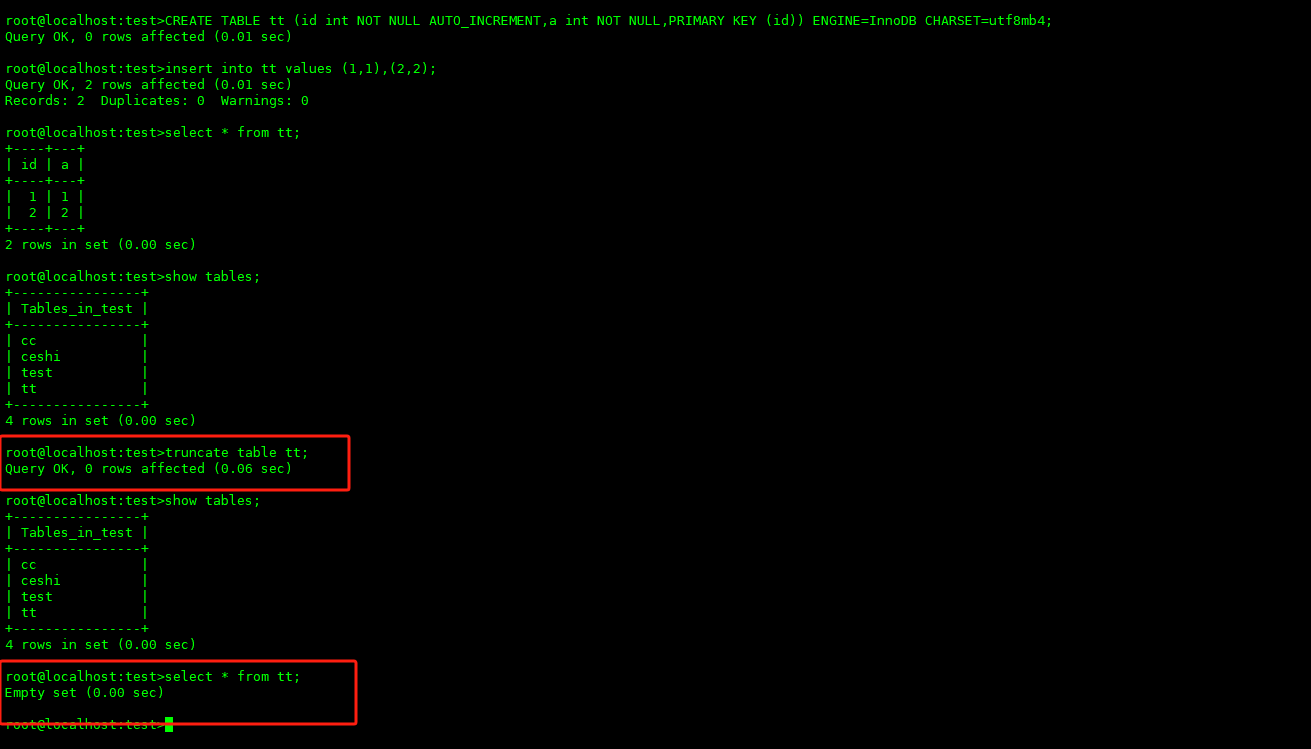
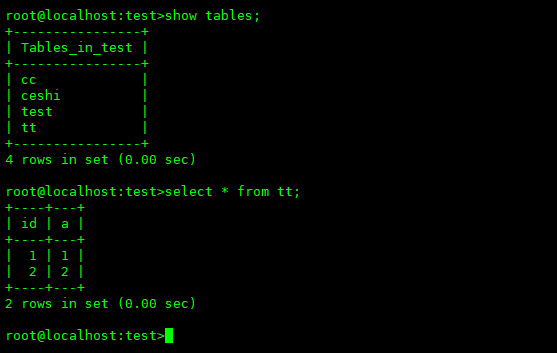
root@localhost:test>CREATE TABLE tt (id int NOT NULL AUTO_INCREMENT,a int NOT NULL,PRIMARY KEY (id)) ENGINE=InnoDB CHARSET=utf8mb4;root@localhost:test>insert into tt values (1,1),(2,2);root@localhost:test>select * from tt;root@localhost:test>show tables;
5、模拟误删数据
root@localhost:test>truncate table tt;root@localhost:test>select * from tt;
(二)数据恢复
1、切换binlog日志
这里没做全库的删除,此次再不演示全量和增量备份数据的恢复。 切换bnlog日志
root@localhost:test>flush logs;

去binlog目录查找是那个binlog文件。
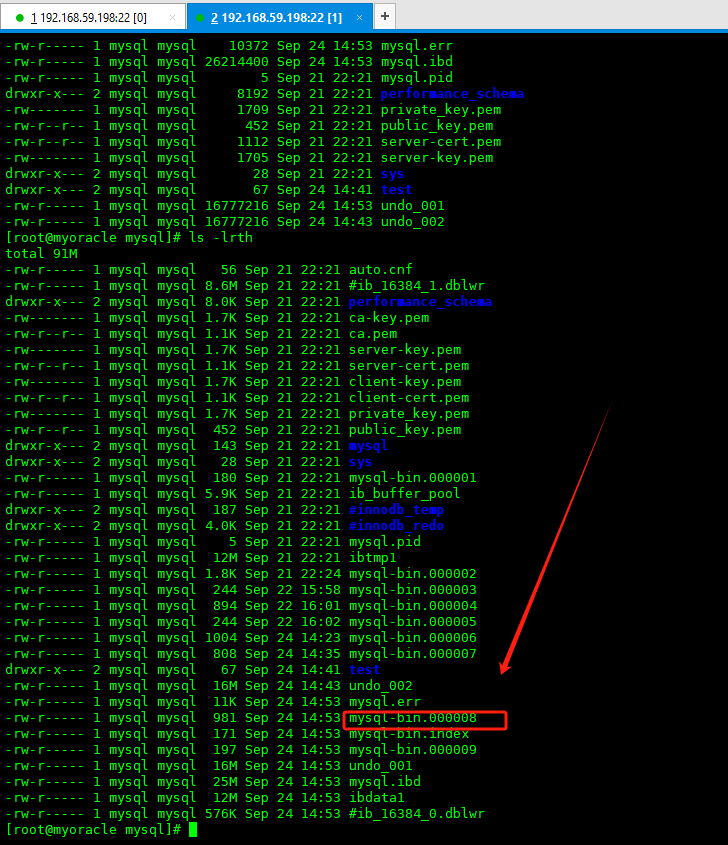
[root@myoracle mysql]# mysqlbinlog --no-defaults --base64-output=decode-rows -v -v mysql-bin.000008 | awk 'BEGIN{IGNORECASE=1} {if($0~/truncate/)count[$1" " $2" " $3" "$NF]++}END{for(i in count)print i,"\t",count[i]}'|column -t|sort -k3nr #确实是否是mysql-bin.000008这个文件。

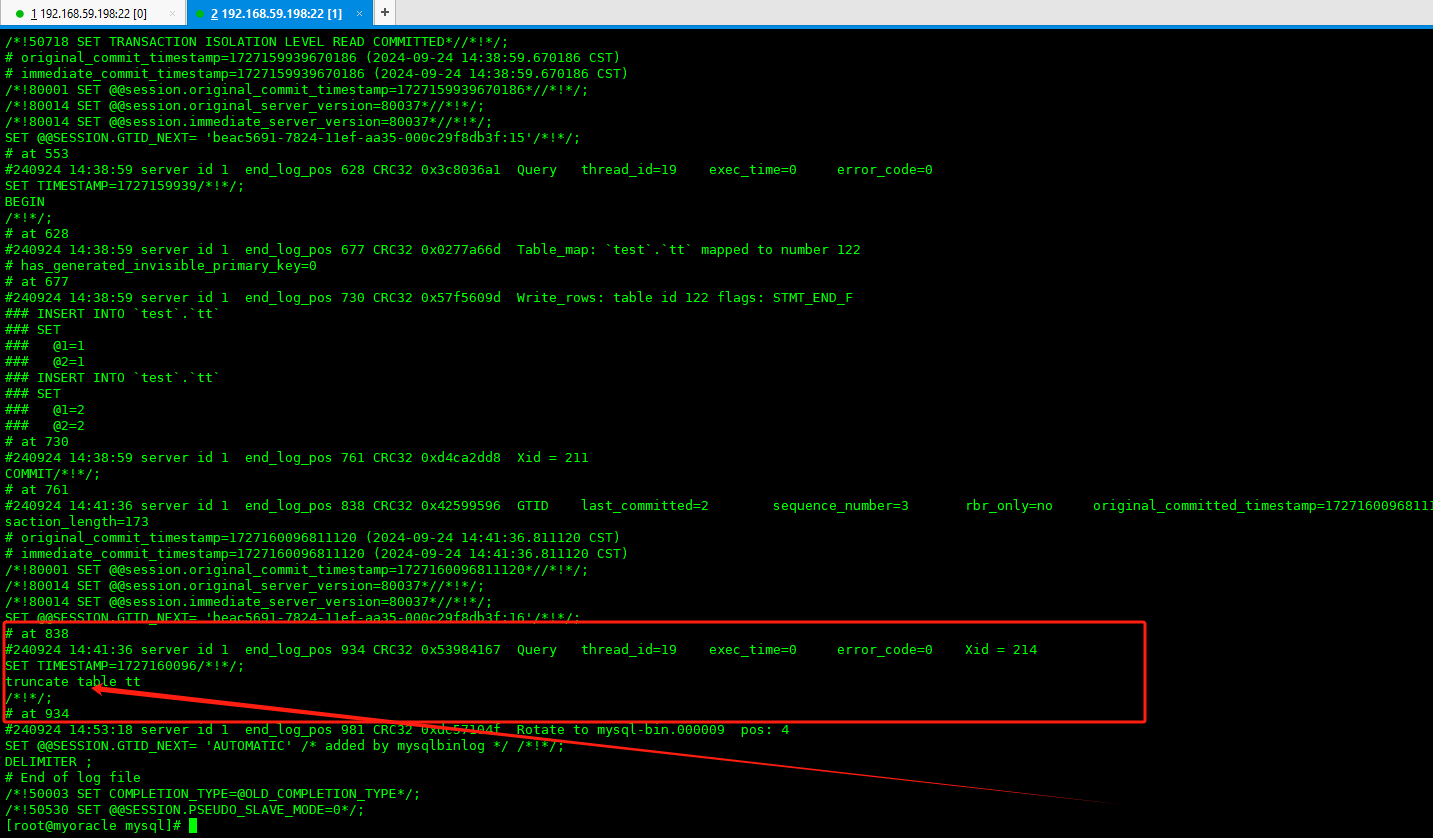
2、查看误操作事务开始和结束的位点
[root@myoracle mysql]# mysqlbinlog mysql-bin.000008 --start-datetime='2024-09-24 14:00:00' --stop-datetime='2024-09-24 15:00:00' --base64-output=decode-rows -v > operation.sql [root@myoracle mysql]# cat operation.sql
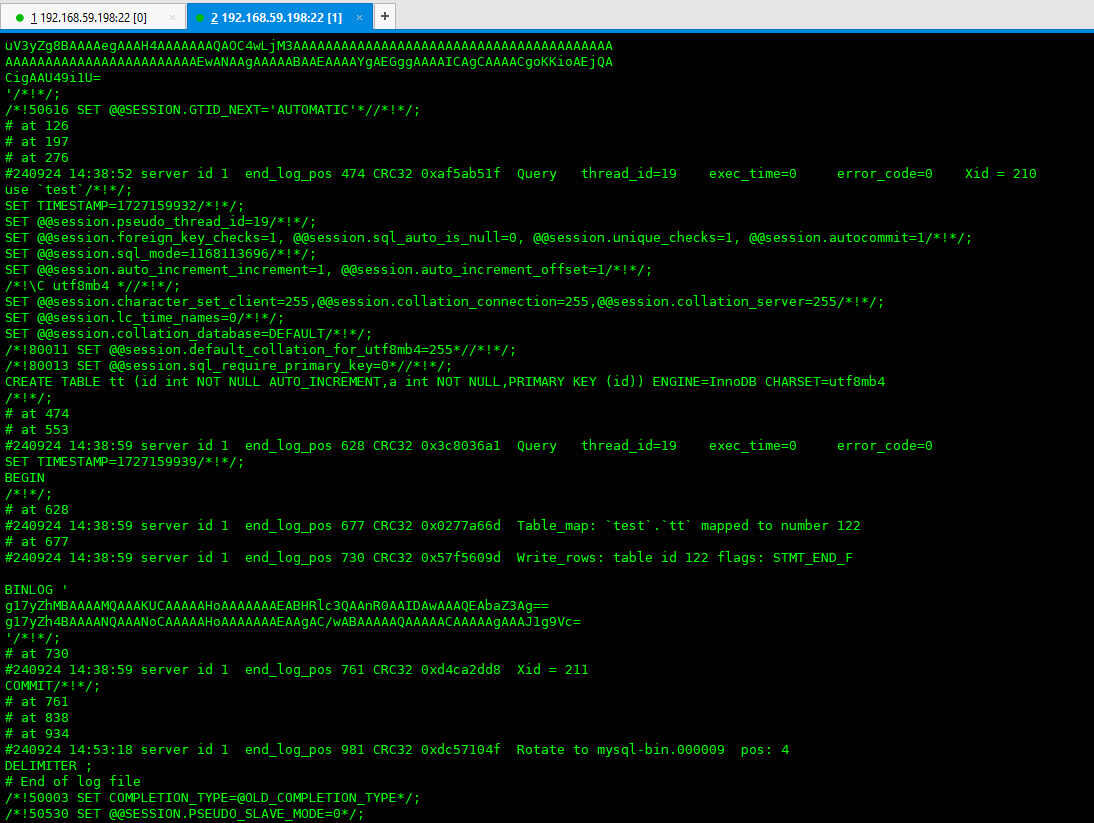
3、导出误删前的gtid并导出SQL
将误操作的binlog的gitd排除掉,前面已经查询得知该误删除的gtid GTID=beac5691-7824-11ef-aa35-000c29f8db3f:16
[root@myoracle mysql]# mysqlbinlog --skip-gtids --exclude-gtids='beac5691-7824-11ef-aa35-000c29f8db3f:16' /data/mysql/mysql-bin.000008 >binlog.sql #忽略指定的GTID,即跳过误删除的事务[root@myoracle mysql]#cat binlog.sql
 null
null
4、将数据导入数据库
root@localhost:test>source /data/mysql/binlog.sql
 null
null
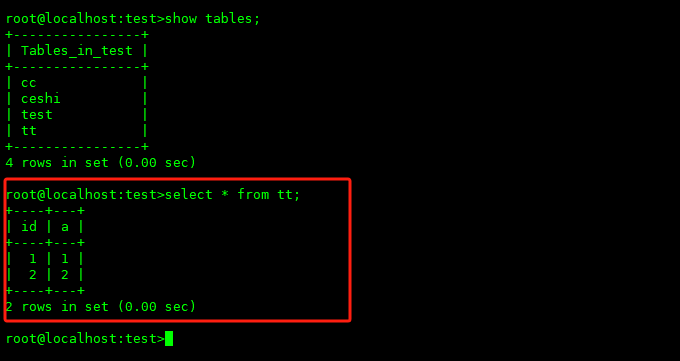
5、验证数据
root@localhost:test>select * from tt;
四、使用drop误删数据
数据我们使用上一个场景的数据。
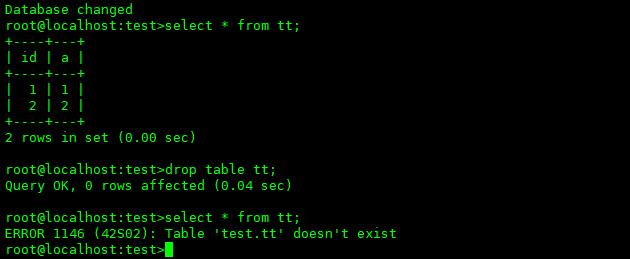
1、模拟误删数据
root@localhost:test>drop table tt;
2、切换binlog日志
root@localhost:test>flush logs;
3、查找binlog日志文件
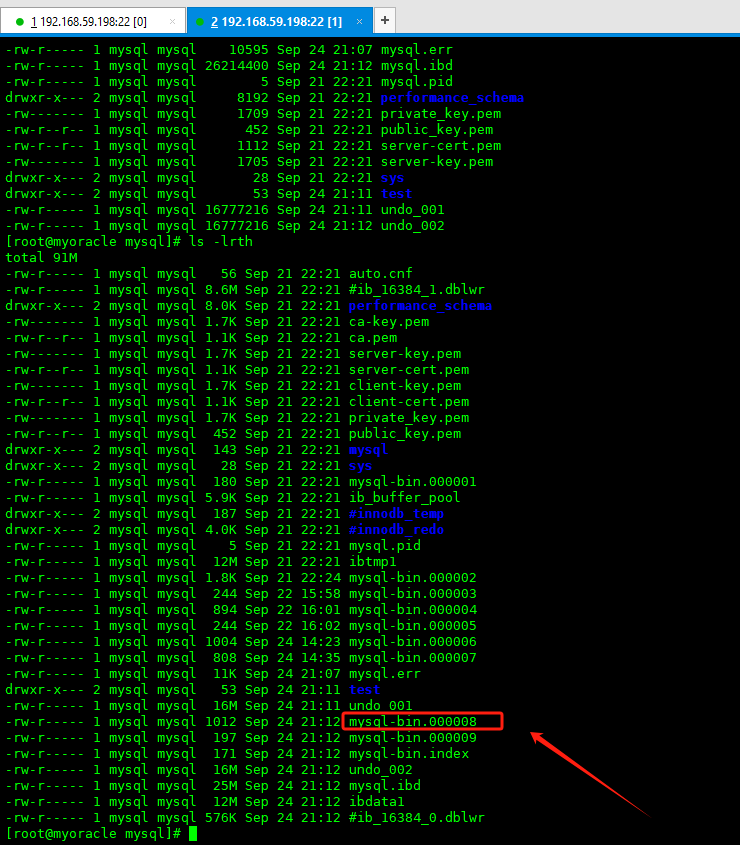
[root@myoracle mysql]# mysqlbinlog --no-defaults --base64-output=decode-rows -v -v mysql-bin.000008 | awk 'BEGIN{IGNORECASE=1} {if($0~/drop/)count[$1" " $2" " $3" "$NF]++}END{for(i in count)print i,"\t",count[i]}'|column -t|sort -k3nr #核实确认,binlog是mysql-bin.000008

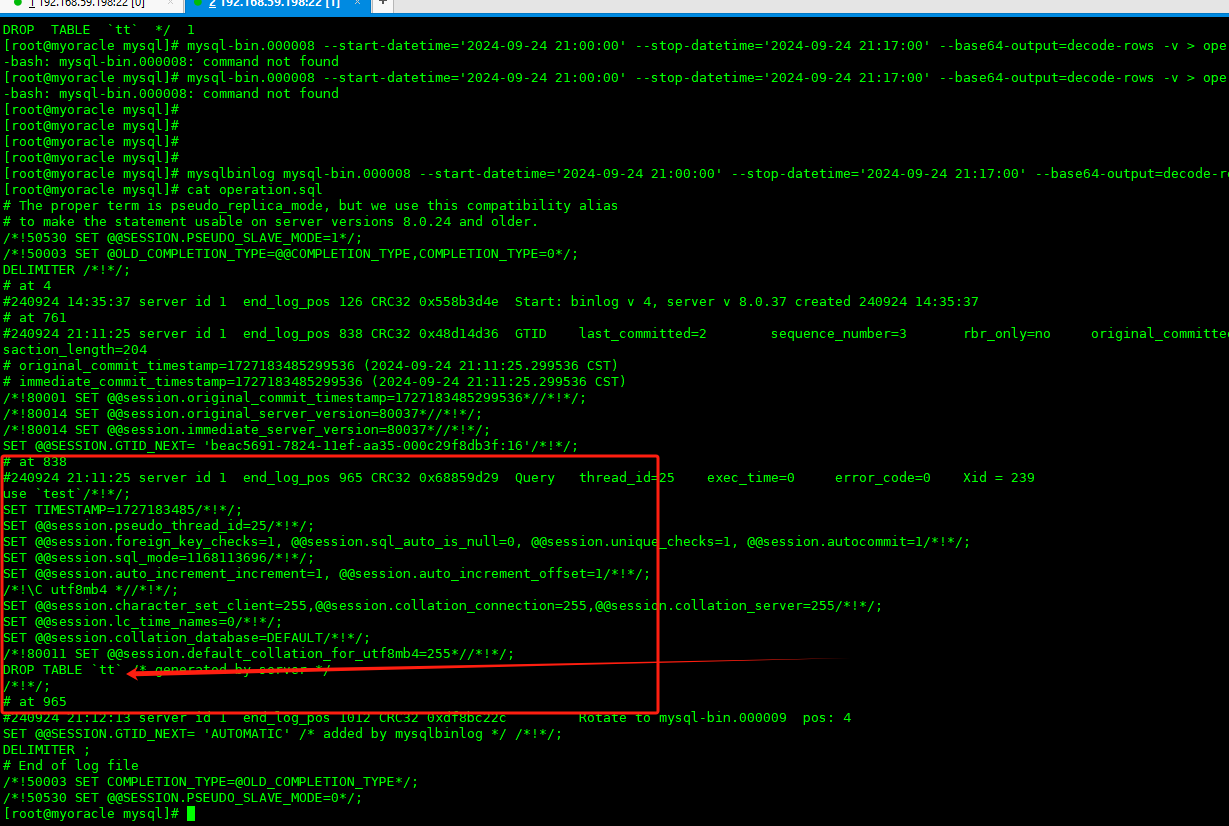
4、查看误操作事务开始和结束的位点
[root@myoracle mysql]# mysqlbinlog mysql-bin.000008 --start-datetime='2024-09-24 21:00:00' --stop-datetime='2024-09-24 21:17:00' --base64-output=decode-rows -v > operation.sql [root@myoracle mysql]# cat operation.sql
5、导出误删前的gtid并导出SQL
将误操作的binlog的gitd排除掉,前面已经查询得知该误删除的gtid GTID=beac5691-7824-11ef-aa35-000c29f8db3f:16
[root@myoracle mysql]# mysqlbinlog --skip-gtids --exclude-gtids='beac5691-7824-11ef-aa35-000c29f8db3f:16' /data/mysql/mysql-bin.000008 >binlog.sql #忽略指定的GTID,即跳过误删除的事务[root@myoracle mysql]# cat binlog.sql
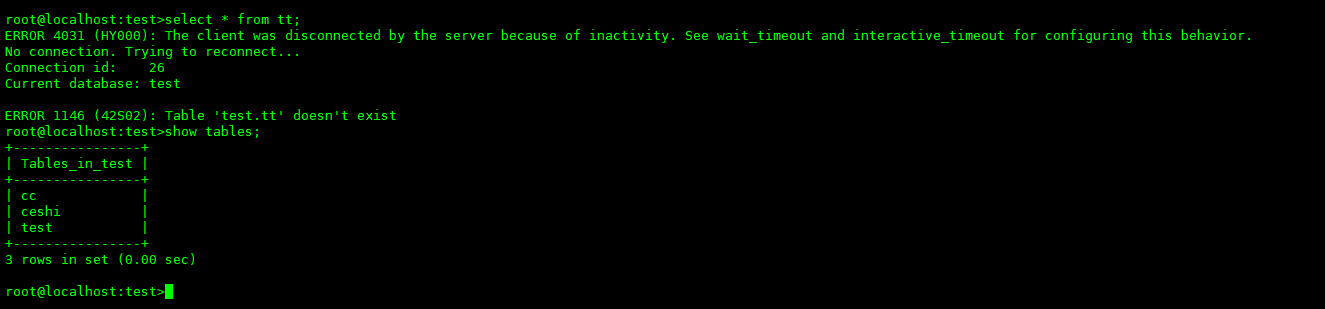
到这里,我再查一下,tt这个表还是不存在 root@localhost:test>select * from tt; root@localhost:test>show tables;
我们也可以新增数据,看看覆盖后新增的数据还会不会存在
root@localhost:test>CREATE TABLE rett (id int NOT NULL AUTO_INCREMENT,a int NOT NULL,PRIMARY KEY (id)) ENGINE=InnoDB CHARSET=utf8mb4;root@localhost:test>insert into rett values (1,1),(2,2);root@localhost:test>show tables;

6、恢复数据
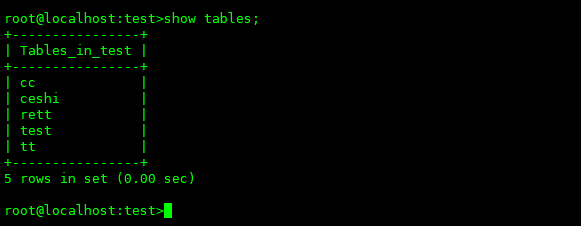
[root@myoracle mysql]# mysql -uroot -p123456 </data/mysql/binlog.sql #将 root@localhost:test>show tables;
7、验证数据
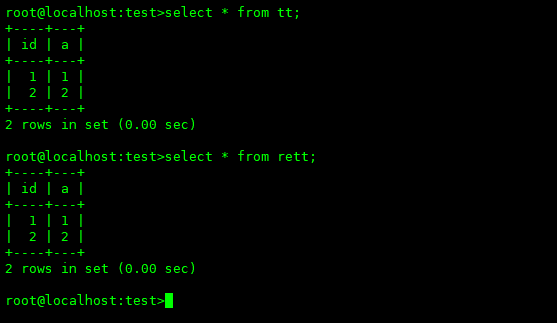
root@localhost:test>select * from tt; #再次检查误删的表root@localhost:test>select * from rett;#再次检查新增的表,这里数据都存在是因为我们切换了binlog,新增数据在mysql-bin.000009
五、总结
此方法相当于闪回的功能。只要binlog日志存在,即可恢复到操作之前的状态。生产建议找个测试库,去把数据恢复出来,再导入生产库。
欢迎关注公众号《小周的数据库进阶之路》,更多精彩知识和干货尽在其中。


 621
621

 被折叠的 条评论
为什么被折叠?
被折叠的 条评论
为什么被折叠?
 到【灌水乐园】发言


