


今天简单学习啦以下hibernate:
1:hibernate的配置文件,如果不使用注解的话,需要两个配置文件
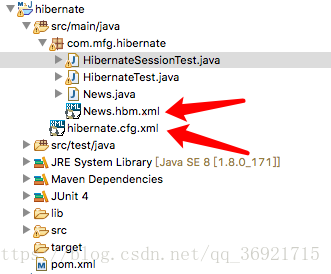
hibernate.cfg.xml.是对hibernate的基本配置,包括数据库的连接,sql格式化,是否显示sql等等。News.hbm.xml是对实体和数据库的映射文件,同时通过在hibernate.cfg.xml关联。再通过Configration将其导入即可。
开发hibernate的四个步骤:
1️⃣:创建Hibernate.cfg.xml文件。
<?xml version="1.0" encoding="UTF-8"?>
<!DOCTYPE hibernate-configuration PUBLIC
        "-//Hibernate/Hibernate Configuration DTD 3.0//EN"
        "http://www.hibernate.org/dtd/hibernate-configuration-3.0.dtd">
<hibernate-configuration>
    <session-factory>
        <!-- 配置连接数据库的基本信息 -->
        <property name="connection.username">root</property>
        <property name="connection.password">123</property>
        <property name="connection.driver_class">com.mysql.jdbc.Driver</property>
        <property name="connection.url">jdbc:mysql:///test</property>

        <!-- 配置hibernate的基本信息 -->
        <!-- hibernate使用的数据库方言 -->
        <property name="dialect">org.hibernate.dialect.MySQLInnoDBDialect</property>

        <!--执行操作时是否在控制台打印sql -->
        <property name="show_sql">true</property>

        <!--是否对sql进行格式化 -->
        <property name="format_sql">true</property>

        <!--指定自动生成表的策略 -->
        <property name="hbm2ddl.auto">update</property>

        <!-- 指定关联的。hbm.xml文件 -->
        <mapping resource="com/mfg/hibernate/News.hbm.xml"/>

    </session-factory>
</hibernate-configuration>
2️⃣:创建一个持久化类:本类是News。一定要加入无参数的构造方法,当查询的时候返回的实体类是一个对象实例,是hibernate动态通过反射生成的,反射的Class.forName("calssName").newInstance();需要对应的类提供一个无参数构造函数
3️⃣:创建对象-关系映射文件,这个可以通过注解的方式来实现。本案类是通过xml文件实现。同时将其通过*<mapping resource="com/mfg/hibernate/News.hbm.xml"/>*加入到啦Hibernate.cfg.xml文件中。
<?xml version="1.0"?>
<!DOCTYPE hibernate-mapping PUBLIC "-//Hibernate/Hibernate Mapping DTD 3.0//EN"
"http://hibernate.sourceforge.net/hibernate-mapping-3.0.dtd">
<!-- Generated 2018-4-26 23:37:15 by Hibernate Tools 3.5.0.Final -->
<hibernate-mapping>
    <class name="com.mfg.hibernate.News" table="NEWS">

        <id name="id" type="java.lang.Integer">
            <column name="ID" />
            <generator class="native" />
        </id>

        <property name="title" type="java.lang.String">
            <column name="TITLE" />
        </property>

        <property name="author" type="java.lang.String">
            <column name="AUTHOR" />
        </property>

        <property name="date" type="java.sql.Date">
            <column name="DATE" />
        </property>
    </class>
</hibernate-mapping>
4️⃣:编写测试文件:测试文件主要包括7个步骤:
session的底层是JDBC connection
package com.atguigu.hibernate.helloworld;

import java.sql.Date;

import org.hibernate.Session;
import org.hibernate.SessionFactory;
import org.hibernate.Transaction;
import org.hibernate.cfg.Configuration;
import org.hibernate.service.ServiceRegistry;
import org.hibernate.service.ServiceRegistryBuilder;
import org.junit.Test;

public class HibernateTest {

    @Test
    public void test() {

        System.out.println("test...");

        //1. 创建一个 SessionFactory 对象
        SessionFactory sessionFactory = null;

              //①️. 创建 Configuration 对象: 对应 hibernate 的基本配置信息和 对象关系映射信息
        Configuration configuration = new Configuration().configure();

             //Hibernate4.0 之前这样创建
             //sessionFactory = configuration.buildSessionFactory();

             //②. 创建一个 ServiceRegistry 对象: hibernate 4.x 新添加的对象
             //hibernate 的任何配置和服务都需要在该对象中注册后才能有效.
        ServiceRegistry serviceRegistry =
                new ServiceRegistryBuilder().applySettings(configuration.getProperties())
                                            .buildServiceRegistry();

            //③.通过Configuration的buildSessionFactory方法,将serviceRegistry作为参数放进去完成SessionFactoryde的创建
        sessionFactory = configuration.buildSessionFactory(serviceRegistry);

        //2. 创建一个 Session 对象
        Session session = sessionFactory.openSession();

        //3. 开启事务
        Transaction transaction = session.beginTransaction();

        //4. 执行保存操作
        News news = new News("Java12345", "ATGUIGU", new Date(new java.util.Date().getTime()));
        session.save(news);

        //5. 提交事务
        transaction.commit();

        //6. 关闭 Session
        session.close();

        //7. 关闭 SessionFactory 对象
        sessionFactory.close();
    }

}
到此,简单的Hibernate应用就完成啦,关于Hibernate的Session或者其他更详细的内容,请关注楼主的其他博客


 3190
3190

 被折叠的 条评论
为什么被折叠?
被折叠的 条评论
为什么被折叠?
 到【灌水乐园】发言


