


 本文介绍了Spring框架中的IOC和AOP两大核心概念。IOC(控制反转)通过容器管理对象的创建,减轻开发者负担;AOP(面向切面编程)则用于处理日志记录、事务管理和权限验证等横切关注点,提升代码的可维护性和可读性。
Spring IOC和AOP
拓展:
Spring是Java开发的行业标准
Spring全家桶
Web:Spring Web MVC/Spring MVC、Spring Web Flux
持久层:Spring Data/Spring Data JPA、Spring Data Redis、Spring Data MongoDB
安全校验:Spring Security
构建工程脚手架:Spring Boot
微服务:Spring Cloud
IOC是Spring全家桶各个功能模块的基础,创建对象的容器。
AOP也是以IOC为基础,AOP是面向切面编程,是一种抽象化的面向对象。
AOP有什么用?
	1、打印日志
	2、执行事务
	3、权限处理
1.1 IOC
IOC:控制反转,将对象的创建进行反转,常规情况下,对象都是开发者手动创建的,使用IOC开发者将不
再需要创建对象,而是IOC容器根据需求自动创建项目所需要的对象。
1.1.1创建maven工程
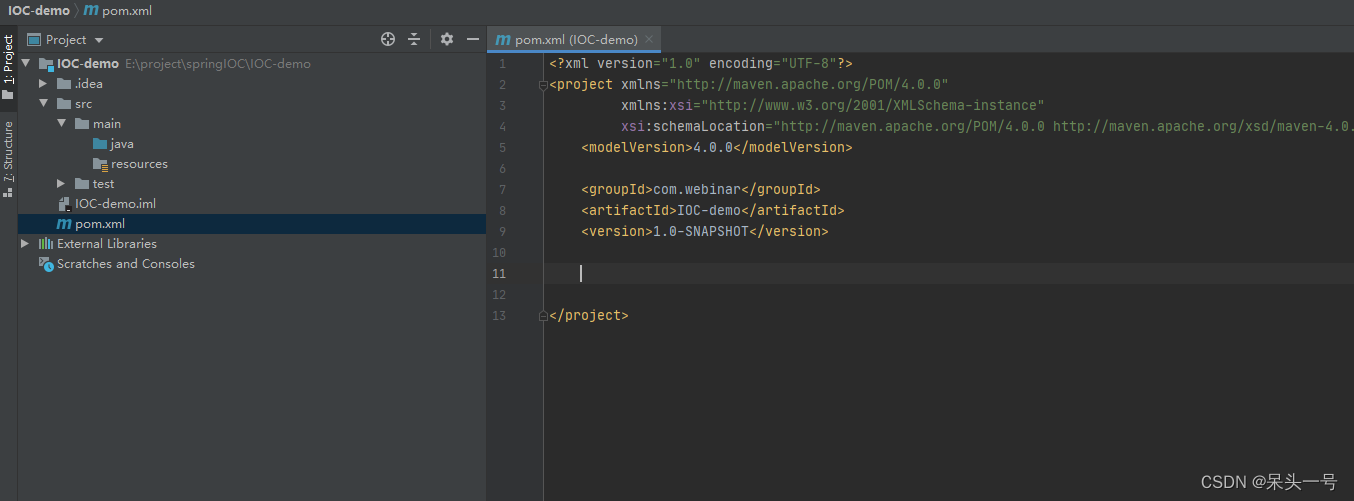
1.1.2 引入pom.xml
 <dependencies>
        <dependency>
            <groupId>org.springframework</groupId>
            <artifactId>spring-context</artifactId>
            <version>5.3.20</version>
        </dependency>
    </dependencies>
1.1.3创建包和实体类以及Test测试类 (过于简单就省略步骤)
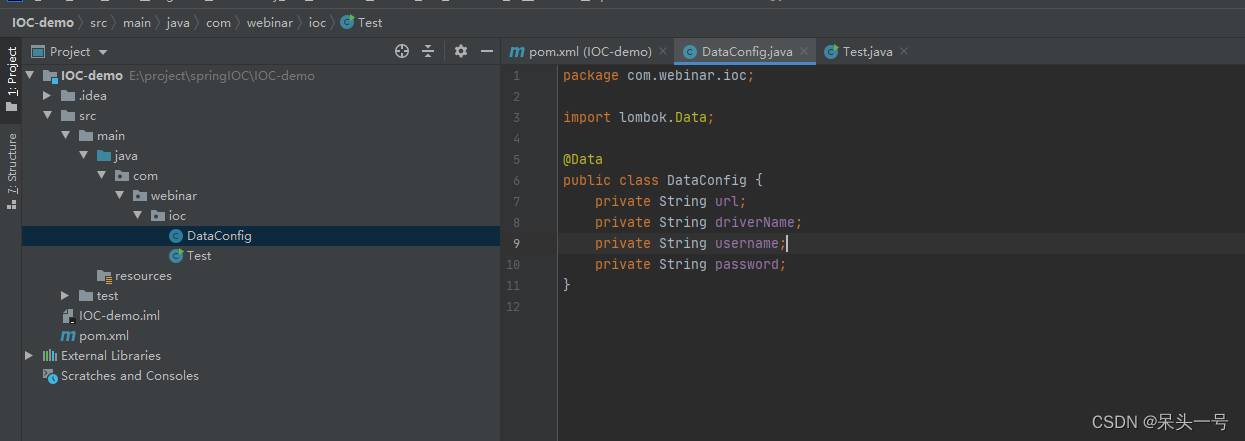
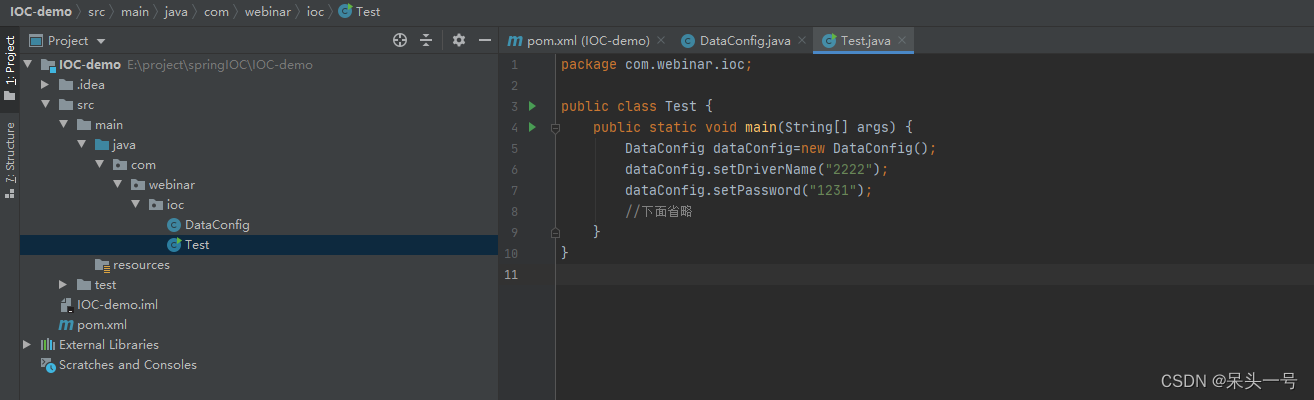
这就是不适用IOC的情况,所有的对象都需要开发者自己手动创建。
1.1.4 下面将使用IOC:对象不用开发者手动创建,而是交给Spring框架来完成。
两种方式:
	1、基于XML
	2、基于注解
1.1.4.1 基于XML
开发者把需要的对象在XML文件中进行配置,让Spring框架来读取这个配置文件,根据配置文件的内容来创建对象。
1.1.4.1.1 在刚才maven工程基础上创建 spring.xml 文件
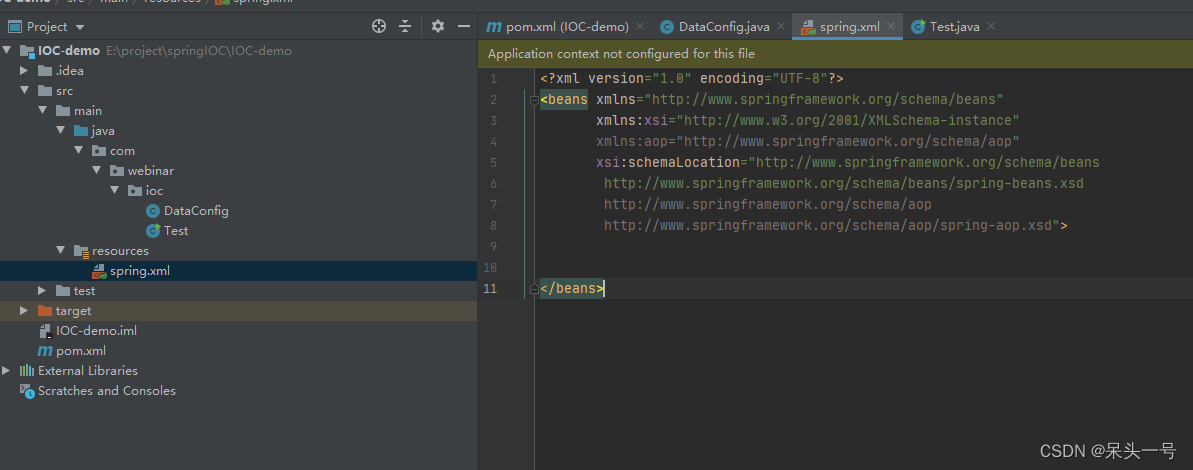
<?xml version="1.0" encoding="UTF-8"?>
<beans xmlns="http://www.springframework.org/schema/beans"
       xmlns:xsi="http://www.w3.org/2001/XMLSchema-instance"
       xmlns:aop="http://www.springframework.org/schema/aop"
       xsi:schemaLocation="http://www.springframework.org/schema/beans
        http://www.springframework.org/schema/beans/spring-beans.xsd
        http://www.springframework.org/schema/aop
        http://www.springframework.org/schema/aop/spring-aop.xsd">


</beans>
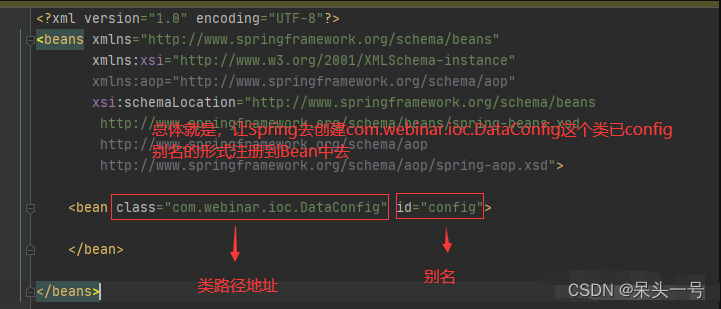
1.1.4.1.2 简单配置一个bean
回到Test测试类
ApplicationContext context=new ClassPathXmlApplicationContext("spring.xml");//加载spring.xml配置文件
        System.out.println(context.getBean("config"));
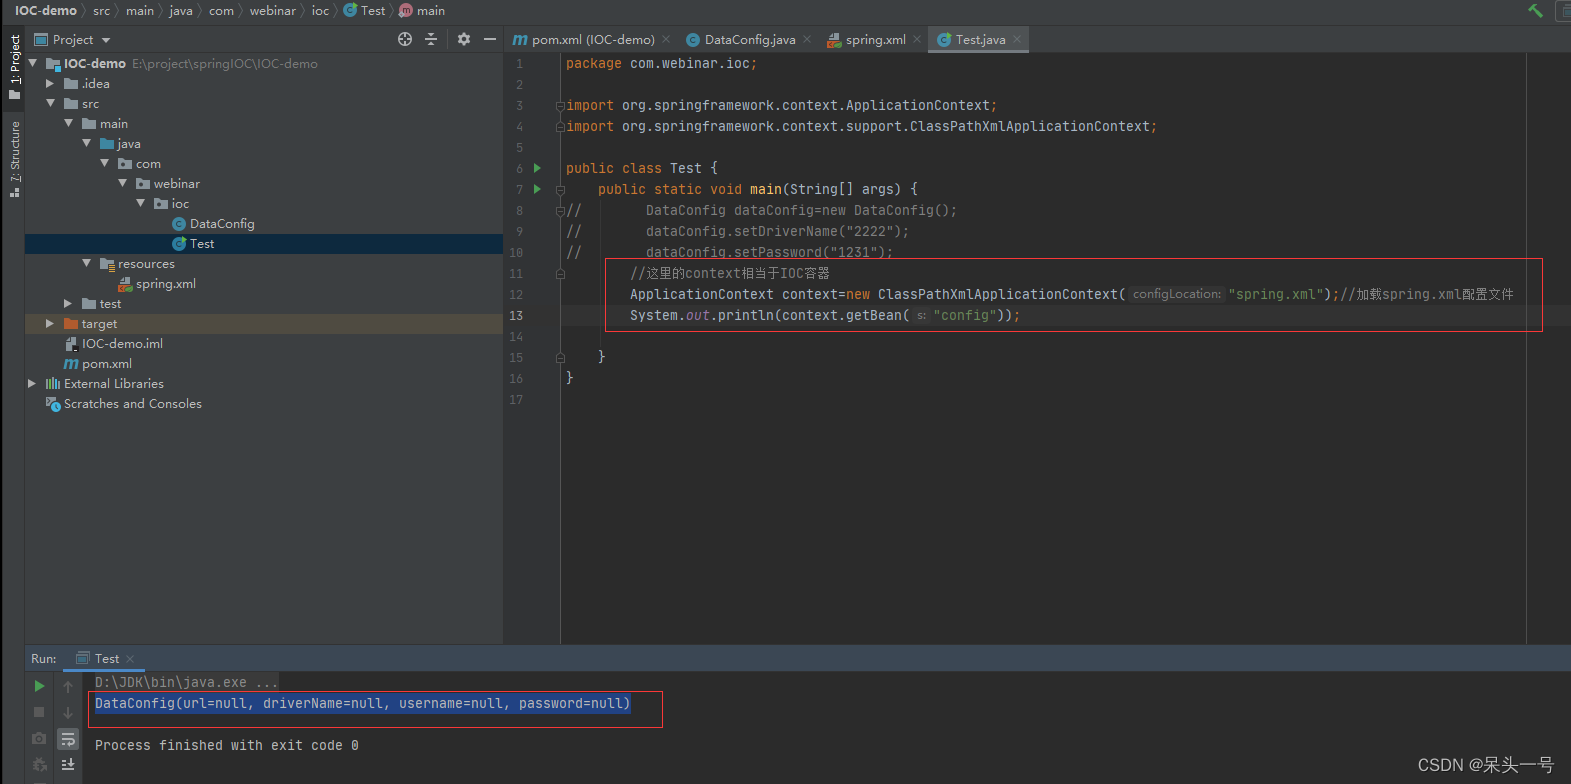
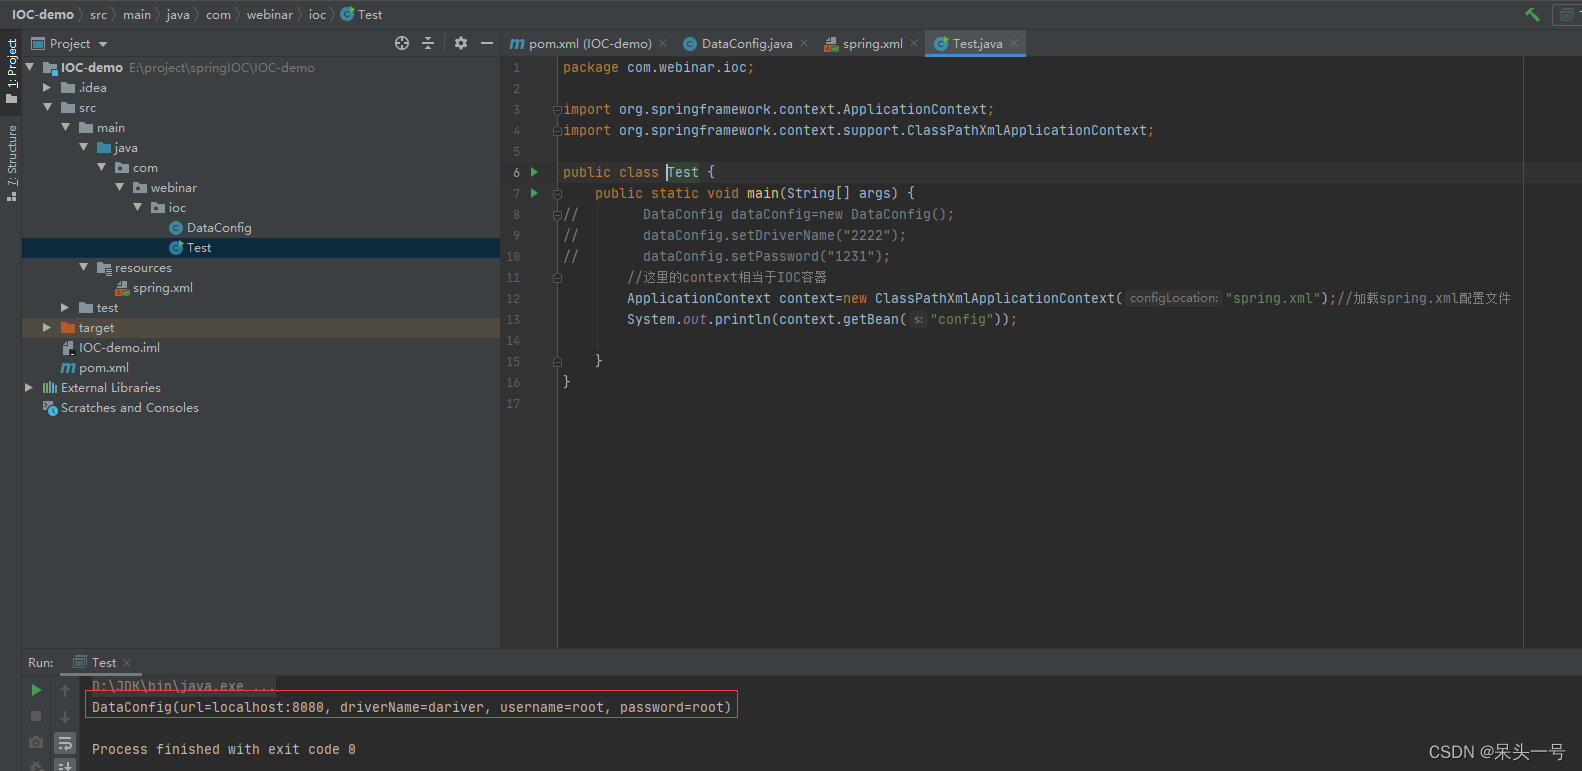
1.1.4.1.3 当然,现在输出的是空的实体,我们尝试着给xml中配置属性和值
<bean class="com.webinar.ioc.DataConfig" id="config">
        <property name="driverName" value="dariver"></property>
        <property name="url" value="localhost:8080"></property>
        <property name="username" value="root"></property>
        <property name="password" value="root"></property>
    </bean>
看到这里,大伙是不是感觉这TM怎么比原来还麻烦了?,
其实吧,大企业级开发中,实体的数量很多,用xml配置的方式还是优于手动new(实体少就手动new或者往下看!)
现在配置xml来管理实体的形式已经快离开开发者的视野了,为什么呢?因为用注解是真的爽!
1.1.4.2 基于注解
也有两种方式:
	1、配置类(跟xml很类似)
		用一个java类来替代xml文件,把在xml配置的内容放到配置类中。
	2、扫包+注解
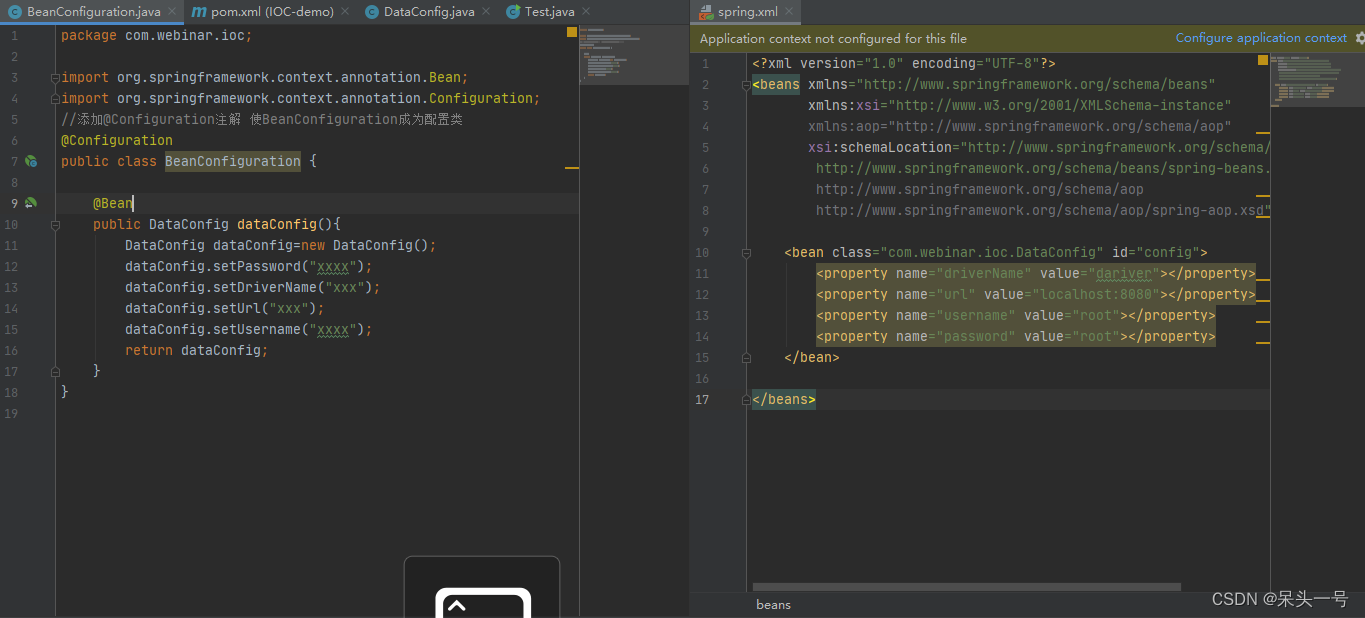
1.1.4.2.1 配置类
创建BeanConfiguration类,配置注解@Configuration
添加@Configuration是为了让BeanConfiguration这个类成为配置类,类似如下(效果等同):
 当然,在Test测试类中的调用方法也需要改变
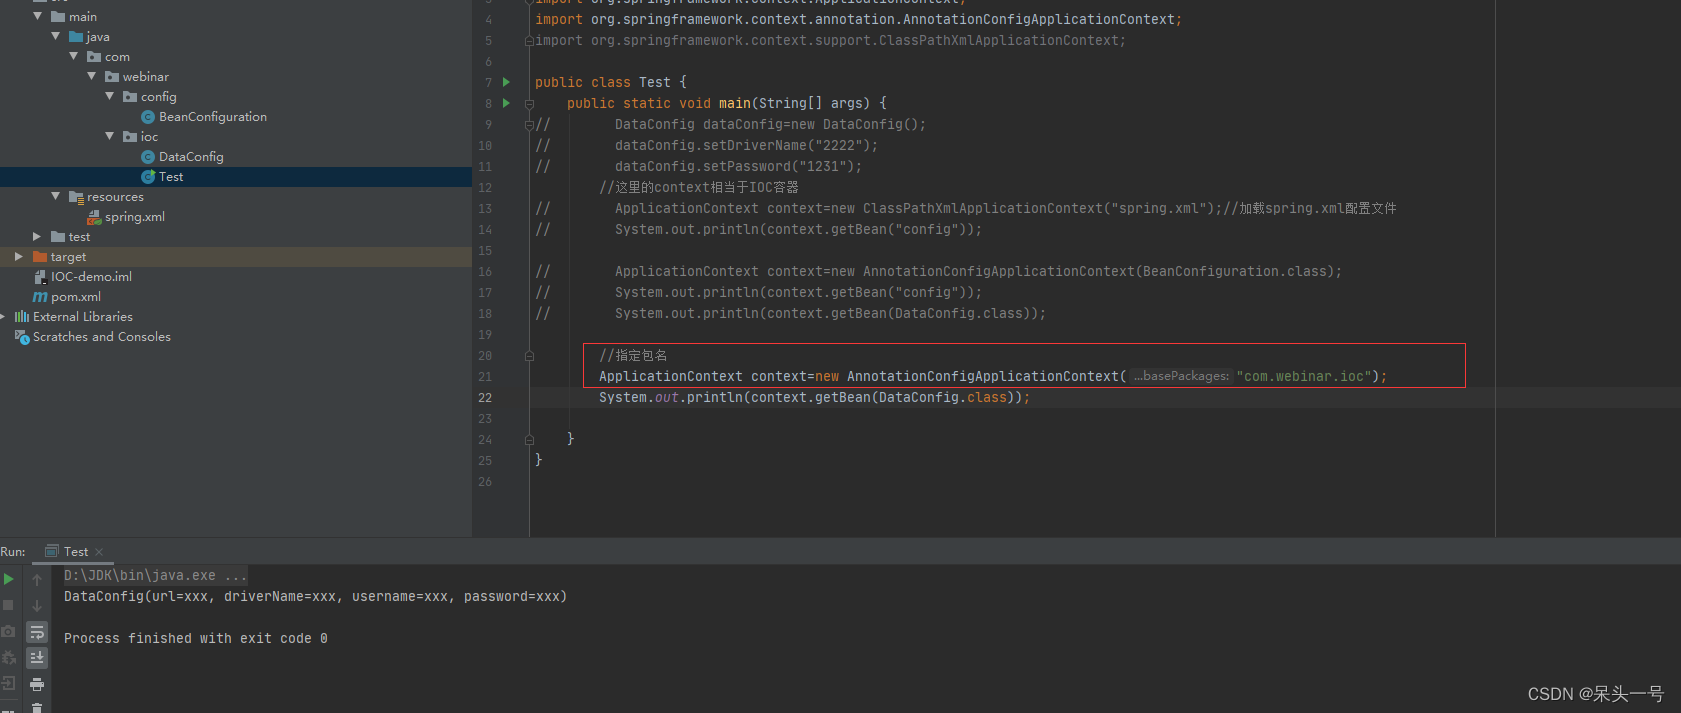
        //除了 通过BeanConfiguration.class类获取,还可以填写报名去获取
        ApplicationContext context=new AnnotationConfigApplicationContext(BeanConfiguration.class);
        System.out.println(context.getBean("config"));
        System.out.println(context.getBean(DataConfig.class));
是不是会出现疑问?为什么能通过 config名称去获取呢? 疑问我在BeanConfiguration中dataConfig()方法上配置了 @Bean(value = "config") 所以给出了标识,通过没有配置,默认名称为方法名,希望大家知道。
1.1.4.2.2 扫包+注解
更简单的方式,不在需要依赖于xml或配置类,而是直接将bean额创建交给目标类,在目标类添加注解来创建.
目标类或实体类添加@Component注解,通过@Value注解来添加值

执行结果如下:
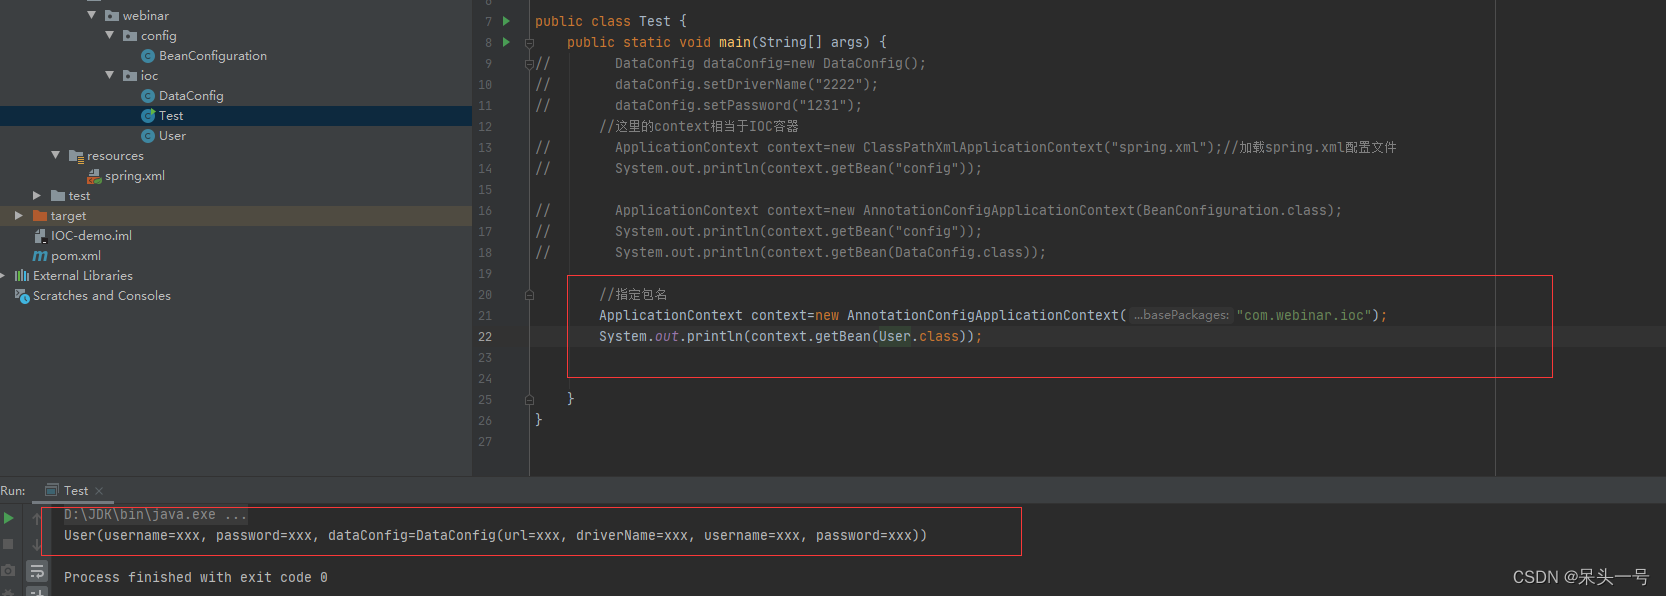
自动创建对象,完成依赖注入:
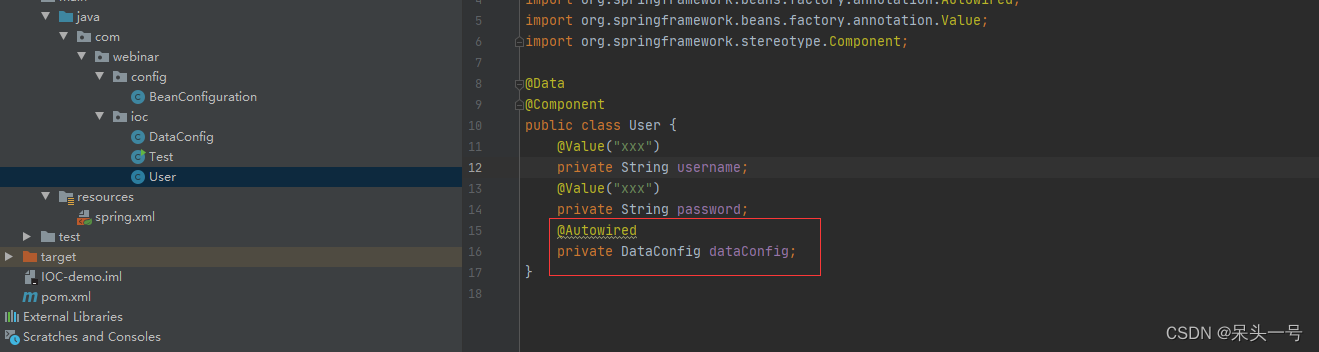
在User类中 添加 DataConfig实体,在实体属性上添加 @Autowired(通过类型进行注入[跟上面通过类型取实体是一样的]) 自动注入,就能实现依赖注入
理解:IOC日期中加载的bean都能实现依赖注入
下面看看输出结果:
1.2 AOP
面向切面编程,是一种抽象化的面向对象编程,对面向对象编程的一种补充
说人话就是:把不影响业务的非业务代码抽离出来
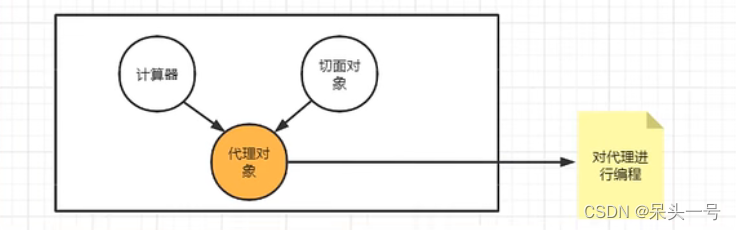
例如:日志打印(底层:动态代理)
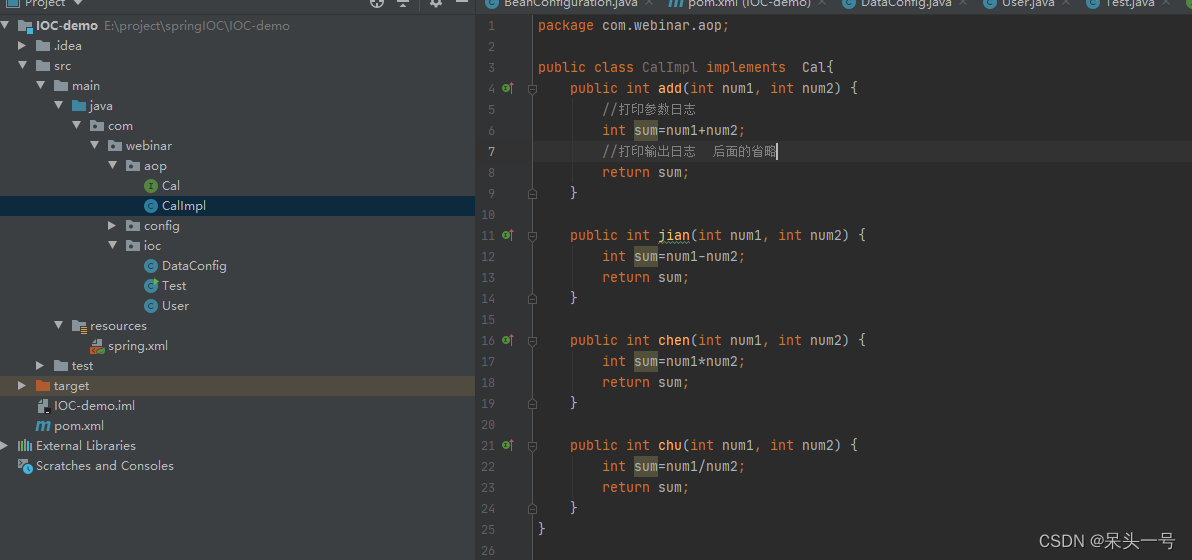
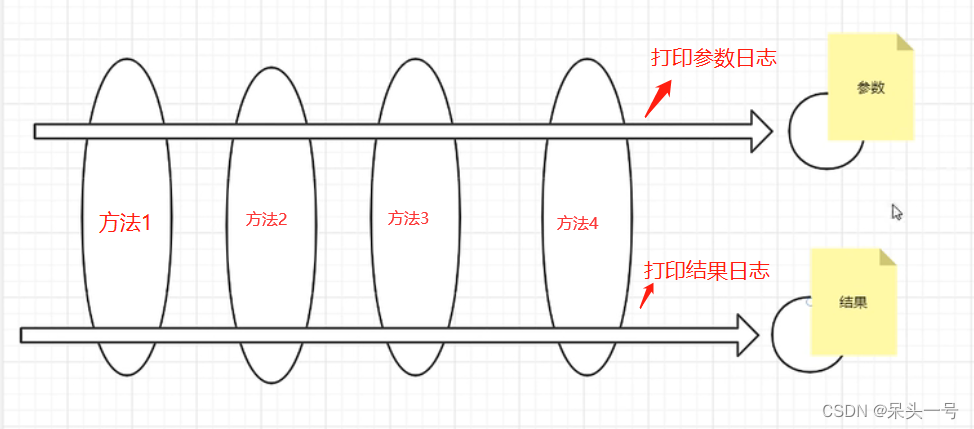
方法中,日志和业务混合在一起,AOP要做的就是将日志代码全部抽象出去统一进行处理,方法中只保留核心的业务代码。
做到核心代码和非业务代码的解耦合。
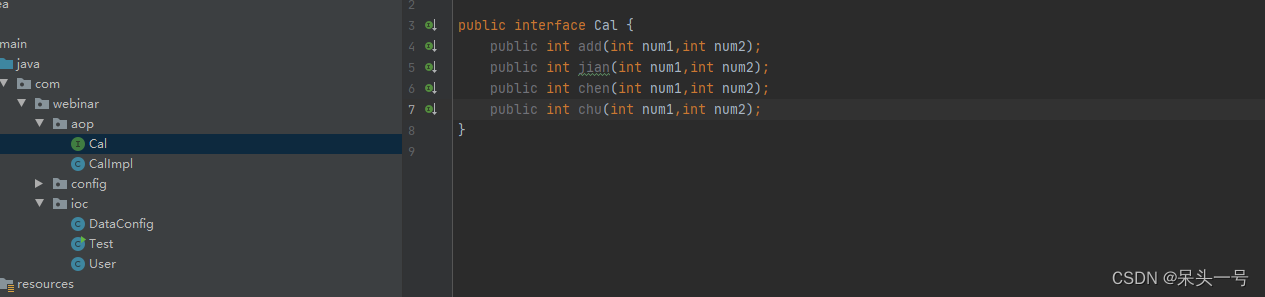
1.2.1 创建切面类
@Component
//如果这是切面 需要添加切面注解
@Aspect
public class LoggerAspect {
    @Before("execution(public  int  com.webinar.aop.CalImpl.*(..))")
    //需要引入JoinPoint依赖
    public void before(JoinPoint joinPoint){
        //拿到方法名
        String name=joinPoint.getSignature().getName();
        System.out.println(name+"方法的参数是:"+ Arrays.toString(joinPoint.getArgs()));
    }
    @AfterReturning(value = "execution(public  int  com.webinar.aop.CalImpl.*(..))",returning = "result")
    public void AfterReturning(JoinPoint joinPoint,Object result){
        //拿到方法名
        String name=joinPoint.getSignature().getName();
        System.out.println(name+"方法的结果是:"+ result);
    }
}
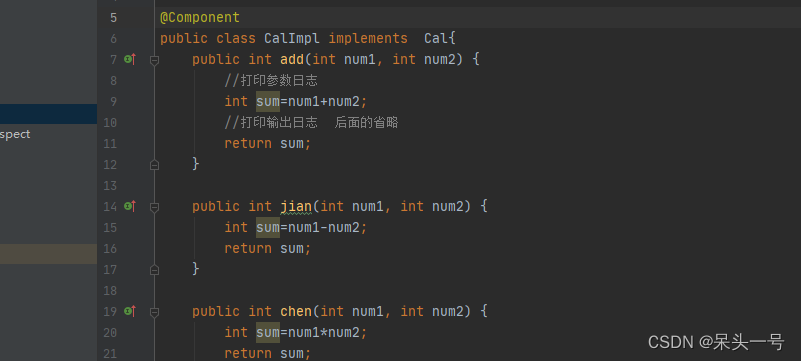
1.2.2 实现类CalImpl添加@Component注解
1.2.3 配置自动扫包,开启自动生成代理对象
<?xml version="1.0" encoding="UTF-8"?>
<beans xmlns="http://www.springframework.org/schema/beans"
       xmlns:xsi="http://www.w3.org/2001/XMLSchema-instance"
       xmlns:aop="http://www.springframework.org/schema/aop"
       xmlns:context="http://www.springframework.org/schema/context"
       xsi:schemaLocation="http://www.springframework.org/schema/beans
        http://www.springframework.org/schema/beans/spring-beans.xsd
        http://www.springframework.org/schema/aop
        http://www.springframework.org/schema/aop/spring-aop.xsd http://www.springframework.org/schema/context https://www.springframework.org/schema/context/spring-context.xsd">

<!--    自动扫包   (SringBoot中不需要xml配置)-->
    <context:component-scan base-package="com.webinar.aop"></context:component-scan>
<!--    开启自动生成代理-->
    <aop:aspectj-autoproxy></aop:aspectj-autoproxy>
</beans>
1.2.4 使用
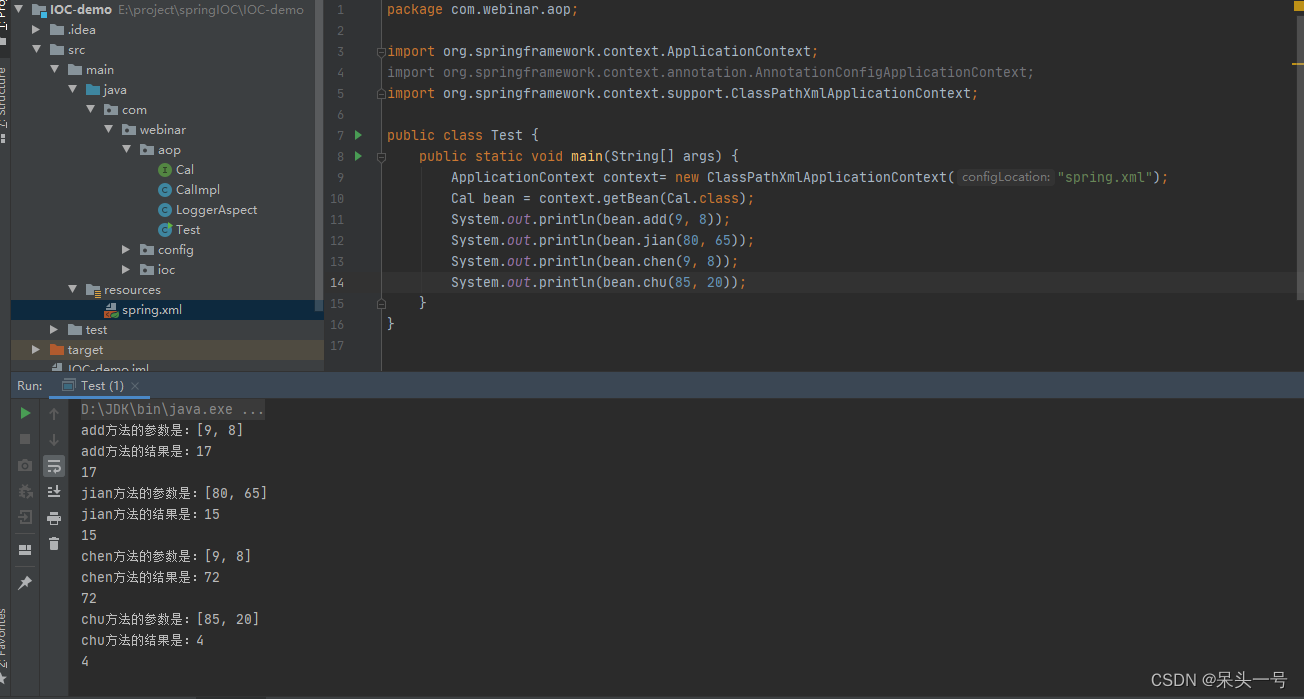
总结:这是切面的基本使用,如果需要进阶的还需深入学习。


 被折叠的 条评论
为什么被折叠?
被折叠的 条评论
为什么被折叠?
 到【灌水乐园】发言


