


Mybatis的使用
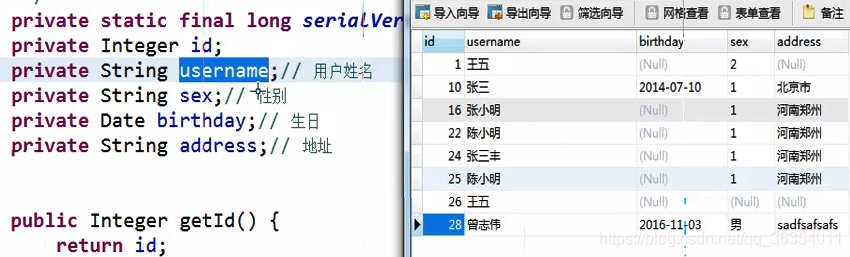
1.parameterType(输入类型)
- 传递简单类型:使用#{}占位符,或者${}进行sql拼接。
	<select id="findUserById" parameterType="Integer" resultType="User">
		select * from user where id = #{v}
		<!--其中的 V 可以使任意字母, #{}的作用就相当于('')括号中的引号-->
	</select>
- 传递pojo对象:Mybatis使用ognl表达式解析对象字段的值,#{}或者${}括号中的值为pojo属性名称。
	<select id="findUserByUsername" parameterType="String" resultType="com.itheima.mybatis.pojo.User">
		select * from user where username like "%"#{haha}"%" ==> '%五%'
		select * from user where username like "%${value}%"  ==> "%"'五'"%"
		<!--两种方法都可以,但是使用$中间只能使用'value'来取值,而#{}中可以使任意字母,${}就相当于没有('')单引号,如果想要使用#{}我们可以多加一对引号-->
	</select>
- 传递pojo包装对象:使用"%"#{username.name}"%" 来包装对象传递输入参数。
	<!-- 根据用户名模糊查询 -->
	<select id="findUserByQueryVo" parameterType="QueryVo" resultType="com.itheima.mybatis.pojo.User">
		select * from user where username like "%"${user.username}"%"
		<!--${user.username}传递的是"QueryVo"里面的对象user中的username的值,要注意这是传递进来的对象-->
		<!--所以下次可以直接输入类型里面的变量或者对象(${}以这种格式)-->
	</select>
2.resultType(输出类型1)
- 输出简单类型
// mybatis和spring整合,整合之后,交给spring管理
	SqlSession sqlSession = this.sqlSessionFactory.openSession();
	// 创建Mapper接口的动态代理对象,整合之后,交给spring管理
	UserMapper userMapper = sqlSession.getMapper(UserMapper.class);
//----------------------------------------------------------
	// 使用userMapper执行查询用户数据条数
	int count = userMapper.queryUserCount();
	System.out.println(count);
//----------------------------------------------------------
	// mybatis和spring整合,整合之后,交给spring管理
	sqlSession.close();
- 输出javaBean对象
- 输出javaBean列表
3.resultMap (映射输出类型2)
作用:当下面图片左边的变量值和右边的不一样时使用 resultMap
什么时候使用:当我们一致的时候会自动映射,不一样的时候就需要要我们手动映射了。
<!--type中写的是输出类型-->
<resultMap type="Orders" id="orders">
<!--column是数据表的属性名,property是类中的属性名,如果属性名一样的不需要写-->
<result column="user_id" property="userId"/>
</resultMap>
<select id="selectOrdersList" resultMap="orders"><!--这里的resultMap的值对应了上面的resultMap标签中的id值-->
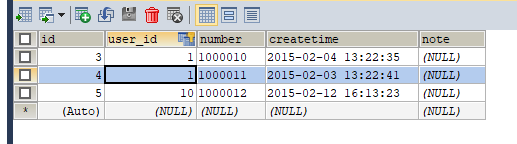
SELECT id, user_id, number, createtime, note FROM orders
</select>
总结
- 使用resultType进行输出映射,只有查询出来的列名和pojo中的属性名一致,该列才可以映射成功。
- 如果查询出来的列名和pojo的属性名不一致,通过定义一个resultMap对列名和pojo属性名之间作一个映射关系。
4.动态 sql
- If标签+where标签+sql片段
什么时候使用:多个条件查询的时候
	<sql id="selector"><!--这个就是定义好的sql片段,可以直接引用-->
		select * from user
	</sql>
	 <!--	根据性别和名字查询用户    -->
	 <select id="selectUserBySexAndUsername" parameterType="User" resultType="User">
	 	<include refid="selector"/><!--这个是sql片段,把重复的sql语句提取出来,使用这个标签来引用-->
	 	<where><!-- where标签可以去掉第一个前and-->
		 	<if test="sex != null and sex != ''"><!--判断sex是否为空-->
		 		 and sex = #{sex}
		 	</if>
		 	<if test="username != null and username != ''">
			 	 and username = #{username}
		 	</if>
	 	</where>
	 	<!--相当于:select * from user where sex = #{sex}  and username = #{username}-->
	 </select>
- foreach标签
什么时候使用:一个条件多条查询的时候(in查询)
	 <!-- 多个ID (1,2,3)查询id为1、2、3的人的数据-->
	 <!--QueryVo:是个包装类,实验中里面封装了list、数组、user等实体对象-->
	 <select id="selectUserByIds" parameterType="QueryVo" resultType="User">
	 	<include refid="selector"/>
	 	<where>
	 		<!--
	 		collection:对应的是前端穿过来的形参名字
	 			有三个分别是List、数组、map集合
	 		    如果需要遍历的是list (list<Integer>),我们在这里需要入list,(List<Integer> idsList;-->list)
	 			需要遍历的是数组array(Integer[])我们则需要输入 array,      (Integer[] ids;-->list)
	 			如果我们需要遍历的是user等实体类中的某个值,我们这时候就可输入我们自定义的变量名
	 																   	 (User user;-->user)
	 		item:表示在迭代过程中每一个元素的别名
	 		index :表示在迭代过程中每次迭代到的位置(下标)
	 		separator:隔断符号
	 		open:前括号( "id in (" 有些人喜欢这样写不放到这里面也可以)
	 		close:后括号
			-->
	 		<foreach collection="list" item="id" index="index" separator="," open="id in (" close=")">
	 			#{id}
	 		</foreach>
	 	</where>
	 	<!--相当于:select * from user where id in(1,2,1)-->
	 </select>
- trim标签
是一个格式化的标记,可以完成set或者是where标记(上面写了where的用法)的功能
	select * from user
  <trim prefix="WHERE" prefixoverride="AND |OR">
    <if test="name != null and name.length()>0"> AND name=#{name}</if>
    <if test="gender != null and gender.length()>0"> AND gender=#{gender}</if>
  </trim>
  假如说name和gender的值都不为null的话打印的SQL为: select *
												  from user
									 		  	  where  name = 'xx' and gender = 'xx'
  prefix:前缀
  prefixoverride:去掉第一个and或者是or
----------------------------------------------------------------------

	update user
  <trim prefix="set" suffixoverride="," suffix=" where id = #{id} ">
    <if test="name != null and name.length()>0"> name=#{name} , </if>
    <if test="gender != null and gender.length()>0"> gender=#{gender} ,  </if>
  </trim>
  假如说name和gender的值都不为null的话打印的SQL为:update user
  												 set name='xx' , gender='xx'
  												 where id='x'
  自动加了一个set前缀和where后缀,上面三个属性的意义如下:
  prefix:前缀
  suffixoverride:去掉最后一个逗号(也可以是其他的标记,就像是上面前缀中的and一样)
  suffix:后缀
- set标签
使用set标签可以将动态的配置 SET 关键字,和剔除追加到条件末尾的任何不相关的逗号。
  <update>
    update user
    <set>
      <if test="name != null and name.length()>0">name = #{name},</if>
      <if test="gender != null and gender.length()>0">gender = #{gender},</if>
    </set>
    where id = #{id}
  </update>
 假如说现在三个字段都有值得话,那么上面打印的SQL语句如下:update user
 													set name='xxx' ,  gender='xx'
													where  id='x'
 在上面第二个if中输出之后的语句没有逗号,也就是说set标记已经自动帮助我们把最后一个逗号给去掉了
5.关联查询
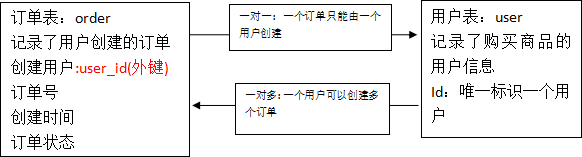
- 一对一查询
	<!--
		//一对一关联 查询  以订单为中心 关联用户
	public List<Orders> selectOrders();//要实现的方法
	 -->
	 <resultMap type="Orders" id="order">
	 	<!--配置属性,与数据库对应,配置了几个,输出的时候就有几个值-->
	 	<result column="id" property="id"/><!--左边的(column)是数据库的属性名,右边(property)是类中的属性名-->
	 	<result column="user_id" property="userId"/>
	 	<result column="number" property="number"/>
	 	<!-- 一对一 -->
	 	<association property="user" javaType="User"><!--property: javaType:类型 -->
	 		<!--这个user_id是外键,是username中的user_id,而上面的id则是Orders表中的id-->
	 		<id column="user_id" property="id"/>
	 		<result column="username" property="username"/>
	 	</association>
	 </resultMap>
	 <!--这里的resultMap对应上面标签中的'id'属性-->
	 <select id="selectOrders" resultMap="order">
	 	SELECT  o.id,o.user_id, o.number,o.createtime,u.username
	 	FROM orders o left join user u
	 	on o.user_id = u.id
	 </select>
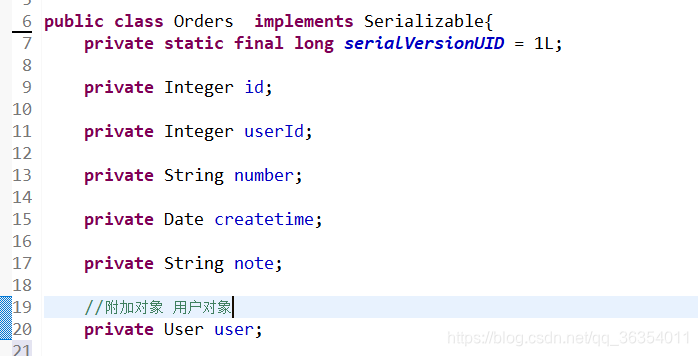
Orders类
Orders表
- 一对多查询
	 	//一对多关联
	 	//用户信息和订单信息为一对多关系
	public List<User> selectUserList(); -->
	<resultMap type="User" id="user">
		<id column="user_id" property="id"/>
		<result column="username" property="username"/>
		<!-- 一对多 -->
		<!--
			property:(private List<Orders> ordersList;)这个字段的变量名
			ofType:对应的类名(一对多中的多)
		-->
		<collection property="ordersList" ofType="Orders">
			<id column="id" property="id"/>
			<result column="number" property="number"/>
		</collection>
	</resultMap>
	<select id="selectUserList" resultMap="user">
		SELECT  o.id,o.user_id,o.number,o.createtime,u.username
	 	FROM user u left join orders o
	 	on o.user_id = u.id
	</select>
User类
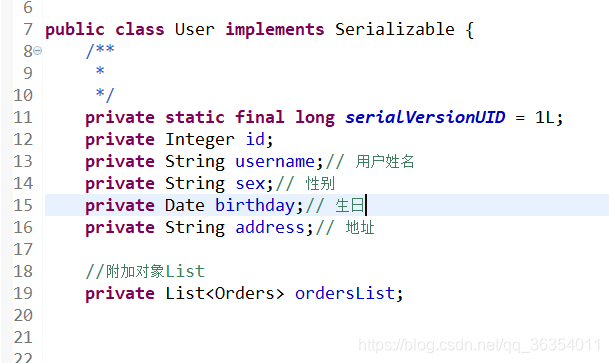
7.Spring整合Mybatis
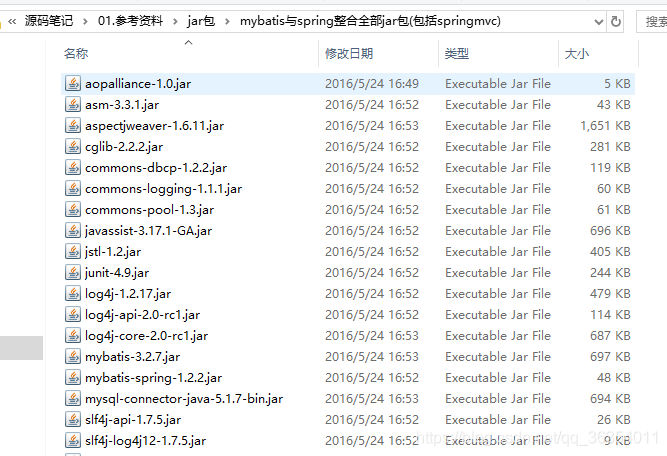
1.需要的包:
1、spring的jar包
2、Mybatis的jar包
3、Spring+mybatis的整合包。
4、Mysql的数据库驱动jar包。
5、数据库连接池的jar包。
(包在下面目录中(共31个))
- applicationContext.xml配置
	<context:property-placeholder location="classpath:db.properties"/>

	<!-- 数据库连接池 -->
	<bean id="dataSource" class="org.apache.commons.dbcp.BasicDataSource"
		destroy-method="close">
		<property name="driverClassName" value="${jdbc.driver}" />
		<property name="url" value="${jdbc.url}" />
		<property name="username" value="${jdbc.username}" />
		<property name="password" value="${jdbc.password}" />
		<property name="maxActive" value="10" />
		<property name="maxIdle" value="5" />
	</bean>
	<!-- Mybatis的工厂(Spring部分和以前学的差不多) -->
	<bean id="sqlSessionFactoryBean" class="org.mybatis.spring.SqlSessionFactoryBean">
		<property name="dataSource" ref="dataSource"/>
		<!-- 核心配置文件的位置 -->
		<property name="configLocation" value="classpath:sqlMapConfig.xml"/>
	</bean>
	<bean id="userMapper" class="org.mybatis.spring.mapper.MapperFactoryBean">
		<property name="sqlSessionFactory" ref="sqlSessionFactoryBean"/>
		<property name="mapperInterface" value="com.itheima.mybatis.mapper.UserMapper"/>
	</bean>
- SqlMapConfig.xml的配置
<configuration>
	<!-- 1.设置别名 -->
	<typeAliases>
		<!-- 2. 指定扫描包,会把包内所有的类都设置别名,别名的名称就是类名,大小写不敏感 -->
		<package name="com.itheima.mybatis.pojo" />
	</typeAliases>

	<mappers>
		<package name="com.itheima.mybatis.mapper"/>
	</mappers>

</configuration>
- db.properties
jdbc.driver=com.mysql.jdbc.Driver
jdbc.url=jdbc:mysql://localhost:3306/mybatis?characterEncoding=utf-8
jdbc.username=root
jdbc.password=123
- log4j.properties
# Global logging configuration
log4j.rootLogger=DEBUG, stdout
# Console output...
log4j.appender.stdout=org.apache.log4j.ConsoleAppender
log4j.appender.stdout.layout=org.apache.log4j.PatternLayout
log4j.appender.stdout.layout.ConversionPattern=%5p [%t] - %m%
8. 1Mapper代理形式开发dao
- 在applicationContext.xml里面配置
	<!-- Mapper动态代理开发 -->
	<bean id="userMapper" class="org.mybatis.spring.mapper.MapperFactoryBean">
		<property name="sqlSessionFactory" ref="sqlSessionFactoryBean"/>
		<property name="mapperInterface" value="com.itheima.mybatis.mapper.UserMapper"/>
	</bean>
上面的配置相当于这两行代码
		//创建SqlSession
		SqlSession sqlSession = sqlSessionFactory.openSession();
		SqlSEssion帮我生成一个实现类  (给接口)
		//OrderMapper orderMapper = sqlSession.getMapper(UserMapper.class);
- UserMapper.xml的查询方法(与普通使用一样)
	<!-- 通过ID查询一个用户 -->
	<select id="findUserById" parameterType="Integer" resultType="User">
		select * from user where id = #{v}
	</select>
- UserMapper.java 接口(与普通使用一样)
public interface UserMapper {
	public User findUserById(Integer id);
	}
- 测试
	@Test
	public void testMapper() throws Exception {
		ApplicationContext ac = new ClassPathXmlApplicationContext("applicationContext.xml");//读取配置文件
		UserMapper mapper = ac.getBean(UserMapper.class);//通过接口获取实体类
//		UserMapper mapper = (UserMapper) ac.getBean("userMapper");//两种方法都可以(这个'userMapper'就是我们bean的id,因为在配置文件中我们已经给他注入了值)
		User user = mapper.findUserById(10);
		System.out.println(user);
	}
8.2方法增强:扫描包形式配置mapper(推荐)
	<!-- Mapper动态代理开发   扫描 -->
	<bean class="org.mybatis.spring.mapper.MapperScannerConfigurer">
		<!-- 基本包 -->
		<property name="basePackage" value="com.itheima.mybatis.mapper"/>
	</bean>
差别:
	 1.bean中没有id属性,因为直接配置了所有在'com.itheima.mybatis.mapper'包中(包括所有下级目录)的类,所以不需要id,有了也没用。
	 2.没有注入'sqlSessionFactory',是因为Mybatis的工厂中已经配置好了,他会自己去找,不需要我们配置。
	 3.导入的是基本包,而不是一个一个配置mapperInterface,这样的好处是以后所有在这个目录下面的文件都不需要在配置,直接一步搞定。
9.Mybatis逆向工程(具体使用方法看视频)
释:使用官方网站的Mapper自动生成工具mybatis-generator-core-1.3.2来生成po类和Mapper映射文件
注意修改以下几点:
			1.修改要生成的数据库表
			2.javaBean文件所在包路径
			3.Mapper所在的包路径


 被折叠的 条评论
为什么被折叠?
被折叠的 条评论
为什么被折叠?
 到【灌水乐园】发言


