


基于XML的AOP开发
1.开发过程
① 导入 AOP 相关坐标
② 创建目标接口和目标类(内部有切点)
③ 创建切面类(内部有增强方法)
④ 将目标类和切面类的对象创建权交给 spring
⑤ 在 applicationContext.xml 中配置织入关系
⑥ 测试代码
1.导入坐标
- aspectjweaver
- spring-aop
<?xml version="1.0" encoding="UTF-8"?>
<project xmlns="http://maven.apache.org/POM/4.0.0"
         xmlns:xsi="http://www.w3.org/2001/XMLSchema-instance"
         xsi:schemaLocation="http://maven.apache.org/POM/4.0.0 http://maven.apache.org/xsd/maven-4.0.0.xsd">
    <modelVersion>4.0.0</modelVersion>

    <groupId>org.example</groupId>
    <artifactId>spring-aop</artifactId>
    <version>1.0-SNAPSHOT</version>

    <dependencies>
        <dependency>
            <groupId>org.springframework</groupId>
            <artifactId>spring-core</artifactId>
            <version>5.0.5.RELEASE</version>
        </dependency>
        <dependency>
            <groupId>org.springframework</groupId>
            <artifactId>spring-context</artifactId>
            <version>5.0.5.RELEASE</version>
        </dependency>
        <dependency>
            <groupId>org.springframework</groupId>
            <artifactId>spring-test</artifactId>
            <version>5.0.5.RELEASE</version>
        </dependency>
        <dependency>
            <groupId>junit</groupId>
            <artifactId>junit</artifactId>
            <version>4.12</version>
        </dependency>
        <dependency>
            <groupId>org.springframework</groupId>
            <artifactId>spring-aop</artifactId>
            <version>5.0.5.RELEASE</version>
        </dependency>
        <dependency>
            <groupId>org.aspectj</groupId>
            <artifactId>aspectjweaver</artifactId>
            <version>1.9.7</version>
        </dependency>
    </dependencies>
</project>
2.创建目标接口和目标类(内部有切点)
//----------目标接口(可能有多个)----------------
package com.itspring.proxy.aop;

public interface TargetInterface1 {
    void save();
}


package com.itspring.proxy.aop;

public interface TargetInterface2 {
    void update();
}

//----------目标类----------------
package com.itspring.proxy.aop;

//目标类(被增强的类)
public class Target implements TargetInterface1, TargetInterface2 {
    public void save() {
        System.out.println("save running...");
    }

    public void update() {
        System.out.println("update running...");
    }
}
3.创建切面类(内部有增强方法)
//---------------切面类------------------
package com.itspring.proxy.aop;

//切面
public class MyAspect {

    public void before() {
        System.out.println("前置增强...");
    }

    public void afterRunning() {
        System.out.println("后置增强...");
    }
}
4.将目标类和切面类的对象创建权交给 spring
	<!--目标类-->
    <bean id="target" class="com.itspring.proxy.aop.Target"></bean>

    <!--切面类-->
    <bean id="myAspect" class="com.itspring.proxy.aop.MyAspect"></bean>
- 在 applicationContext.xml 中配置织入关系
<!--配置织入:告诉spring框架,哪些方法(切点)需要进行增强(前置,后置...)-->
<aop:config>
<!--声明切面-->
<aop:aspect ref="myAspect">
<!--切面=通知+切点-->
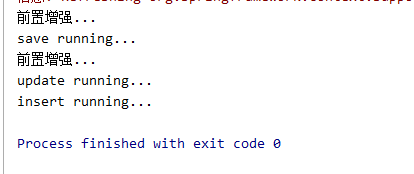
<!--只对save放法进行前置增强-->
<aop:before method="before" pointcut="execution(public void com.itspring.proxy.aop.Target.save())"/>
</aop:aspect>
</aop:config>
6.测试代码
@RunWith(SpringJUnit4ClassRunner.class)
@ContextConfiguration(locations = "classpath:applicationContext.xml")
public class AOPTest {

    @Autowired
    private TargetInterface1 targetInterface1;

    @Autowired
    private TargetInterface2 targetInterface2;


    @Test
    public void test1() {
        targetInterface1.save();
        targetInterface2.update();
    }
}

2. 切点表达式写法
1.表达式语法
execution([修饰符] 返回值类型 包名.类名.方法名(参数))
- 访问修饰符可以省略
- 返回值类型、包名、类名、方法名可以使用星号* 代表任意
- 包名与类名之间一个点 . 代表当前包下的类,两个点 … 表示当前包及其子包下的类
- 参数列表可以使用两个点 … 表示任意个数,任意类型的参数列表
//com.itheima.aop.Target.method()的main方法,没有参数,没有返回值,public
execution(public void com.itheima.aop.Target.method())

//com.itheima.aop.Target.*(..)类中的所有方法,任意参数,没有返回值
execution(void com.itheima.aop.Target.*(..))

//com.itheima.aop.*.*(..) aop包中的类中的所有方法,任意参数,任意返回值
execution(* com.itheima.aop.*.*(..))

//com.itheima.aop.*.*(..) aop包及其子包中的类中的所有方法,任意参数,任意返回值
execution(* com.itheima.aop..*.*(..))

//任意包及其子包中的类的所有方法,任意参数,任意返回值
execution(* *..*.*(..))
3.通知的类型
通知的配置语法:
<aop:通知类型 method=“切面类中方法名” pointcut=“切点表达式"></aop:通知类型>
| 名称 | 标签 | 说明 |
|---|---|---|
| 前置通知 | <aop:before> | 用于配置前置通知。指定增强的方法在切入点方法之前执行 |
| 后置通知 | <aop:after-returning> | 用于配置后置通知。指定增强的方法在切入点方法之后执行 |
| 环绕通知 | <aop:around> | 用于配置环绕通知。指定增强的方法在切入点方法之前和之后都执行 |
| 异常抛出通知 | <aop:throwing> | 用于配置异常抛出通知。指定增强的方法在出现异常时执行 |
| 最终通知 | <aop:after> | 用于配置最终通知。无论增强方式执行是否有异常都会执行 |
4. 切点表达式抽取
当多个增强的切点表达式相同时,可以将切点表达式进行抽取,在增强中使用 pointcut-ref属性代替 pointcut属性来引用抽取后的切点表达式
    <!--配置织入:告诉spring框架,哪些方法(切点)需要进行增强(前置,后置...)-->
    <aop:config>
        <!--声明切面-->
        <aop:aspect ref="myAspect">
            <!--抽取切点-->
            <aop:pointcut id="pointcut1" expression="execution(* com.itspring.proxy.aop.*.*(..))"/>
            <!--切面=通知+切点-->
            <!--只对save放法进行前置增强-->
            <aop:before method="before" pointcut-ref="pointcut1"/>
        </aop:aspect>
    </aop:config>
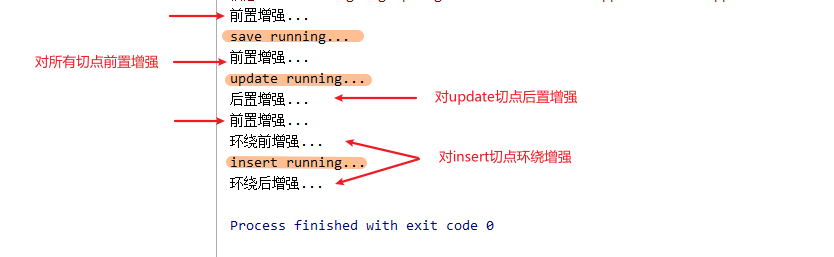
5.环绕通知用法
环绕通知需要使用ProceedingJoinPoint,正在执行的连接点===切点
//---------切面类MyAspet------------
    public Object around(ProceedingJoinPoint pjp) throws Throwable {
        System.out.println("环绕前增强...");
        Object proceed = pjp.proceed(); //切点方法
        System.out.println("环绕后增强...");
        return proceed;
    }
//---------applicationContext.xml------------
<!--配置织入:告诉spring框架,哪些方法(切点)需要进行增强(前置,后置...)-->
    <aop:config>
        <!--抽取多个切点表达式-->
        <aop:pointcut id="p1" expression="execution(* com.itspring.proxy.aop.*.*(..))"/>
        <aop:pointcut id="p2" expression="execution(* com.itspring.proxy.aop.Target.update())"/>
        <aop:pointcut id="p3" expression="execution(* com.itspring.proxy.aop.Target.insert())"/>
        <!--声明切面-->
        <aop:aspect ref="myAspect">
            <!--切面=通知+切点-->
            <!--对所有切点进行前置增强-->
            <aop:before method="before" pointcut-ref="p1"/>
            <!--对update切点进行后置增强-->
            <aop:after-returning method="afterRunning" pointcut-ref="p2"/>
            <!--对insert切点进行环绕增强-->
            <aop:around method="around" pointcut-ref="p3"/>
        </aop:aspect>
    </aop:config>
@RunWith(SpringJUnit4ClassRunner.class)
@ContextConfiguration(locations = "classpath:applicationContext.xml")
public class AOPTest {

    @Autowired
    private TargetInterface1 targetInterface1;

    @Autowired
    private TargetInterface2 targetInterface2;

    @Autowired
    private TargetInterface3 targetInterface3;

    @Test
    public void test1() {
        targetInterface1.save();
        targetInterface2.update();
        targetInterface3.insert();
    }
}
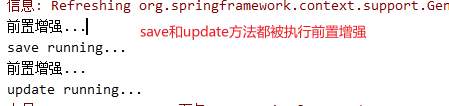
6.组合切点
https://blog.youkuaiyun.com/ranshenyi/article/details/79999037
在Schema风格下,由于在XML中使用“&&”需要使用转义字符“&&”来代替之,所以很不方便,因此Spring AOP 提供了and、or、not来代替&&、||、!
    <aop:config>
        <!--抽取切点save和update-->
        <aop:pointcut id="p1"
                      expression="execution(* com.itspring.proxy.aop.Target.save())
                      or execution(* com.itspring.proxy.aop.Target.update())"/>
        <aop:aspect ref="myAspect">
            <!--对切点save和update前置增强-->
            <aop:before method="before" pointcut-ref="p1"/>
        </aop:aspect>
    </aop:config>
 @Autowired
    private TargetInterface1 targetInterface1;

    @Autowired
    private TargetInterface2 targetInterface2;

    @Autowired
    private TargetInterface3 targetInterface3;

    @Test
    public void test1() {
        targetInterface1.save();
        targetInterface2.update();
        targetInterface3.insert();
    }


 484
484

 被折叠的 条评论
为什么被折叠?
被折叠的 条评论
为什么被折叠?
 到【灌水乐园】发言


