前言

前面一篇介绍了自定义View的基础概念(皮毛),接下来全部是自定义View实战,让我们一起开启自定义View之旅吧!

1. 实现目标

本篇将实现一个自定义的TextView,通过自定义属性让我们可以配置文本内容、颜色、字体大小。主要是掌握自定义View中画文字的基础概念。

  • attrs.xml 中定义自定义属性
  • 在自定义View中解析自定义属性
  • 绘制文本
  • 测量控件宽高

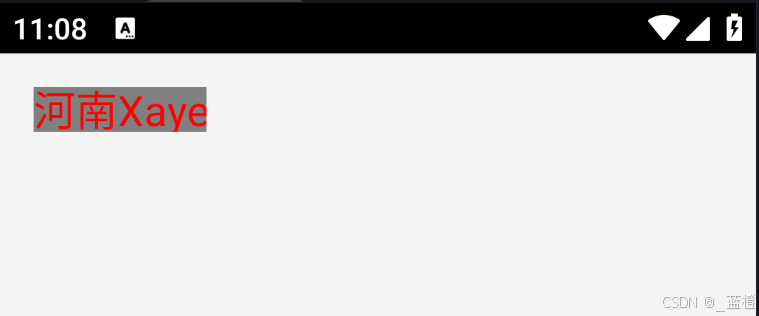
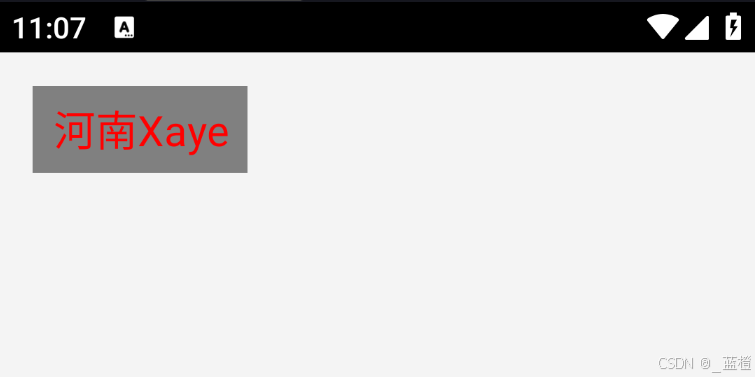
以下是完成效果图:

效果1:不带Padding

重学 Android 自定义 View 系列:动手实现专属 TextView_自定义

效果2:带Padding

重学 Android 自定义 View 系列:动手实现专属 TextView_自定义_02

看似很简单,其实有一点绕,先来看一张图。

重学 Android 自定义 View 系列:动手实现专属 TextView_android_03

首先我们需要知道一点,文字的绘制是从左下角开始的,并不是 文字左上角的坐标,这一点与其他自定义view的绘制会有一些不同,因为文字的绘制是以基线为基础的,就是上图的Baseline,当自定义Textview时,我们要么拿到确定的宽高,要么是根据文本的长度和大小去自适应宽高,不管怎样我们得到的都是一个矩形。

而我们要绘制文本,最重要的是确认基线坐标,那么基线坐标怎么获取呢?这时候就要用到 Paint.FontMetricsInt了。

Paint.FontMetricsInt 的基本概念

Paint.FontMetricsIntPaint 类中的一个内部类,用于提供字体的度量信息。它的字段主要表示从基线(baseline)到不同字符边界的距离,通常用来计算文本在垂直方向上的绘制位置。

主要字段如下:

  • top:从基线到字符最高点的距离,通常是负值。
  • ascent:从基线到字符实际顶部的距离,也是负值,但通常比 top 小。
  • descent:从基线到字符实际底部的距离,通常是正值。
  • bottom:从基线到字符最低点的距离,一般用于字符尾部的间距,是正值。
  • leading:字符之间的间距,通常用于行间距的控制。它的值可能是正的、负的或者零。

这些字段的单位通常是像素,且它们的值相对于基线来计算,如所示:

top    --  文本框架的最高点
    ascent --  字符的最高点(字体上方留白)
    baseline -- 基线,字符绘制的参考线
    descent --  字符的最低点(字体下方留白)
    bottom  --  文本框架的最低点
  • 1.
  • 2.
  • 3.
  • 4.
  • 5.

这里主要用到的是 top 和 bottom。计算基线的公式如下:

float dy = (fontMetrics.bottom - fontMetrics.top) / 2 - fontMetrics.bottom;
     float baseLine = getHeight() / 2 + dy;
  • 1.
  • 2.

getHeight() / 2是控件高度的一半,(bottom - top) / 2 是字体中心与顶部的距离,用来计算从基线到中心点的位移dy。减去 bottom 是为了调整基线,使得绘制效果居中。

OK!了解了这些基础概念后,你就能画一个很正的文本了。

2. 定义自定义属性


res/values/attrs.xml 中,我们定义了三个自定义属性:xText(文本内容)、xTextColor(文本颜色)、xTextSize(文本大小)。

<declare-styleable name="MyTextView">
    <attr name="xText" format="string"/>
    <attr name="xTextColor" format="color"/>
    <attr name="xTextSize" format="dimension"/>
</declare-styleable>
  • 1.
  • 2.
  • 3.
  • 4.
  • 5.

3. 自定义TextView的实现


  • 解析自定义属性
  • 初始化画笔
  • 测量View的宽高(onMeasure)
  • 绘制文本(onDraw)

onLayout 呢?,不是说好三步走的吗?这是因为 onLayout 方法的主要作用是对子View(即子元素)进行布局,而 MyTextView 继承自 View,它本身就是一个单一的视图控件,没有任何子元素,因此无需重写 onLayout。

大部分自定义View都是单View的,一般不需要自定义onLayout

4. 完整代码实现

public class MyTextView extends View {
    // 创建画笔对象
    private Paint mPaint;

    // 文本内容、字体大小和颜色的默认值
    private String mText = "Hello!";
    private int mTextColor = Color.BLACK;
    private float mTextSize = 50f;

    public MyTextView(Context context) {
        this(context, null);
    }

    public MyTextView(Context context, AttributeSet attrs) {
        super(context, attrs);

        if (attrs != null) {
            // 获取所有自定义属性
            TypedArray typedArray = context.obtainStyledAttributes(attrs, R.styleable.MyTextView);

            mText = typedArray.getString(R.styleable.MyTextView_xText);
            mTextColor = typedArray.getColor(R.styleable.MyTextView_xTextColor, mTextColor);
            mTextSize = typedArray.getDimension(R.styleable.MyTextView_xTextSize, spToPx(mTextSize));

            //回收
            typedArray.recycle();
        }
        init();
    }

    // 初始化画笔
    private void init() {
        mPaint = new Paint();
        mPaint.setAntiAlias(true);  // 启用抗锯齿
        mPaint.setColor(mTextColor); // 设置文本颜色
        mPaint.setTextSize(mTextSize); // 设置文本大小
    }

    // 测量控件的宽高
    @Override
    protected void onMeasure(int widthMeasureSpec, int heightMeasureSpec) {
        // 获取父容器传递的宽度和高度的测量模式(MeasureSpec的模式和尺寸)
        int widthMode = MeasureSpec.getMode(widthMeasureSpec);
        int widthSize = MeasureSpec.getSize(widthMeasureSpec);
        int heightMode = MeasureSpec.getMode(heightMeasureSpec);
        int heightSize = MeasureSpec.getSize(heightMeasureSpec);

        // 1. 确定的值,这个时候不需要计算,给多少就是多少

        // 获取文本的矩形边界
        Rect bounds = new Rect();
        mPaint.getTextBounds(mText, 0, mText.length(), bounds);

        // 计算宽度
        int width = widthSize;

        // 2.给的是wrap_content 需要计算
        if (widthMode == MeasureSpec.AT_MOST) {
            width = bounds.width() + getPaddingLeft() + getPaddingRight();
        }

        // 计算高度
        int height = heightSize;
        if (heightMode == MeasureSpec.AT_MOST) {
            height = bounds.height() + getPaddingTop() + getPaddingBottom();
        }
        // 设置控件宽高
        setMeasuredDimension(width, height);
    }

    private float spToPx(float sp) {
        return TypedValue.applyDimension(TypedValue.COMPLEX_UNIT_SP, sp, getResources().getDisplayMetrics());
    }

    @Override
    protected void onLayout(boolean changed, int left, int top, int right, int bottom) {
        super.onLayout(changed, left, top, right, bottom);
    }

    @Override
    protected void onDraw(Canvas canvas) {
        super.onDraw(canvas);

        // 绘制文本
        // x 开始位置 0
        // y 基线 baseLine

        Paint.FontMetrics fontMetrics = mPaint.getFontMetrics();
        // top是一个负值 ,bottom是一个正值
        // dy 代表 盖度一半到基线的距离
        float dy = (fontMetrics.bottom - fontMetrics.top) / 2 - fontMetrics.bottom;
        float baseLine = getHeight() / 2 + dy;

        int x = getPaddingLeft();
        float y = (getHeight() - fontMetrics.bottom + fontMetrics.top) / 2;
        canvas.drawText(mText, x, baseLine, mPaint);
    }
}
  • 1.
  • 2.
  • 3.
  • 4.
  • 5.
  • 6.
  • 7.
  • 8.
  • 9.
  • 10.
  • 11.
  • 12.
  • 13.
  • 14.
  • 15.
  • 16.
  • 17.
  • 18.
  • 19.
  • 20.
  • 21.
  • 22.
  • 23.
  • 24.
  • 25.
  • 26.
  • 27.
  • 28.
  • 29.
  • 30.
  • 31.
  • 32.
  • 33.
  • 34.
  • 35.
  • 36.
  • 37.
  • 38.
  • 39.
  • 40.
  • 41.
  • 42.
  • 43.
  • 44.
  • 45.
  • 46.
  • 47.
  • 48.
  • 49.
  • 50.
  • 51.
  • 52.
  • 53.
  • 54.
  • 55.
  • 56.
  • 57.
  • 58.
  • 59.
  • 60.
  • 61.
  • 62.
  • 63.
  • 64.
  • 65.
  • 66.
  • 67.
  • 68.
  • 69.
  • 70.
  • 71.
  • 72.
  • 73.
  • 74.
  • 75.
  • 76.
  • 77.
  • 78.
  • 79.
  • 80.
  • 81.
  • 82.
  • 83.
  • 84.
  • 85.
  • 86.
  • 87.
  • 88.
  • 89.
  • 90.
  • 91.
  • 92.
  • 93.
  • 94.
  • 95.
  • 96.
  • 97.
  • 98.

5. 使用:


<com.example.quickdev.test.MyTextView
        android:layout_width="wrap_content"
        android:layout_height="wrap_content"
        android:background="@color/gray"
        app:xText="河南Xaye"
        android:padding="10dp"
        app:xTextColor="#ff0000"
        app:xTextSize="20dp"/>
  • 1.
  • 2.
  • 3.
  • 4.
  • 5.
  • 6.
  • 7.
  • 8.

显示结果就是开篇的图片。

6. 最后


知识点不多,主要是两点:1. 实现wrap_content的支持,2. 使用Paint绘制文本内容,调整基线位置以实现文本居中。