


 本文详细介绍如何在SpringBoot项目中整合Swagger2,包括环境搭建、依赖引入及配置方法,同时提供代码示例,帮助读者快速掌握并应用到实际项目中。
@[TOC](java spring框架学习-环境搭建2(整合swagger2))
目的介绍
学习java spring mvc 框架
功能列表
我们对项目做功能分析。归类出下以功能功知识点。
1.环境搭建
2.角色
3.用户
4.权限
5.组织
6.登陆
7.菜单
8.日志
9.错误处理
10.并发处理
11.用队列方式解决高并发请求。
功具介绍
1.spring boot 整合swagger2
引用swagger2
在pom.xml中增加 dependency
		<dependency>
			<groupId>org.springframework.boot</groupId>
			<artifactId>spring-boot-devtools</artifactId>
		</dependency>
		<dependency>
			<groupId>io.springfox</groupId>
			<artifactId>springfox-swagger2</artifactId>
			<version>${springfox-swagger2.version}</version>
		</dependency>
		<dependency>
		   <groupId>io.springfox</groupId>
		   <artifactId>springfox-swagger-ui</artifactId>
		   <version>${springfox-swagger2.version}</version>
		</dependency>
配置变量 springfox-swagger2.version
<springfox-swagger2.version>2.8.0</springfox-swagger2.version>
springboot 配置
package com.example.bxhmvc;
import org.springframework.context.annotation.Bean;
import org.springframework.context.annotation.Configuration;
import springfox.documentation.builders.ApiInfoBuilder;
import springfox.documentation.builders.PathSelectors;
import springfox.documentation.builders.RequestHandlerSelectors;
import springfox.documentation.service.ApiInfo;
import springfox.documentation.spi.DocumentationType;
import springfox.documentation.spring.web.plugins.Docket;
/**
*
* @Description:
* @author fan
* @email fanshiyou@163.com
* @date 2019/10/24 13:49
*
*/
@Configuration
public class Swagger2Config {
@Bean
public Docket createRestApi() {
return new Docket(DocumentationType.SWAGGER_2)
.apiInfo(apiInfo())
.select()
.apis(RequestHandlerSelectors.basePackage("com.example.bxhmvc.controller"))
.paths(PathSelectors.any())
.build();
}
private ApiInfo apiInfo() {
return new ApiInfoBuilder()
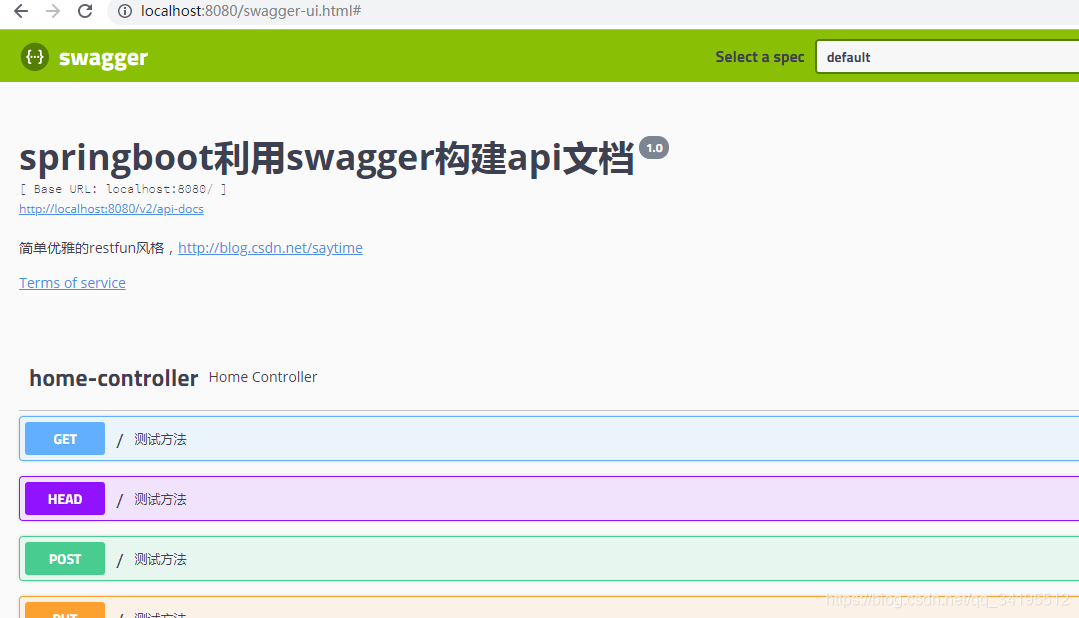
.title("springboot利用swagger构建api文档")
.description("简单优雅的restfun风格")
.termsOfServiceUrl("http://blog.youkuaiyun.com/fanshiyou")
.version("1.0")
.build();
}
}
其实到这个时候已经整合好了,剩下就是注解的使用了。
以下是例子
例子
package com.example.bxhmvc.controller;

import java.text.DateFormat;
import java.util.Date;
import java.util.Locale;

import org.springframework.stereotype.Controller;
import org.springframework.ui.Model;
import org.springframework.web.bind.annotation.RequestMapping;
import org.springframework.web.bind.annotation.RestController;

import io.swagger.annotations.Api;
import io.swagger.annotations.ApiOperation;

@RestController
@Api(value = "测试模块")
public class HomeController {

    @RequestMapping("/")
    @ApiOperation(value = "测试方法", notes = "测试方法")
    public String index(Locale locale, Model model) {
        Date date = new Date();
        DateFormat dateFormat = DateFormat.getDateTimeInstance(DateFormat.LONG, DateFormat.LONG, locale);

        String formattedDate = dateFormat.format(date);

        return formattedDate;
    }

}


 3万+
3万+

 被折叠的 条评论
为什么被折叠?
被折叠的 条评论
为什么被折叠?
 到【灌水乐园】发言


