


 本文详细介绍如何利用jQueryEasyUI插件集简化Web界面开发,包括layout布局、accordion可折叠面板、tab选项卡等组件的使用,以及alert、confirm、menubutton、validatebox等实用功能的演示。同时,深入探讨datagrid数据表格的多种应用,如静态HTML渲染、AJAX数据加载、动态行操作等,还介绍了combobox和combotree组件的配置方法。
jQuery EasyUI是一组基于jQuery的UI插件集合体,而jQuery EasyUI的目标就是帮助web开发者更轻松的打造出功能丰富并且美观的UI界面
①layout布局、accordion可折叠、tab选项卡,动态添加选项卡。
*注:这种插件其实导入一个封装的css和js文件。基于jQuery.可以使了。
<!DOCTYPE html>
<html lang="en">
<head>
    <meta charset="UTF-8">
    <link rel="stylesheet" href="js/easyui/themes/default/easyui.css">
    <link rel="stylesheet" href="js/easyui/themes/icon.css">
    <script type="text/javascript" src="js/jquery-1.8.3.js"></script>
    <script type="text/javascript" src="js/easyui/jquery.easyui.min.js"></script>

    <title>Title</title>
</head>
<body class="easyui-layout">
    <div data-options="region:'north',title:'North Title',split:true" style="height:100px;">北部</div>
    <div data-options="region:'south',title:'South Title',split:true" style="height:100px;">南部</div>
    <div data-options="region:'east',iconCls:'icon-reload',title:'East',split:true" style="width:100px;"></div>
    <div data-options="region:'west',title:'West',split:true" style="width:100px;">
        <div class="easyui-accordion" data-options="fit:true">
            <!-- 使用子div表示每个面板 -->
            <div data-options="iconCls:'icon-cut'" title="面板一">1111</div>
            <div title="面板二">2222</div>
            <div title="面板三">3333</div>
        </div>
    </div>
    <div data-options="region:'center',title:'center title'" style="padding:5px;background:#eee;">
        <a id="btn" href="#" class="easyui-linkbutton" data-options="iconCls:'icon-add'">添加一个面板</a>
        <div id="mytabs" class="easyui-tabs" data-options="fit:true">
            <!-- 使用子div表示每个面板 -->
            <div data-options="iconCls:'icon-cut'" title="面板一">1111</div>
            <div data-options="closable:true" title="面板二">2222</div>
            <div title="面板三">3333</div>
        </div>
    </div>

<script>
    $(function(){
//        动态创建tab
        $('#btn').bind('click', function(){
            var e = $("#mytabs").tabs("exists","面板四");
            if(e){
                $("#mytabs").tabs("select","面板四");
            }else{
                $("#mytabs").tabs("add",{
                    title:'面板四',
                    iconCls:'icon-edit',
                    closable:true,
                    content:'<iframe frameborder="0" height="100%" width="100%" src="https://www.baidu.com"></iframe>'
                });
            }
        });

    });
</script>
</body>
</html>
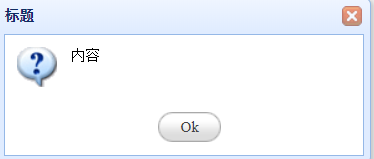
②alert()的使用
$.messager.alert("标题","内容","question");
confirm的使用
$.messager.confirm("标题","内容",function(r){
    alert(r);
})

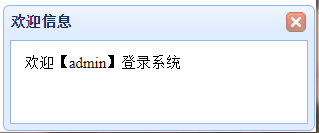
show()方法的使用
        $.messager.show({
            title:'欢迎信息',
            msg:'欢迎【admin】登录系统',
            timeout:5000,
            showType:'slide'
        });
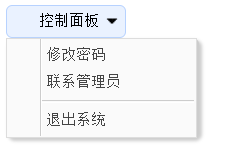
③menubutton的使用
制作下拉菜单
<a data-options="iconCls:'icon-help',menu:'#mm'" class="easyui-menubutton">控制面板</a>
<div id="mm">
    <div onclick="alert(1111)" data-options="iconCls:'icon-edit'">修改密码</div>
    <div>联系管理员</div>
    <div class="menu-sep"></div>
    <div>退出系统</div>
</div>
④validatebox的使用
提供的校验规则:
1、非空校验required="required"
2、使用validType指定
email: 正则表达式匹配电子邮件规则。
url: 正则表达式匹配的URL规则。
length[0,100]: 在x和x字符允许。
remote['http://.../action.do','paramName']: 发送ajax请求做验证值,返回“true”当成功。
<table cellpadding=3>
                    <tr>
                        <td>新密码:</td>
                        <td><input  required="true" data-options="validType:'length[4,6]'" id="txtNewPass" type="Password" class="txt01 easyui-validatebox" /></td>
                    </tr>
                    <tr>
                        <td>确认密码:</td>
                        <td><input required="true" data-options="validType:'length[4,6]'" id="txtRePass" type="Password" class="txt01 easyui-validatebox" /></td>
                    </tr>
                </table>
补充:自定义校验规则,使用方法和上面定义的一样。
<script type="text/javascript">
	$(function(){
		var reg = /^1[3|4|5|7|8][0-9]{9}$/;
		//扩展手机号校验规则
		$.extend($.fn.validatebox.defaults.rules, {
			elephone: {
			validator: function(value,param){
			return reg.test(value);
			},
			message: '手机号输入有误!'
			}
		});
	});
</script>
获取校验的结果
var v = $("#editPasswordForm").form("validate");
⑤将静态HTML渲染为datagrid样式
静态的表格
	<table class="easyui-datagrid">
		<thead>
			<tr>
				<th data-options="field:'id'">编号</th>
				<th data-options="field:'name'">姓名</th>
				<th data-options="field:'age'">年龄</th>
			</tr>
		</thead>
		<tbody>
			<tr>
				<td>001</td>
				<td>小明</td>
				<td>90</td>
			</tr>
			<tr>
				<td>002</td>
				<td>老王</td>
				<td>3</td>
			</tr>
		</tbody>
	</table>
发送ajax请求获得json ,进行初始化
*通过url去请求json数据,如果key和field对上就进行遍历显示。没有对应的什么也不进行显示。
	<table data-options="url:'${pageContext.request.contextPath }/json/datagrid_data.json'"
			class="easyui-datagrid">
		<thead>
			<tr>
				<th data-options="field:'id'">编号</th>
				<th data-options="field:'name'">姓名</th>
				<th data-options="field:'age'">年龄</th>
			</tr>
		</thead>
	</table>
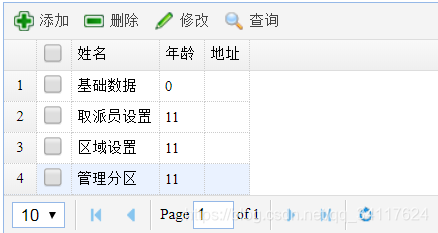
使用easyUI提供的API创建datagrid
*前提是导入了:jquery-1.8.3.js、icon.css(添加删除的标签)、easyui.css、jquery.easyui.min.js
<table id="mytable"></table>
<script>
    $(function(){
        //页面加载完成后,创建数据表格datagrid
        $("#mytable").datagrid({
            //定义标题行所有的列
            columns:[[
                {title:'编号',field:'id',checkbox:true},
                {title:'姓名',field:'name'},
                {title:'年龄',field:'age'},
                {title:'地址',field:'address'}
            ]],
            //指定数据表格发送ajax请求的地址
            url:'json/menu.json',       -------->请求回json数据进行遍历显示
            rownumbers:true,            -------->行号
            singleSelect:true,          -------->单选
            //定义工具栏
            toolbar:[
                {text:'添加',iconCls:'icon-add',   ------>icon.css决定了是否可以显示
                    //为按钮绑定单击事件
                    handler:function(){
                        alert('add...');
                    }
                },
                {text:'删除',iconCls:'icon-remove'},
                {text:'修改',iconCls:'icon-edit'},
                {text:'查询',iconCls:'icon-search'}
            ],
            //显示分页条
            pagination:true
        });
    });
</script>
如果要实现这种分页的效果,需要对json格式有一定的要求
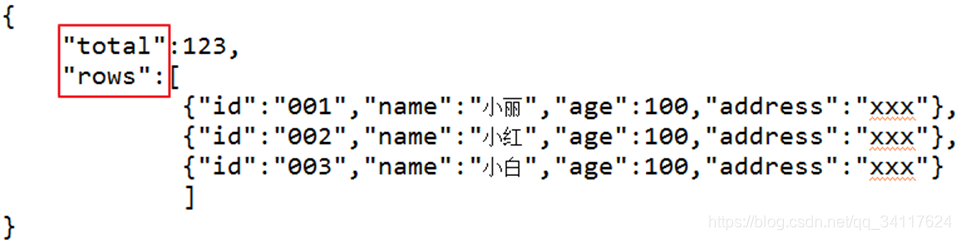
注:像这种的数据格式一般会封装实体bean,再转json的时候一定要注意使用jsonObject进行转,否则会在json外包装一个【】导致数据无法正常显示。。。
datagrid功能补充
删除功能可以选用datagrid的getSelections方法,这里获取的是整个集合,我们需要指定方法,将id抽离出来
var rows=$("#grid").datagrid("getSelections");
var arr=new Array();
for(var i=0;i<rows.length;i++){
    var staff=rows[i];
    arr.push(staff.id);
}
var ids=arr.join(",");
实现修改时候的数据回显方法,直接使用已经查询的数据直接在进行回显。
通过datagrid的onDblClickRow函数来实现。
rowIndex:下标从零开始
rowData:一行表格数据,可以理解为一个java对象的json表示。
	function doDblClickRow(rowIndex, rowData){
		$("#editStaffWindow").window("open");
		$("#editStaffForm").form("load",rowData);
	}
⑥easyUI combobox下拉框的使用
[
	{"id":100,"name":"小明"},
	{"id":100,"name":"小红"},
	{"id":100,"name":"小绿"},
	{"id":100,"name":"小蓝"}
]
-----------------------------------------------
<input data-options="url:'json/menu.json',
			valueField:'id',
			textField:'name'"
       class="easyui-combobox">
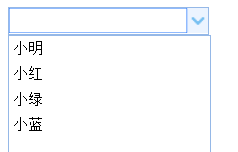
注:这个下拉框封装了一个键盘抬起的事件,服务器可以通过属性模型String p 获取输入的内容。
datagrid 的行操作
<link rel="stylesheet" type="text/css" href="${pageContext.request.contextPath }/js/easyui/themes/
default/easyui.css">
<link rel="stylesheet" type="text/css" href="${pageContext.request.contextPath }/js/easyui/themes/icon.css">
<script type="text/javascript" src="${pageContext.request.contextPath }/js/jquery-1.8.3.js"></script>
<script type="text/javascript" src="${pageContext.request.contextPath }/js/easyui/jquery.easyui.min.js"></script>
<script type="text/javascript" src="${pageContext.request.contextPath }/js/easyui/locale/easyui-lang-zh_CN.js"></script>
<script type="text/javascript">
		$(function(){
			//这里只能编辑第一行,定义一个全局索引来记录行值,让其值一直为正在编辑的行
			var myIndex=-1;
			//页面加载完成后,创建数据表格datagrid
			$("#mytable").datagrid({
				//定义标题行所有的列
				//修改行的操作分为两步,1.添加插件  2.添加触发事件的触发点
				columns:[[
				          {title:'编号',field:'id',checkbox:true},
				          {width:150,title:'姓名',field:'name',editor:{
				        	  type:'validatebox',
				        	  optiosn:{}
				          }},
				          {width:150,title:'年龄',field:'age',editor:{
				        	  type:'numberbox',
				        	  optiosn:{}
				          }},
				          {width:150,title:'日期',field:'address',editor:{
				        	  type:'datebox',
				        	  optiosn:{}
				          }}
				          ]],
				//指定数据表格发送ajax请求的地址
				url:'${pageContext.request.contextPath }/json/datagrid_data.json',
				rownumbers:true,
				singleSelect:true,
				//定义工具栏
				toolbar:[
				         {text:'添加',iconCls:'icon-add',
				        	 //为按钮绑定单击事件
				        	 handler:function(){
					        	 $("#mytable").datagrid("insertRow",{
					        		 index:0,//第零行
					        		 row:{}  //空列
					        	 });
					        	 $("#mytable").datagrid("beginEdit",0);
					        	 myIndex=0;
				         	 }
				         },
				         {text:'删除',iconCls:'icon-remove',handler:function(){
				        	 var rows=$("#mytable").datagrid("getSelections");
				        	 if(rows.length==1){
				        		 var row=rows[0];
				        		 myIndex=$("#mytable").datagrid("getRowIndex",row);
				        	 }
				        	 $("#mytable").datagrid("deleteRow",0);
				         }},
				         {text:'修改',iconCls:'icon-edit',handler:function(){
				        	 var rows=$("#mytable").datagrid("getSelections");
				        	 if(rows.length==1){
				        		 var row=rows[0];
				        		 myIndex=$("#mytable").datagrid("getRowIndex",row);
				        	 }
				        	 $("#mytable").datagrid("beginEdit",myIndex);
				         }},
				         {text:'保存',iconCls:'icon-save',handler:function(){
				        	 $("#mytable").datagrid("endEdit",myIndex);
				         }}
				         ],
				//显示分页条
				pagination:true,
				//页面编辑结束提交数据库操作方法,之保存时间,删除中需要重新定义一遍
				onAfterEdit:function(index,data,changes){
					console.info(data);
				}
			});
		});
	</script>
</head>
<body>
	<table id="mytable"></table>
</body>
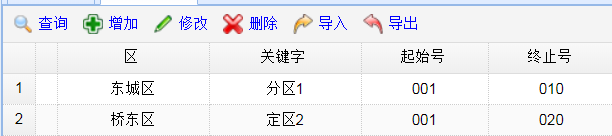
补充:在这里写一个案例吧,就是寻常的页面中间部分头部和显示表头的初始化工具常用数据
注:表头初始化的时候field和获得 的json数据,一定要匹配否则报错,也没事,错了再改过来就好了。
	//工具栏
	var toolbar = [ {
		id : 'button-search',
		text : '查询',
		iconCls : 'icon-search',
		handler : doSearch
	}, {
		id : 'button-add',
		text : '增加',
		iconCls : 'icon-add',
		handler : doAdd
	}, {
		id : 'button-edit',
		text : '修改',
		iconCls : 'icon-edit',
		handler : doEdit
	},{
		id : 'button-delete',
		text : '删除',
		iconCls : 'icon-cancel',
		handler : doDelete
	},{
		id : 'button-import',
		text : '导入',
		iconCls : 'icon-redo',
		handler : doImport
	},{
		id : 'button-export',
		text : '导出',
		iconCls : 'icon-undo',
		handler : doExport
	}];
	// 定义列
	var columns = [ [ {
		field : 'id',
		checkbox : true,
	}, {
		field : 'showid',
		title : '分拣编号',
		width : 120,
		align : 'center',
		formatter : function(data,row ,index){
			return row.id;
		}
	},{
		field : 'bcRegion.province',
		title : '省',
		width : 120,
		align : 'center',
		formatter : function(data,row ,index){
			return row.bcRegion.province; ----------->就是这里field和json一定要对上。
		}
	}, {
		field : 'bcRegion.city',
		title : '市',
		width : 120,
		align : 'center',
		formatter : function(data,row ,index){
			return row.bcRegion.city;
		}
	}, {
		field : 'bcRegion.district',
		title : '区',
		width : 120,
		align : 'center',
		formatter : function(data,row ,index){
			return row.bcRegion.district;
		}
	}, {
		field : 'addresskey',
		title : '关键字',
		width : 120,
		align : 'center'
	}, {
		field : 'startnum',
		title : '起始号',
		width : 100,
		align : 'center'
	}, {
		field : 'endnum',
		title : '终止号',
		width : 100,
		align : 'center'
	} , {
		field : 'single',
		title : '单双号',
		width : 100,
		align : 'center'
	} , {
		field : 'position',
		title : '位置',
		width : 200,
		align : 'center'
	} ] ];
⑥easyUI的load方法的使用
前提:这里有一个查询的实现,条件被写进了一个表单里,通过一个函数可以使表单数据转为json.
通过load方法来实现条件查询的效果。页面重新发送了一次请求,并将条件封装的数据传了过去
	$.fn.serializeJson=function(){  -->通过这种方式定义的命名函数可以直接调用。
        var serializeObj={};
        var array=this.serializeArray();
        $(array).each(function(){
            if(serializeObj[this.name]){
                if($.isArray(serializeObj[this.name])){
                    serializeObj[this.name].push(this.value);
                }else{
                    serializeObj[this.name]=[serializeObj[this.name],this.value];
                }
            }else{
                serializeObj[this.name]=this.value;
            }
        });
        return serializeObj;
    };

	$(function(){
		/* 为查询按钮绑定事件 */
		$("#btn").click(function(){
			//将指定的form表单中所有的输入项转为json数据{key:value,key:value}
			var p = $("#searchForm").serializeJson();
			console.info(p);
			//调用数据表格的load方法,重新发送一次ajax请求,并且提交参数
			$("#grid").datagrid("load",p); --->重新加载页面、并且将p数据提交
			//关闭查询窗口
			$("#searchWindow").window("close");
		});
easyui的combotree
*需要的数据格式是有一定要求的
*使用hibernate加载时一定要将set集合的懒加载去掉。
*valueField:'id',textField:'text' 可以不写。children为指定的。
$("#cc").combotree("loadData",[{
    id:1,
    text:"Languages",
    children:[{
        id:11,
        text:"java"
        },{
        id:12,
        text:"c++"
    }]
}]);
页面中初始化
<input class="easyui-combotree" name="parentFunction.id" data-options="url:'functionAction_listajax.action'" style="width:170px;"/>


 182
182

 被折叠的 条评论
为什么被折叠?
被折叠的 条评论
为什么被折叠?
 到【灌水乐园】发言


