


 本文介绍了如何在SpringBoot项目中使用Swagger UI进行API文档的生成与展示。首先创建父模块和子模块,配置父模块pom.xml,然后在子模块pom.xml中指定父模块依赖。接着展示demo-user子模块的目录结构,并详细说明了启动类DemoUserApplication和Swagger2配置类的代码。通过正确的配置,可以在本地启动项目后通过http://localhost:8080/swagger-ui.html访问Swagger UI界面。
1.首先创建父模块,在父模块上右击新建子模块
这个请参考这位大神~~~~https://blog.youkuaiyun.com/zcf980/article/details/83040029
下面是我新建完成之后的项目

2.父模块的pom.xml
<?xml version="1.0" encoding="UTF-8"?>
<project xmlns="http://maven.apache.org/POM/4.0.0" xmlns:xsi="http://www.w3.org/2001/XMLSchema-instance"
xsi:schemaLocation="http://maven.apache.org/POM/4.0.0 http://maven.apache.org/xsd/maven-4.0.0.xsd">
<modelVersion>4.0.0</modelVersion>
<parent>
<groupId>org.springframework.boot</groupId>
<artifactId>spring-boot-starter-parent</artifactId>
<version>1.3.3.RELEASE</version>
</parent>
<modules></modules>
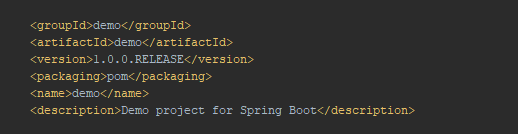
<groupId>demo</groupId>
<artifactId>demo</artifactId>
<version>1.0.0.RELEASE</version>
<packaging>pom</packaging>
<name>demo</name>
<description>Demo project for Spring Boot</description>
<properties>
<java.version>1.8</java.version>
</properties>
<dependencies>
<dependency>
<groupId>org.springframework.boot</groupId>
<artifactId>spring-boot-starter</artifactId>
</dependency>
<dependency>
<groupId>org.springframework.boot</groupId>
<artifactId>spring-boot-starter-test</artifactId>
<scope>test</scope>
</dependency>
<dependency>
<groupId>io.springfox</groupId>
<artifactId>springfox-swagger2</artifactId>
<version>2.6.1</version>
</dependency>
<dependency>
<groupId>io.springfox</groupId>
<artifactId>springfox-swagger-ui</artifactId>
<version>2.6.1</version>
</dependency>
<!-- https://mvnrepository.com/artifact/org.slf4j/slf4j-log4j12 -->
<dependency>
<groupId>org.slf4j</groupId>
<artifactId>slf4j-log4j12</artifactId>
<version>1.7.21</version>
</dependency>
<!-- https://mvnrepository.com/artifact/log4j/log4j -->
<dependency>
<groupId>log4j</groupId>
<artifactId>log4j</artifactId>
<version>1.2.17</version>
</dependency>
</dependencies>
<build>
<plugins>
<plugin>
<groupId>org.springframework.boot</groupId>
<artifactId>spring-boot-maven-plugin</artifactId>
</plugin>
</plugins>
</build>
</project>尤其要注意这边一定要正确,这个是group ID相当于父模块的名字,之后子模块要去找这个名字并依赖
3.子模块的pom.xml
<?xml version="1.0" encoding="UTF-8"?>
<project xmlns="http://maven.apache.org/POM/4.0.0" xmlns:xsi="http://www.w3.org/2001/XMLSchema-instance"
   xsi:schemaLocation="http://maven.apache.org/POM/4.0.0 http://maven.apache.org/xsd/maven-4.0.0.xsd">
   <modelVersion>4.0.0</modelVersion>

    <groupId>demo</groupId>
    <artifactId>demo-user</artifactId>
    <version>1.0.0.RELEASE</version>
    <name>demo-user</name>

   <parent>
      <groupId>demo</groupId>
      <artifactId>demo</artifactId>
      <version>1.0.0.RELEASE</version>
      <relativePath>../pom.xml</relativePath> <!-- lookup parent from repository -->
   </parent>


   <description>Demo project for Spring Boot</description>

   <properties>
      <java.version>1.8</java.version>
   </properties>

   <dependencies>
      <dependency>
         <groupId>org.springframework.boot</groupId>
         <artifactId>spring-boot-starter-data-jpa</artifactId>
            <version>2.0.5.RELEASE</version>
      </dependency>
      <dependency>
         <groupId>org.springframework.boot</groupId>
         <artifactId>spring-boot-starter-web</artifactId>
      </dependency>

      <dependency>
         <groupId>mysql</groupId>
         <artifactId>mysql-connector-java</artifactId>
            <version>5.1.25</version>
         <scope>runtime</scope>
      </dependency>

      <dependency>
         <groupId>org.springframework.boot</groupId>
         <artifactId>spring-boot-starter-test</artifactId>
      </dependency>
      <dependency>
         <groupId>io.springfox</groupId>
         <artifactId>springfox-swagger2</artifactId>
         <version>2.6.1</version>
      </dependency>

      <dependency>
         <groupId>io.springfox</groupId>
         <artifactId>springfox-swagger-ui</artifactId>
         <version>2.6.1</version>
      </dependency>
   </dependencies>

   <build>
      <plugins>
         <plugin>
            <groupId>org.springframework.boot</groupId>
            <artifactId>spring-boot-maven-plugin</artifactId>
         </plugin>
      </plugins>
   </build>

</project>
大家注意看这里
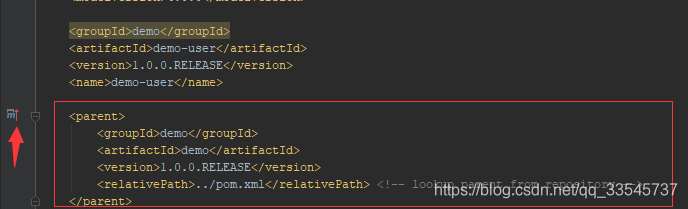
红框的就是子模块依赖的父亲,箭头指向的那个图标说明可以找到父模块。
4.demo-user下的目录结构

在swagger上显示只需要DemoUserApplication(启动类)和Swagger2这两个类
5.DemoUserApplication(启动类)和Swagger2的代码
DemoUserApplication(启动类)记得一定要加注解!!!注解所依赖的包已经在pom.xml的依赖引入,选择自己需要的即可
package com.jit;

import org.springframework.boot.SpringApplication;
import org.springframework.boot.autoconfigure.EnableAutoConfiguration;
import org.springframework.boot.autoconfigure.SpringBootApplication;
import org.springframework.boot.autoconfigure.jdbc.DataSourceAutoConfiguration;
import org.springframework.context.annotation.ComponentScan;
@ComponentScan(basePackages = "com.jit")
@EnableAutoConfiguration(exclude={DataSourceAutoConfiguration.class})
@SpringBootApplication
public class DemoUserApplication {

   public static void main(String[] args) {
      SpringApplication.run(DemoUserApplication.class, args);
   }

}
Swagger2
package com.jit;

import org.springframework.context.annotation.Bean;
import org.springframework.context.annotation.Configuration;
import springfox.documentation.builders.ApiInfoBuilder;
import springfox.documentation.builders.PathSelectors;
import springfox.documentation.builders.RequestHandlerSelectors;
import springfox.documentation.service.ApiInfo;
import springfox.documentation.spi.DocumentationType;
import springfox.documentation.spring.web.plugins.Docket;
import springfox.documentation.swagger2.annotations.EnableSwagger2;

/**
 * Created by Mengyuan.Yu on 2019/1/16.
 */
@Configuration
@EnableSwagger2
public class Swagger2 {

    @Bean
    public Docket createRestApi() {
        return new Docket(DocumentationType.SWAGGER_2)
                .apiInfo(apiInfo())
                .select()
                .apis(RequestHandlerSelectors.basePackage("com.jit"))
                .paths(PathSelectors.any())
                .build();
    }

    private ApiInfo apiInfo() {
        return new ApiInfoBuilder()
                .title("demo")
                .description("demo")
                .termsOfServiceUrl("http://localhost/")
                .contact("demo")
                .version("1.0")
                .build();
    }

}
注意!!!!!

这边一定要写正确
6.debug项目在swagger显示

表示启动成功
在浏览器输入http://localhost:8080/swagger-ui.html(默认8080)
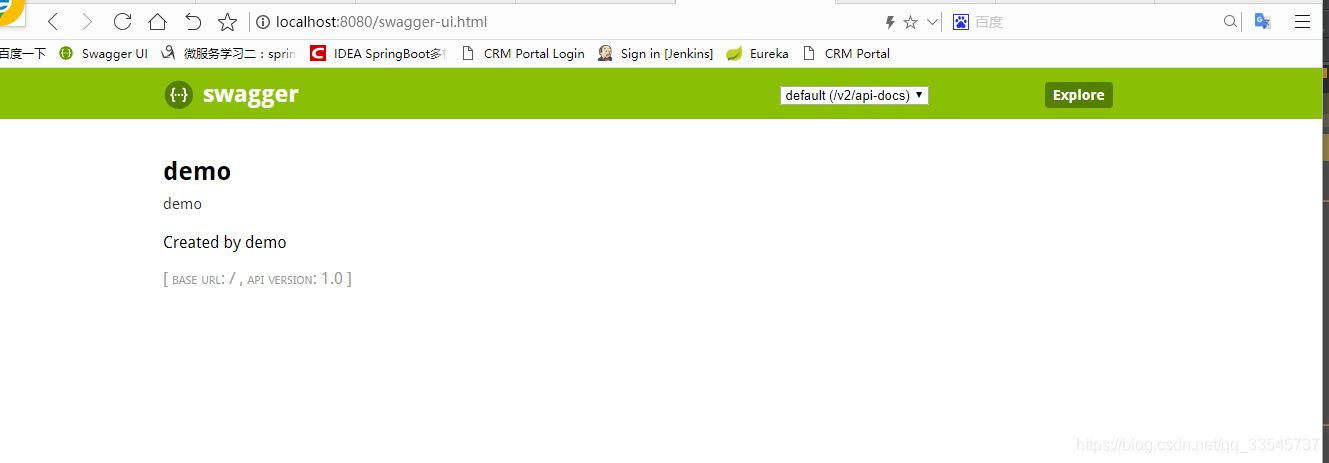
可以啦!!!!!!!!


 745
745

 被折叠的 条评论
为什么被折叠?
被折叠的 条评论
为什么被折叠?
 到【灌水乐园】发言


