


在网上找了份源码,下载回来以后打开工程全是全是问题,都是一些版本的问题,其中最恶心的就是这些依赖库都没法连接,包括google() jcenter()等国外的库。一开始尝试使用阿里的托管库,多次尝试,并没用,最后找到了这个方法,分享给大家。
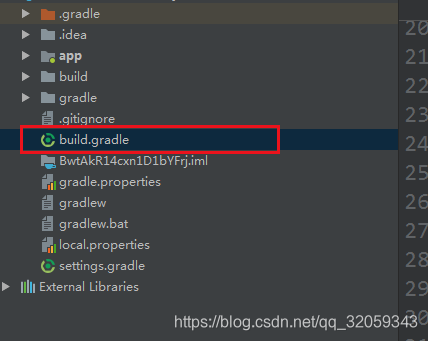
贴上整个project的bulild.gradle文件:
// Top-level build file where you can add configuration options common to all sub-projects/modules.

buildscript {

    repositories {
        //google()
        //jcenter()
        //maven{ url'http://maven.aliyun.com/nexus/content/groups/public/' }
        //maven{ url'http://maven.aliyun.com/nexus/content/repositories/jcenter'}
        jcenter(){url 'http://jcenter.bintray.com/'}
        //maven{url 'http://maven.aliyun.com/nexus/content/repositories/central'}
        //google(){url 'https://maven.aliyun.com/repository/google/'}
        maven { url 'https://dl.google.com/dl/android/maven2/' }
    }
    dependencies {
        classpath 'com.android.tools.build:gradle:3.0.0'

        // NOTE: Do not place your application dependencies here; they belong
        // in the individual module build.gradle files
    }
}

allprojects {
    repositories {
        //google()
        //maven{ url'http://maven.aliyun.com/nexus/content/groups/public/' }
        //maven{ url'http://maven.aliyun.com/nexus/content/repositories/jcenter'}
        //maven{url 'http://maven.aliyun.com/nexus/content/repositories/central'}
        jcenter(){url 'http://jcenter.bintray.com/'}
        maven { url 'https://dl.google.com/dl/android/maven2/' }
    }
}

task clean(type: Delete) {
    delete rootProject.buildDir
}
其中第一个是依赖的jcenter库,如果直接写为jcenter()是不好用的,等半天结果是连接超时,使用阿里的库也是一样,然后找了半天,亲测这个url好用。后面一个便是google()的库,同样,直接写google()也是超时,阿里的也不好使。不过上面那个好用,但是先需要一些配置。
原贴来自这里,感谢作者的分享:
https://bushrose.github.io/compile/
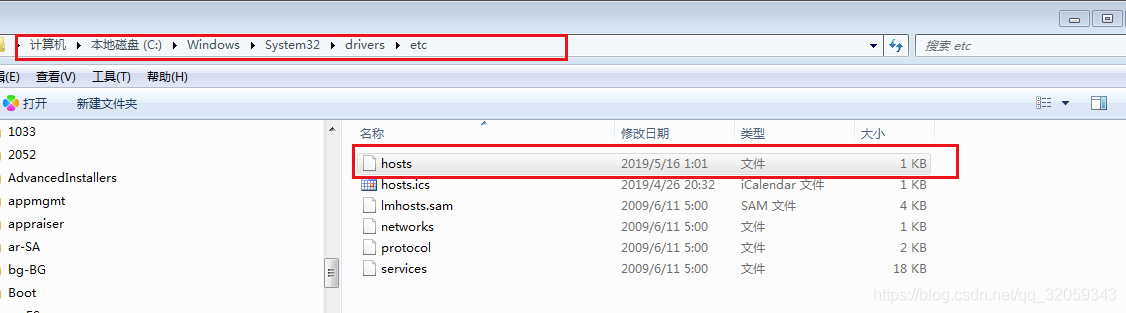
- 打开站长工具网站,http://ping.chinaz.com/dl.google.com

- 找到 ping测试,输入dl.google.com,执行ping测试

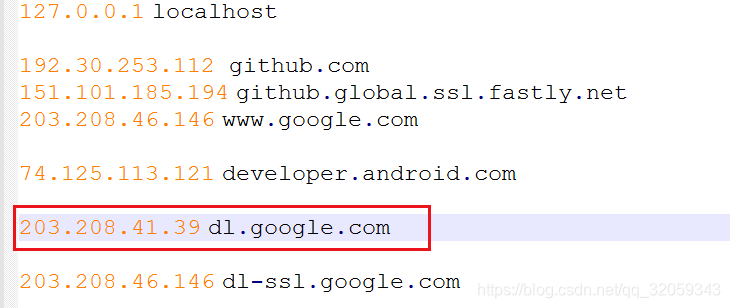
- 网页往下翻,随便拿到个ip地址,如20208.41.39

- 修改host文件,windows进入C:\Windows\System32\drivers\etc,打开host文件,在文件最末尾加入203.208.41.39 dl.google.com
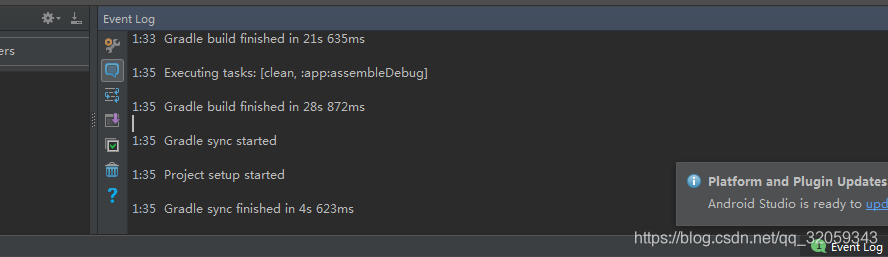
工程编译成功:
-
Butterknife zelezny无法在setting中直接下载:
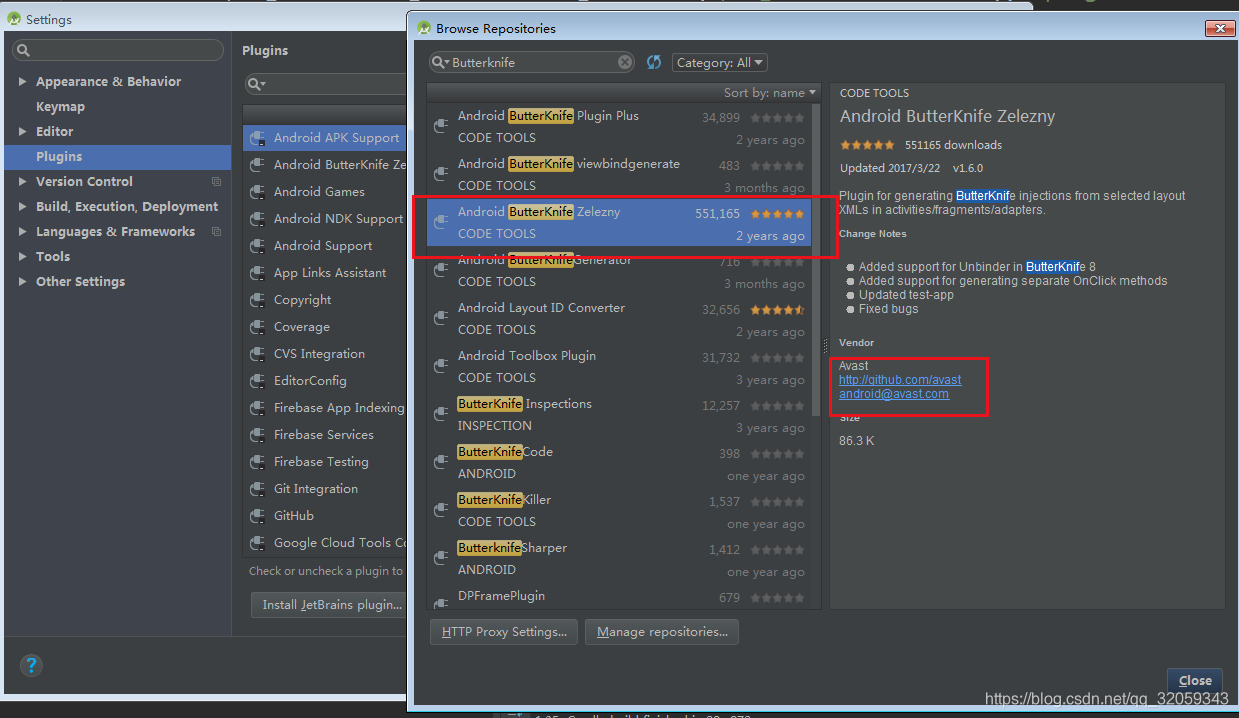
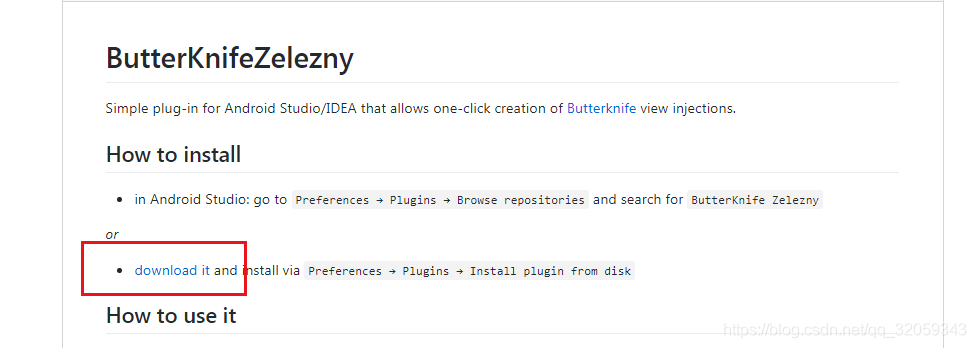
其中亲测好使的办法是在Setting中的页面上提供的github地址下载离线安装包: 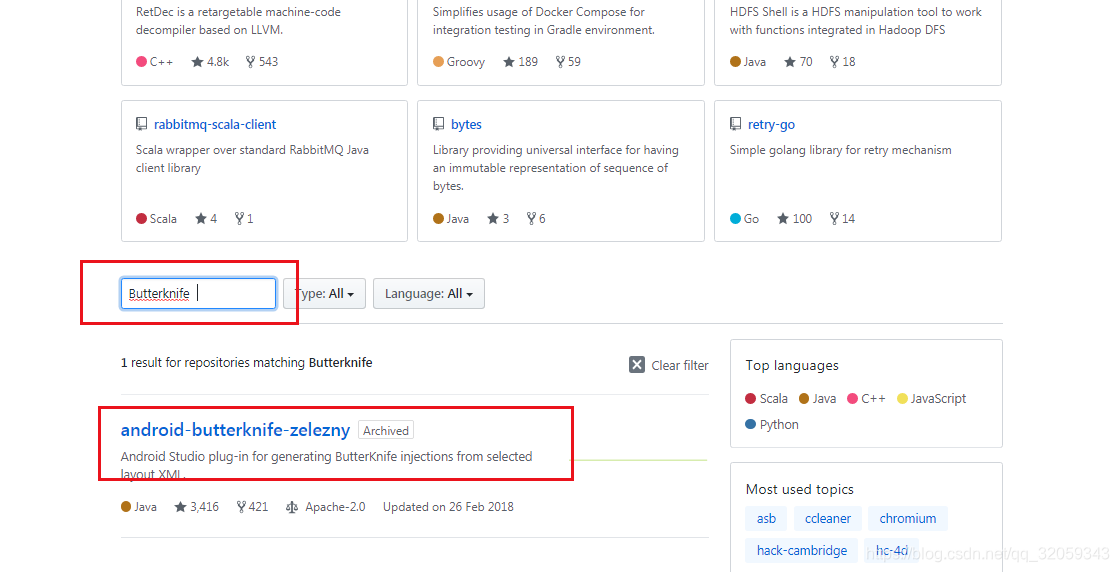
在DownLoad it中找想要的安装包:
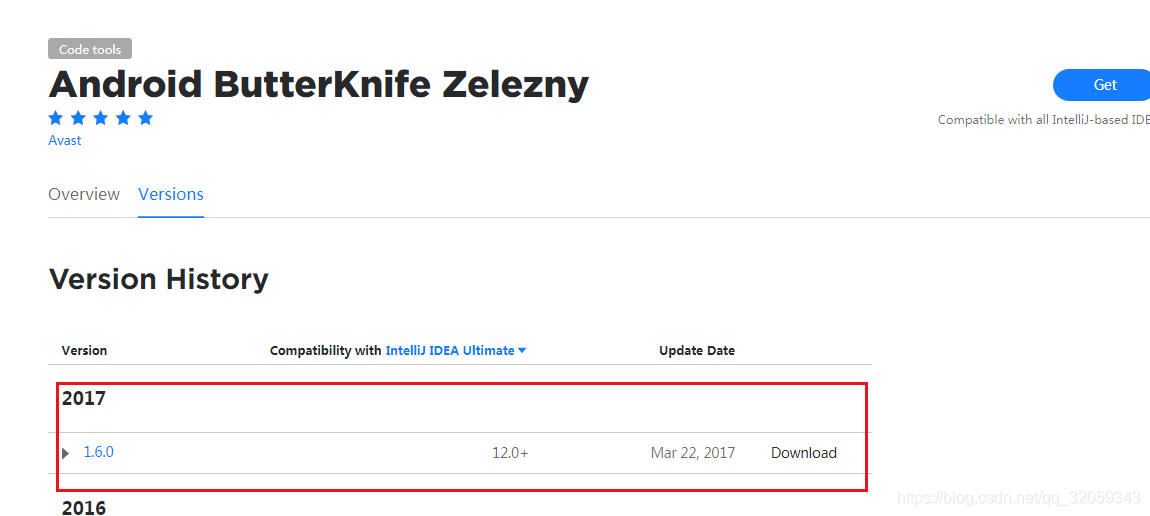
本人下载的最新版本,网上之前都说Android studio3.0与这个插件不兼容,不过设置好build.gradle是可以用的:
如下文件配置如下三行:


apply plugin: 'com.android.application'
android {
compileSdkVersion 27
defaultConfig {
applicationId "com.android.testdemo"
minSdkVersion 19
targetSdkVersion 27
versionCode 1
versionName "1.0"
testInstrumentationRunner "android.support.test.runner.AndroidJUnitRunner"
}
buildTypes {
release {
minifyEnabled false
proguardFiles getDefaultProguardFile('proguard-android.txt'), 'proguard-rules.pro'
}
}
}
dependencies {
implementation fileTree(include: ['*.jar'], dir: 'libs')
implementation 'com.android.support:appcompat-v7:27.1.1'
compile 'com.android.support:support-v4:27.1.1'
compile 'com.android.support:recyclerview-v7:27.1.1'
compile 'com.android.support:support-annotations:27.1.1'
implementation 'com.android.support.constraint:constraint-layout:1.1.0'
testImplementation 'junit:junit:4.12'
androidTestImplementation 'com.android.support.test:runner:1.0.2'
androidTestImplementation 'com.android.support.test.espresso:espresso-core:3.0.2'
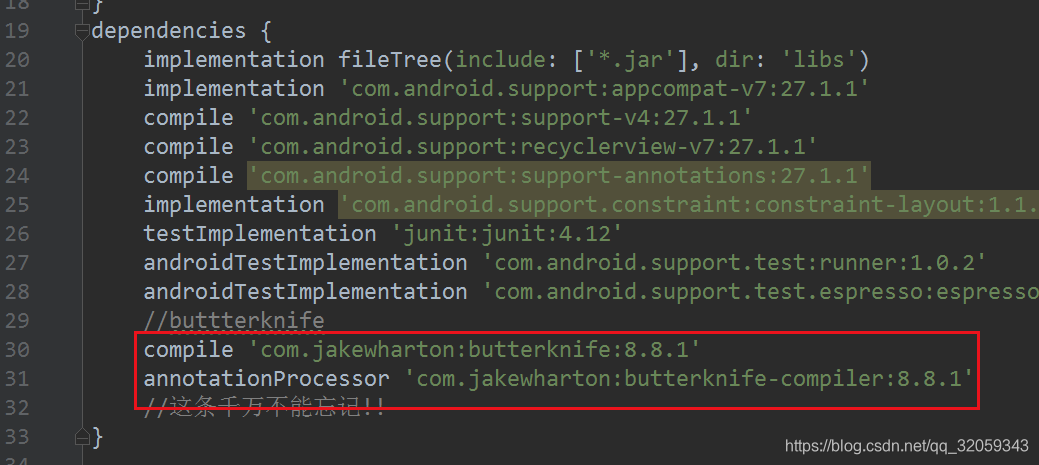
//buttterknife
compile 'com.jakewharton:butterknife:8.8.1'
annotationProcessor 'com.jakewharton:butterknife-compiler:8.8.1'
//这条千万不能忘记!!
}
然后鼠标放在R.id上,右键可以看到:
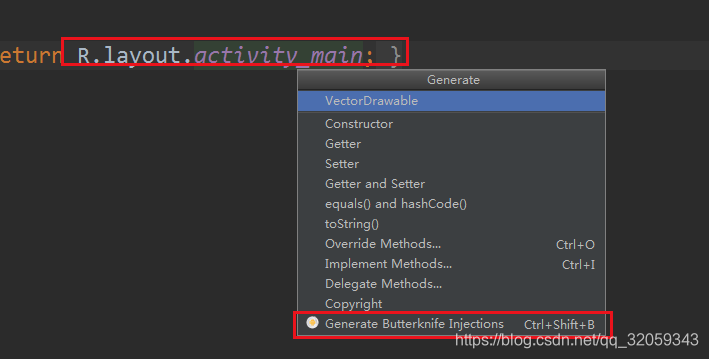
有最后一个框框表示安装成功了。
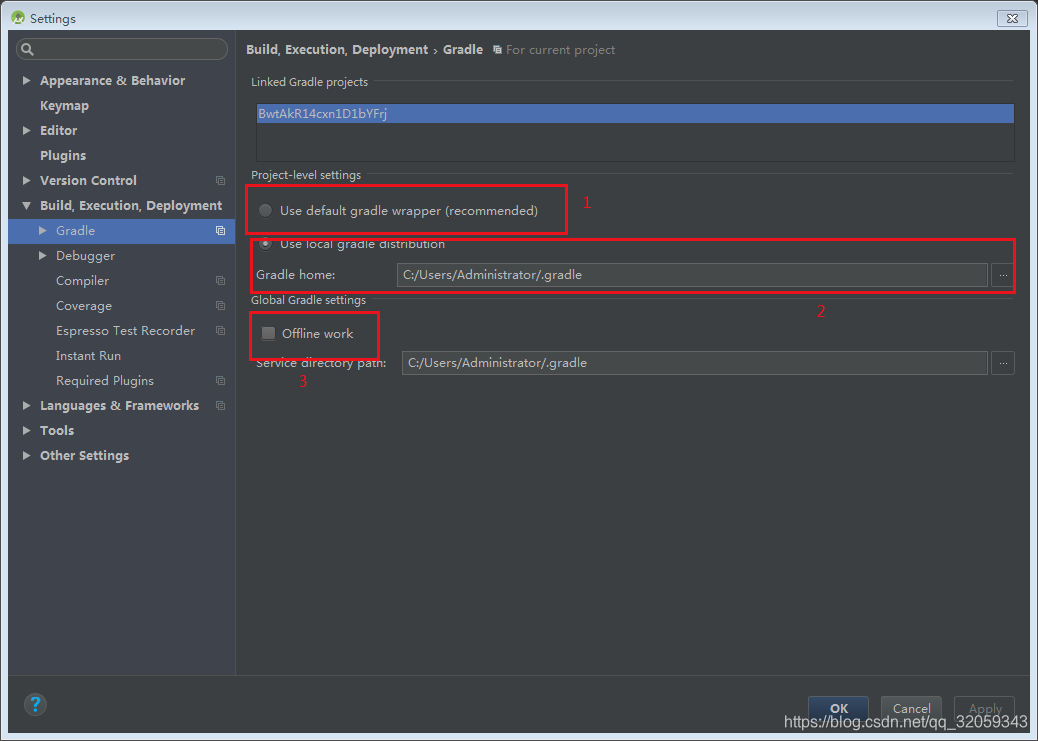
最后还有一点,如果在打开工程时,设置的不是指定Gradle,而是下面的红框1,很有可能卡死,因为软件会去库中下载匹配的版本,而网速很慢或者压根用不了。所以一般都是下载离线的Gradle包,放在指定文件夹中。离线Gradle包要放在如下文件夹中,不需要解压:
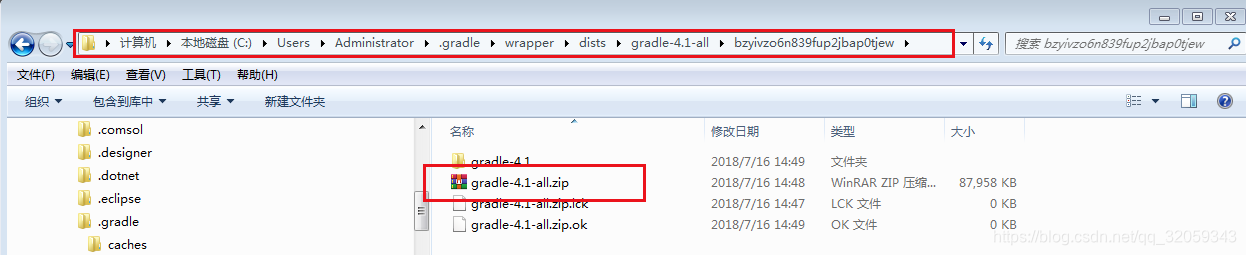
C:\Users\Administrator\.gradle\wrapper\dists\gradle-4.1-all\bzyivzo6n839fup2jbap0tjew;然后下图中红框2是不能设置到上述文件夹下,如果这么设置是不好使的,没法找到这个离线包,指定路径应该如下图所示。红框3中网上有教程在针对无法联网获得库是让勾选Offline work,亲测能编译通过,不过还是觉得不太对劲,所以还是不推荐,还是本文一开始提出的方法靠谱。
最后附二张SDK Manger的图,可能用的上:
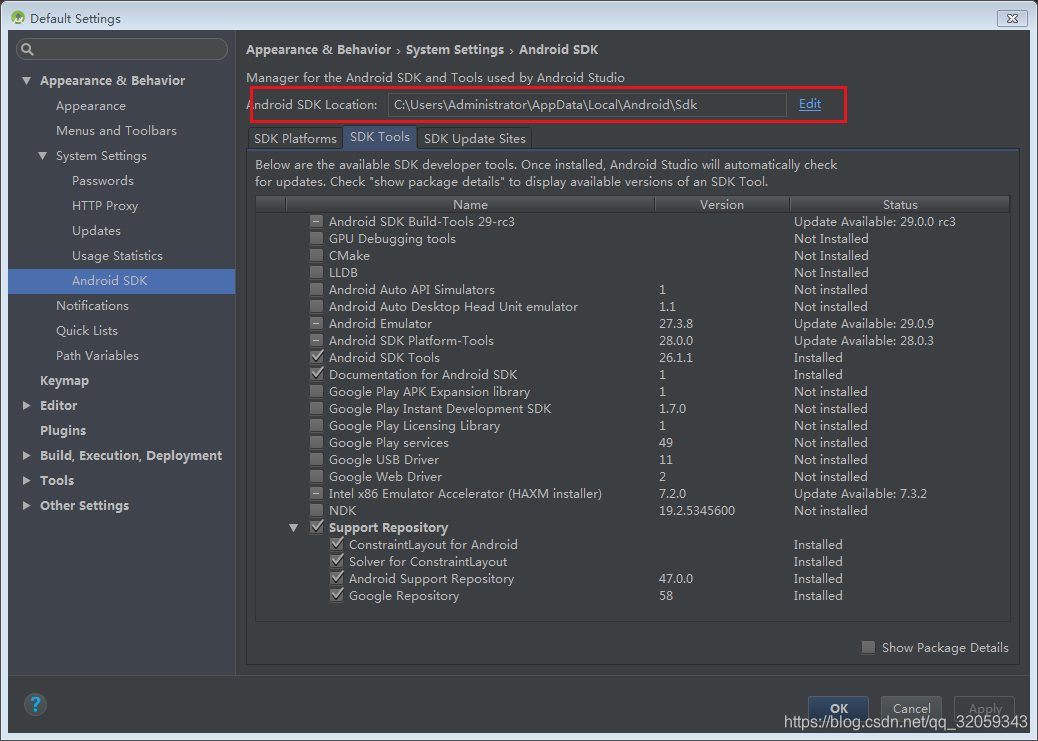
添加了一些国内的镜像库,不知道有没有起作用。


 2036
2036

 被折叠的 条评论
为什么被折叠?
被折叠的 条评论
为什么被折叠?
 到【灌水乐园】发言


