


概述
本系列文章从0开始学习光线追踪,参考资料为光线追踪三部曲:
1.Ray Tracing in One Weekend
2.Ray Tracing: The Next Week
3.Ray Tracing: The Rest of Your Life
记录并翻译部分内容。
Ray Tracing in One Weekend 概述
总共分为以下几章节内容:
一.内容
二.输出一张图片
三.向量类的定义
四.光线,一个简单的相机,和背景
五.添加一个球体
六.法线与多个物体
七.反走样
八.漫反射材质
九.金属
十.介质
十一.相机移动
十二.焦散模糊
十三.下一章
[One Weekend 内容(一)]
略 这里简单介绍了Ray Tracing
[One Weekend 输出一张图片(二)]
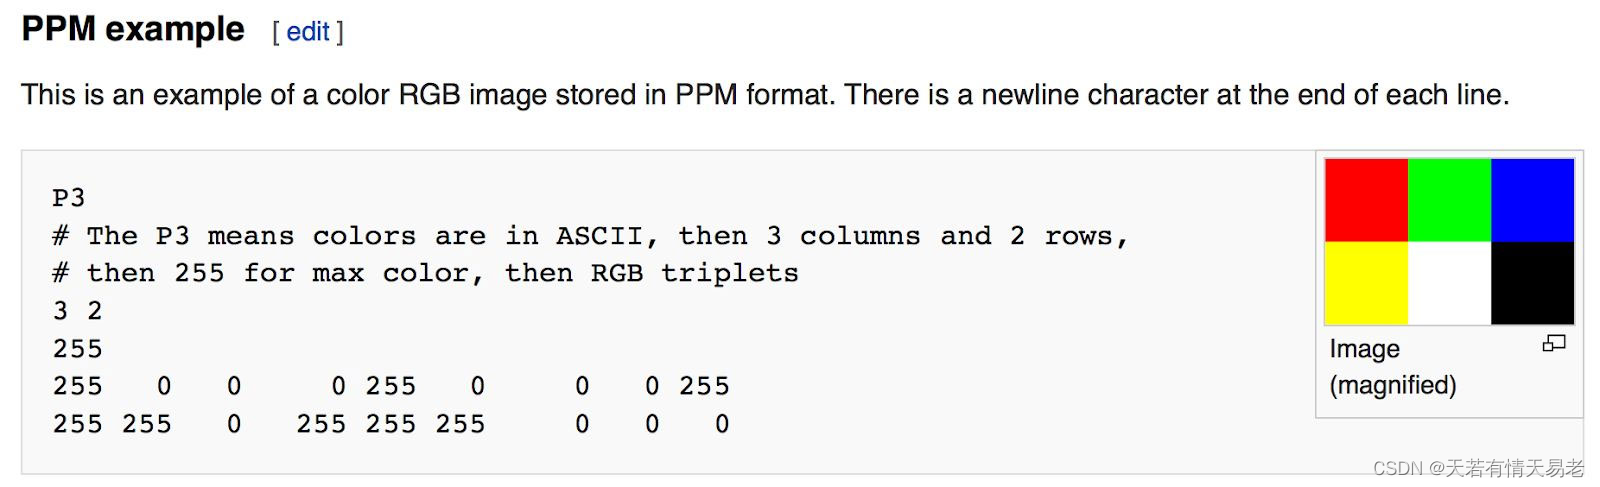
2.1.PPM格式
我们开始渲染的时候,需要看到渲染的结果。最直接的方式是把结果写道文件中。我们用ppm图片来存储渲染结果。以下是PPM的描述。
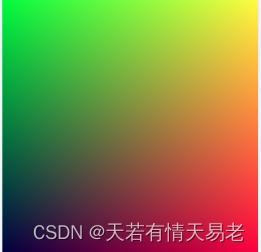
代码:以下代码输出一张256 * 256 像素的内容,如果想要输出图片
#include <iostream>
int main() {
    // Image
    const int image_width = 256;
    const int image_height = 256;
    // Render
    std::cout << "P3\n" << image_width << ' ' << image_height << "\n255\n";

    for (int j = image_height-1; j >= 0; --j) {
        for (int i = 0; i < image_width; ++i) {
            auto r = double(i) / (image_width-1);
            auto g = double(j) / (image_height-1);
            auto b = 0.25;
            int ir = static_cast<int>(255.999 * r);
            int ig = static_cast<int>(255.999 * g);
            int ib = static_cast<int>(255.999 * b);
            std::cout << ir << ' ' << ig << ' ' << ib << '\n';
        }
    }
}
需要说明的几个点:
1.左上角为(0, 0)点
2.为了方便,红/绿/蓝的范围是0.0~1.0.我们后续有可能会引入HDR,但是目前我们不会做什么改变
2.2.输出一张图片
上述的C++代码其实是在命令行输出字符串,怎么做才能输出图片呢?
答案:执行的时候加上 >> 命令 或者 > 命令
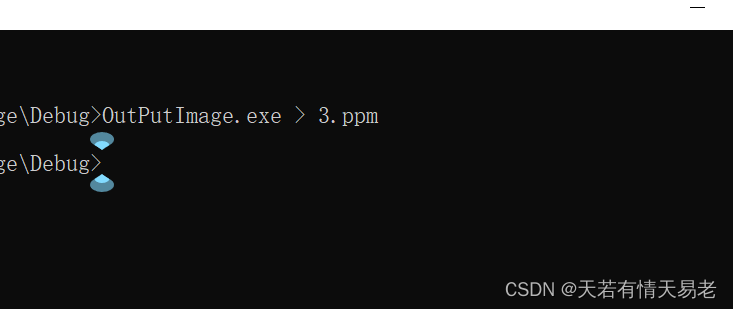
输出结果:
2.3添加进度指标
我们的图片使用标准的std::cout,所以我们用std::cerr输出进度信息
for (int j = image_height - 1; j >= 0; --j) {
    std::cerr << "\rScanlines remaining: " << j << ' ' << std::flush;
    for (int i = 0; i < image_width; ++i) {
        auto r = double(i) / (image_width - 1);
        auto g = double(j) / (image_height - 1);
        auto b = 0.25;
        int ir = static_cast<int>(255.999 * r);
        int ig = static_cast<int>(255.999 * g);
        int ib = static_cast<int>(255.999 * b);
        std::cout << ir << ' ' << ig << ' ' << ib << '\n';
    }
}
[One Weekend 向量(三)]
我们需要一些类来存储几何向量,位置,颜色。在很多系统中,这些向量是4D的(一般情况下我们用齐次坐标表示,颜色(RGBA)有ALPHA项,代表透明度,也是4D)。但是目前对于我们来讲3D的坐标就够用了。我们用Vec3不光能用来表示向量,也能用来表示颜色
3.1变量和方法
数据的定义double或者float都是可以的,全看个人喜好
#ifndef VEC3_H
#define VEC3_H

#include <cmath>
#include <iostream>

using std::sqrt;

class vec3 {
    public:
        vec3() : e{0,0,0} {}
        vec3(double e0, double e1, double e2) : e{e0, e1, e2} {}

        double x() const { return e[0]; }
        double y() const { return e[1]; }
        double z() const { return e[2]; }

        vec3 operator-() const { return vec3(-e[0], -e[1], -e[2]); }
        double operator[](int i) const { return e[i]; }
        double& operator[](int i) { return e[i]; }

        vec3& operator+=(const vec3 &v) {
            e[0] += v.e[0];
            e[1] += v.e[1];
            e[2] += v.e[2];
            return *this;
        }
        vec3& operator*=(const double t) {
            e[0] *= t;
            e[1] *= t;
            e[2] *= t;
            return *this;
        }
        vec3& operator/=(const double t) {
            return *this *= 1/t;
        }
        double length() const {
            return sqrt(length_squared());
        }
        double length_squared() const {
            return e[0]*e[0] + e[1]*e[1] + e[2]*e[2];
        }
    public:
        double e[3];
};
// Type aliases for vec3
using point3 = vec3;   // 3D point
using color = vec3;    // RGB color
#endif
3.2 Vec3的实用函数
// vec3 Utility Functions

inline std::ostream& operator<<(std::ostream &out, const vec3 &v) {
    return out << v.e[0] << ' ' << v.e[1] << ' ' << v.e[2];
}

inline vec3 operator+(const vec3 &u, const vec3 &v) {
    return vec3(u.e[0] + v.e[0], u.e[1] + v.e[1], u.e[2] + v.e[2]);
}

inline vec3 operator-(const vec3 &u, const vec3 &v) {
    return vec3(u.e[0] - v.e[0], u.e[1] - v.e[1], u.e[2] - v.e[2]);
}

inline vec3 operator*(const vec3 &u, const vec3 &v) {
    return vec3(u.e[0] * v.e[0], u.e[1] * v.e[1], u.e[2] * v.e[2]);
}

inline vec3 operator*(double t, const vec3 &v) {
    return vec3(t*v.e[0], t*v.e[1], t*v.e[2]);
}

inline vec3 operator*(const vec3 &v, double t) {
    return t * v;
}

inline vec3 operator/(vec3 v, double t) {
    return (1/t) * v;
}

inline double dot(const vec3 &u, const vec3 &v) {
    return u.e[0] * v.e[0]
         + u.e[1] * v.e[1]
         + u.e[2] * v.e[2];
}

inline vec3 cross(const vec3 &u, const vec3 &v) {
    return vec3(u.e[1] * v.e[2] - u.e[2] * v.e[1],
                u.e[2] * v.e[0] - u.e[0] * v.e[2],
                u.e[0] * v.e[1] - u.e[1] * v.e[0]);
}

inline vec3 unit_vector(vec3 v) {
    return v / v.length();
}
3.3颜色的实用函数
以下方法用来输出一个颜色值
#ifndef COLOR_H
#define COLOR_H

#include "vec3.h"

#include <iostream>

void write_color(std::ostream &out, color pixel_color) {
    // Write the translated [0,255] value of each color component.
    out << static_cast<int>(255.999 * pixel_color.x()) << ' '
        << static_cast<int>(255.999 * pixel_color.y()) << ' '
        << static_cast<int>(255.999 * pixel_color.z()) << '\n';
}
#endif
现在我们可以把Main函数改成下面的样子了。
#include "color.h"
#include "vec3.h"

#include <iostream>

int main() {
    // Image
    const int image_width = 256;
    const int image_height = 256;
    // Render
    std::cout << "P3\n" << image_width << ' ' << image_height << "\n255\n";

    for (int j = image_height-1; j >= 0; --j) {
        std::cerr << "\rScanlines remaining: " << j << ' ' << std::flush;
        for (int i = 0; i < image_width; ++i) {
            color pixel_color(double(i)/(image_width-1), double(j)/(image_height-1), 0.25);
            write_color(std::cout, pixel_color);
        }
    }
    std::cerr << "\nDone.\n";
}
[One Weekend 光线,一个简单的相机,和背景(四)]
4.1 光线的定义
我们定义一个和时间相关的函数P(t)=A+tb t表示时间。P光线上的一个位置(3D).A表示光线的起点。b表示光线的方向。t是一个实数,可以理解为时间t,经过t时间,P(t) 表示光线传输到的位置。
实现光线:
#ifndef RAY_H
#define RAY_H

#include "vec3.h"

class ray {
    public:
        ray() {}
        ray(const point3& origin, const vec3& direction)
            : orig(origin), dir(direction)
        {}
        point3 origin() const  { return orig; }
        vec3 direction() const { return dir; }
        point3 at(double t) const {
            return orig + t*dir;
        }
    public:
        point3 orig;
        vec3 dir;
};
#endif
4.2向场景发射光线
现在我们需要向场景中发射一条光线。分为以下三个步骤:
1.计算从眼睛(相机)到像素(屏幕)的一条光线
2.计算哪个物体和这条光线相交
3.计算交点的颜色。
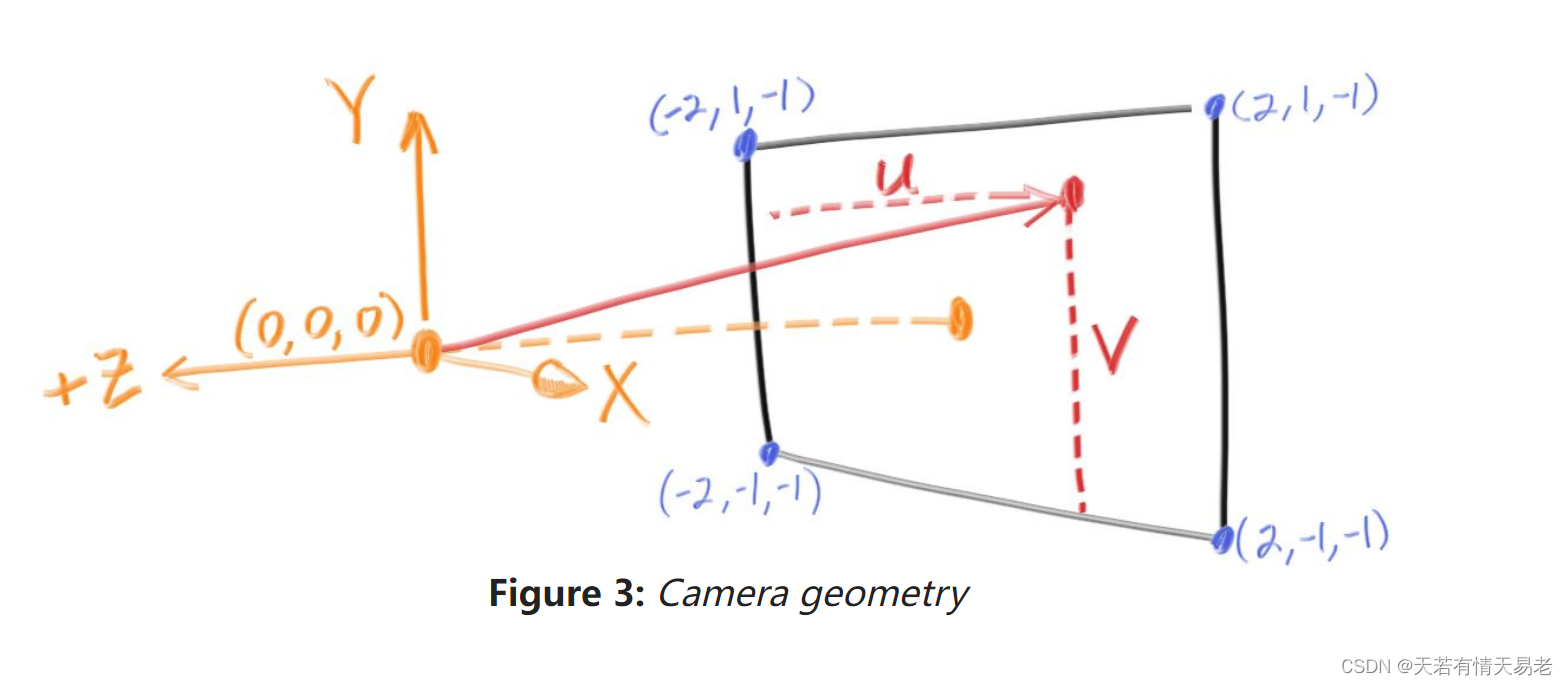
我们现在假设相机在(0, 0, 0)位置,向上方向为Y正方向,向右方向X正方向,负Z方向朝向屏幕里面。我们从屏幕矩阵(可以理解为值为Vec3的二维数组)。在屏幕上找到一个点P(x, y, z). 其中z是固定的。(p-原点).norm() 就是光线的方向。那么我们就能发射一条光线 o + td
#include "color.h"
#include "ray.h"
#include "vec3.h"

#include <iostream>

color ray_color(const ray& r) {
    vec3 unit_direction = unit_vector(r.direction());
    auto t = 0.5*(unit_direction.y() + 1.0);
    return (1.0-t)*color(1.0, 1.0, 1.0) + t*color(0.5, 0.7, 1.0);
}

int main() {
    // Image
    const auto aspect_ratio = 16.0 / 9.0;
    const int image_width = 400;
    const int image_height = static_cast<int>(image_width / aspect_ratio);

    // Camera

    auto viewport_height = 2.0;
    auto viewport_width = aspect_ratio * viewport_height;
    auto focal_length = 1.0;
    auto origin = point3(0, 0, 0);
    auto horizontal = vec3(viewport_width, 0, 0);
    auto vertical = vec3(0, viewport_height, 0);
    auto lower_left_corner = origin - horizontal/2 - vertical/2 - vec3(0, 0, focal_length);
    // Render
    std::cout << "P3\n" << image_width << " " << image_height << "\n255\n";

    for (int j = image_height-1; j >= 0; --j) {
        std::cerr << "\rScanlines remaining: " << j << ' ' << std::flush;
        for (int i = 0; i < image_width; ++i) {
            auto u = double(i) / (image_width-1);
            auto v = double(j) / (image_height-1);
            ray r(origin, lower_left_corner + u*horizontal + v*vertical - origin);
            color pixel_color = ray_color(r);
            write_color(std::cout, pixel_color);
        }
    }

    std::cerr << "\nDone.\n";
}
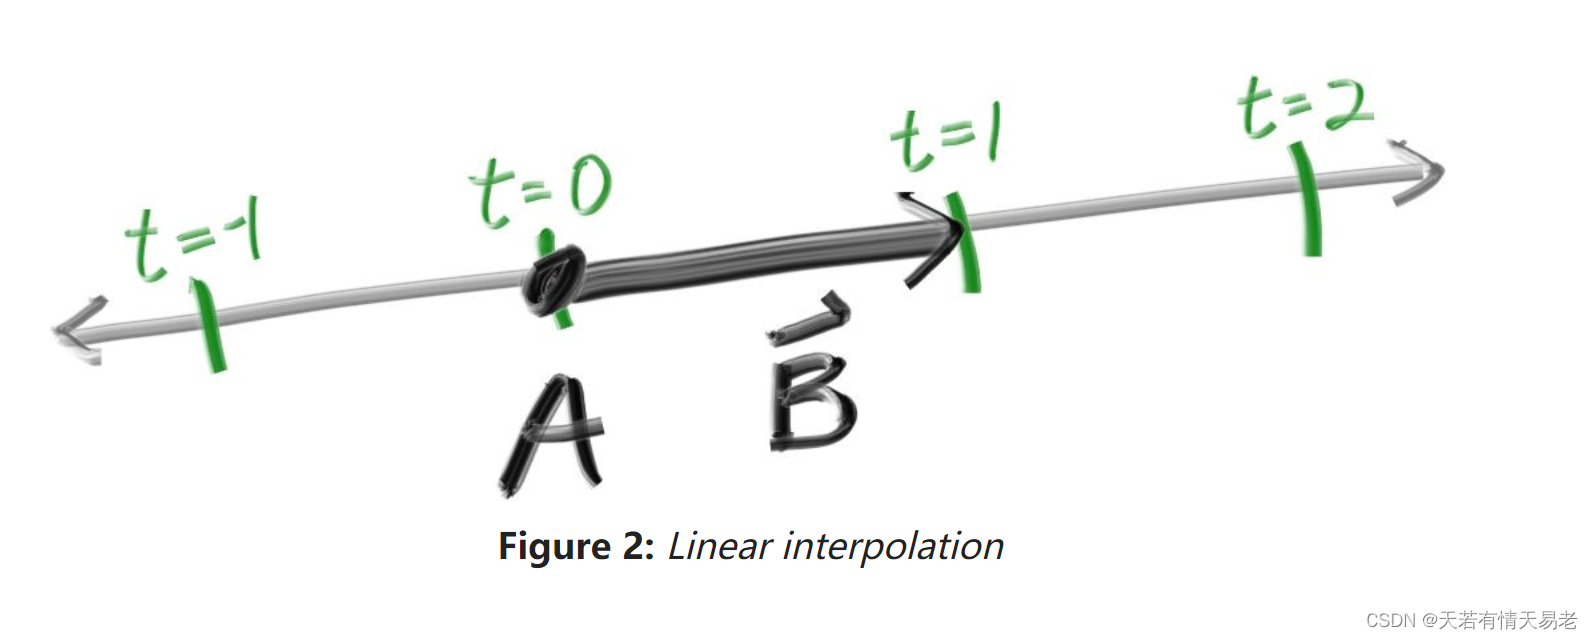
ray_color 函数从白色到蓝色渐变,找个白蓝渐变依赖的是高度变化,也就是三维空间的Y值,再次强调,我们的Y是续向上方向。
blendedValue = (1-t)*startValue + t.endValue;
当t=0的时候是白色,t=1的时候是蓝色。最总我们可以绘制出蓝白色的背景。
[One Weekend 添加一个球体(五)]
让我们来给场景中添加一个物体吧。人们经常使用球体来做光线追踪,因为计算光线是否和球体相交是十分容易的。
5.1光线和球体相交
我们先看一下球体的方程,球体的方程式如下,其中

现在我们用向量的方式表示球体的方程式,如下,C代表球心坐标,P代表球面上的任意一点

也就是:

那么还记得我们的光线是怎么表示的呢

如果光线和球体相交,那么我们一定可以解出有效的时间t,使得

带入后可得:

展开后可得:

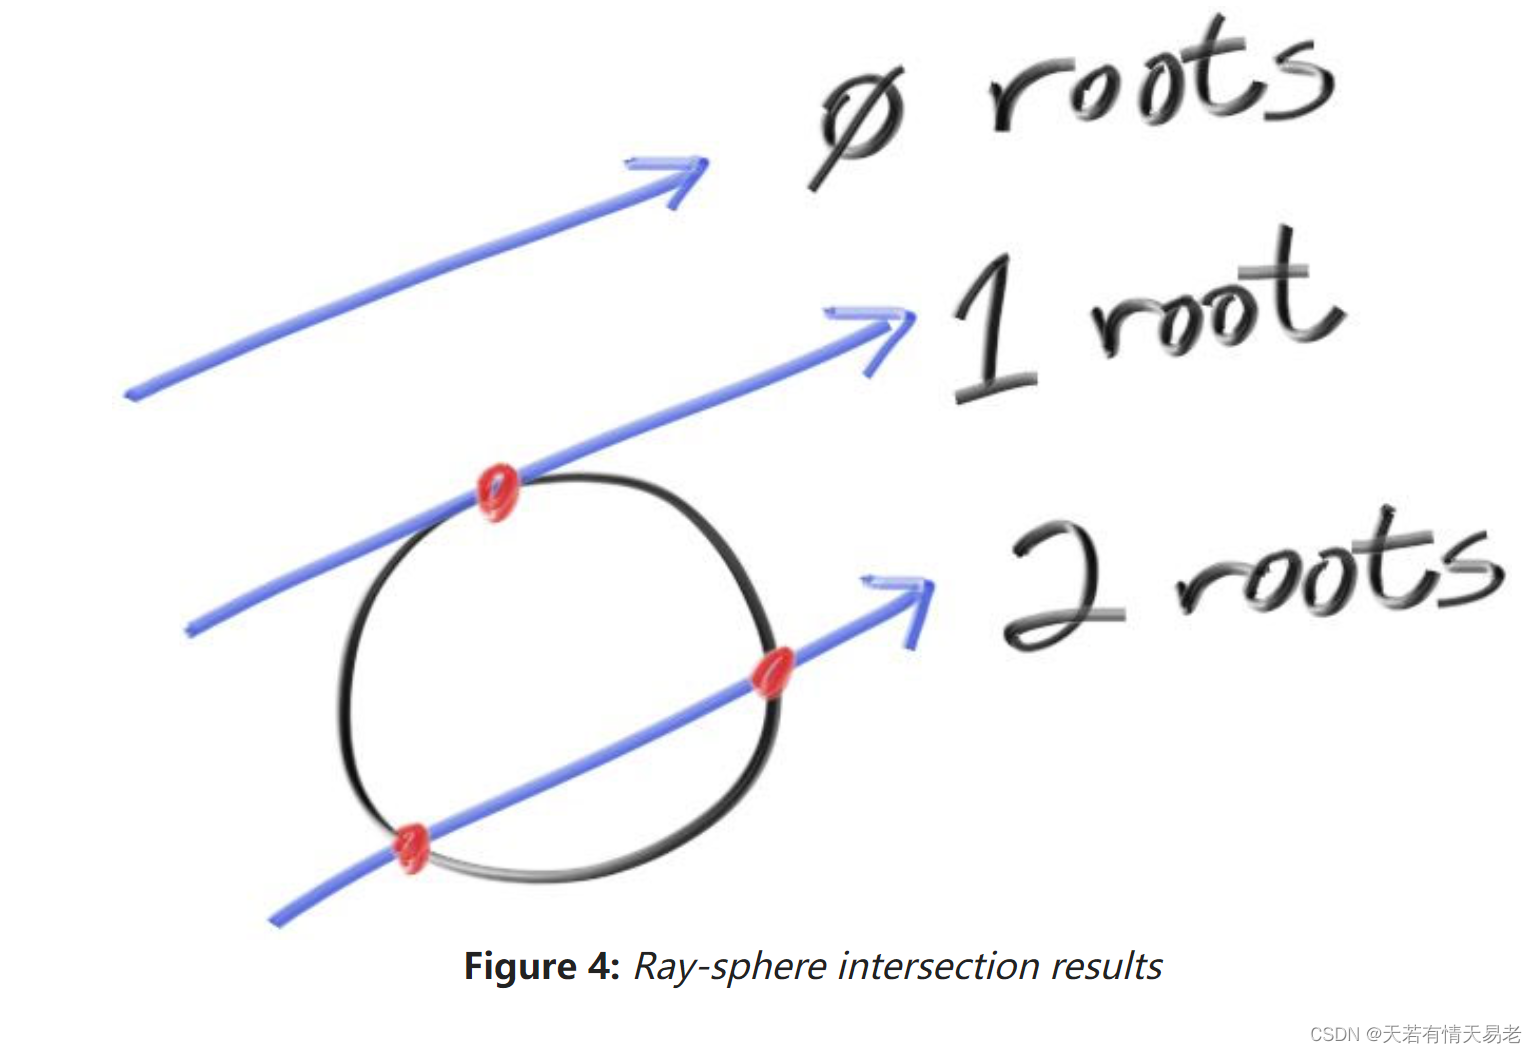
那么上述函数式有三种情况,一种是:
不相交
相切
相交
5.2创建我们第一个光线追踪的图像
计算和光线和球体相交的方法:
bool hit_sphere(const point3& center, double radius, const ray& r) {
    vec3 oc = r.origin() - center;
    auto a = dot(r.direction(), r.direction());
    auto b = 2.0 * dot(oc, r.direction());
    auto c = dot(oc, oc) - radius*radius;
    //这里求解的是t,如果t >0 ,则代表有有效值,光线和球体相交
    auto discriminant = b*b - 4*a*c;
    return (discriminant > 0);
}
渲染球体:
color ray_color(const ray& r) {
    if (hit_sphere(point3(0,0,-1), 0.5, r))
        return color(1, 0, 0);
    vec3 unit_direction = unit_vector(r.direction());
    auto t = 0.5*(unit_direction.y() + 1.0);
    return (1.0-t)*color(1.0, 1.0, 1.0) + t*color(0.5, 0.7, 1.0);
}
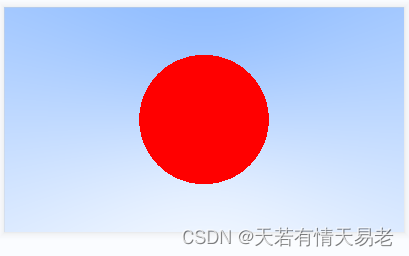
我们的第一个球体渲染出来了。
[One Weekend 表面法线和多个物体(六)]
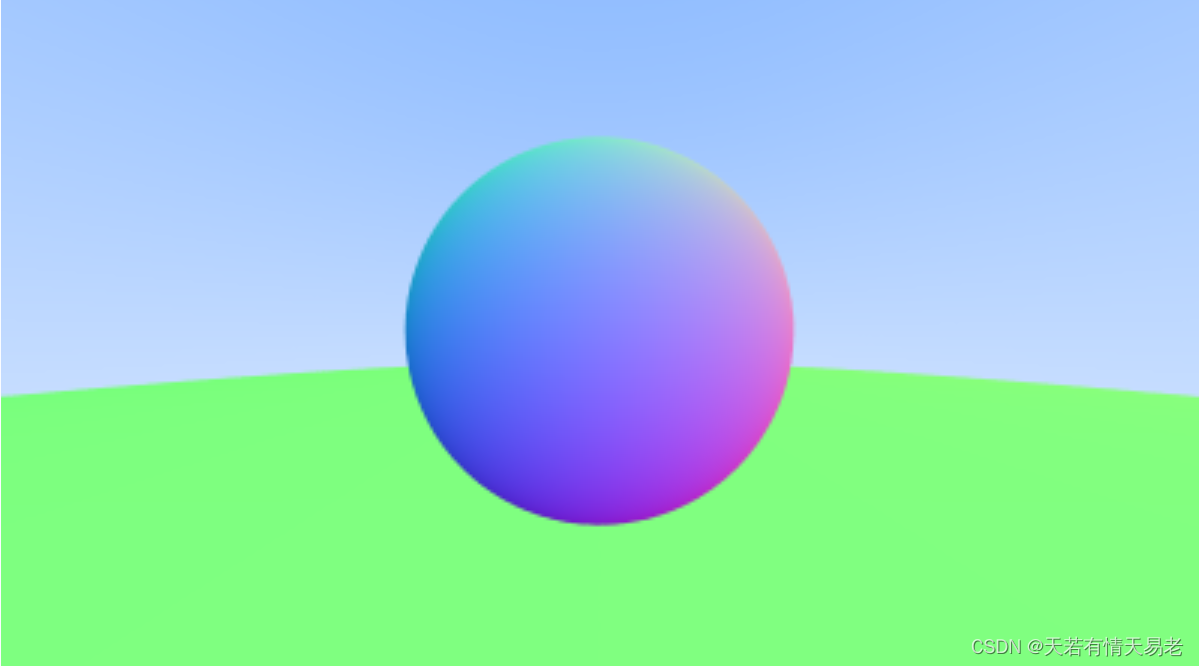
6.1渲染球体的法线
现在,让我们来获取我们表面的法线。法线和是球体表面点垂直的。法线有2个特点:
1.法线是单位向量,这里的意思是向量的长度是1
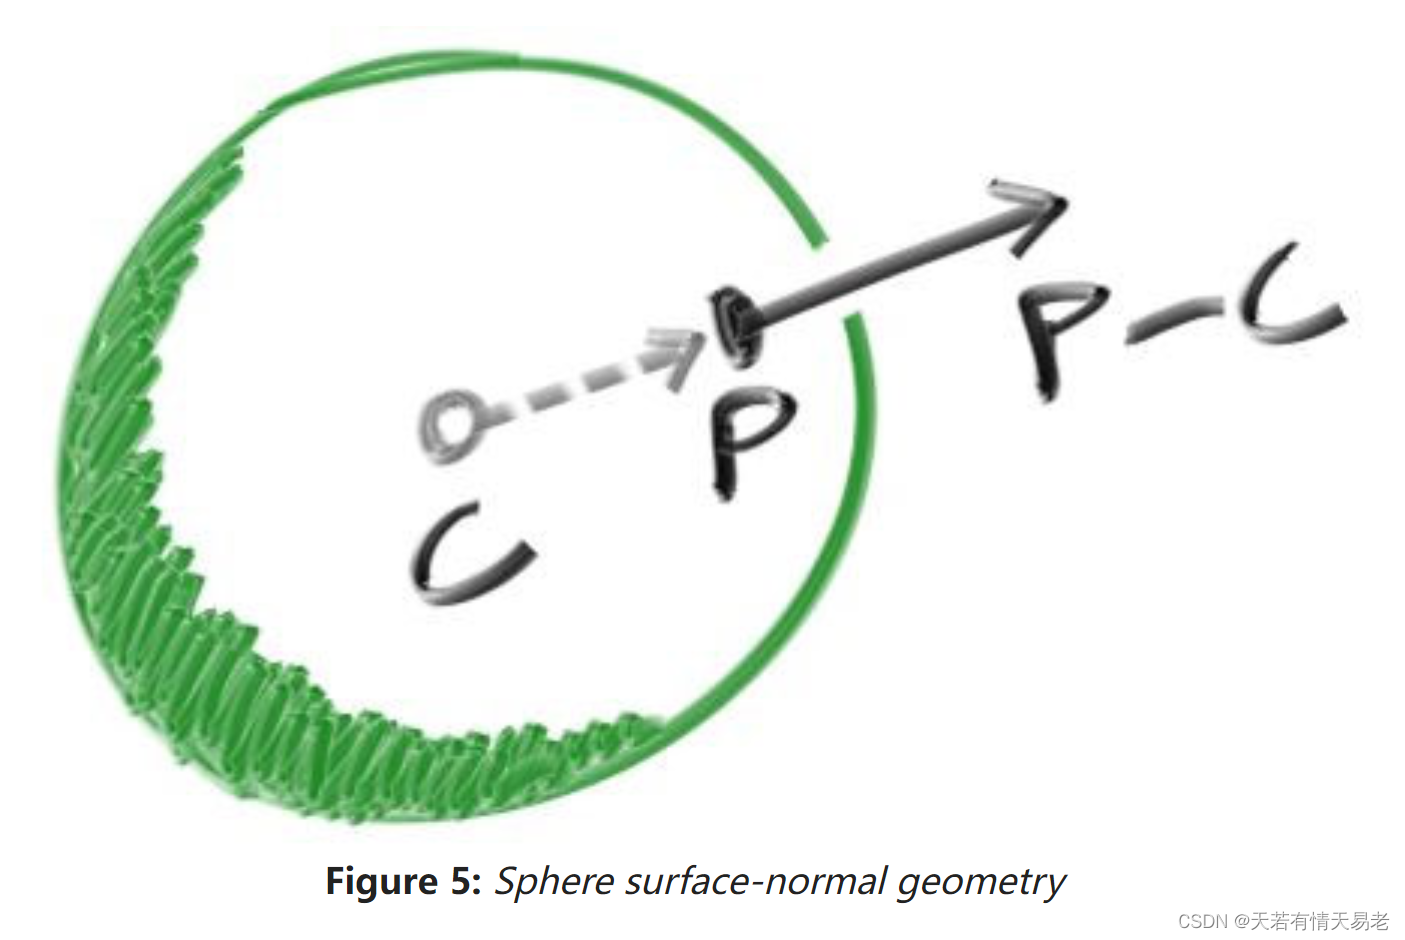
2.对于球体来说,法线方向和,球面上的某一点P减去球体的圆形O的单位向量。现在我们修改一部分代码,将法线渲染出来。
double hit_sphere(const point3& center, double radius, const ray& r) {
    vec3 oc = r.origin() - center;
    auto a = dot(r.direction(), r.direction());
    auto b = 2.0 * dot(oc, r.direction());
    auto c = dot(oc, oc) - radius*radius;
    auto discriminant = b*b - 4*a*c;
    //这个是不相交的请情况
    if (discriminant < 0) {
        return -1.0;
    } else {
    	// 如果相交,我们求取第一个交点的时间t
        return (-b - sqrt(discriminant) ) / (2.0*a);
    }
}
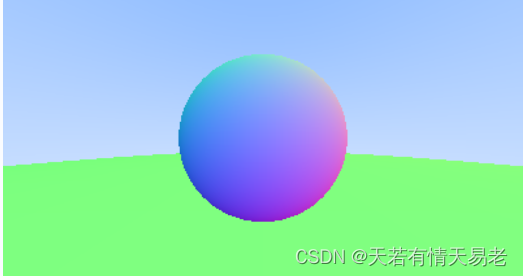
根据给定的时间t,计算法线的颜色。
color ray_color(const ray& r) {
    auto t = hit_sphere(point3(0,0,-1), 0.5, r);
    if (t > 0.0) {
    	//如果相交,根据法线方向计算颜色
        vec3 N = unit_vector(r.at(t) - vec3(0,0,-1));
        return 0.5*color(N.x()+1, N.y()+1, N.z()+1);
    }
    //如果不相交,渲染渐变的颜色
    vec3 unit_direction = unit_vector(r.direction());
    t = 0.5*(unit_direction.y() + 1.0);
    return (1.0-t)*color(1.0, 1.0, 1.0) + t*color(0.5, 0.7, 1.0);
}
6.2简化球体和光线相交的代码
将b=2h带入后,光线和球体相交的代码简化如下
double hit_sphere(const point3& center, double radius, const ray& r) {
    vec3 oc = r.origin() - center;
    auto a = dot(r.direction(), r.direction());
    auto b = 2.0 * dot(oc, r.direction());
    auto c = dot(oc, oc) - radius*radius;
    auto discriminant = b*b - 4*a*c;

    if (discriminant < 0) {
        return -1.0;
    } else {
        return (-b - sqrt(discriminant) ) / (2.0*a);
    }
}
6.3定义相交的抽象算法
我们定义了一个hittable 类,这个类有一个抽象的方法hit,会计算出相交的交点p,交点的法线normal,和相交时
#ifndef HITTABLE_H
#define HITTABLE_H

#include "ray.h"

struct hit_record {
    point3 p;
    vec3 normal;
    double t;
};

class hittable {
    public:
        virtual bool hit(const ray& r, double t_min, double t_max, hit_record& rec) const = 0;
};
#endif
再将光线和球体相交的算法重新提取:
#ifndef SPHERE_H
#define SPHERE_H

#include "hittable.h"
#include "vec3.h"

class sphere : public hittable {
    public:
        sphere() {}
        sphere(point3 cen, double r) : center(cen), radius(r) {};

        virtual bool hit(
            const ray& r, double t_min, double t_max, hit_record& rec) const override;

    public:
        point3 center;
        double radius;
};

bool sphere::hit(const ray& r, double t_min, double t_max, hit_record& rec) const {
    vec3 oc = r.origin() - center;
    auto a = r.direction().length_squared();
    auto half_b = dot(oc, r.direction());
    auto c = oc.length_squared() - radius*radius;

    auto discriminant = half_b*half_b - a*c;
    if (discriminant < 0) return false;
    auto sqrtd = sqrt(discriminant);

    // Find the nearest root that lies in the acceptable range.
    auto root = (-half_b - sqrtd) / a;
    if (root < t_min || t_max < root) {
        root = (-half_b + sqrtd) / a;
        if (root < t_min || t_max < root)
            return false;
    }

    rec.t = root;
    rec.p = r.at(rec.t);
    rec.normal = (rec.p - center) / radius;

    return true;
}

#endif
6.4正面和背面
这里有个问题需要搞明白,法线是不是总是指向物体外。之前,我们的法线总是指向外部,球体上的法线反方向总是从球心到球面上的某一点。我们现在假设如果光线和球体相交在外面,法线向外,如果光线和球体相交在内部,法线方向为向内,也就是从交点到球心的方向。
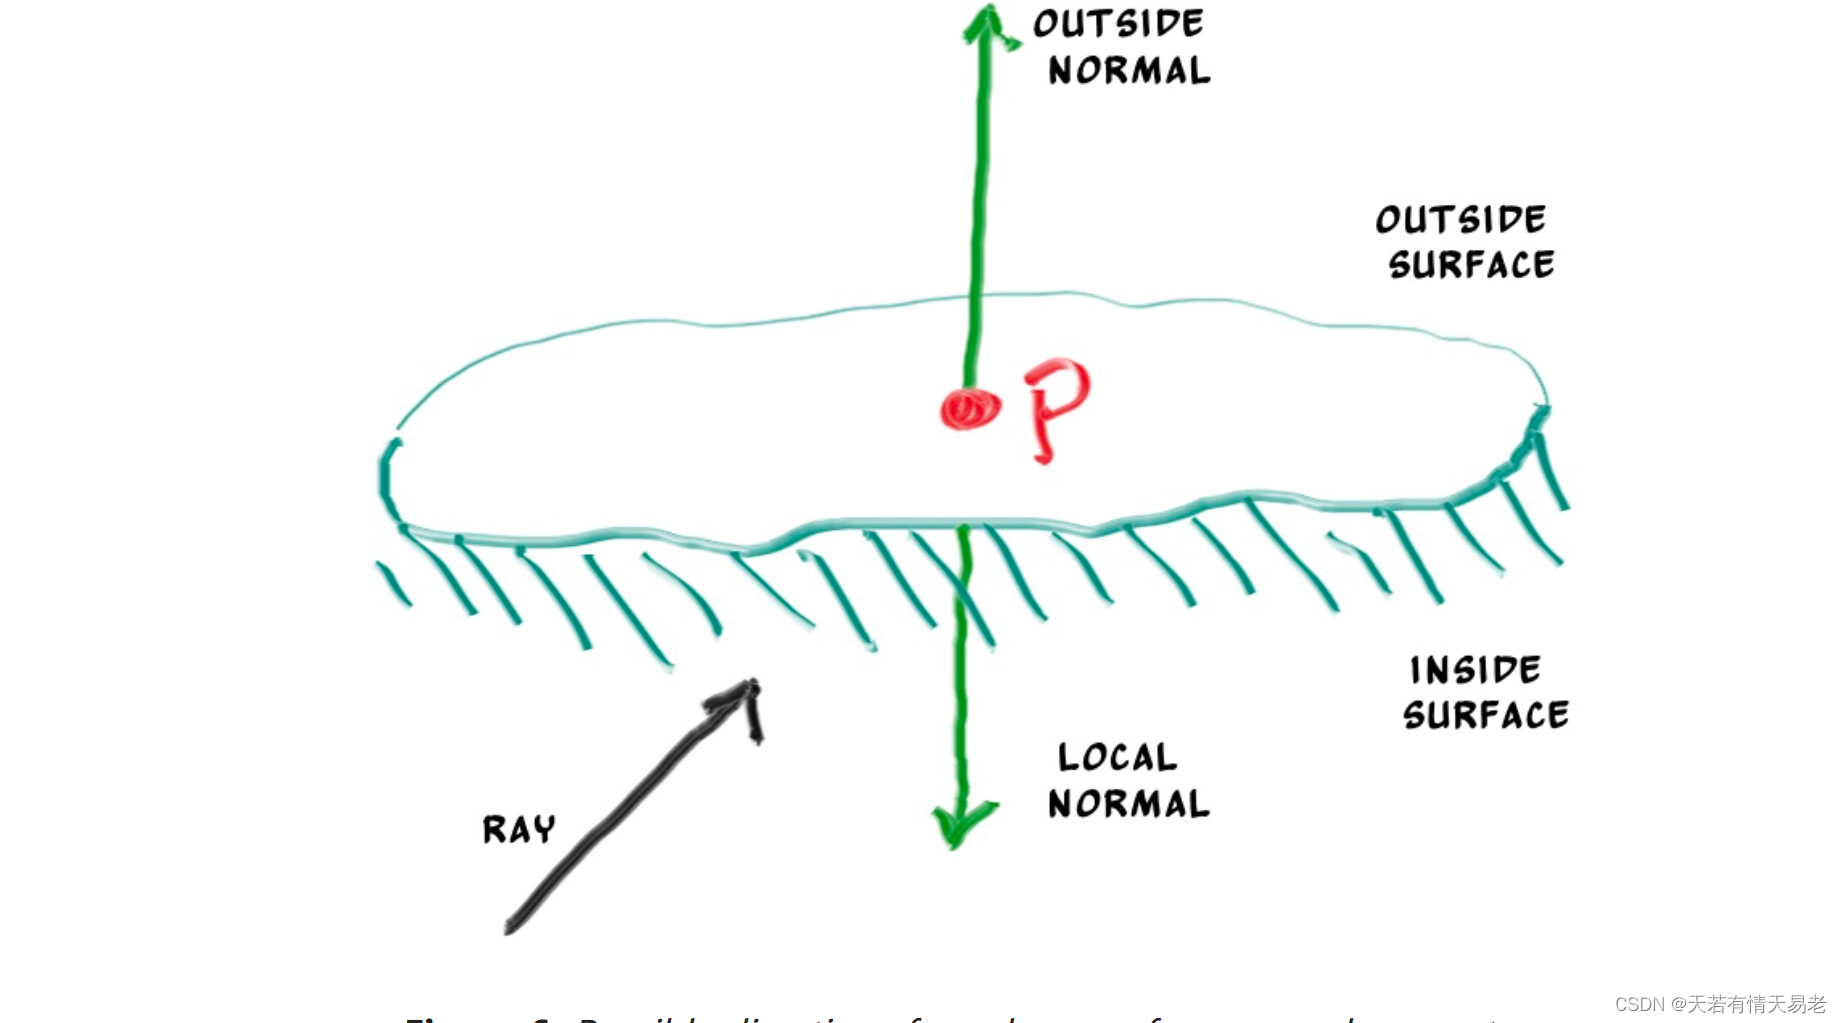
我们需要选择出这种情况,我们必须知道光线是从哪边过来的。这种情况有利于我们渲染2边不同的物体,例如2面不同文字的纸张,例如玻璃。
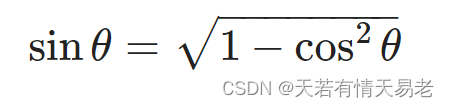
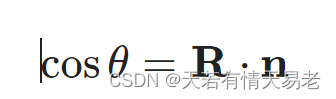
如果我们决定让2边的法线都是向外的,那么我们需要在着色的时候知道光线是在正面相交还是i背面相交。我们可以通过比较光线和法线得出结果。如果光线和法线在相同的方向,光线在背面,也就是内部。如果光线和法线在不同的方向,光线在物体外部。可以用点成来判断。tips:这里的相同方向和不同方向,准确的描述应该是光线和法线夹角>90 度,我们认为是不同方向,夹角小于90度,认为是在相同的方向。
if (dot(ray_direction, outward_normal) > 0.0) {
    // ray is inside the sphere
    ...
} else {
    // ray is outside the sphere
    ...
}
如果我们总是假设光线和法线方向相反(相反指大于90度的教教),我们需要额外的数据来标记光线和物体相交的面是正面还是背面
bool front_face;
if (dot(ray_direction, outward_normal) > 0.0) {
    // ray is inside the sphere
    normal = -outward_normal;
    front_face = false;
} else {
    // ray is outside the sphere
    normal = outward_normal;
    front_face = true;
}
我们可以假设法线总是和交点方向向外,或者总是和光线进来的方向相反(这里指的光线和法线的夹角小于90度)。这取决于你是否在物体存在的的时候确认正面还是反面,还是在着色的时候才确认正反面。在这里我们会有很多种材质类型,为了省事,我们给物体标记出正面和反面。光线相交的时候,我们给出是正面还是反面。
struct hit_record {
    point3 p;
    vec3 normal;
    double t;
    bool front_face;

    inline void set_face_normal(const ray& r, const vec3& outward_normal) {
        front_face = dot(r.direction(), outward_normal) < 0;
        normal = front_face ? outward_normal :-outward_normal;
    }
};
bool sphere::hit(const ray& r, double t_min, double t_max, hit_record& rec) const {
    ...
    rec.t = root;
    rec.p = r.at(rec.t);
    vec3 outward_normal = (rec.p - center) / radius;
    rec.set_face_normal(r, outward_normal);
    return true;
}
6.5多个物体的相交
写出光线和场景中多个物体相交情况的代码
#ifndef HITTABLE_LIST_H
#define HITTABLE_LIST_H

#include "hittable.h"

#include <memory>
#include <vector>

using std::shared_ptr;
using std::make_shared;

class hittable_list : public hittable {
    public:
        hittable_list() {}
        hittable_list(shared_ptr<hittable> object) { add(object); }
        void clear() { objects.clear(); }
        void add(shared_ptr<hittable> object) { objects.push_back(object); }
        virtual bool hit(
            const ray& r, double t_min, double t_max, hit_record& rec) const override;
    public:
        std::vector<shared_ptr<hittable>> objects;
};

bool hittable_list::hit(const ray& r, double t_min, double t_max, hit_record& rec) const {
    hit_record temp_rec;
    bool hit_anything = false;
    auto closest_so_far = t_max;
    for (const auto& object : objects) {
        if (object->hit(r, t_min, closest_so_far, temp_rec)) {
            hit_anything = true;
            closest_so_far = temp_rec.t;
            rec = temp_rec;
        }
    }
    return hit_anything;
}

#endif
6.6一些C++特征
略,这里介绍的是C++语法
6.7常量和通用函数
rtweekend.h 定义了一些常量
#ifndef RTWEEKEND_H
#define RTWEEKEND_H

#include <cmath>
#include <limits>
#include <memory>


// Usings

using std::shared_ptr;
using std::make_shared;
using std::sqrt;

// Constants

const double infinity = std::numeric_limits<double>::infinity();
const double pi = 3.1415926535897932385;

// Utility Functions

inline double degrees_to_radians(double degrees) {
    return degrees * pi / 180.0;
}

// Common Headers

#include "ray.h"
#include "vec3.h"

#endif
修改新的main函数:
#include “rtweekend.h”
#include "color.h"
#include "hittable_list.h"
#include "sphere.h"

#include <iostream>
color ray_color(const ray& r, const hittable& world) {
    hit_record rec;
    if (world.hit(r, 0, infinity, rec)) {
        return 0.5 * (rec.normal + color(1,1,1));
    }
    vec3 unit_direction = unit_vector(r.direction());
    auto t = 0.5*(unit_direction.y() + 1.0);
    return (1.0-t)*color(1.0, 1.0, 1.0) + t*color(0.5, 0.7, 1.0);
}
int main() {

    // Image

    const auto aspect_ratio = 16.0 / 9.0;
    const int image_width = 400;
    const int image_height = static_cast<int>(image_width / aspect_ratio);

    // World
    hittable_list world;
    world.add(make_shared<sphere>(point3(0,0,-1), 0.5));
    world.add(make_shared<sphere>(point3(0,-100.5,-1), 100));

    // Camera

    auto viewport_height = 2.0;
    auto viewport_width = aspect_ratio * viewport_height;
    auto focal_length = 1.0;

    auto origin = point3(0, 0, 0);
    auto horizontal = vec3(viewport_width, 0, 0);
    auto vertical = vec3(0, viewport_height, 0);
    auto lower_left_corner = origin - horizontal/2 - vertical/2 - vec3(0, 0, focal_length);

    // Render

    std::cout << "P3\n" << image_width << ' ' << image_height << "\n255\n";

    for (int j = image_height-1; j >= 0; --j) {
        std::cerr << "\rScanlines remaining: " << j << ' ' << std::flush;
        for (int i = 0; i < image_width; ++i) {
            auto u = double(i) / (image_width-1);
            auto v = double(j) / (image_height-1);
            ray r(origin, lower_left_corner + u*horizontal + v*vertical);
            color pixel_color = ray_color(r, world);
            write_color(std::cout, pixel_color);
        }
    }

    std::cerr << "\nDone.\n";
}
[One Weekend 反走样(七)]
本质上来讲,走样是因为对函数(信号)的采样频率不足,或者说信号的变化速率远大于采样的频率,简单来说,在图形学中无法呈现所设想的效果,即称为走样。在计算机渲染中,由于绘制的图形在数学上是连续的,而渲染的像素点是离散的,从而导致在光栅化的三角形遍历阶段,将图形打散为像素时,会不可避免的产生锯齿(Jaggies),这种现象不可避免,只能减轻。
7.1一些随机数的定义
定义随机数生成的方法,产生随机数。
C语言的方式
#include <cstdlib>
...
inline double random_double() {
    // Returns a random real in [0,1).
    return rand() / (RAND_MAX + 1.0);
}
inline double random_double(double min, double max) {
    // Returns a random real in [min,max).
    return min + (max-min)*random_double();
}
C++的方式
#include <random>

inline double random_double() {
    static std::uniform_real_distribution<double> distribution(0.0, 1.0);
    static std::mt19937 generator;
    return distribution(generator);
}
7.2对一个像素进行多次采样
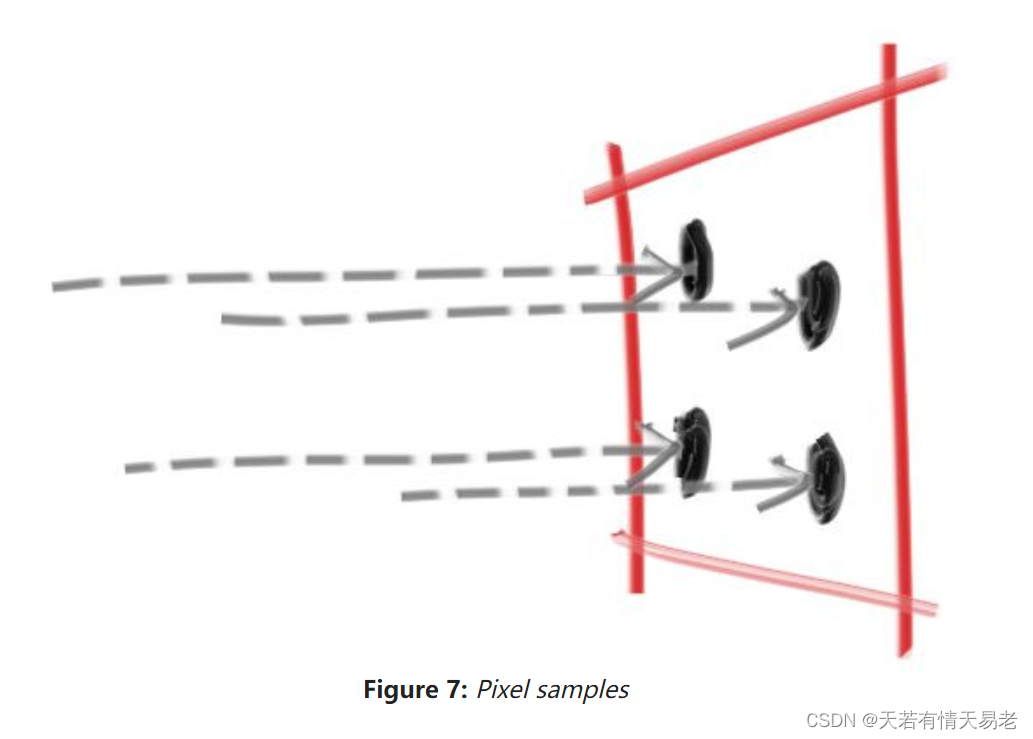
现在我们创建一个相机类来管理虚拟相机和采样。
#ifndef CAMERA_H
#define CAMERA_H

#include "rtweekend.h"

class camera {
    public:
        camera() {
            auto aspect_ratio = 16.0 / 9.0;
            auto viewport_height = 2.0;
            auto viewport_width = aspect_ratio * viewport_height;
            auto focal_length = 1.0;

            origin = point3(0, 0, 0);
            horizontal = vec3(viewport_width, 0.0, 0.0);
            vertical = vec3(0.0, viewport_height, 0.0);
            lower_left_corner = origin - horizontal/2 - vertical/2 - vec3(0, 0, focal_length);
        }

        ray get_ray(double u, double v) const {
            return ray(origin, lower_left_corner + u*horizontal + v*vertical - origin);
        }

    private:
        point3 origin;
        point3 lower_left_corner;
        vec3 horizontal;
        vec3 vertical;
};
#endif
为了支持多次采样,我们需要修改write_color()函数。
实现clamp函数,限制范围。
inline double clamp(double x, double min, double max) {
    if (x < min) return min;
    if (x > max) return max;
    return x;
}
write_color 函数的改动其实是添加了采样的次数samples_per_pixel,每个像素的光线数目,那么每条光线的对该像素产生的颜色为贡献为1.0/samples_per_pixel。
void write_color(std::ostream &out, color pixel_color, int samples_per_pixel) {
    auto r = pixel_color.x();
    auto g = pixel_color.y();
    auto b = pixel_color.z();

    // Divide the color by the number of samples.
    auto scale = 1.0 / samples_per_pixel;
    r *= scale;
    g *= scale;
    b *= scale;

    // Write the translated [0,255] value of each color component.
    out << static_cast<int>(256 * clamp(r, 0.0, 0.999)) << ' '
        << static_cast<int>(256 * clamp(g, 0.0, 0.999)) << ' '
        << static_cast<int>(256 * clamp(b, 0.0, 0.999)) << '\n';
}
再次修改main函数:
#include "camera.h"

...

int main() {
    // Image
    const auto aspect_ratio = 16.0 / 9.0;
    const int image_width = 400;
    const int image_height = static_cast<int>(image_width / aspect_ratio);
    const int samples_per_pixel = 100;
    // World
    hittable_list world;
    world.add(make_shared<sphere>(point3(0,0,-1), 0.5));
    world.add(make_shared<sphere>(point3(0,-100.5,-1), 100));
    // Camera
    camera cam;
    // Render
    std::cout << "P3\n" << image_width << " " << image_height << "\n255\n";
    for (int j = image_height-1; j >= 0; --j) {
        std::cerr << "\rScanlines remaining: " << j << ' ' << std::flush;
        for (int i = 0; i < image_width; ++i) {
            color pixel_color(0, 0, 0);
            for (int s = 0; s < samples_per_pixel; ++s) {
                auto u = (i + random_double()) / (image_width-1);
                auto v = (j + random_double()) / (image_height-1);
                ray r = cam.get_ray(u, v);
                pixel_color += ray_color(r, world);
            }
            write_color(std::cout, pixel_color, samples_per_pixel);
        }
    }
    std::cerr << "\nDone.\n";
 }
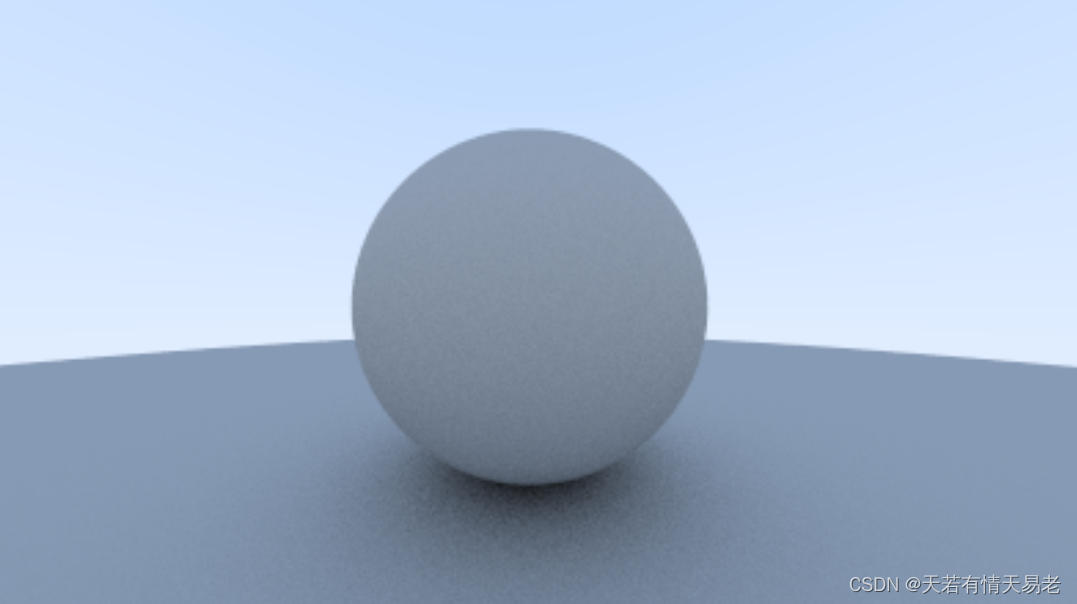
结果:下图是每个像素200条光线产生的结果
[One Weekend 漫反射材质(八)]
8.1 一个简单的漫反射材质
漫反射材质不会直接发光,它们显示的颜色是和周围环境颜色相关,根据环境光的颜色调节它们自身的颜色。光线打到漫反射物体后会反射到西面八方(这里原文描述是随机的,个人理解可能有点不太准确)。如果我们向2个漫反射物体发射光线, 它们的反射方向如下所示:
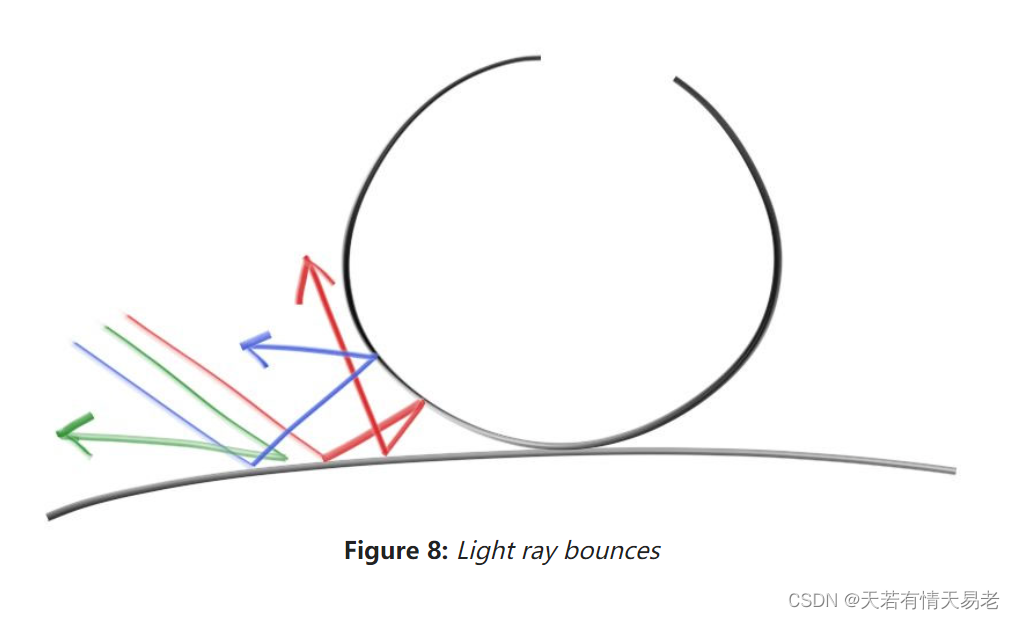
它们大部分都会被吸收而不是被反射。颜色越暗,越容易吸收。一个完全真实的漫反射算法会让物体表面看起来很粗糙。我们现在用一个简单的方法来实现漫反射(这里原文描述是一个简单的hack,使用兰伯特光照模型)。
(这里描述的是一个简单的兰伯特光照模型,正确的兰伯特光照比我们目前使用的要多很多东西)
这里有2个单位球体相切在p点,2个球体体的中心是(p+n)和(p-n),n是表面的法向量。这个球心在(p-n)的我们认为法线实在表面外的,相切的球体在光线(这里应该指的眼睛)的同一侧,那我们可以随机选取一个在同一侧的点s,发出一条光线从p点到s点。
我们需要写出一个算法去获取球面上的一个点。随机生成-1~1之间的x, y, z。
class vec3 {
  public:
    ...
    inline static vec3 random() {
        return vec3(random_double(), random_double(), random_double());
    }

    inline static vec3 random(double min, double max) {
        return vec3(random_double(min,max), random_double(min,max), random_double(min,max));
    }
如果随机在了球体外,则重新随机。
vec3 random_in_unit_sphere() {
    while (true) {
        auto p = vec3::random(-1,1);
        if (p.length_squared() >= 1) continue;
        return p;
    }
}
更新ray_color() 函数使用新的随机方向。
color ray_color(const ray& r, const hittable& world) {
    hit_record rec;

    if (world.hit(r, 0, infinity, rec)) {
        point3 target = rec.p + rec.normal + random_in_unit_sphere();
        return 0.5 * ray_color(ray(rec.p, target - rec.p), world);
    }

    vec3 unit_direction = unit_vector(r.direction());
    auto t = 0.5*(unit_direction.y() + 1.0);
    return (1.0-t)*color(1.0, 1.0, 1.0) + t*color(0.5, 0.7, 1.0);
}
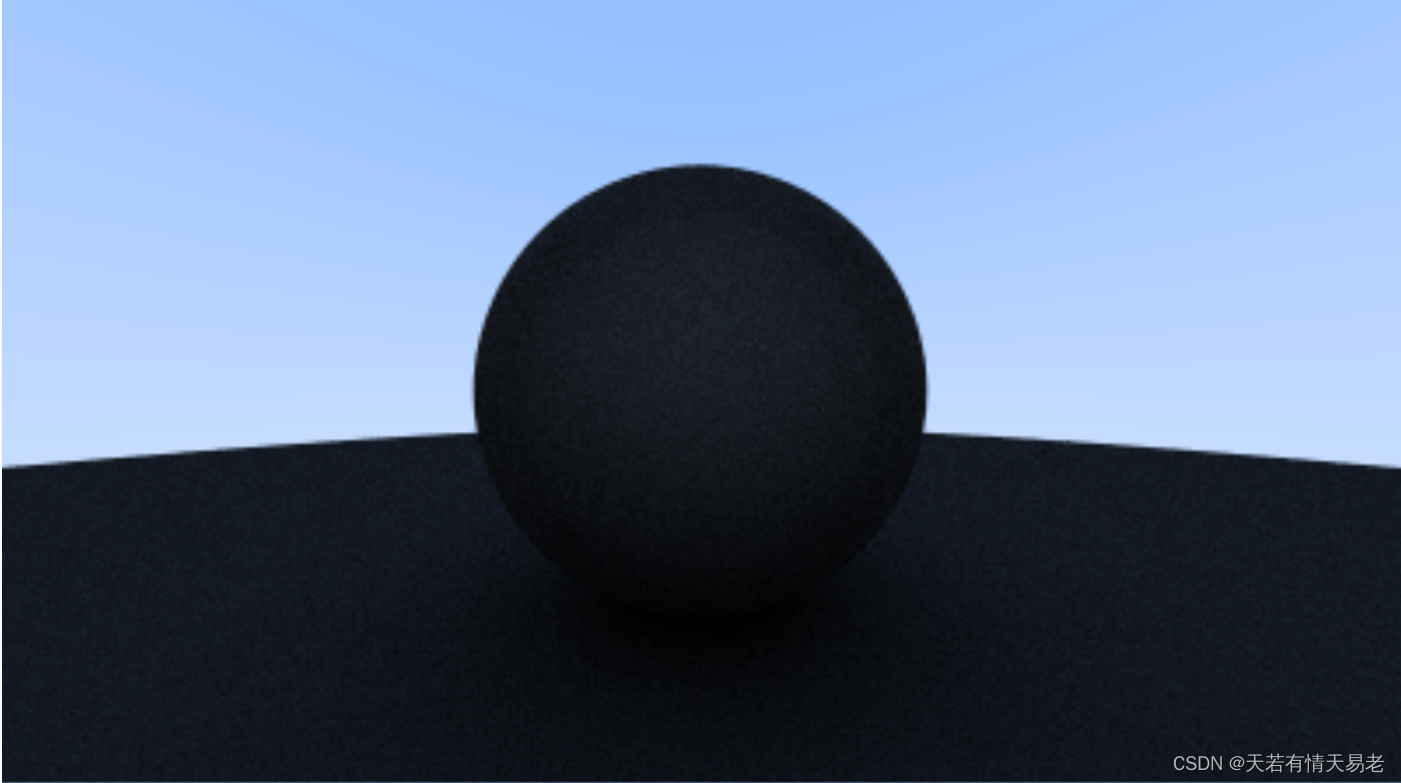
还有一个问题,我们需要限制光线弹射的次数,不然会无限执行下去
color ray_color(const ray& r, const hittable& world, int depth) {
    hit_record rec;

    // If we've exceeded the ray bounce limit, no more light is gathered.
    if (depth <= 0)
        return color(0,0,0);

    if (world.hit(r, 0, infinity, rec)) {
        point3 target = rec.p + rec.normal + random_in_unit_sphere();
        return 0.5 * ray_color(ray(rec.p, target - rec.p), world, depth-1);
    }

    vec3 unit_direction = unit_vector(r.direction());
    auto t = 0.5*(unit_direction.y() + 1.0);
    return (1.0-t)*color(1.0, 1.0, 1.0) + t*color(0.5, 0.7, 1.0);
}

...

int main() {
    // Image
    const auto aspect_ratio = 16.0 / 9.0;
    const int image_width = 400;
    const int image_height = static_cast<int>(image_width / aspect_ratio);
    const int samples_per_pixel = 100;
    const int max_depth = 50;
    ...
    // Render
    std::cout << "P3\n" << image_width << " " << image_height << "\n255\n";

    for (int j = image_height-1; j >= 0; --j) {
        std::cerr << "\rScanlines remaining: " << j << ' ' << std::flush;
        for (int i = 0; i < image_width; ++i) {
            color pixel_color(0, 0, 0);
            for (int s = 0; s < samples_per_pixel; ++s) {
                auto u = (i + random_double()) / (image_width-1);
                auto v = (j + random_double()) / (image_height-1);
                ray r = cam.get_ray(u, v);
                pixel_color += ray_color(r, world, max_depth);
            }
            write_color(std::cout, pixel_color, samples_per_pixel);
        }
    }
    std::cerr << "\nDone.\n";
}
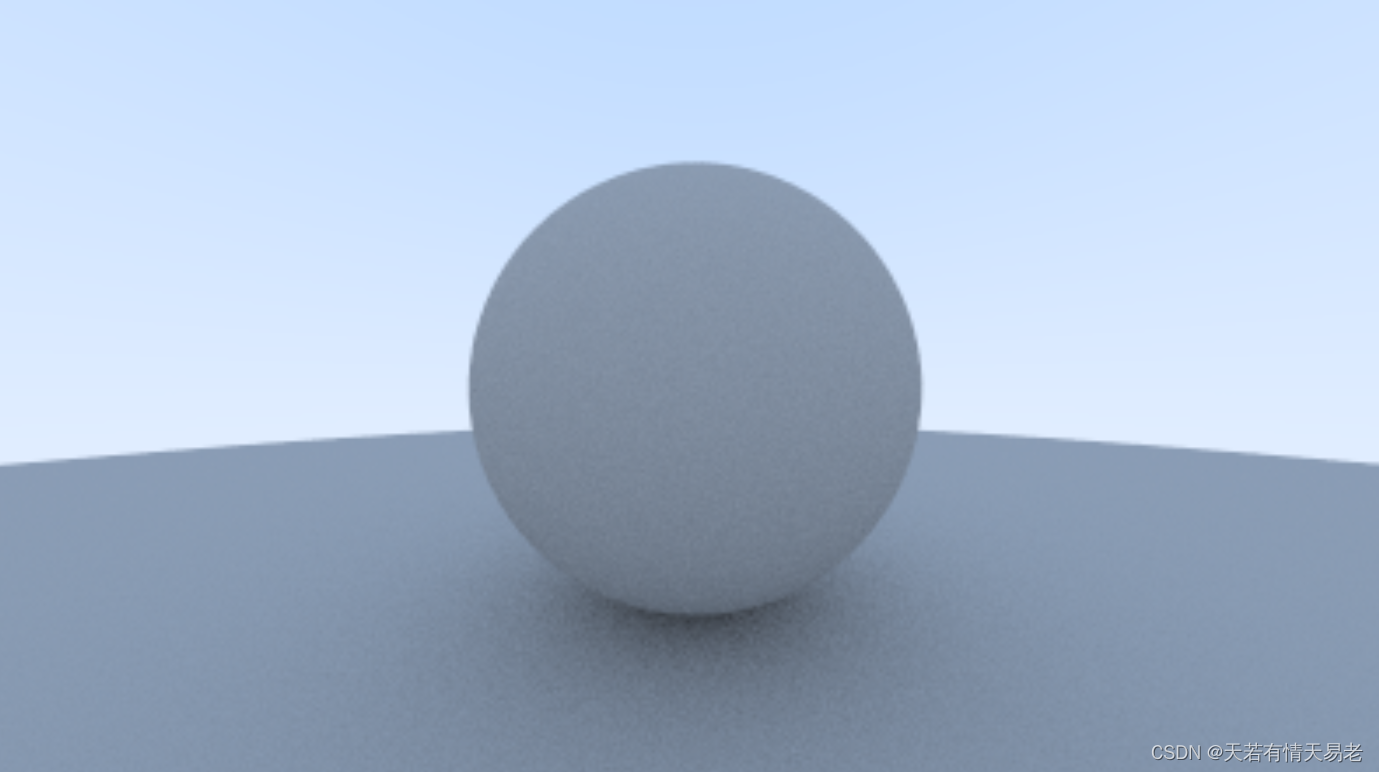
下图是200条光线/像素的渲染结果
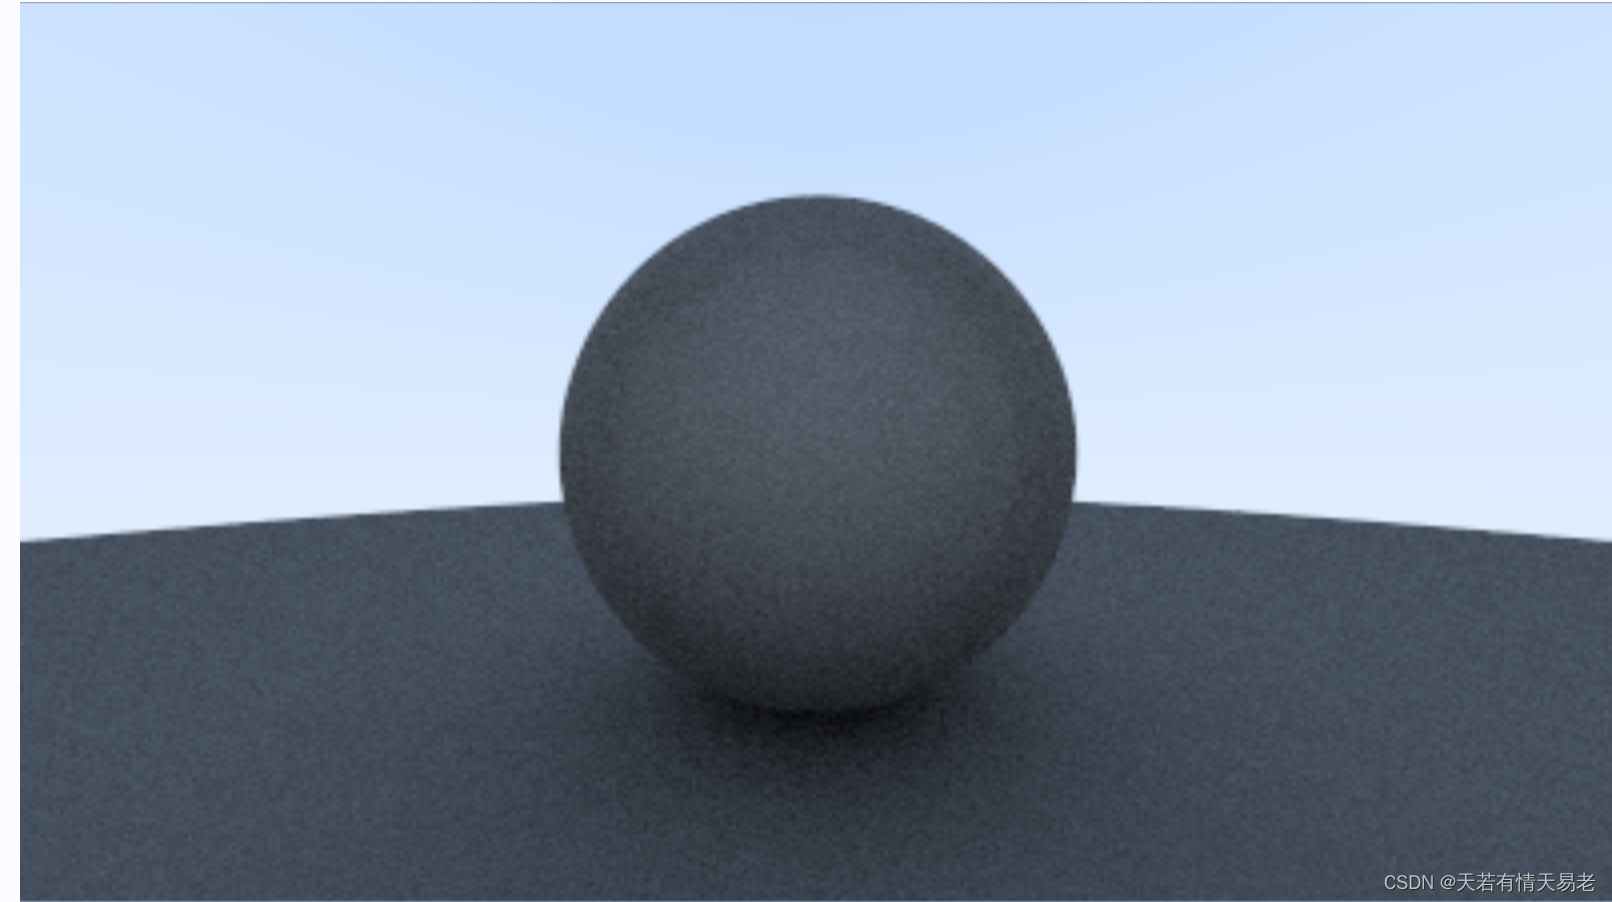
8.3使用伽马矫正获取更加准确的颜色
关于什么是伽马矫正以及怎么做伽马矫正,可以看以下链接
https://learnopenglcn.github.io/05%20Advanced%20Lighting/02%20Gamma%20Correction/
伽马矫正有多种方式,这里我们使用 “gamma 2” ,这意味着将颜色提升为( 1 / G a m m a ) (1/Gamma)(1/Gamma)的幂,即( R G B ) ½ (RGB)^{½}(RGB) ½。
void write_color(std::ostream &out, color pixel_color, int samples_per_pixel) {
    auto r = pixel_color.x();
    auto g = pixel_color.y();
    auto b = pixel_color.z();

    // Divide the color by the number of samples and gamma-correct for gamma=2.0.
    auto scale = 1.0 / samples_per_pixel;
    r = sqrt(scale * r);
    g = sqrt(scale * g);
    b = sqrt(scale * b);

    // Write the translated [0,255] value of each color component.
    out << static_cast<int>(256 * clamp(r, 0.0, 0.999)) << ' '
        << static_cast<int>(256 * clamp(g, 0.0, 0.999)) << ' '
        << static_cast<int>(256 * clamp(b, 0.0, 0.999)) << '\n';
}
8.4修复细微的错误
有些光线并不是在t=0的地方发生反射,而是t=-0.000000001或者t=-0.0000000001,或者更接近的地方。所以我们需要忽略接近0的。
if (world.hit(r, 0.001, infinity, rec)) {
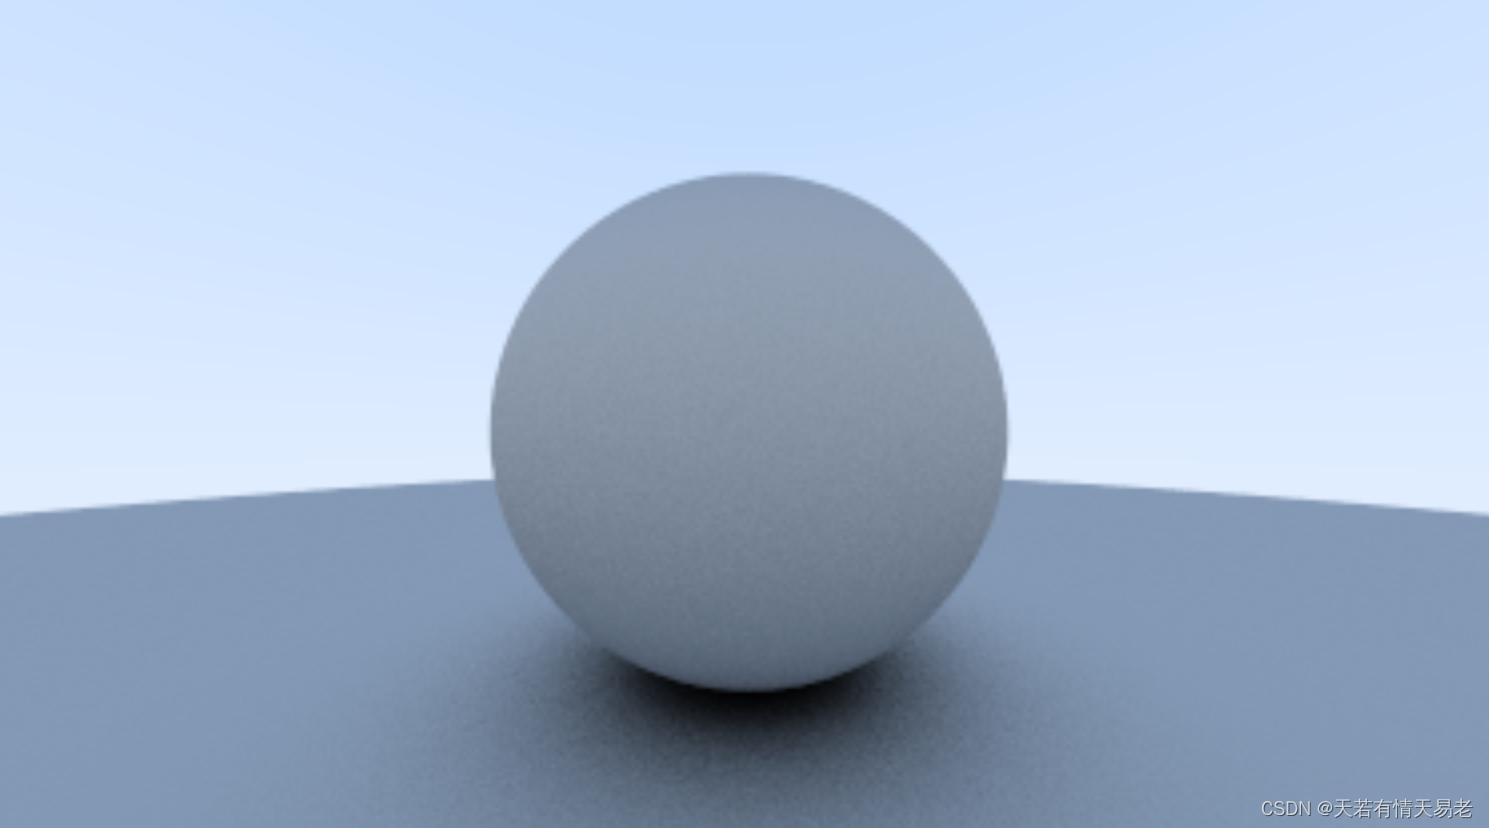
8.5兰伯特光照
这里我们对之前的向量进行单位化。使得结果更加准确。这里的代码和原文描述的兰伯特光照不太一致,只是做了单位化一件事情。原文描述的算法应该没有给出code.
inline vec3 random_in_unit_sphere() {
    ...
}
vec3 random_unit_vector() {
    return unit_vector(random_in_unit_sphere());
}
color ray_color(const ray& r, const hittable& world, int depth) {
    hit_record rec;

    // If we've exceeded the ray bounce limit, no more light is gathered.
    if (depth <= 0)
        return color(0,0,0);

    if (world.hit(r, 0.001, infinity, rec)) {
        point3 target = rec.p + rec.normal + random_unit_vector();
        return 0.5 * ray_color(ray(rec.p, target - rec.p), world, depth-1);
    }

    vec3 unit_direction = unit_vector(r.direction());
    auto t = 0.5*(unit_direction.y() + 1.0);
    return (1.0-t)*color(1.0, 1.0, 1.0) + t*color(0.5, 0.7, 1.0);
}
8.6另外一种漫反射公式
在法线所在的半球做反射。8.5和8.6只是对漫反射方式不同算法的描述,本文这里不深究此处
vec3 random_in_hemisphere(const vec3& normal) {
    vec3 in_unit_sphere = random_in_unit_sphere();
    if (dot(in_unit_sphere, normal) > 0.0) // In the same hemisphere as the normal
        return in_unit_sphere;
    else
        return -in_unit_sphere;
}
color ray_color(const ray& r, const hittable& world, int depth) {
    hit_record rec;
    // If we've exceeded the ray bounce limit, no more light is gathered.
    if (depth <= 0)
        return color(0,0,0);
    if (world.hit(r, 0.001, infinity, rec)) {
        point3 target = rec.p + random_in_hemisphere(rec.normal);
        return 0.5 * ray_color(ray(rec.p, target - rec.p), world, depth-1);
    }
    vec3 unit_direction = unit_vector(r.direction());
    auto t = 0.5*(unit_direction.y() + 1.0);
    return (1.0-t)*color(1.0, 1.0, 1.0) + t*color(0.5, 0.7, 1.0);
}
[One Weekend 金属材质(九)]
9.1对金属的抽象描述
如果我们希望的不同的物体拥有不同的材质,需要对现有的代码进行改进。我们可以拥有一种通用材质,但是有很多不同的参数。或者我们可以提取一个材质的抽象类。使得其它类型的材质都继承自它。对于材质,我们需要做2件事情:
1.产生散射的射线
2.如果发生散射,那么吸收了多少,反射了多少
#ifndef MATERIAL_H
#define MATERIAL_H

#include "rtweekend.h"

struct hit_record;

class material {
    public:
        virtual bool scatter(
            const ray& r_in, const hit_record& rec, color& attenuation, ray& scattered
        ) const = 0;
};
#endif
9.2描述交点的数据结构
这里添加了交点的材质信息
#include "rtweekend.h"

class material;

struct hit_record {
    point3 p;
    vec3 normal;
    shared_ptr<material> mat_ptr; // 交点的材质
    double t;
    bool front_face;

    inline void set_face_normal(const ray& r, const vec3& outward_normal) {
        front_face = dot(r.direction(), outward_normal) < 0;
        normal = front_face ? outward_normal :-outward_normal;
    }
};
当光线打到材质的时候,我们需要带上材质的信息
class sphere : public hittable {
    public:
        sphere() {}
        sphere(point3 cen, double r, shared_ptr<material> m)
            : center(cen), radius(r), mat_ptr(m) {};

        virtual bool hit(
            const ray& r, double t_min, double t_max, hit_record& rec) const override;

    public:
        point3 center;
        double radius;
        shared_ptr<material> mat_ptr;
};

bool sphere::hit(const ray& r, double t_min, double t_max, hit_record& rec) const {
    ...

    rec.t = root;
    rec.p = r.at(rec.t);
    vec3 outward_normal = (rec.p - center) / radius;
    rec.set_face_normal(r, outward_normal);
    rec.mat_ptr = mat_ptr;

    return true;
}
9.3描述光线的入射和散射
对于兰伯特(漫反射)的材质来说,我们已经有了,它们可以散射并衰减。简单来讲,下面的兰伯特计算了光线入射到某个点hit_record,然后然后随机反射到某个方向的ray和衰减后的color。
class lambertian : public material {
    public:
        lambertian(const color& a) : albedo(a) {}

        virtual bool scatter(
            const ray& r_in, const hit_record& rec, color& attenuation, ray& scattered
        ) const override {
            auto scatter_direction = rec.normal + random_unit_vector();
            scattered = ray(rec.p, scatter_direction);
            attenuation = albedo;
            return true;
        }
    public:
        color albedo;
};
现在我们以某种概率p散射,并使得衰减为albedo/p。如果我们仔细看上述代码,还是会有一点点的小瑕疵。如果我们随机的向量和法线方向相反,那么rec.normal + random_unit_vector()的结果接近0.这会导致后面的糟糕情况和无穷,所以我们要事先避免这种情况。
我们会创建一个新的方法,判断向量是否接近零。
class vec3 {
    ...
    bool near_zero() const {
        // Return true if the vector is close to zero in all dimensions.
        const auto s = 1e-8;
        return (fabs(e[0]) < s) && (fabs(e[1]) < s) && (fabs(e[2]) < s);
    }
    ...
};
修改算法
class lambertian : public material {
    public:
        lambertian(const color& a) : albedo(a) {}

        virtual bool scatter(
            const ray& r_in, const hit_record& rec, color& attenuation, ray& scattered
        ) const override {
            auto scatter_direction = rec.normal + random_unit_vector();

            // Catch degenerate scatter direction
            if (scatter_direction.near_zero())
                scatter_direction = rec.normal;

            scattered = ray(rec.p, scatter_direction);
            attenuation = albedo;
            return true;
        }

    public:
        color albedo;
};
9.4镜面反射
对于一个光滑的表面来说,光线不会随机的散射。我们来看光线如何在镜面反射的。
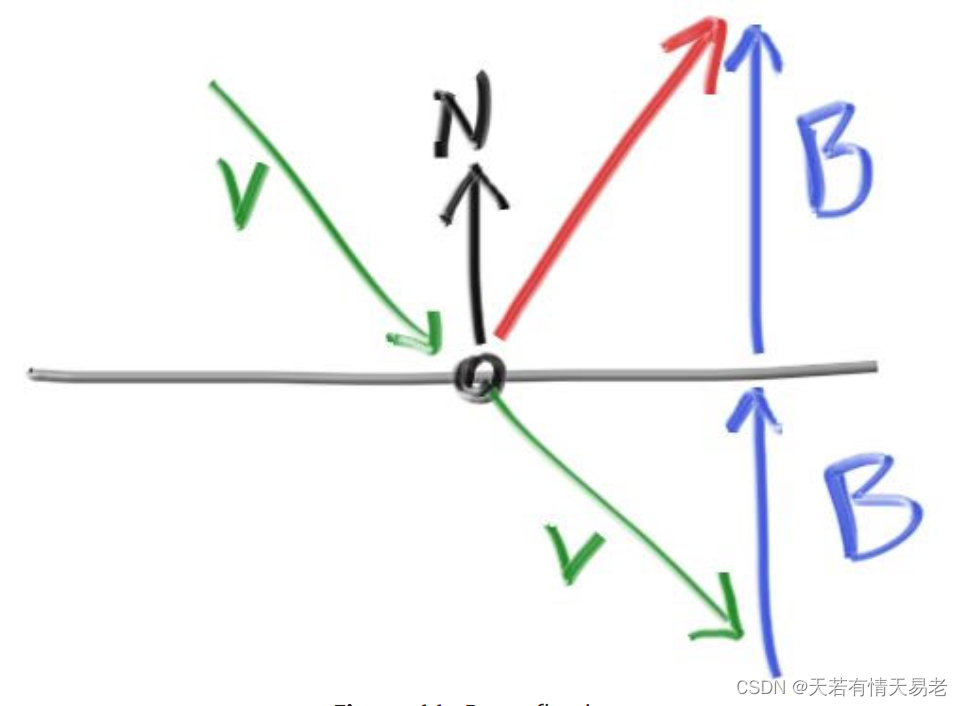
反射的方向是红色的v+2b。在我们的设计中,n是单位向量,但是v不一定是。b的长度是v.n。v是入射光线
vec3 reflect(const vec3& v, const vec3& n) {
    return v - 2*dot(v,n)*n;
}
金属材质通过上面的公式反射光线
class metal : public material {
    public:
        metal(const color& a) : albedo(a) {}

        virtual bool scatter(
            const ray& r_in, const hit_record& rec, color& attenuation, ray& scattered
        ) const override {
            vec3 reflected = reflect(unit_vector(r_in.direction()), rec.normal);
            scattered = ray(rec.p, reflected);
            attenuation = albedo;
            return (dot(scattered.direction(), rec.normal) > 0);
        }

    public:
        color albedo;
};
我们需要修改ray_color函数:
color ray_color(const ray& r, const hittable& world, int depth) {
    hit_record rec;
    // If we've exceeded the ray bounce limit, no more light is gathered.
    if (depth <= 0)
        return color(0,0,0);
    if (world.hit(r, 0.001, infinity, rec)) {
        ray scattered;
        color attenuation;
        if (rec.mat_ptr->scatter(r, rec, attenuation, scattered))
            return attenuation * ray_color(scattered, world, depth-1);
        return color(0,0,0);
    }
    vec3 unit_direction = unit_vector(r.direction());
    auto t = 0.5*(unit_direction.y() + 1.0);
    return (1.0-t)*color(1.0, 1.0, 1.0) + t*color(0.5, 0.7, 1.0);
}
9.5含有金属球体的场景
#include "material.h"
...
int main() {

    // Image
    const auto aspect_ratio = 16.0 / 9.0;
    const int image_width = 400;
    const int image_height = static_cast<int>(image_width / aspect_ratio);
    const int samples_per_pixel = 100;
    const int max_depth = 50;
    // World
    hittable_list world;
    auto material_ground = make_shared<lambertian>(color(0.8, 0.8, 0.0));
    auto material_center = make_shared<lambertian>(color(0.7, 0.3, 0.3));
    auto material_left   = make_shared<metal>(color(0.8, 0.8, 0.8));
    auto material_right  = make_shared<metal>(color(0.8, 0.6, 0.2));

    world.add(make_shared<sphere>(point3( 0.0, -100.5, -1.0), 100.0, material_ground));
    world.add(make_shared<sphere>(point3( 0.0,    0.0, -1.0),   0.5, material_center));
    world.add(make_shared<sphere>(point3(-1.0,    0.0, -1.0),   0.5, material_left));
    world.add(make_shared<sphere>(point3( 1.0,    0.0, -1.0),   0.5, material_right));
    // Camera
    camera cam;
    // Render
    std::cout << "P3\n" << image_width << " " << image_height << "\n255\n";
    for (int j = image_height-1; j >= 0; --j) {
        std::cerr << "\rScanlines remaining: " << j << ' ' << std::flush;
        for (int i = 0; i < image_width; ++i) {
            color pixel_color(0, 0, 0);
            for (int s = 0; s < samples_per_pixel; ++s) {
                auto u = (i + random_double()) / (image_width-1);
                auto v = (j + random_double()) / (image_height-1);
                ray r = cam.get_ray(u, v);
                pixel_color += ray_color(r, world, max_depth);
            }
            write_color(std::cout, pixel_color, samples_per_pixel);
        }
    }
    std::cerr << "\nDone.\n";
}
9.6模糊反射
我们可以随机的反射光线方向。
球体越大,反射将变得越模糊。 建议添加一个模糊度参数,该参数仅是球体的半径。 要注意的是,对于大球体或掠食性射线,我们可能会散射到表面以下, 我们可以让表面吸收
掉。
class metal : public material {
    public:
        metal(const color& a, double f) : albedo(a), fuzz(f < 1 ? f : 1) {}

        virtual bool scatter(
            const ray& r_in, const hit_record& rec, color& attenuation, ray& scattered
        ) const override {
            vec3 reflected = reflect(unit_vector(r_in.direction()), rec.normal);
            scattered = ray(rec.p, reflected + fuzz*random_in_unit_sphere());
            attenuation = albedo;
            return (dot(scattered.direction(), rec.normal) > 0);
        }

    public:
        color albedo;
        double fuzz;
};
我们可以尝试添加0.3和1.0的模糊在金属球上面:
int main() {
    ...
    // World

    auto material_ground = make_shared<lambertian>(color(0.8, 0.8, 0.0));
    auto material_center = make_shared<lambertian>(color(0.7, 0.3, 0.3));
    auto material_left   = make_shared<metal>(color(0.8, 0.8, 0.8), 0.3);
    auto material_right  = make_shared<metal>(color(0.8, 0.6, 0.2), 1.0);
    ...
}
[One Weekend 介质(十)]
透明的物体如水,玻璃,钻石都是介质。当光线打进来后,它们有部分被反射,有部分被折射。我们打算在场景中放入2个玻璃球。
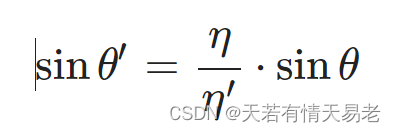
10.1 折射
折射是用斯奈尔定律描述的
10.2 斯奈尔定律
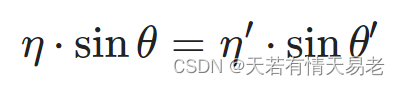
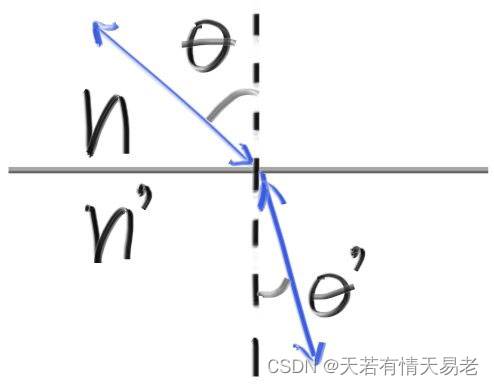
为了确定折射的方向,我们选择解下述方程:
我们将折射方向的光线拆分为垂直和平行方向:
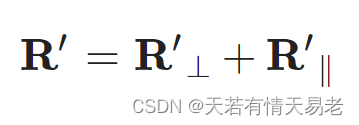
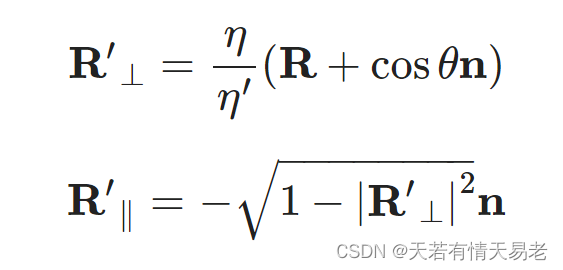
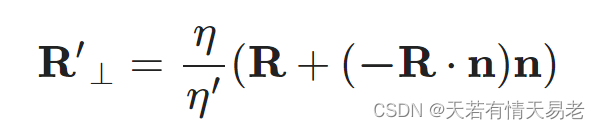
这样,我们可以计算出折射光:
vec3 refract(const vec3& uv, const vec3& n, double etai_over_etat) {
    auto cos_theta = fmin(dot(-uv, n), 1.0);
    vec3 r_out_perp =  etai_over_etat * (uv + cos_theta*n);
    vec3 r_out_parallel = -sqrt(fabs(1.0 - r_out_perp.length_squared())) * n;
    return r_out_perp + r_out_parallel;
}
添加材质的折射:
class dielectric : public material {
    public:
        dielectric(double index_of_refraction) : ir(index_of_refraction) {}

        virtual bool scatter(
            const ray& r_in, const hit_record& rec, color& attenuation, ray& scattered
        ) const override {
            attenuation = color(1.0, 1.0, 1.0);
            double refraction_ratio = rec.front_face ? (1.0/ir) : ir;

            vec3 unit_direction = unit_vector(r_in.direction());
            vec3 refracted = refract(unit_direction, rec.normal, refraction_ratio);

            scattered = ray(rec.p, refracted);
            return true;
        }

    public:
        double ir; // Index of Refraction
};
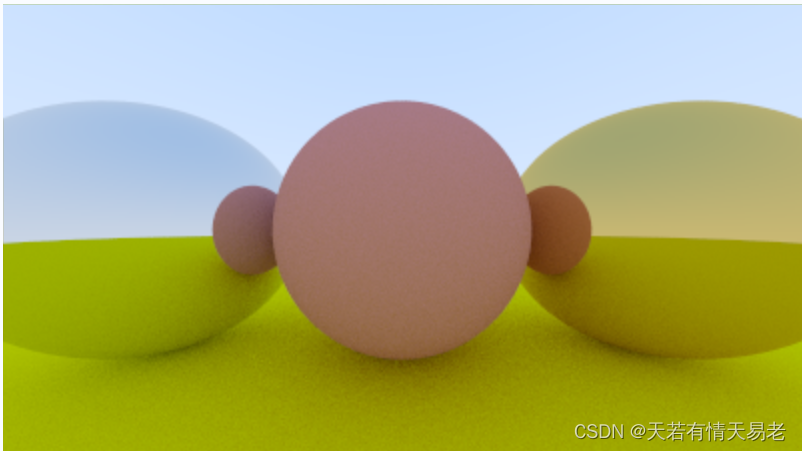
auto material_ground = make_shared<lambertian>(color(0.8, 0.8, 0.0));
auto material_center = make_shared<dielectric>(1.5);
auto material_left   = make_shared<dielectric>(1.5);
auto material_right  = make_shared<metal>(color(0.8, 0.6, 0.2), 1.0);
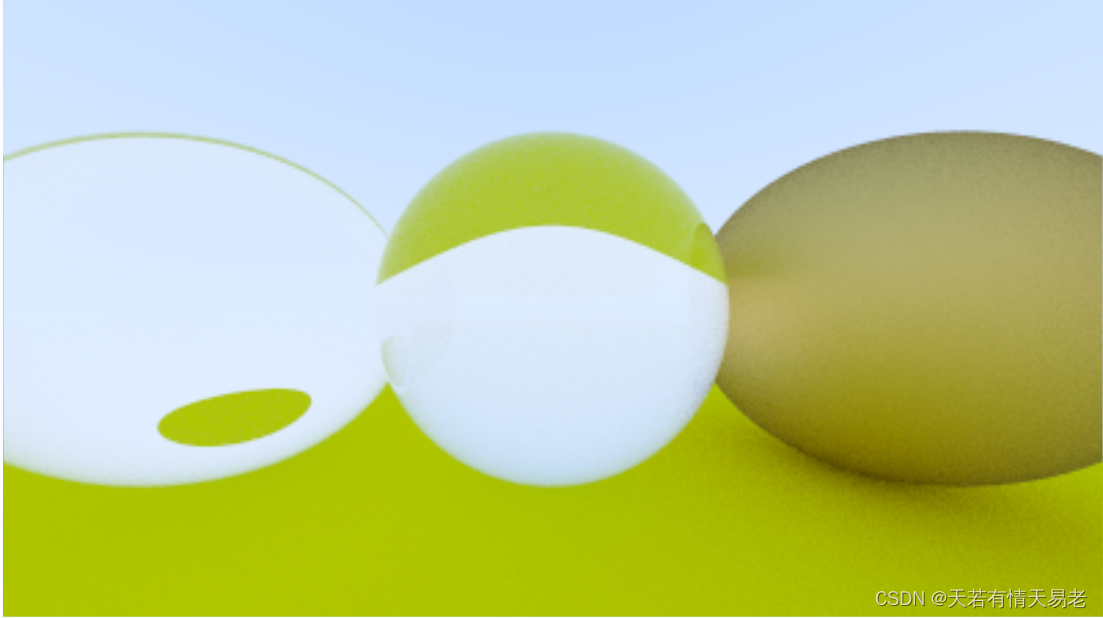
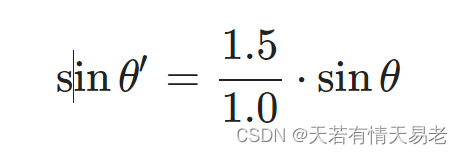
10.3完全的内部反射
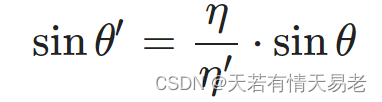
如果光线从一个折射率比较高的地方到折射率比较低的地方:
如果是从玻璃到外部的空气(η=1.5 and η′=1.0):
由于sinθ′不可能大于1,所以,如果
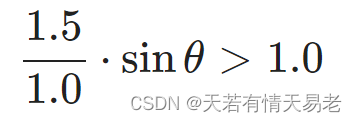
我们的折射就不存在,玻璃不会存在折射,但是会反射光线:
if (refraction_ratio * sin_theta > 1.0) {
    // Must Reflect
    ...
} else {
    // Can Refract
    ...
}
现在我们所有的光线都被反射了,常规来讲,光线是在物体的内部,所以叫做"内部全反射".这就是为什么水-空气表面看起来像是完美的镜面反射一样。
double cos_theta = fmin(dot(-unit_direction, rec.normal), 1.0);
double sin_theta = sqrt(1.0 - cos_theta*cos_theta);

if (refraction_ratio * sin_theta > 1.0) {
    // Must Reflect
    ...
} else {
    // Can Refract
    ...
}
修改材质
class dielectric : public material {
    public:
        dielectric(double index_of_refraction) : ir(index_of_refraction) {}

        virtual bool scatter(
            const ray& r_in, const hit_record& rec, color& attenuation, ray& scattered
        ) const override {
            attenuation = color(1.0, 1.0, 1.0);
            double refraction_ratio = rec.front_face ? (1.0/ir) : ir;

            vec3 unit_direction = unit_vector(r_in.direction());
            double cos_theta = fmin(dot(-unit_direction, rec.normal), 1.0);
            double sin_theta = sqrt(1.0 - cos_theta*cos_theta);

            bool cannot_refract = refraction_ratio * sin_theta > 1.0;
            vec3 direction;

            if (cannot_refract)
                direction = reflect(unit_direction, rec.normal);
            else
                direction = refract(unit_direction, rec.normal, refraction_ratio);

            scattered = ray(rec.p, direction);
            return true;
        }

    public:
        double ir; // Index of Refraction
};

10.4 施利克近似
真正的玻璃的反射率随角度的变化而变化——看一扇倾斜角度的窗户,它就变成了一面镜子。这有一个丑陋的大方程,但几乎每个人都使用克里斯托弗·施里克(Christophe Schlick)的廉价而精确的多项式近似。这就产生了我们的全玻璃材料:
class dielectric : public material {
    public:
        dielectric(double index_of_refraction) : ir(index_of_refraction) {}

        virtual bool scatter(
            const ray& r_in, const hit_record& rec, color& attenuation, ray& scattered
        ) const override {
            attenuation = color(1.0, 1.0, 1.0);
            double refraction_ratio = rec.front_face ? (1.0/ir) : ir;

            vec3 unit_direction = unit_vector(r_in.direction());
            double cos_theta = fmin(dot(-unit_direction, rec.normal), 1.0);
            double sin_theta = sqrt(1.0 - cos_theta*cos_theta);

            bool cannot_refract = refraction_ratio * sin_theta > 1.0;
            vec3 direction;
            if (cannot_refract || reflectance(cos_theta, refraction_ratio) > random_double())
                direction = reflect(unit_direction, rec.normal);
            else
                direction = refract(unit_direction, rec.normal, refraction_ratio);

            scattered = ray(rec.p, direction);
            return true;
        }

    public:
        double ir; // Index of Refraction

    private:
        static double reflectance(double cosine, double ref_idx) {
            // Use Schlick's approximation for reflectance.
            auto r0 = (1-ref_idx) / (1+ref_idx);
            r0 = r0*r0;
            return r0 + (1-r0)*pow((1 - cosine),5);
        }
};
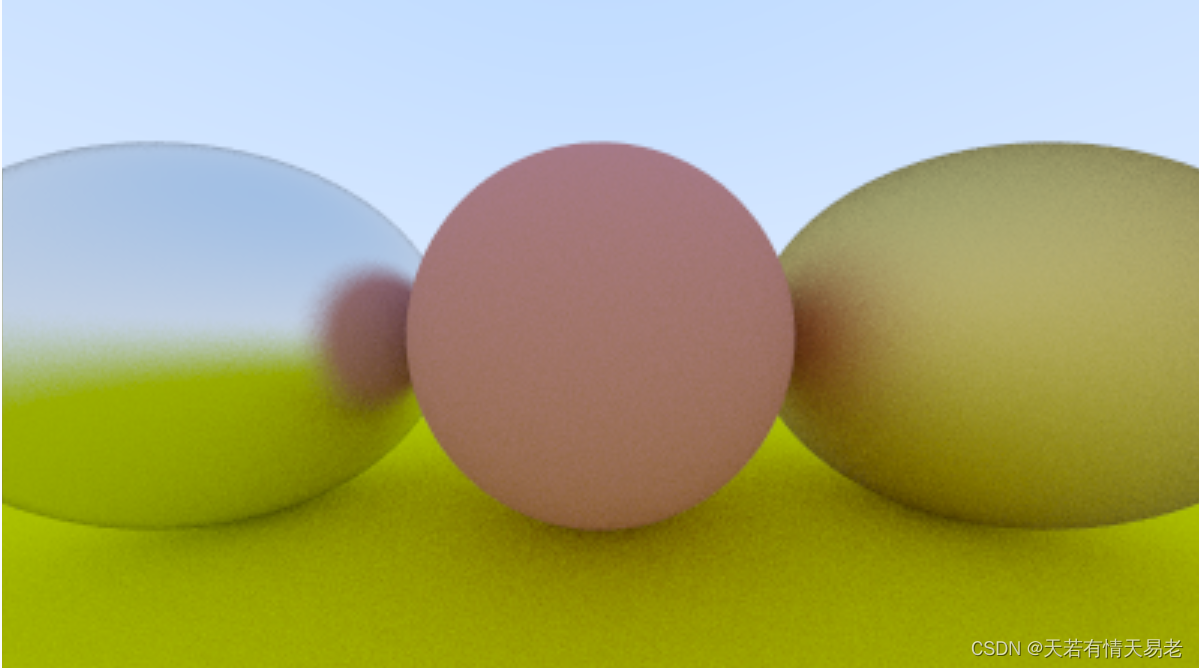
10.4 空心玻璃球建模
我们很容易使用半径为负数的,创建空心玻璃球
world.add(make_shared<sphere>(point3( 0.0, -100.5, -1.0), 100.0, material_ground));
world.add(make_shared<sphere>(point3( 0.0,    0.0, -1.0),   0.5, material_center));
world.add(make_shared<sphere>(point3(-1.0,    0.0, -1.0),   0.5, material_left));
world.add(make_shared<sphere>(point3(-1.0,    0.0, -1.0),  -0.4, material_left));
world.add(make_shared<sphere>(point3( 1.0,    0.0, -1.0),   0.5, material_right));

[One Weekend 可以移动的相机(十一)]
相机,类似介质,是很难调试的。所以,我经常渐进式开发。首先,我们允许调节的FOV(视角场)。
11.1相机视角
我们首先假设光线从源点过来,打向z=-1的平面。
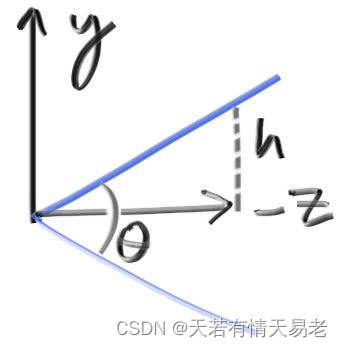
h=tan(θ/2).我们的相机现在变成了
class camera {
    public:
        camera(
            double vfov, // vertical field-of-view in degrees
            double aspect_ratio
        ) {
            auto theta = degrees_to_radians(vfov);
            auto h = tan(theta/2);
            auto viewport_height = 2.0 * h;
            auto viewport_width = aspect_ratio * viewport_height;

            auto focal_length = 1.0;

            origin = point3(0, 0, 0);
            horizontal = vec3(viewport_width, 0.0, 0.0);
            vertical = vec3(0.0, viewport_height, 0.0);
            lower_left_corner = origin - horizontal/2 - vertical/2 - vec3(0, 0, focal_length);
        }

        ray get_ray(double u, double v) const {
            return ray(origin, lower_left_corner + u*horizontal + v*vertical - origin);
        }

    private:
        point3 origin;
        point3 lower_left_corner;
        vec3 horizontal;
        vec3 vertical;
};
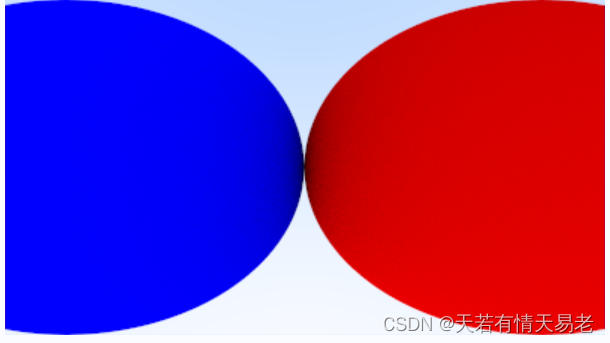
我们将相机参数设置为 cam(90, aspect_ratio)。
int main() {
    ...
    // World
    auto R = cos(pi/4);
    hittable_list world;
    auto material_left  = make_shared<lambertian>(color(0,0,1));
    auto material_right = make_shared<lambertian>(color(1,0,0));

    world.add(make_shared<sphere>(point3(-R, 0, -1), R, material_left));
    world.add(make_shared<sphere>(point3( R, 0, -1), R, material_right));

    // Camera
    camera cam(90.0, aspect_ratio);
    // Render
    std::cout << "P3\n" << image_width << " " << image_height << "\n255\n";
    for (int j = image_height-1; j >= 0; --j) {
    ...
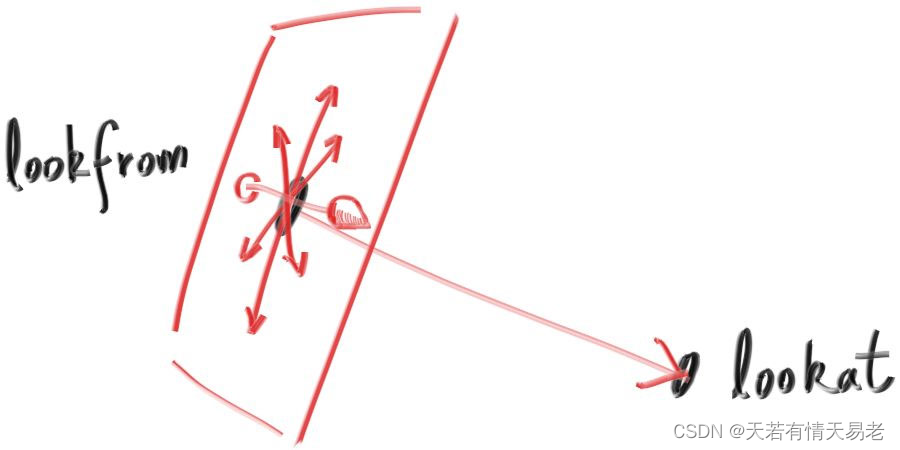
11.2 位置和定向相机
我们可以指定相机的位置,以及相机朝向。我们将相机所在的位置表示为lookfrom,我们看向的位置表示为lookat。我们绕着lookat-lookfrom轴的朝向,被定义为lookup。lookup应该和视线方向垂直。
我们可以使用和视线方向垂直的任何向量表示向上方向。我们使用(u,v,w)表示相机的方向。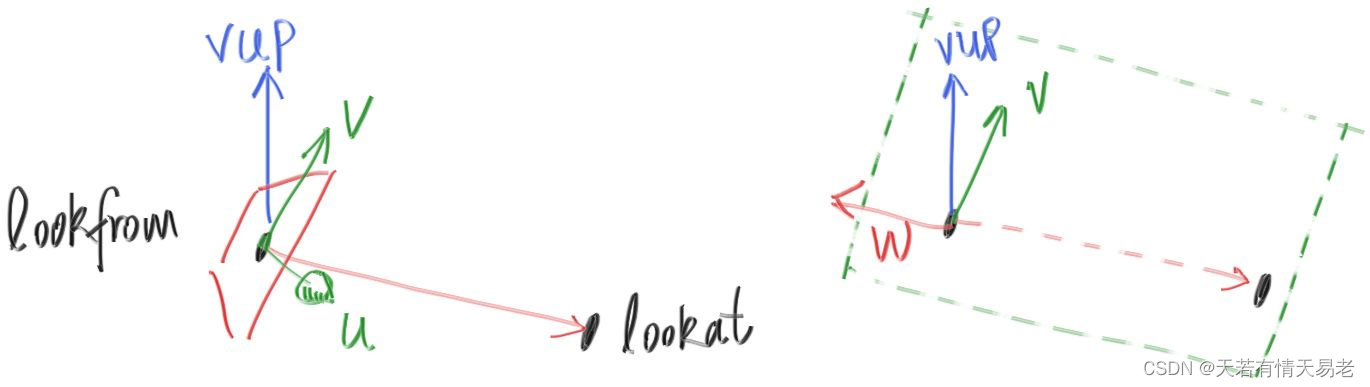
class camera {
    public:
        camera(
            point3 lookfrom,
            point3 lookat,
            vec3   vup,
            double vfov, // vertical field-of-view in degrees
            double aspect_ratio
        ) {
            auto theta = degrees_to_radians(vfov);
            auto h = tan(theta/2);
            auto viewport_height = 2.0 * h;
            auto viewport_width = aspect_ratio * viewport_height;

            auto w = unit_vector(lookfrom - lookat);
            auto u = unit_vector(cross(vup, w));
            auto v = cross(w, u);

            origin = lookfrom;
            horizontal = viewport_width * u;
            vertical = viewport_height * v;
            lower_left_corner = origin - horizontal/2 - vertical/2 - w;
        }

        ray get_ray(double s, double t) const {
            return ray(origin, lower_left_corner + s*horizontal + t*vertical - origin);
        }

    private:
        point3 origin;
        point3 lower_left_corner;
        vec3 horizontal;
        vec3 vertical;
};
hittable_list world;

auto material_ground = make_shared<lambertian>(color(0.8, 0.8, 0.0));
auto material_center = make_shared<lambertian>(color(0.1, 0.2, 0.5));
auto material_left   = make_shared<dielectric>(1.5);
auto material_right  = make_shared<metal>(color(0.8, 0.6, 0.2), 0.0);

world.add(make_shared<sphere>(point3( 0.0, -100.5, -1.0), 100.0, material_ground));
world.add(make_shared<sphere>(point3( 0.0,    0.0, -1.0),   0.5, material_center));
world.add(make_shared<sphere>(point3(-1.0,    0.0, -1.0),   0.5, material_left));
world.add(make_shared<sphere>(point3(-1.0,    0.0, -1.0), -0.45, material_left));
world.add(make_shared<sphere>(point3( 1.0,    0.0, -1.0),   0.5, material_right));

camera cam(point3(-2,2,1), point3(0,0,-1), vec3(0,1,0), 90, aspect_ratio);
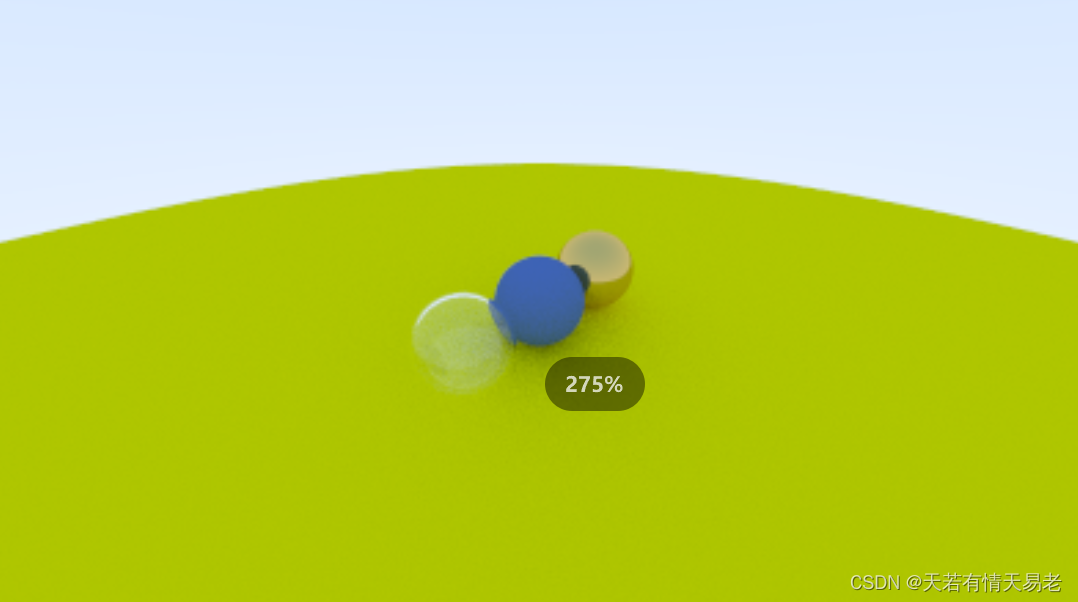
如果我们改变视角
camera cam(point3(-2,2,1), point3(0,0,-1), vec3(0,1,0), 20, aspect_ratio);
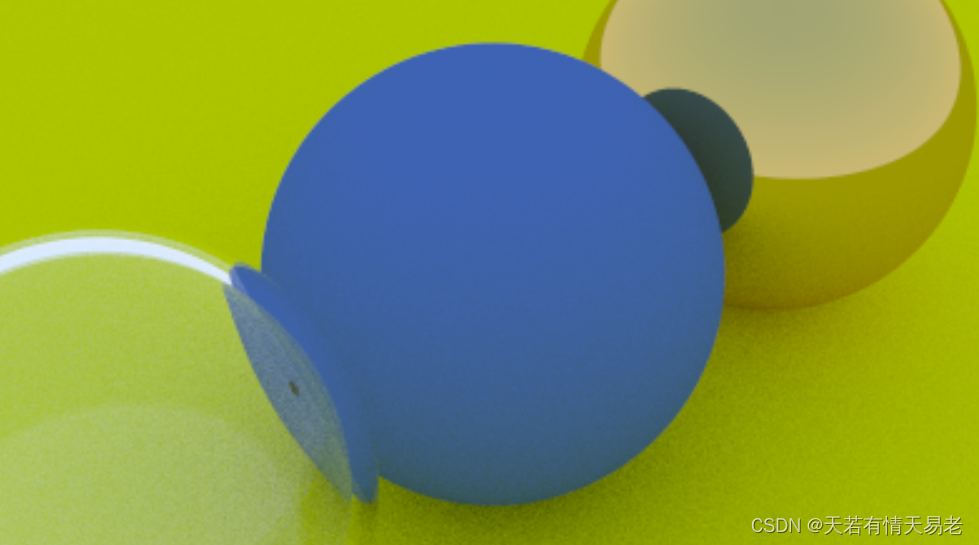
[One Weekend 焦散模糊(十二)]
现在我们最后一步,就是焦散模糊。摄影师朋友称之为"景深"。
我们在真实的相机中会碰到焦散模糊是因为我们需要一个很大的孔(而不是小孔)才能吸收到足够的光。这回焦散所有物体,但是如果我们在孔中插入一个镜头,所有的东西都在焦点上。你可以这样想:所有的光线都来自特定焦距的一个点——光线打到镜头上——将被弯曲并且传送到图像传感器上。
我们将投影点和完美聚焦的平面之间的距离称之为焦距。
对于一个真实的相机来讲,焦距可以由镜头和成像平面控制。这是为什么移动镜头可以调整焦距。光圈是一个可以有效控制镜头大小的孔,如果你需要更多的光,你就把光圈调大,这样会得到更多的焦散模糊。
12.1 薄透镜近似
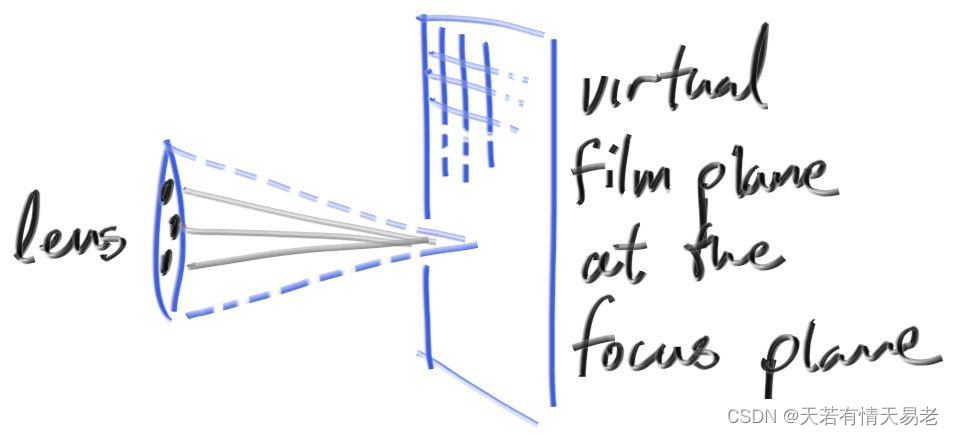
真正的相机有一个复杂的复合镜头。对于我们的代码,我们可以模拟顺序:传感器,镜头,光圈。然后我们可以找出将光线发送到哪里,并在计算后翻转图像(图像倒置投影到胶片上)。人们通常使用薄透镜近似值: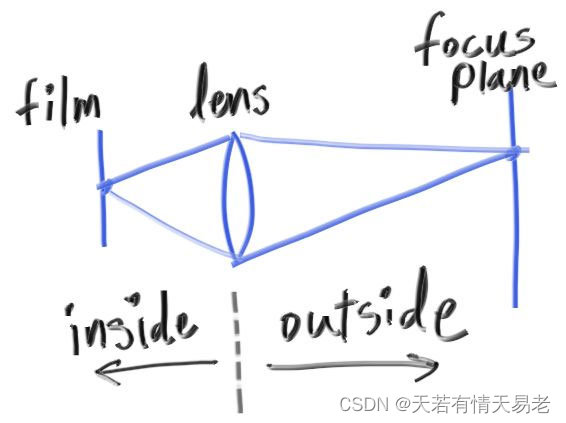
我们不需要模拟相机内部的所有操作。渲染一张不在相机内的图像,并不是那么复杂。相反,我们经常在镜头前发射一条光线,光线的方向朝向焦平面,这样,平面上的所有物体都是完美聚焦的。
12.2 生成光线
通常来讲,场景中所有的光线都是空lookfrom的位置发出的。为了实现焦散模糊,我们在以lookfrom点为圆盘的内部随机生成光线。半径越大,越容易焦散模糊。
vec3 random_in_unit_disk() {
    while (true) {
        auto p = vec3(random_double(-1,1), 	 random_double(-1,1), 0);
        if (p.length_squared() >= 1) continue;
        return p;
    }
}
class camera {
    public:
        camera(
            point3 lookfrom,
            point3 lookat,
            vec3   vup,
            double vfov, // vertical field-of-view in degrees
            double aspect_ratio,
            double aperture,
            double focus_dist
        ) {
            auto theta = degrees_to_radians(vfov);
            auto h = tan(theta/2);
            auto viewport_height = 2.0 * h;
            auto viewport_width = aspect_ratio * viewport_height;

            w = unit_vector(lookfrom - lookat);
            u = unit_vector(cross(vup, w));
            v = cross(w, u);

            origin = lookfrom;
            horizontal = focus_dist * viewport_width * u;
            vertical = focus_dist * viewport_height * v;
            lower_left_corner = origin - horizontal/2 - vertical/2 - focus_dist*w;

            lens_radius = aperture / 2;
        }


        ray get_ray(double s, double t) const {
            vec3 rd = lens_radius * random_in_unit_disk();
            vec3 offset = u * rd.x() + v * rd.y();

            return ray(
                origin + offset,
                lower_left_corner + s*horizontal + t*vertical - origin - offset
            );
        }

    private:
        point3 origin;
        point3 lower_left_corner;
        vec3 horizontal;
        vec3 vertical;
        vec3 u, v, w;
        double lens_radius;
};
[One Weekend 下一步是什么(十三)]
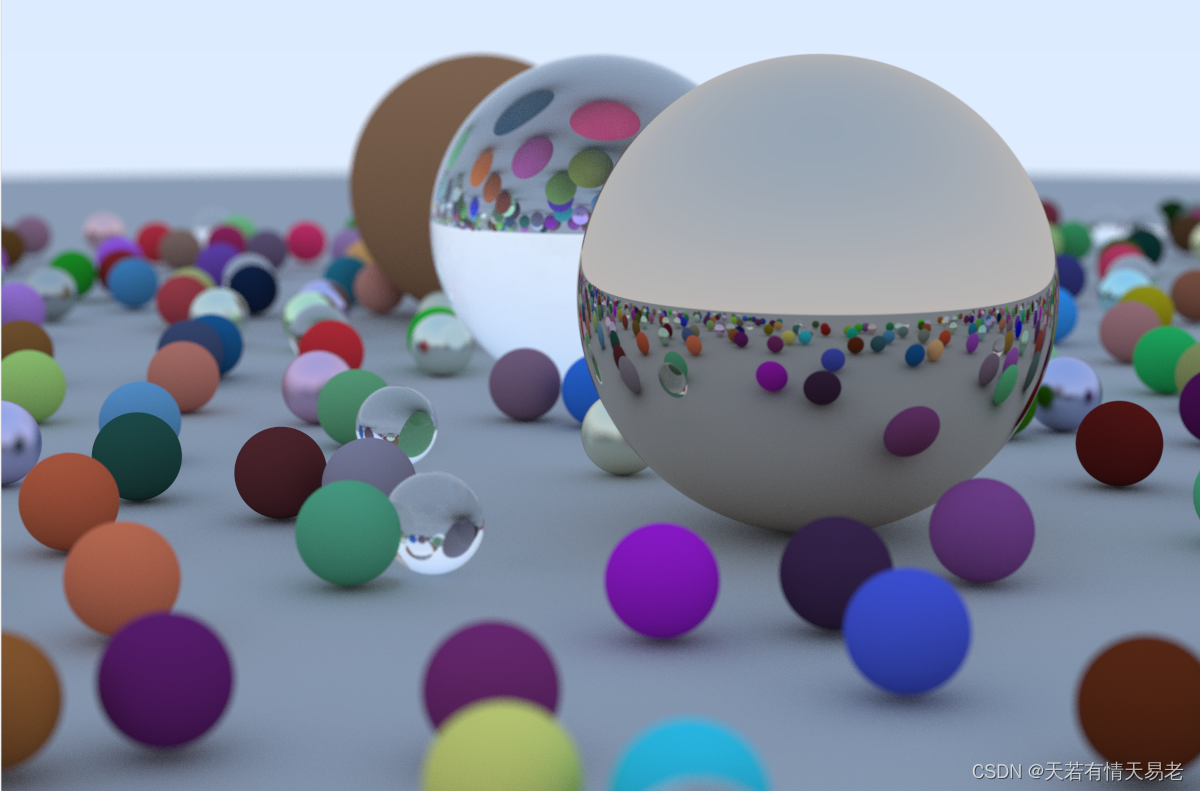
现在,让我们开始渲染一个场景。
hittable_list random_scene() {
    hittable_list world;

    auto ground_material = make_shared<lambertian>(color(0.5, 0.5, 0.5));
    world.add(make_shared<sphere>(point3(0,-1000,0), 1000, ground_material));

    for (int a = -11; a < 11; a++) {
        for (int b = -11; b < 11; b++) {
            auto choose_mat = random_double();
            point3 center(a + 0.9*random_double(), 0.2, b + 0.9*random_double());

            if ((center - point3(4, 0.2, 0)).length() > 0.9) {
                shared_ptr<material> sphere_material;

                if (choose_mat < 0.8) {
                    // diffuse
                    auto albedo = color::random() * color::random();
                    sphere_material = make_shared<lambertian>(albedo);
                    world.add(make_shared<sphere>(center, 0.2, sphere_material));
                } else if (choose_mat < 0.95) {
                    // metal
                    auto albedo = color::random(0.5, 1);
                    auto fuzz = random_double(0, 0.5);
                    sphere_material = make_shared<metal>(albedo, fuzz);
                    world.add(make_shared<sphere>(center, 0.2, sphere_material));
                } else {
                    // glass
                    sphere_material = make_shared<dielectric>(1.5);
                    world.add(make_shared<sphere>(center, 0.2, sphere_material));
                }
            }
        }
    }

    auto material1 = make_shared<dielectric>(1.5);
    world.add(make_shared<sphere>(point3(0, 1, 0), 1.0, material1));

    auto material2 = make_shared<lambertian>(color(0.4, 0.2, 0.1));
    world.add(make_shared<sphere>(point3(-4, 1, 0), 1.0, material2));

    auto material3 = make_shared<metal>(color(0.7, 0.6, 0.5), 0.0);
    world.add(make_shared<sphere>(point3(4, 1, 0), 1.0, material3));

    return world;
}

int main() {
    // Image
    const auto aspect_ratio = 3.0 / 2.0;
    const int image_width = 1200;
    const int image_height = static_cast<int>(image_width / aspect_ratio);
    const int samples_per_pixel = 500;
    const int max_depth = 50;
    // World

    auto world = random_scene();

    // Camera
    point3 lookfrom(13,2,3);
    point3 lookat(0,0,0);
    vec3 vup(0,1,0);
    auto dist_to_focus = 10.0;
    auto aperture = 0.1;
    camera cam(lookfrom, lookat, vup, 20, aspect_ratio, aperture, dist_to_focus);
    // Render
    std::cout << "P3\n" << image_width << ' ' << image_height << "\n255\n";

    for (int j = image_height-1; j >= 0; --j) {
        ...
}
参考资料:
https://raytracing.github.io/books/RayTracingInOneWeekend.html


 816
816

 被折叠的 条评论
为什么被折叠?
被折叠的 条评论
为什么被折叠?
 到【灌水乐园】发言


