


十二 、集成SpringSecurity
文档:https://docs.spring.io/spring-security/site/docs/5.2.0.RELEASE/reference/htmlsingle/
认识SpringSecurity
Spring Security 是针对Spring项目的安全框架,也是Spring Boot底层安全模块默认的技术选型,他可以实现强大的Web安全控制,对于安全控制,我们仅需要引入 spring-boot-starter-security 模块,进行少量的配置,即可实现强大的安全管理!
记住几个类:
WebSecurityConfigurerAdapter:自定义Security策略
AuthenticationManagerBuilder:自定义认证策略
@EnableWebSecurity:开启WebSecurity模式
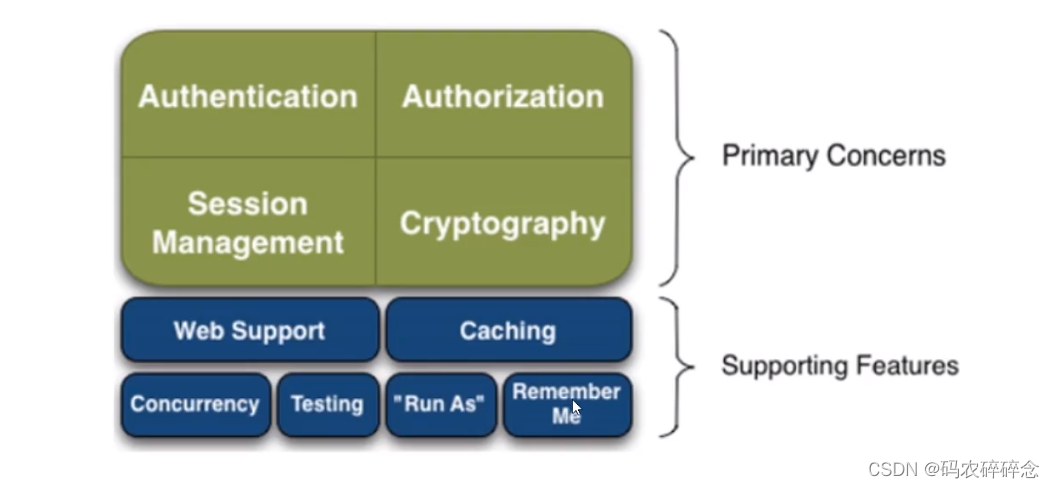
Spring Security的两个主要目标是 “认证” 和 “授权”(访问控制)。
“认证”(Authentication)
身份验证是关于验证您的凭据,如用户名/用户ID和密码,以验证您的身份。
身份验证通常通过用户名和密码完成,有时与身份验证因素结合使用。
“授权” (Authorization)
授权发生在系统成功验证您的身份后,最终会授予您访问资源(如信息,文件,数据库,资金,位置,几乎任何内容)的完全权限。
这个概念是通用的,而不是只在Spring Security 中存在。
1. 搭建环境
項目資源:https://gitee.com/ENNRIAAA/spring-security-material
1. 创建项目
项目名称:springboot-06-security
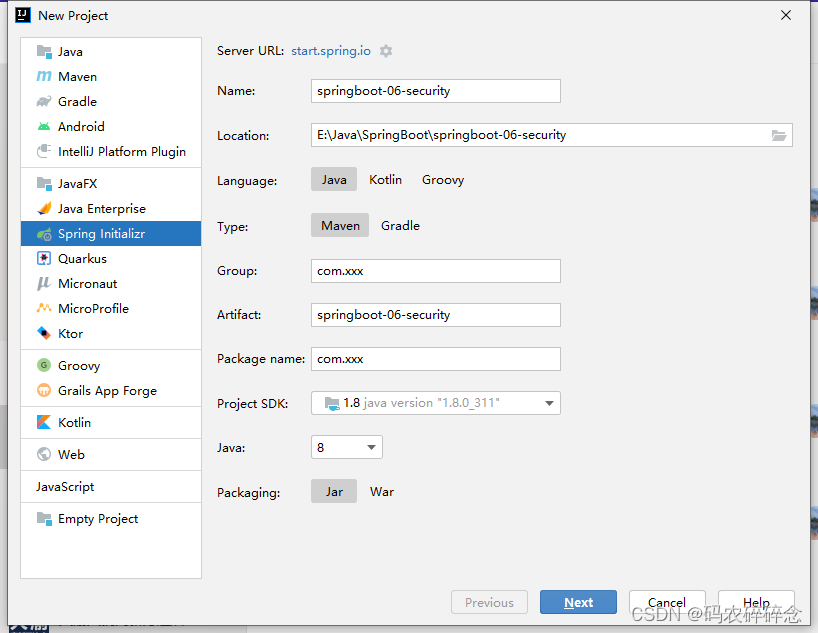
选择项目依赖
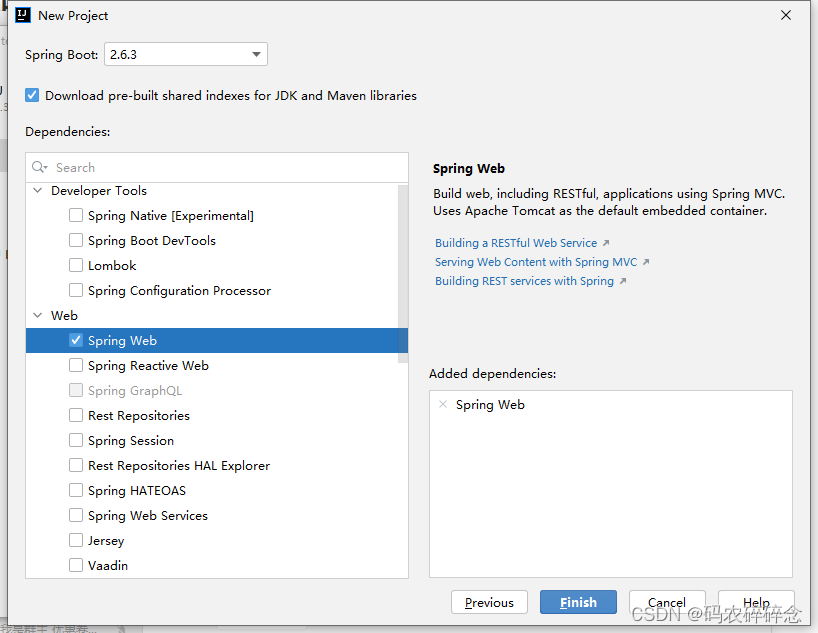
pom.xml导入依赖
          <!--thymeleaf模板-->
        <dependency>
            <groupId>org.thymeleaf</groupId>
            <artifactId>thymeleaf-spring5</artifactId>
        </dependency>
        <dependency>
            <groupId>org.thymeleaf.extras</groupId>
            <artifactId>thymeleaf-extras-java8time</artifactId>
        </dependency>
          <!--security-->
        <dependency>
            <groupId>org.springframework.boot</groupId>
            <artifactId>spring-boot-starter-security</artifactId>
        </dependency>
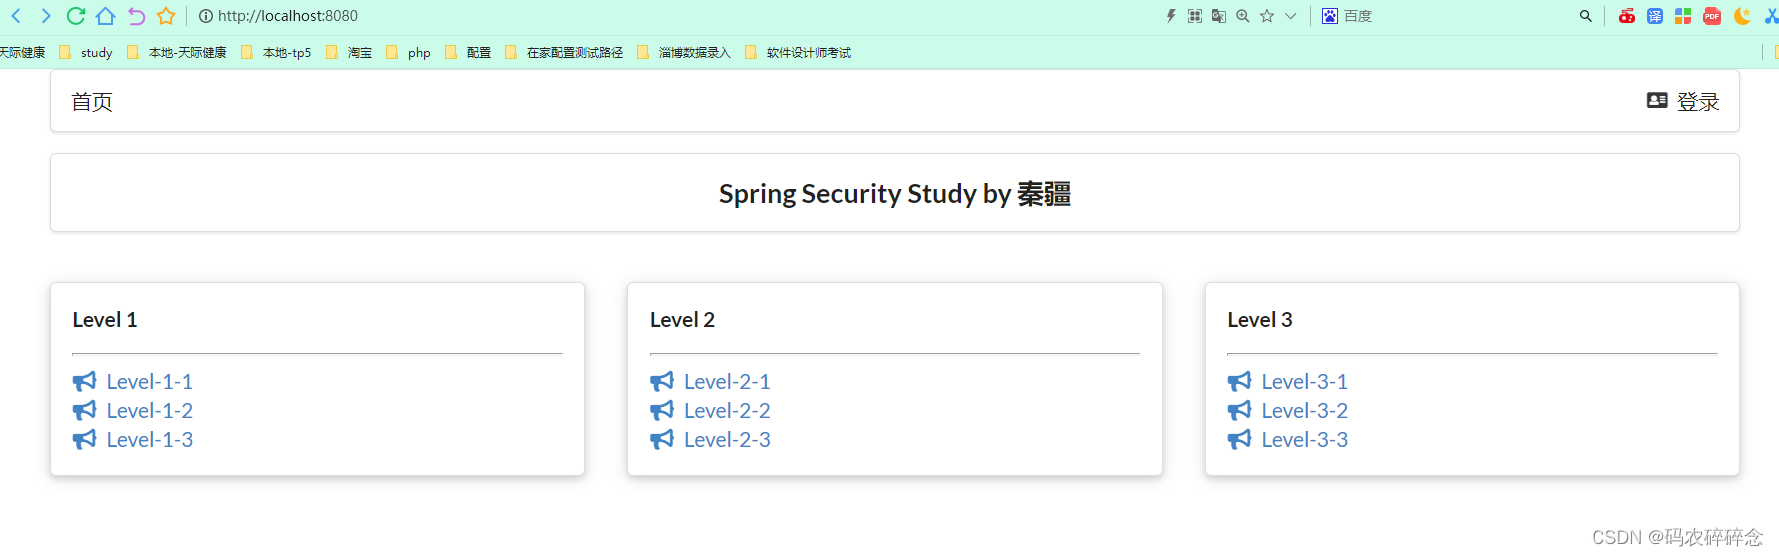
2. 导入静态资源
路径:https://spring.io/projects/spring-security
解压:
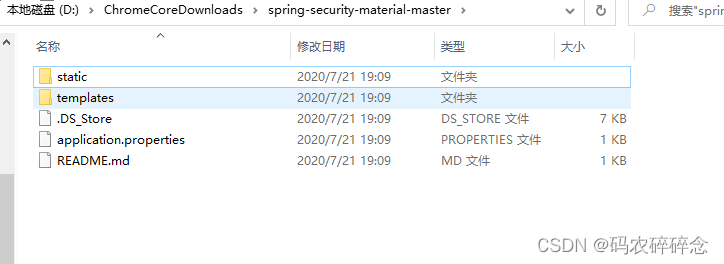
复制到项目resource里面
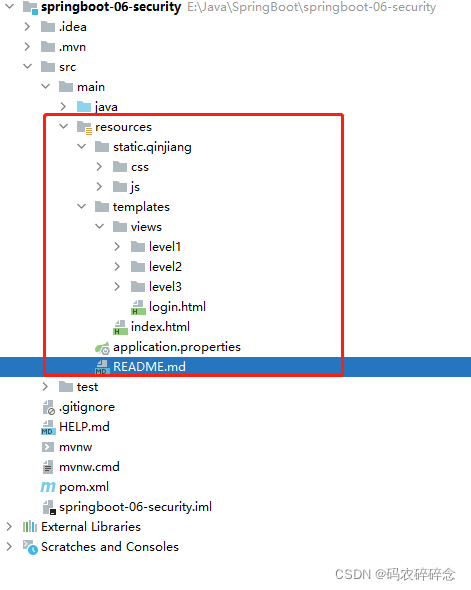
3. 编写控制器
路径: src/main/java/com/xxx/controller/RouterController.java
代码:
package com.xxx.controller;

import org.springframework.stereotype.Controller;
import org.springframework.web.bind.annotation.PathVariable;
import org.springframework.web.bind.annotation.RequestMapping;

@Controller
public class RouterController {
    @RequestMapping({"/","/index"})
    public String index(){
        return "index";
    }

    @RequestMapping("/toLogin")
    public String toLogin(){
        return "views/login";
    }

    @RequestMapping("/level1/{id}")
    public String level1(@PathVariable("id") int id){
        return "views/level1/"+id;
    }

    @RequestMapping("/level2/{id}")
    public String level2(@PathVariable("id") int id){
        return "views/level2/"+id;
    }

    @RequestMapping("/level3/{id}")
    public String level3(@PathVariable("id") int id){
        return "views/level3/"+id;
    }

}
运行:http://localhost:8080/
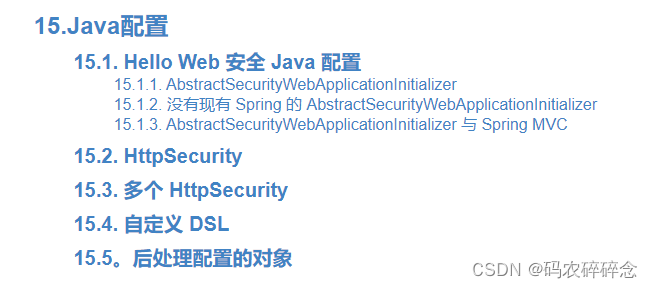
4. 配置
文档:https://docs.spring.io/spring-security/site/docs/5.2.0.RELEASE/reference/htmlsingle/
查看 15. Java Configuration 配置流程
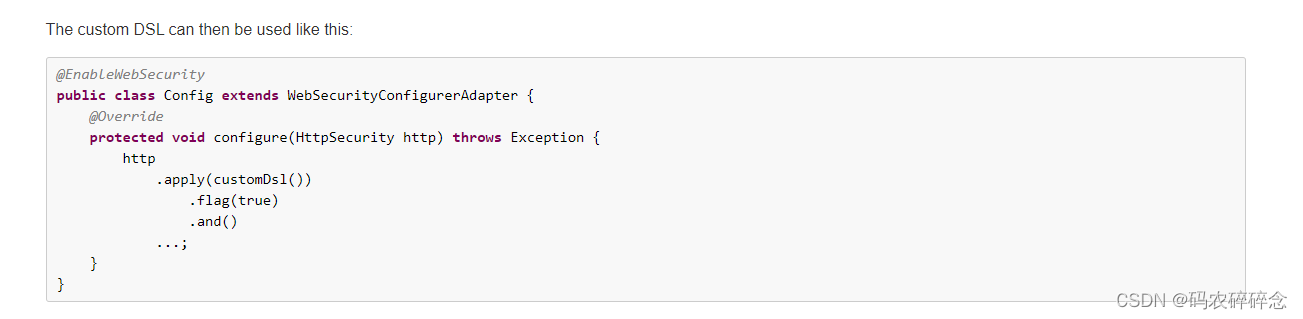
1. 自定义配置
文档路径:https://docs.spring.io/spring-security/site/docs/5.2.0.RELEASE/reference/htmlsingle/#jc-custom-dsls
1. 创建控制器
路径:src/main/java/com/xxx/config/SecurityConfig.java
代码:
package com.xxx.config;

import org.springframework.security.config.annotation.authentication.builders.AuthenticationManagerBuilder;
import org.springframework.security.config.annotation.web.builders.HttpSecurity;
import org.springframework.security.config.annotation.web.configuration.EnableWebSecurity;
import org.springframework.security.config.annotation.web.configuration.WebSecurityConfigurerAdapter;
import org.springframework.security.crypto.bcrypt.BCryptPasswordEncoder;

@EnableWebSecurity
public class SecurityConfig extends WebSecurityConfigurerAdapter {
    //授权
    @Override
    protected void configure(HttpSecurity http) throws Exception {
        //首页所有人可以访问,功能页只有对应有权限的人才能访问
        //请求授权的规则
        // 定制请求的授权规则
        // 首页所有人可以访问
        http.authorizeRequests().antMatchers("/").permitAll()
                .antMatchers("/level1/**").hasRole("vip1")
                .antMatchers("/level2/**").hasRole("vip2")
                .antMatchers("/level3/**").hasRole("vip3");
        //没有权限跳转到登录页面,需要开启登录的页面
        http.formLogin();
        //注销,开启了注销功能
        http.logout().logoutSuccessUrl("/");
    }

    // 认证
    //密码编码:passwordEncoder
    //在spring se
    @Override
    protected void configure(AuthenticationManagerBuilder auth) throws Exception {
        //super.configure(auth);
        //在内存中定义,也可以在jdbc中去拿....
        //Spring security 5.0中新增了多种加密方式,也改变了密码的格式。
        //要想我们的项目还能够正常登陆,需要修改一下configure中的代码。我们要将前端传过来的密码进行某种方式加密
        //spring security 官方推荐的是使用bcrypt加密方式。
        auth.inMemoryAuthentication().passwordEncoder(new BCryptPasswordEncoder())
                .withUser("fj").password(new BCryptPasswordEncoder().encode("123456")).roles("vip2", "vip3")
                .and()
                .withUser("root").password(new BCryptPasswordEncoder().encode("123456")).roles("vip1", "vip2", "vip3")
                .and()
                .withUser("guest").password(new BCryptPasswordEncoder().encode("123456")).roles("vip1", "vip2");

    }
}
2. 添加注销按钮
路径:src/main/resources/templates/index.html
代码:
 <div class="ui segment" id="index-header-nav" th:fragment="nav-menu">
        <div class="ui secondary menu">
            <a class="item"  th:href="@{/index}">首页</a>

            <!--登录注销-->
            <div class="right menu">
                <!--未登录-->
                <a class="item" th:href="@{/toLogin}">
                    <i class="address card icon"></i> 登录
                </a>
                <!--注销-->
                <a class="item" th:href="@{/logout}">
                    <i class="address card icon"></i> 注销
                </a>
                <!--已登录
                <a th:href="@{/usr/toUserCenter}">
                    <i class="address card icon"></i> admin
                </a>
                -->
            </div>
        </div>
    </div>
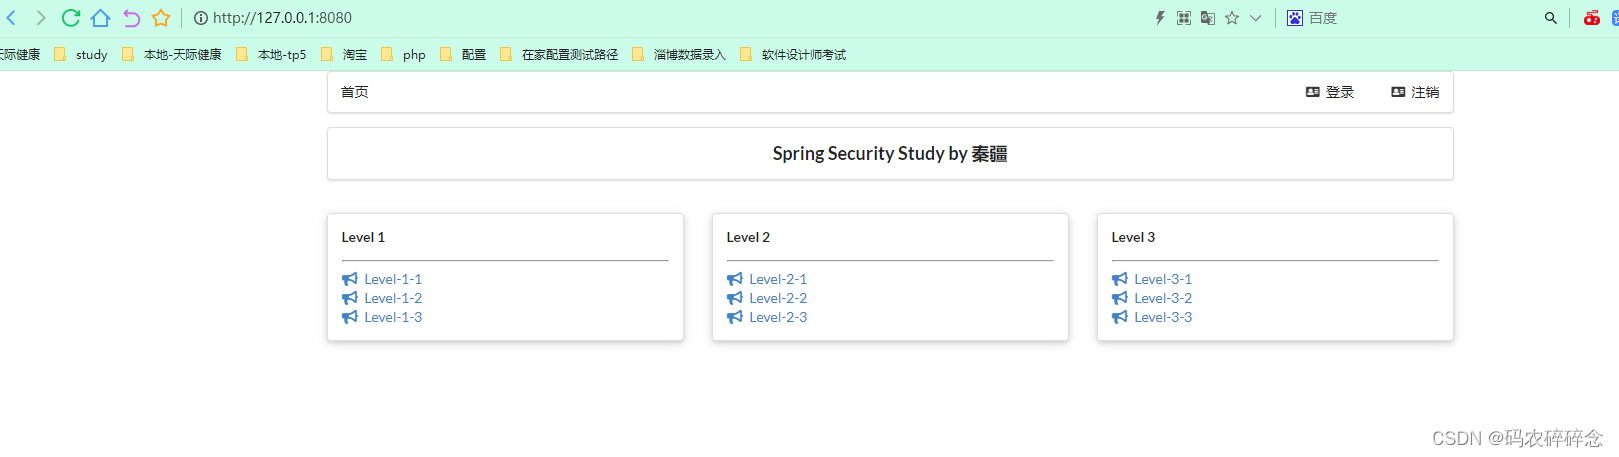
3. 测试
访问:http://127.0.0.1:8080/
点击任何一个链接都跳转到登录http://127.0.0.1:8080/login
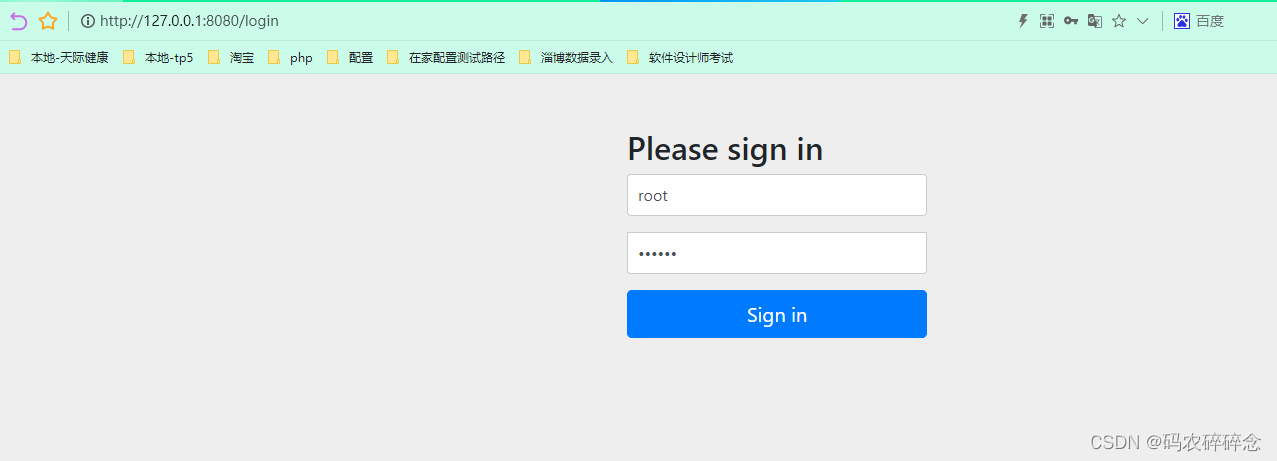
输入配置的用户名密码,登录,跳转到刚才点击的页面http://127.0.0.1:8080/level1/1

点击注销按钮注销

点击注销后跳转到:http://127.0.0.1:8080/logout
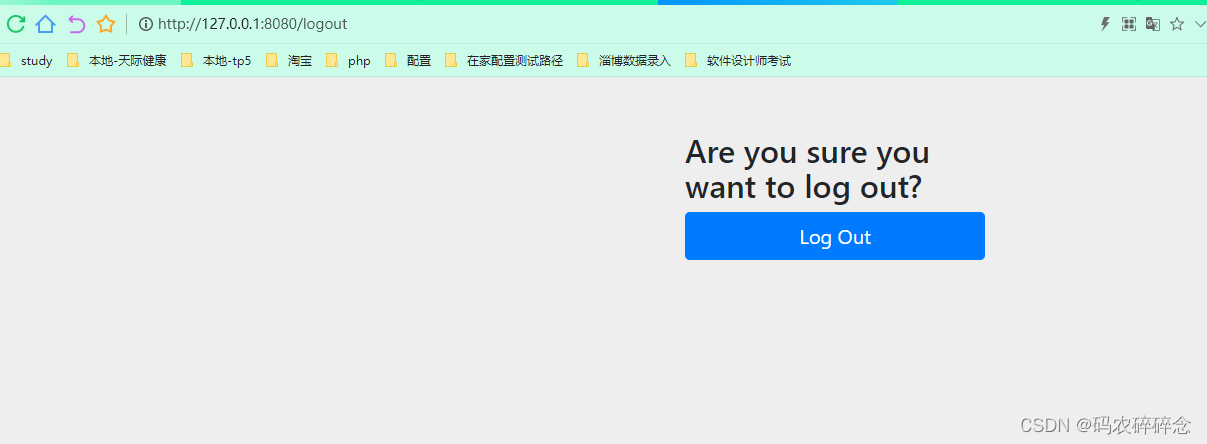
点击Log Out 返回首页
5. thymeleaf和security整合
我们现在又来一个需求:用户没有登录的时候,导航栏上只显示登录按钮,用户登录之后,导航栏可以显示登录的用户信息及注销按钮!还有就是,比如kuangshen这个用户,它只有 vip2,vip3功能,那么登录则只显示这两个功能,而vip1的功能菜单不显示!这个就是真实的网站情况了!该如何做呢?
我们需要结合thymeleaf中的一些功能
sec:authorize="isAuthenticated()":是否认证登录!来显示不同的页面
1. 导入包
<!-- https://mvnrepository.com/artifact/org.thymeleaf.extras/thymeleaf-extras-springsecurity4 -->
<dependency>
   <groupId>org.thymeleaf.extras</groupId>
   <artifactId>thymeleaf-extras-springsecurity5</artifactId>
   <version>3.0.4.RELEASE</version>
</dependency>
2. 前端页面修改
路径:src/main/resources/templates/index.html
1. 导入命名空间
<html lang="en" xmlns="http://www.w3.org/1999/xhtml"
      xmlns:th="http://www.thymeleaf.org"
      xmlns:sec="http://www.thymeleaf.org/extras/spring-security">
2. 修改导航栏,增加认证判断
  <!--登录注销-->
      <div class="right menu">

       <!--如果未登录:显示登录-->
       <!--未登录-->
       <div sec:authorize="!isAuthenticated()">
            <a class="item" th:href="@{/toLogin}">
               <i class="address card icon"></i> 登录
            </a>
       </div>

      <!--如果登录:显示用户名-->
      <div sec:authorize="isAuthenticated()">
           <a class="item">
              用户名:<span sec:authentication="name"></span>
              角色:<span sec:authentication="principal.authorities"></span>
            </a>
      </div>
      <!--如果登录:显示注销-->
     <div sec:authorize="isAuthenticated()">
          <!--注销-->
          <a class="item" th:href="@{/logout}">
             <i class="address card icon"></i> 注销
          </a>
     </div>

  </div>
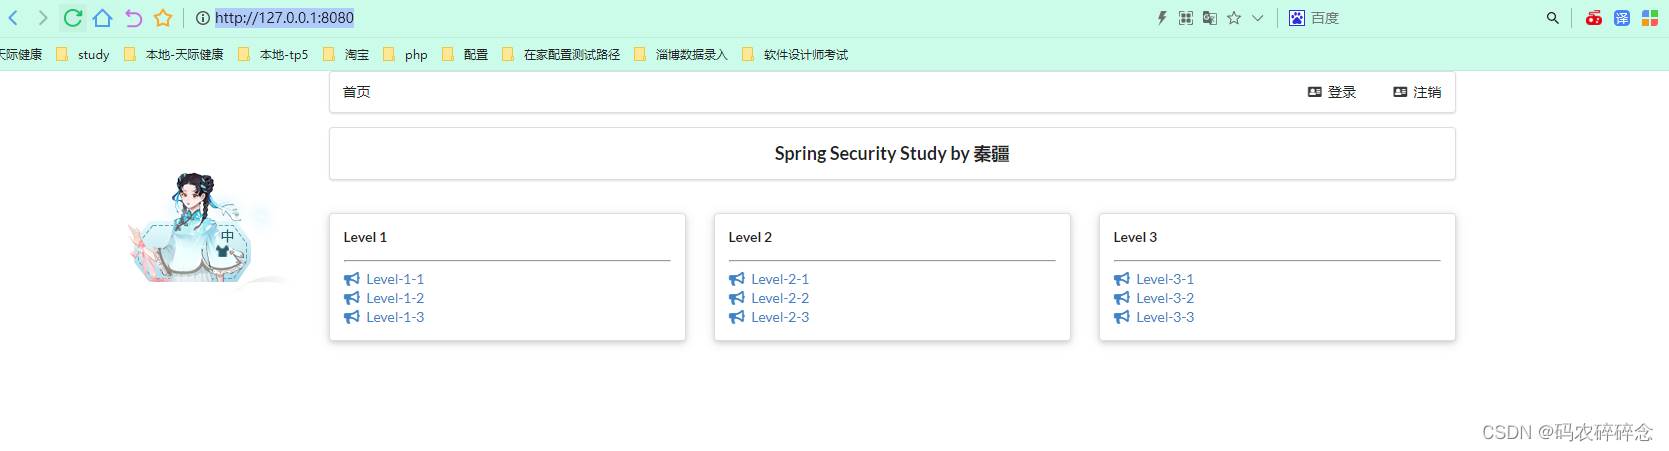
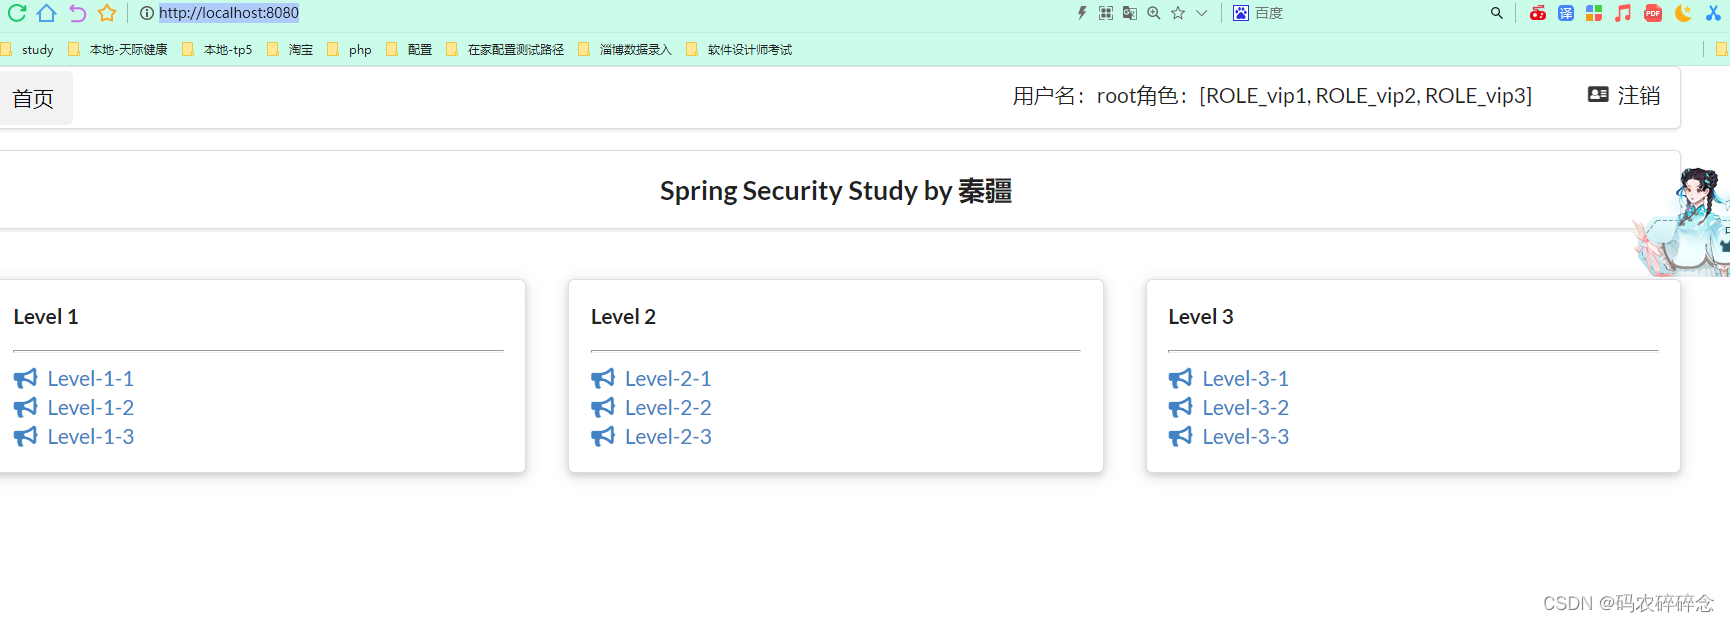
3. 测试
访问:http://localhost:8080/,登录成功后
4. 关闭csrf功能
路径:src/main/java/com/xxx/config/SecurityConfig.java
代码:
http.csrf().disable();//关闭csrf功能:跨站请求伪造,默认只能通过post方式提交logout请求
http.logout().logoutSuccessUrl("/");
5. 角色功能块认证
根据当前登录的角色,显示角色能看的范围
1. 实现
路径:src/main/resources/templates/index.html
代码:
 <div>
        <br>
        <div class="ui three column stackable grid">
            <!--动态菜单的实现 sec:authorize="hasRole('vip1')"-->
            <div class="column" sec:authorize="hasRole('vip1')">
                <div class="ui raised segment">
                    <div class="ui">
                        <div class="content">
                            <h5 class="content">Level 1</h5>
                            <hr>
                            <div><a th:href="@{/level1/1}"><i class="bullhorn icon"></i> Level-1-1</a></div>
                            <div><a th:href="@{/level1/2}"><i class="bullhorn icon"></i> Level-1-2</a></div>
                            <div><a th:href="@{/level1/3}"><i class="bullhorn icon"></i> Level-1-3</a></div>
                        </div>
                    </div>
                </div>
            </div>

            <div class="column" sec:authorize="hasRole('vip2')">
                <div class="ui raised segment">
                    <div class="ui">
                        <div class="content">
                            <h5 class="content">Level 2</h5>
                            <hr>
                            <div><a th:href="@{/level2/1}"><i class="bullhorn icon"></i> Level-2-1</a></div>
                            <div><a th:href="@{/level2/2}"><i class="bullhorn icon"></i> Level-2-2</a></div>
                            <div><a th:href="@{/level2/3}"><i class="bullhorn icon"></i> Level-2-3</a></div>
                        </div>
                    </div>
                </div>
            </div>

            <div class="column" sec:authorize="hasRole('vip3')">
                <div class="ui raised segment">
                    <div class="ui">
                        <div class="content">
                            <h5 class="content">Level 3</h5>
                            <hr>
                            <div><a th:href="@{/level3/1}"><i class="bullhorn icon"></i> Level-3-1</a></div>
                            <div><a th:href="@{/level3/2}"><i class="bullhorn icon"></i> Level-3-2</a></div>
                            <div><a th:href="@{/level3/3}"><i class="bullhorn icon"></i> Level-3-3</a></div>
                        </div>
                    </div>
                </div>
            </div>

        </div>
    </div>
2. 测试
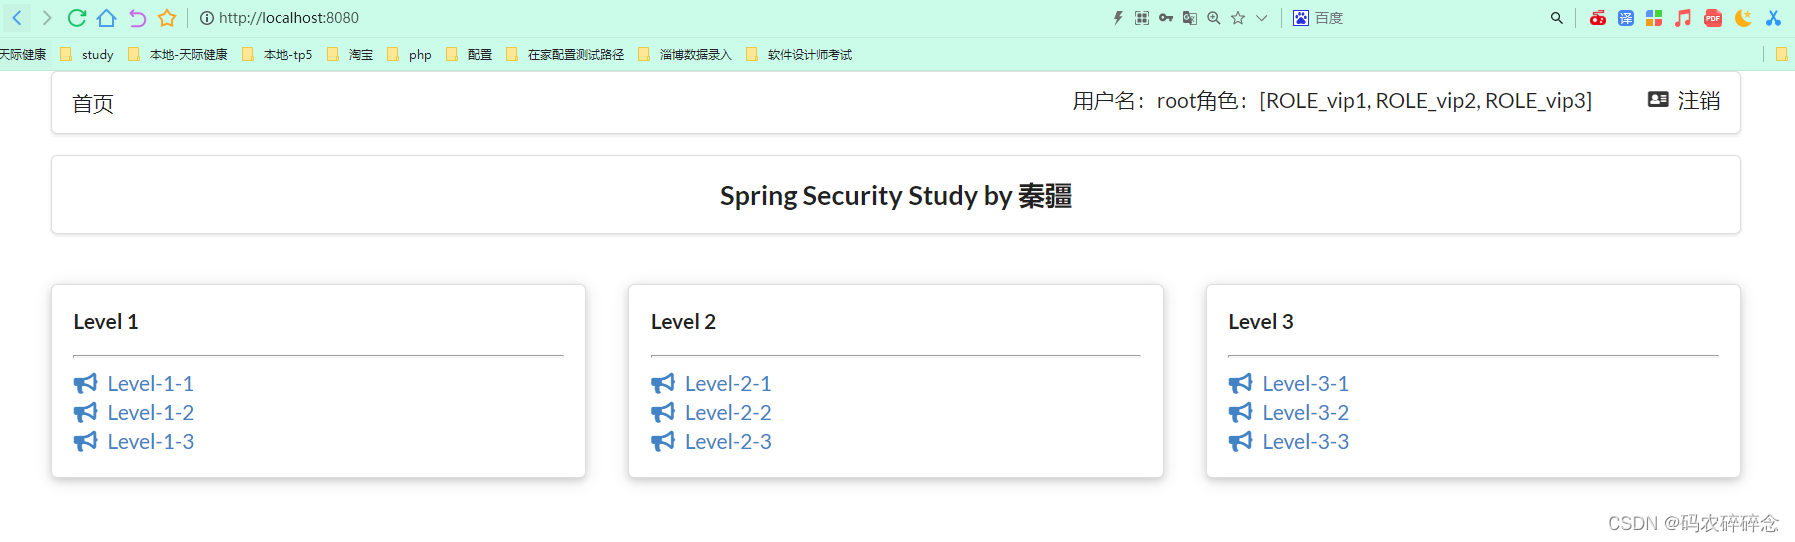
- root登录
http://localhost:8080/login
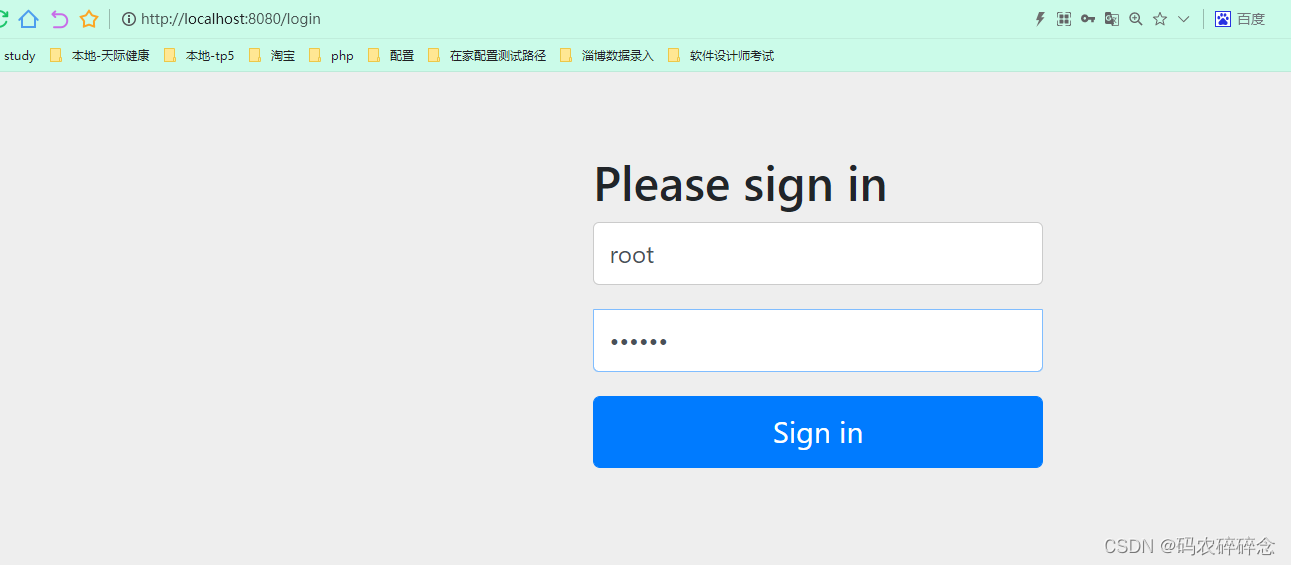
登录后
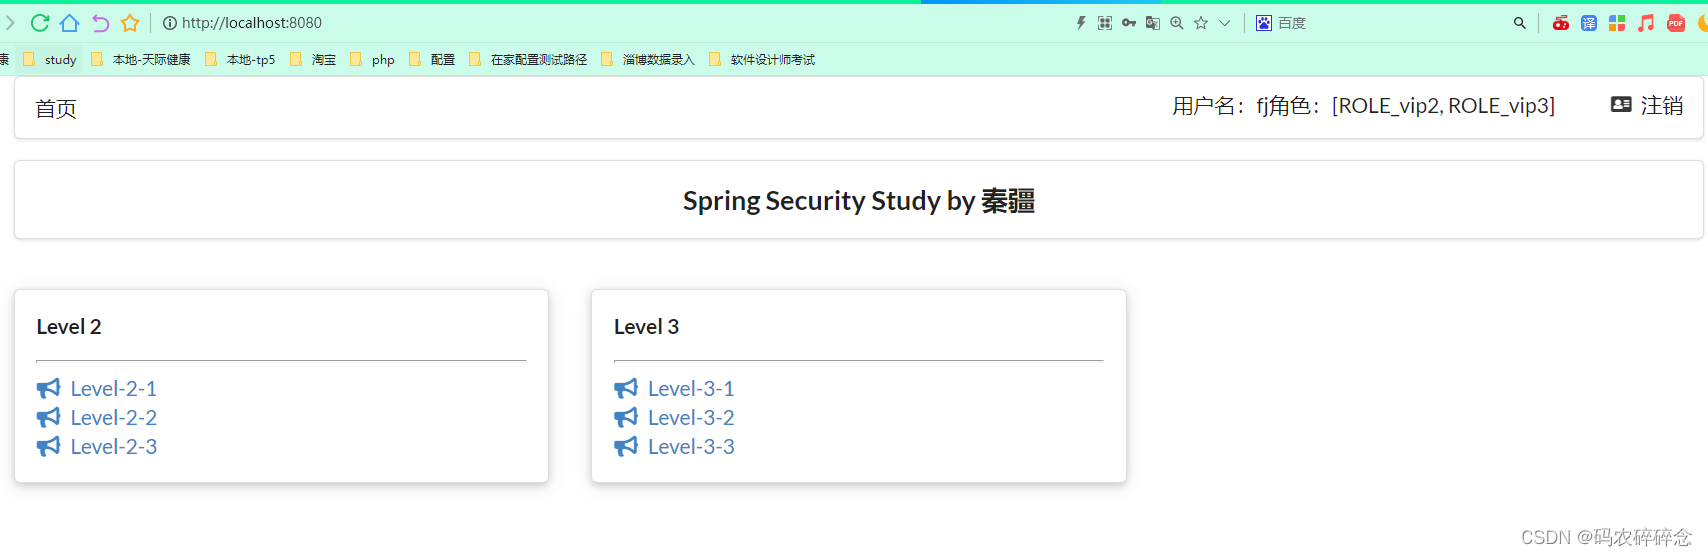
- fj 登录:
http://localhost:8080/login
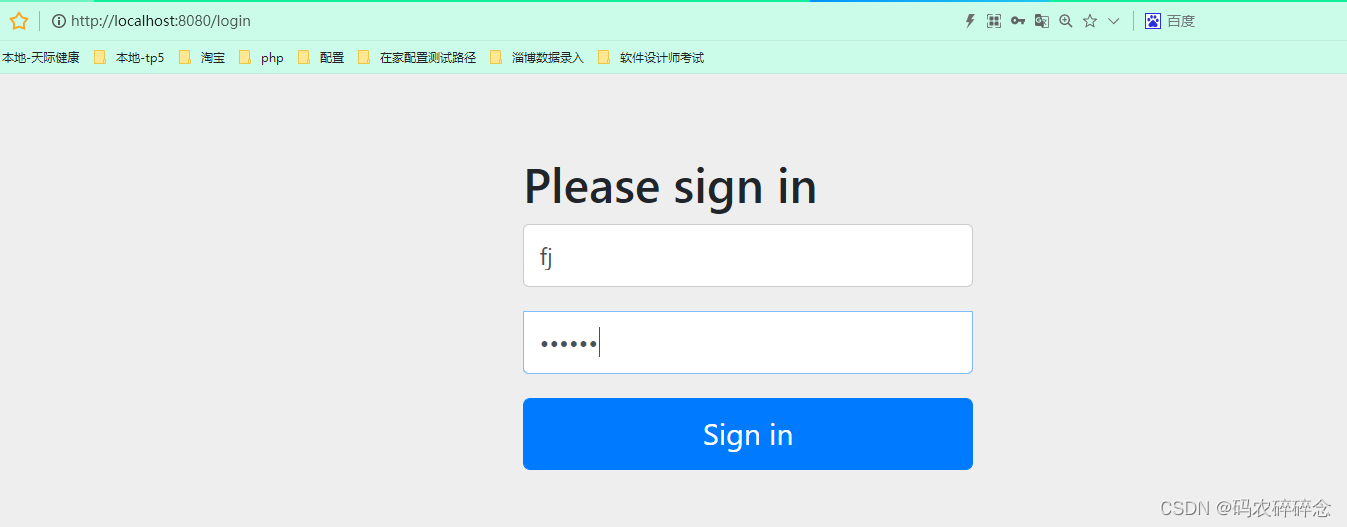
登录后
6. 记住我
现在的情况,我们只要登录之后,关闭浏览器,再登录,就会让我们重新登录,但是很多网站的情况,就是有一个记住密码的功能,这个该如何实现呢?很简单
1. 实现
路径:src/main/java/com/xxx/config/SecurityConfig.java
代码:
  //防止网站工具:get,post
        http.csrf().disable();//关闭csrf功能:跨站请求伪造,默认只能通过post方式提交logout请求
        //注销,开启了注销功能
        http.logout().logoutSuccessUrl("/");
        //记住我
        http.rememberMe();
2. 测试
我们再次启动项目测试一下,发现登录页多了一个记住我功能,我们登录之后关闭 浏览器,然后重新打开浏览器访问,发现用户依旧存在!
访问路径:http://localhost:8080/login
思考:如何实现的呢?其实非常简单
我们可以查看浏览器的cookie
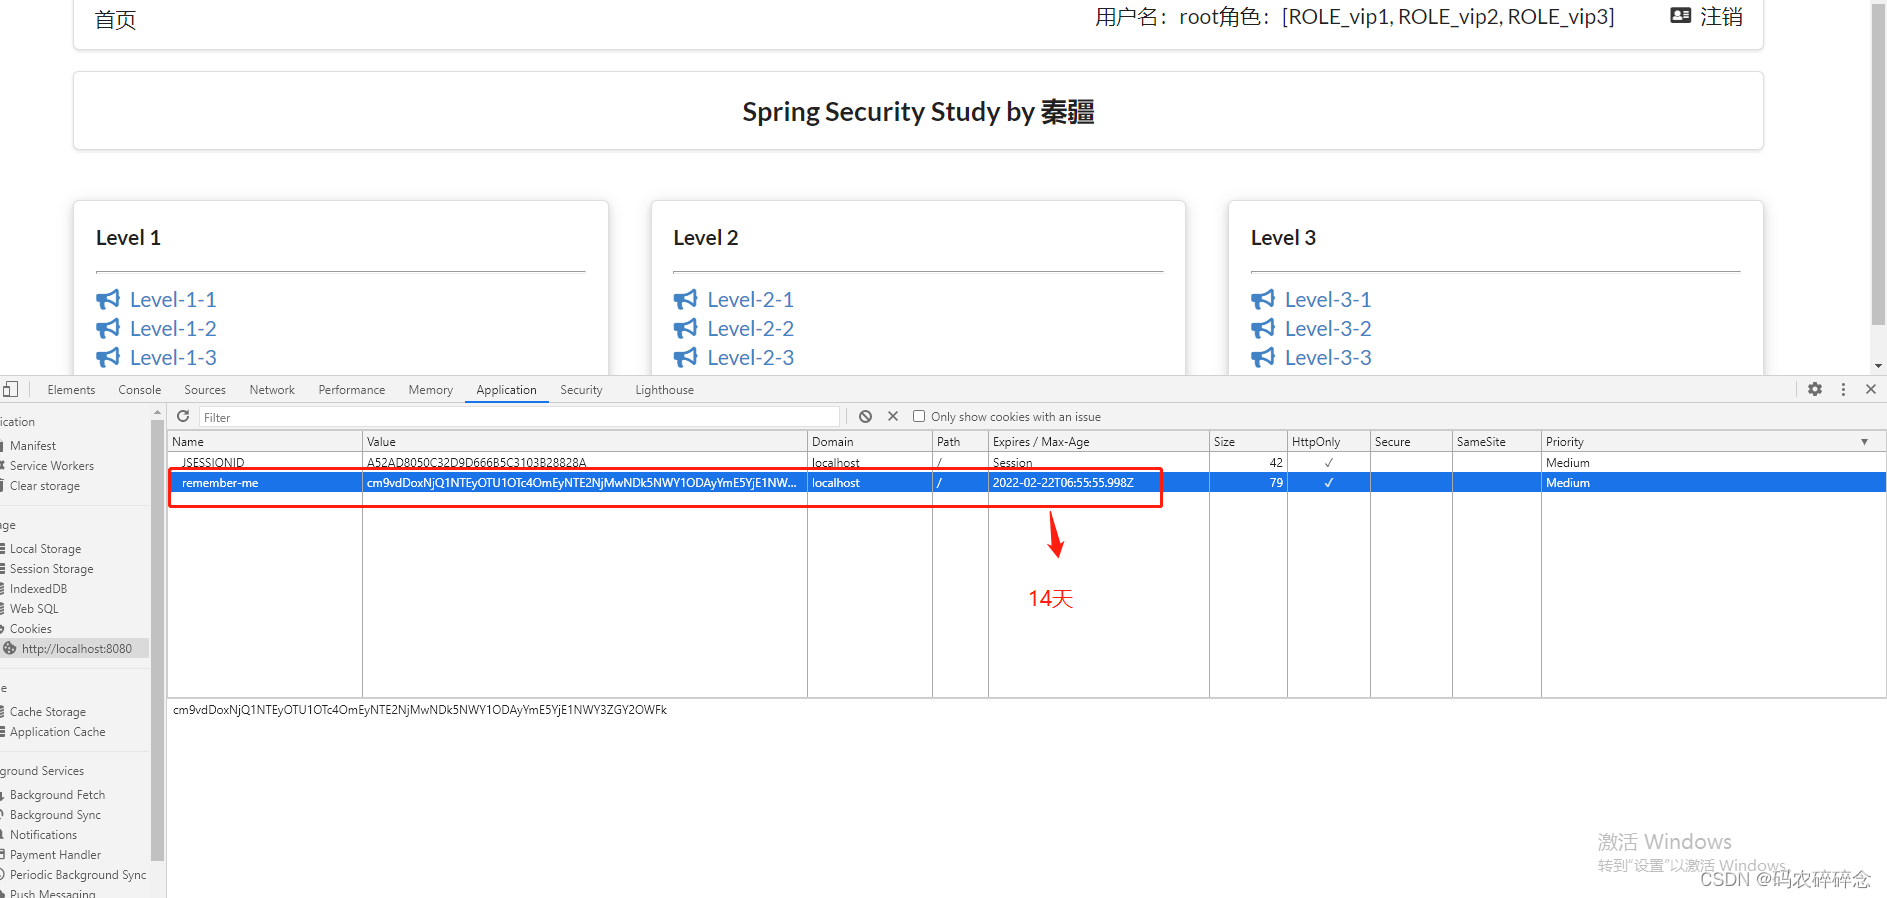
我们点击注销的时候,可以发现,spring security 帮我们自动删除了这个 cookie
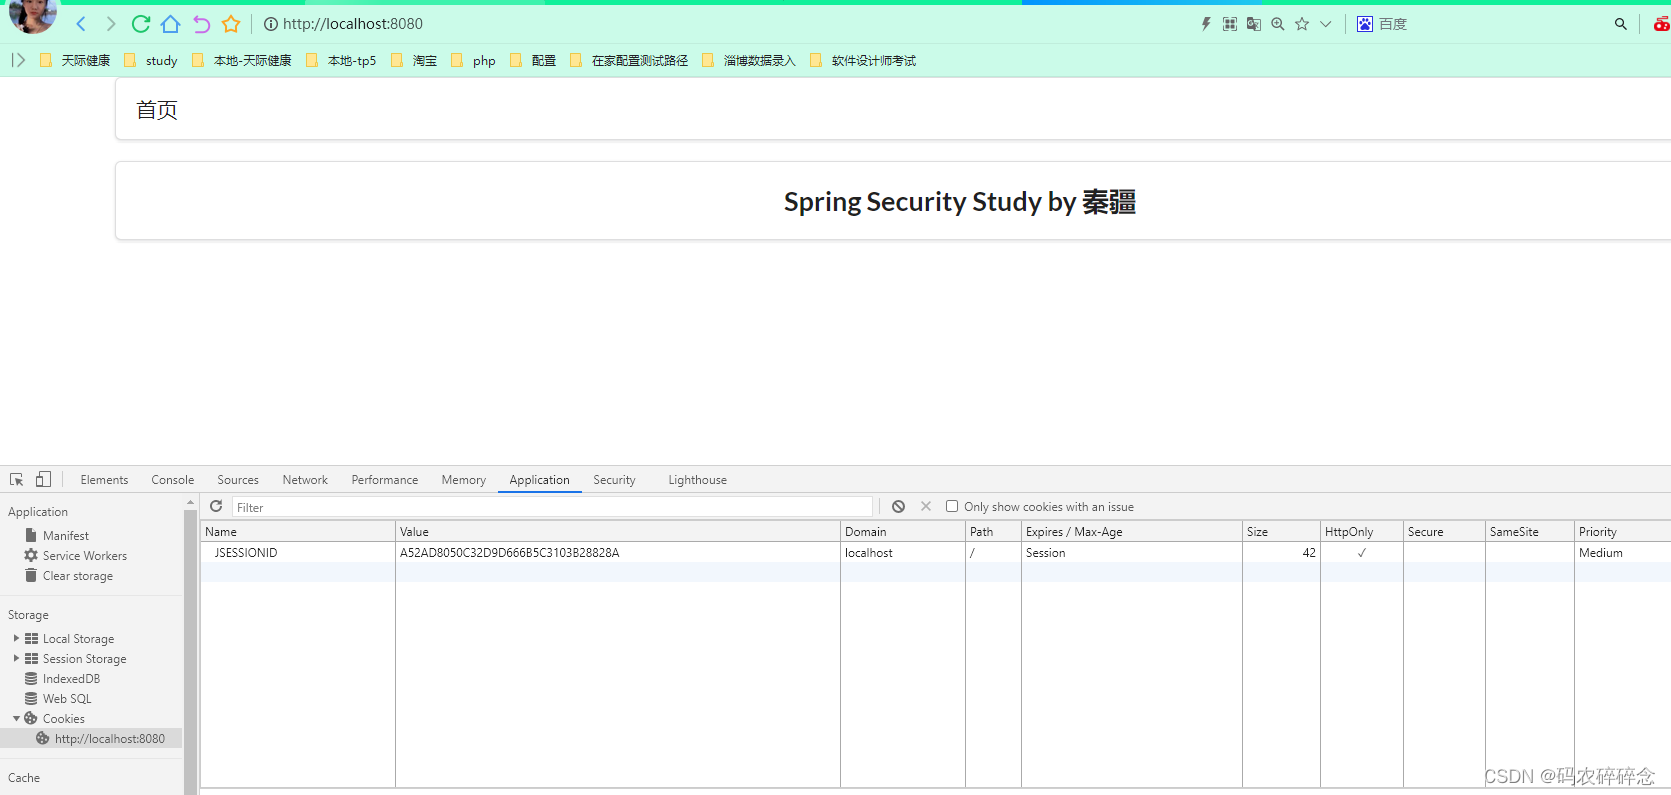
结论:登录成功后,将cookie发送给浏览器保存,以后登录带上这个cookie,只要通过检查就可以免登录了。如果点击注销,则会删除这个cookie,具体的原理我们在JavaWeb阶段都讲过了,这里就不在多说了!
7. 定制登录页
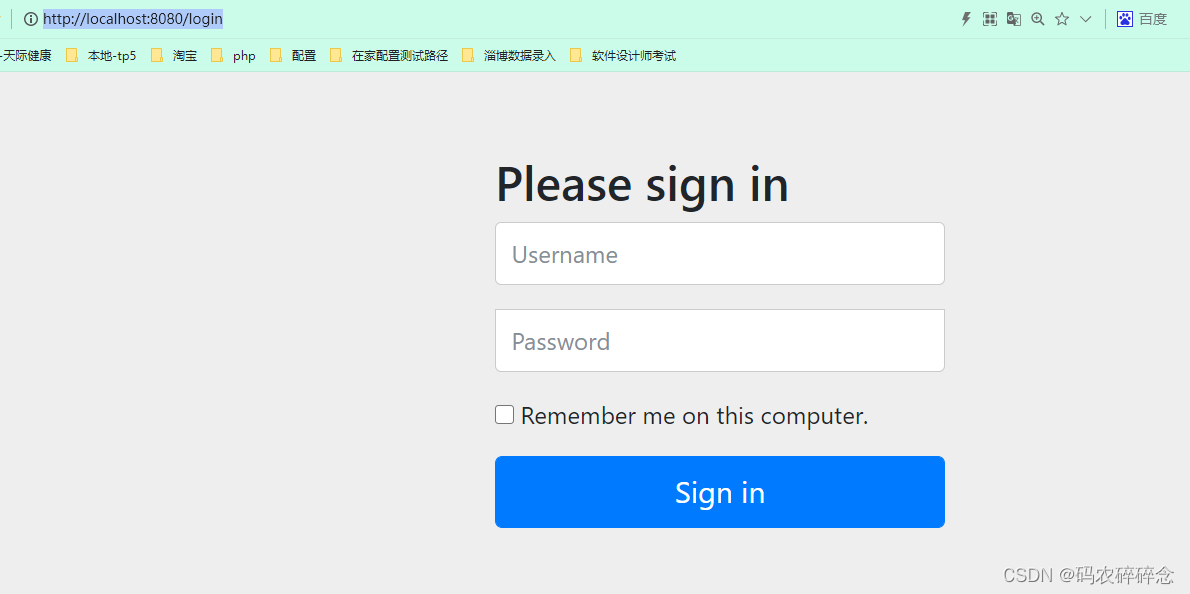
现在这个登录页面都是spring security 默认的,怎么样可以使用我们自己写的Login界面呢?
1. 指定 loginpage
路径:src/main/java/com/xxx/config/SecurityConfig.java
代码:
http.formLogin().loginPage("/toLogin");
2. 定义的 login请求
路径:src/main/resources/templates/index.html
代码:
  <!--未登录-->
  <div sec:authorize="!isAuthenticated()">
       <a class="item" th:href="@{/toLogin}">
       <i class="address card icon"></i> 登录 </a>
 </div>
3. 配置页面提交地址
我们登录,需要将这些信息发送到哪里,我们也需要配置,login.html 配置提交请求及方式,方式必须为post:
路径:src/main/resources/templates/views/login.html
代码:
<form th:action="@{/login}" method="post">
   <div class="field">
       <label>Username</label>
       <div class="ui left icon input">
           <input type="text" placeholder="Username" name="username">
           <i class="user icon"></i>
       </div>
   </div>
   <div class="field">
       <label>Password</label>
       <div class="ui left icon input">
           <input type="password" name="password">
           <i class="lock icon"></i>
       </div>
   </div>
   <input type="submit" class="ui blue submit button"/>
</form>
4. 验证处理参数
这个请求提交上来,我们还需要验证处理,怎么做呢?我们可以查看formLogin()方法的源码!我们配置接收登录的用户名和密码的参数!
路径:src/main/java/com/xxx/config/SecurityConfig.javal
代码:
http.formLogin()
  .usernameParameter("username")
  .passwordParameter("password")
  .loginPage("/toLogin")
  .loginProcessingUrl("/login"); // 登陆表单提交请求
5、在登录页增加记住我的多选框
路径:src/main/resources/templates/views/login.html
代码:
 <div class="field">
      <input type="checkbox" name="remember"> 记住我
 </div>
6、后端验证处理!
//定制记住我的参数!
http.rememberMe().rememberMeParameter("remember");
十三、Shiro
1、Shiro简介
1.1 什么是Shiro?
- Apache Shiro是一个Java 的安全(权限)框架。
- Shiro可以非常容易的开发出足够好的应用,其不仅可以用在JavaSE环境,也可以用在JavaEE环境。
- Shiro可以完成,认证,授权,加密,会话管理,Web集成,缓存等.
下载地址: http://shiro.apache.org/
1.2 有哪些功能

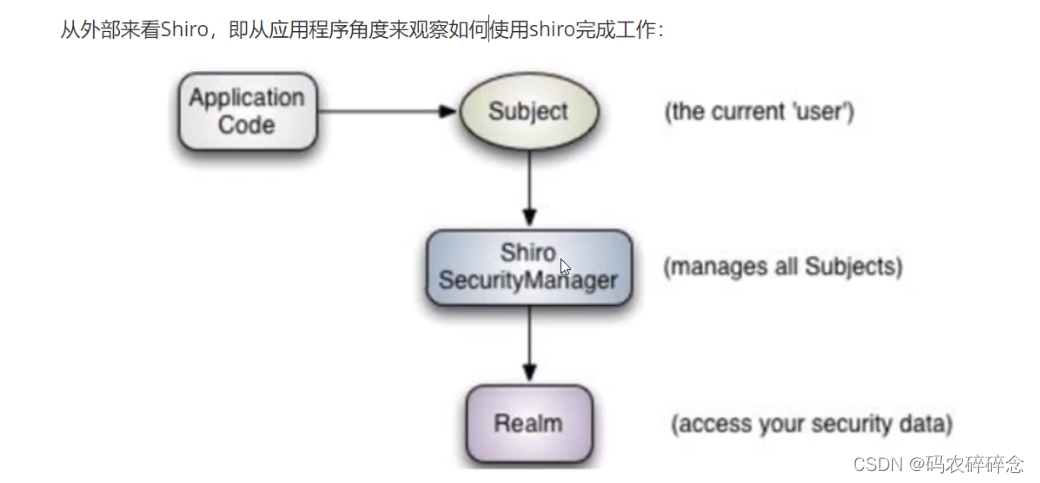
1.3 外部结构

1.4 内部结构
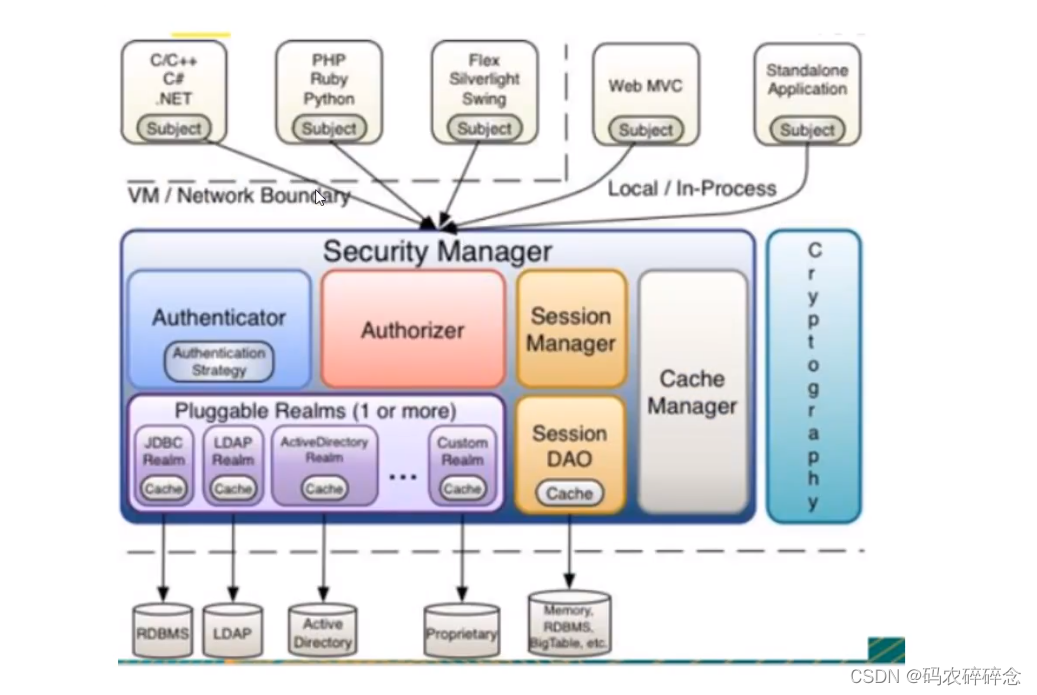
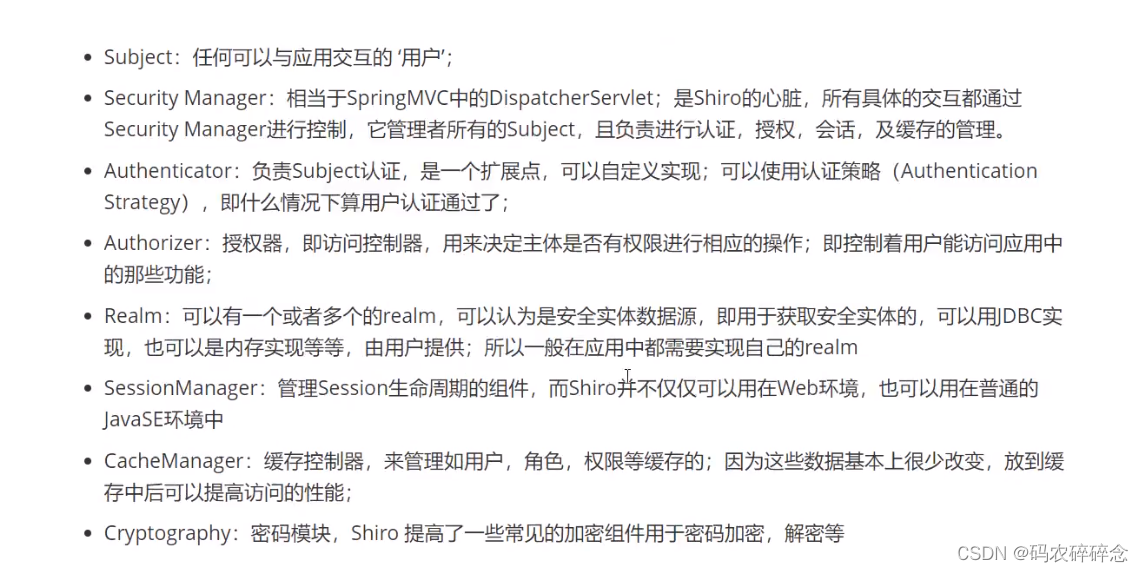
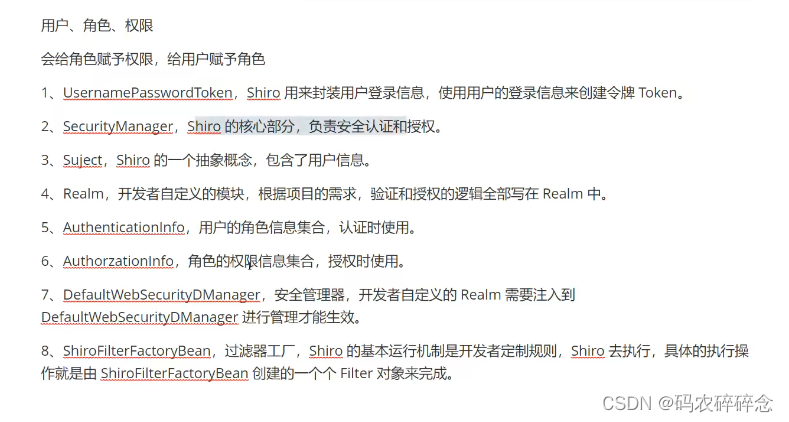
1.5 核心组件

2、快速开始
github地址:https://github.com/apache/shiro
十分钟入门地址:https://shiro.apache.org/10-minute-tutorial.html
mvn仓库:https://mvnrepository.com/
1. 搭建环境
1. 新建项目
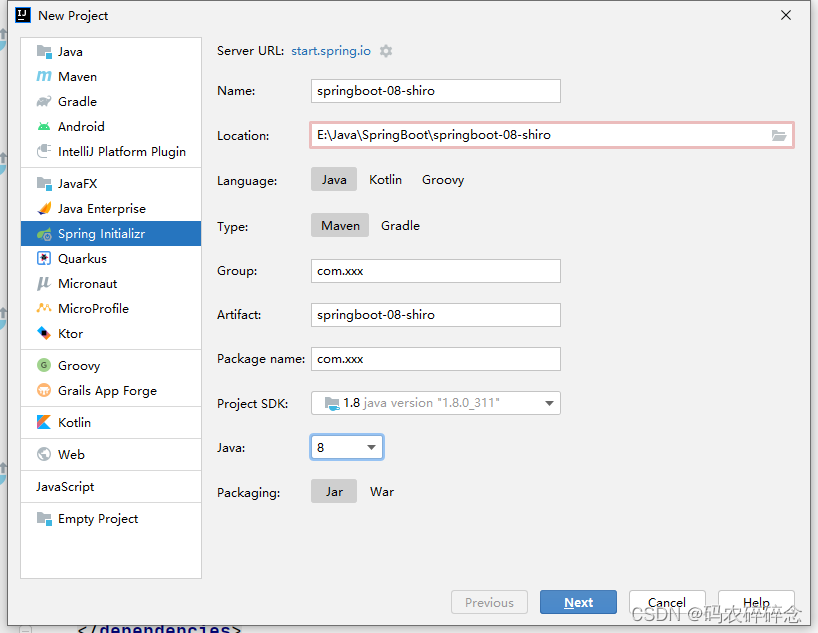
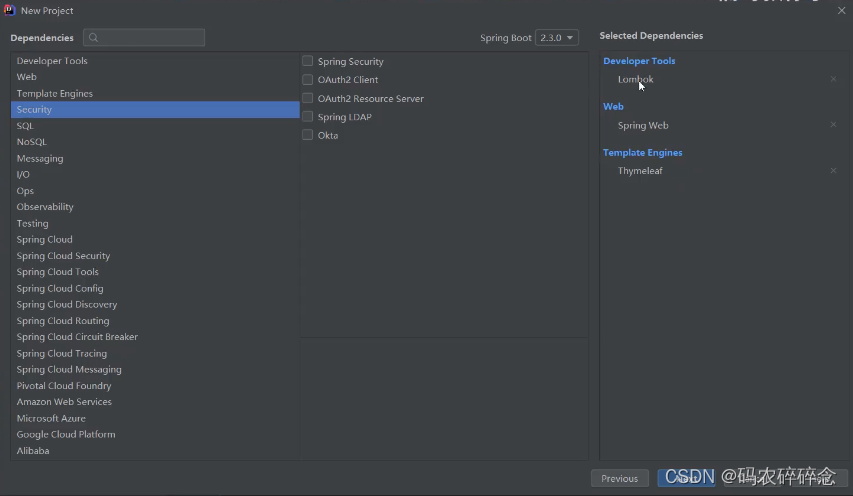
选择依赖
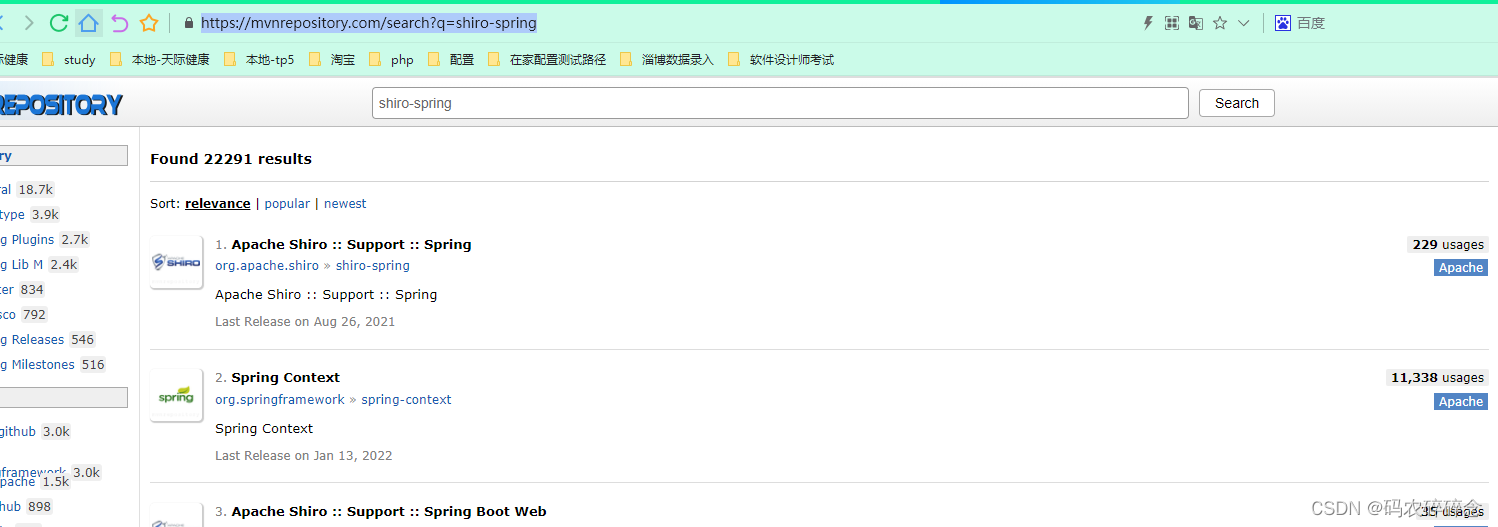
2. 添加依赖shiro-spring
- 地址:https://mvnrepository.com/search?q=shiro-spring 点击第一个进去
- 点击第一个版本进去
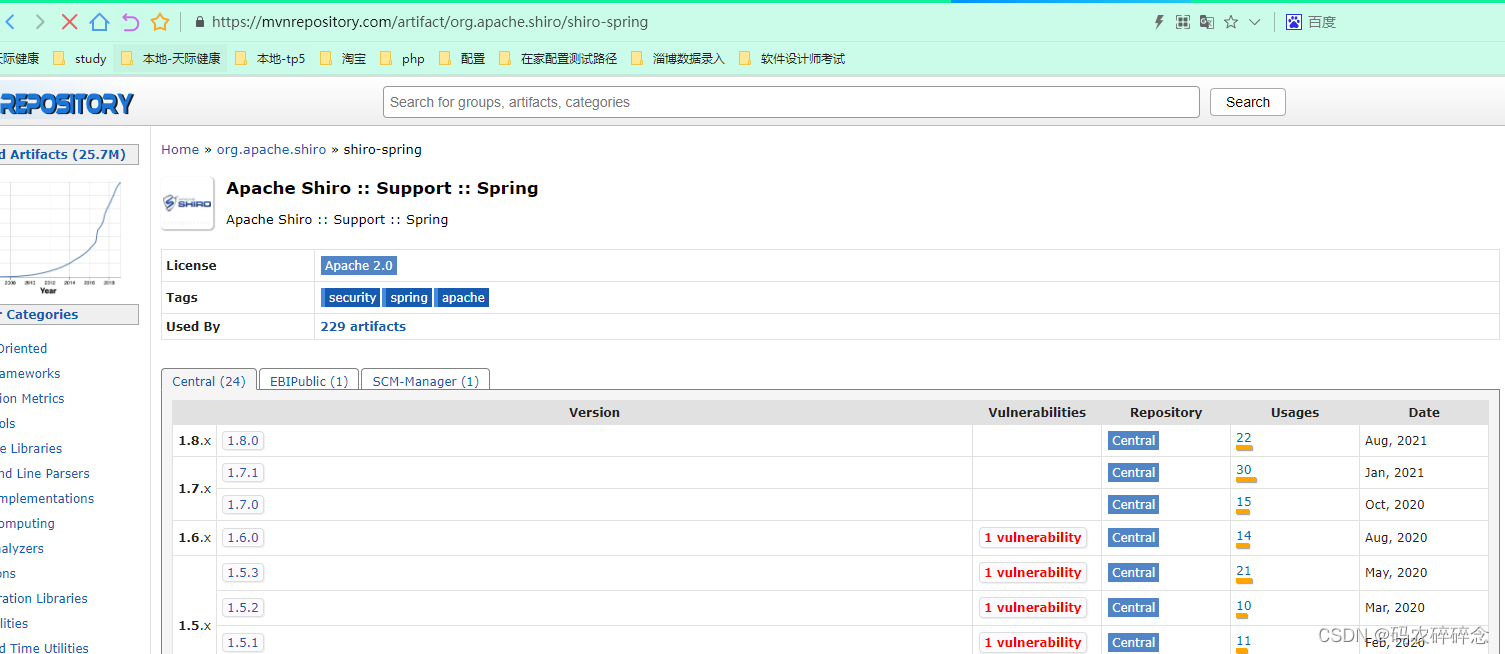
- 版本代码如下:
<!-- https://mvnrepository.com/artifact/org.apache.shiro/shiro-spring -->
<dependency>
    <groupId>org.apache.shiro</groupId>
    <artifactId>shiro-spring</artifactId>
    <version>1.8.0</version>
</dependency>
- 导入到pom.xml依赖,pom.xml如下:
 <dependencies>
          <!--shiro-spring-->
        <dependency>
            <groupId>org.apache.shiro</groupId>
            <artifactId>shiro-spring</artifactId>
            <version>1.8.0</version>
        </dependency>

        <dependency>
            <groupId>org.springframework.boot</groupId>
            <artifactId>spring-boot-starter-thymeleaf</artifactId>
        </dependency>
        <dependency>
            <groupId>org.springframework.boot</groupId>
            <artifactId>spring-boot-starter-web</artifactId>
        </dependency>

        <dependency>
            <groupId>org.projectlombok</groupId>
            <artifactId>lombok</artifactId>
            <optional>true</optional>
        </dependency>
        <dependency>
            <groupId>org.springframework.boot</groupId>
            <artifactId>spring-boot-starter-test</artifactId>
            <scope>test</scope>
        </dependency>
    </dependencies>
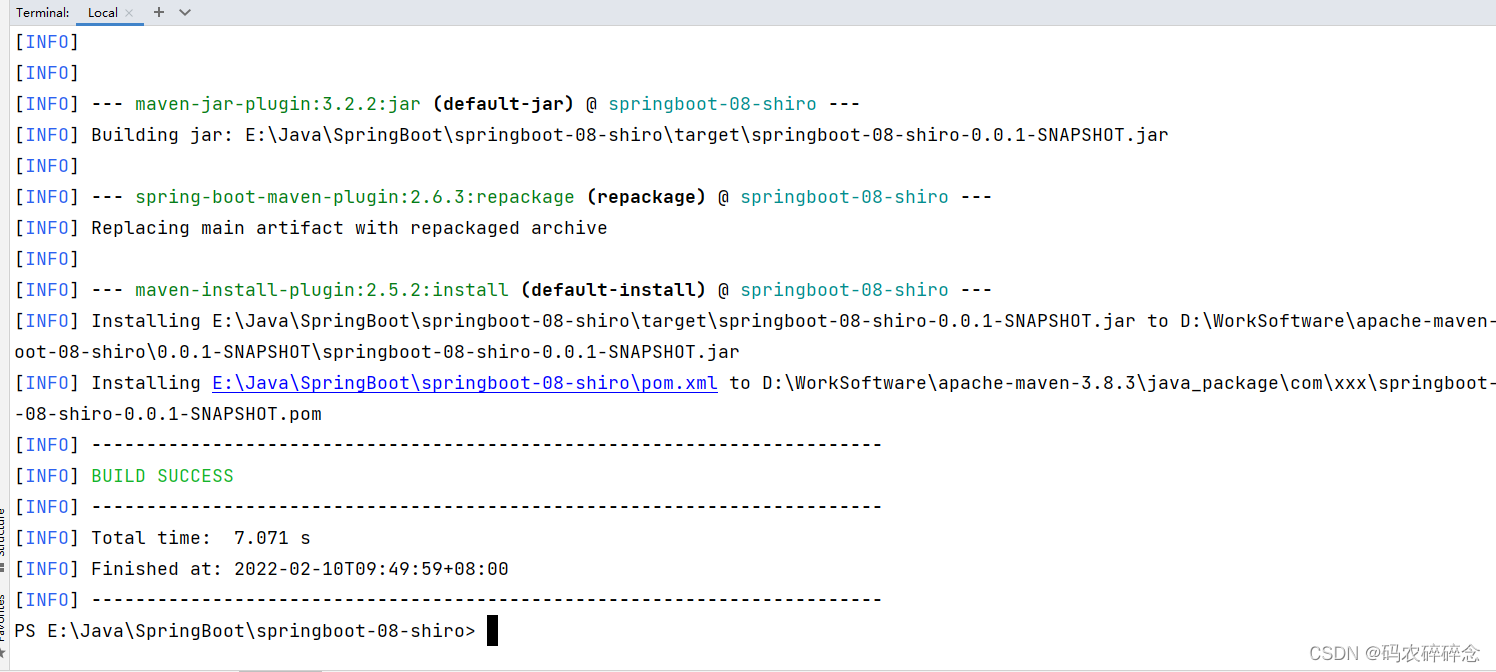
- 运行命令
Terminal: mvn clean install
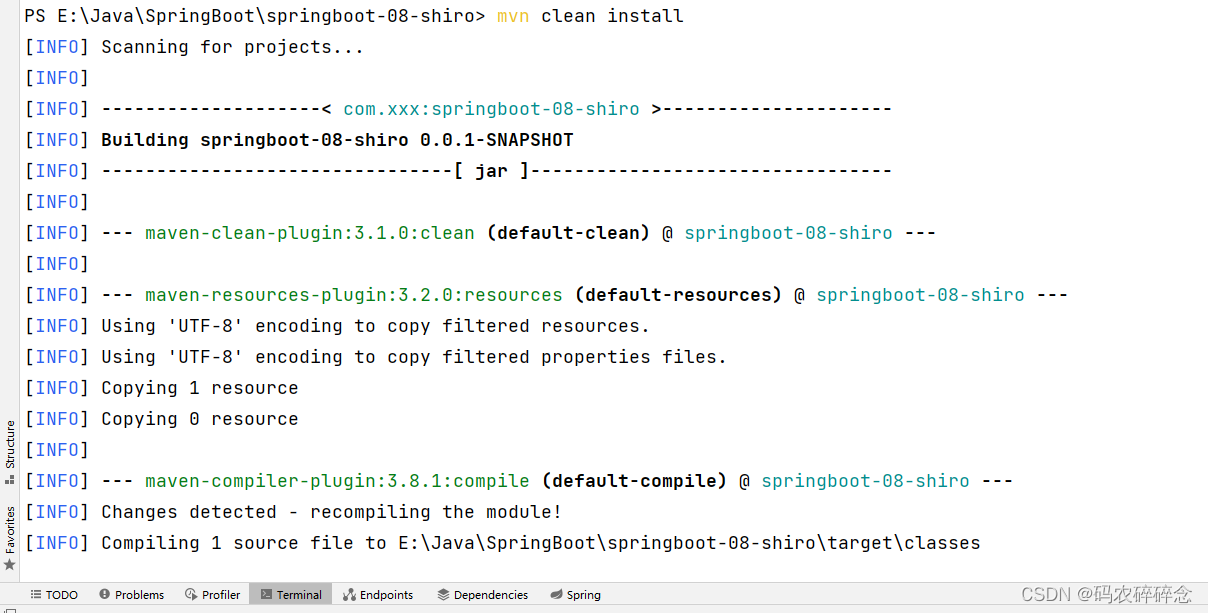
运行结果
2. 自定义shiro 过滤器
1. 创建表
/*
 Navicat Premium Data Transfer

 Source Server         : localhost
 Source Server Type    : MySQL
 Source Server Version : 50726
 Source Host           : localhost:3306
 Source Schema         : mybatis

 Target Server Type    : MySQL
 Target Server Version : 50726
 File Encoding         : 65001

 Date: 10/02/2022 10:06:11
*/

SET NAMES utf8mb4;
SET FOREIGN_KEY_CHECKS = 0;

-- ----------------------------
-- Table structure for account
-- ----------------------------
DROP TABLE IF EXISTS `account`;
CREATE TABLE `account`  (
  `id` int(11) NOT NULL AUTO_INCREMENT COMMENT 'id',
  `username` varchar(50) CHARACTER SET utf8 COLLATE utf8_unicode_ci NOT NULL COMMENT '用户名',
  `password` varchar(100) CHARACTER SET utf8 COLLATE utf8_unicode_ci NOT NULL COMMENT '密码',
  `perms` varchar(50) CHARACTER SET utf8 COLLATE utf8_unicode_ci NULL DEFAULT NULL COMMENT '权限',
  `role` varchar(50) CHARACTER SET utf8 COLLATE utf8_unicode_ci NULL DEFAULT NULL COMMENT '角色',
  PRIMARY KEY (`id`) USING BTREE
) ENGINE = MyISAM AUTO_INCREMENT = 4 CHARACTER SET = utf8 COLLATE = utf8_unicode_ci COMMENT = '账户表' ROW_FORMAT = Dynamic;

-- ----------------------------
-- Records of account
-- ----------------------------
INSERT INTO `account` VALUES (1, 'zs', '123123', NULL, NULL);
INSERT INTO `account` VALUES (2, 'ls', '123123', 'manage', NULL);
INSERT INTO `account` VALUES (3, 'www', '123123', 'manage', 'administerator');

SET FOREIGN_KEY_CHECKS = 1;
2. 添加依赖
注意:
官方依赖:spring-boot-starter + 名字
第三方依赖:名字 + boot-starter
pom.xml
        <!--mysql-->
        <dependency>
            <groupId>mysql</groupId>
            <artifactId>mysql-connector-java</artifactId>
        </dependency>
        <!--mybatis-->
        <dependency>
            <groupId>com.baomidou</groupId>
            <artifactId>mybatis-plus-boot-starter</artifactId>
            <version>3.5.1</version>
        </dependency>
3. 添加实体类
路径:src/main/java/com/xxx/entity/Account.java
代码:
package com.xxx.entity;

import lombok.Data;

/**
 * entity实体类
 */
@Data
public class Account {
    private Integer id;
    private String username;
    private String password;
    private String perms;
    private String role;
}
4. 添加Mapper接口类
路径:src/main/java/com/xxx/mapper/AccountMapper.java
代码:
package com.xxx.mapper;

import com.baomidou.mybatisplus.core.mapper.BaseMapper;
import com.xxx.entity.Account;
import org.apache.ibatis.annotations.Mapper;

@Mapper
public interface AccountMapper extends BaseMapper<Account> {


}
5. 配置数据库链接
路径:src/main/resources/application.yaml
代码:
spring:
  datasource:
    driver-class-name: com.mysql.cj.jdbc.Driver
    username: root
    password: root
    url: jdbc:mysql://localhost:3306/mybatis
mybatis-plus:
  configuration:
    log-impl: org.apache.ibatis.logging.stdout.StdOutImpl
6. 测试
路径:src/test/java/com/xxx/Springboot08ShiroApplicationTests.java
代码:
package com.xxx;
import com.xxx.mapper.AccountMapper;
import org.junit.jupiter.api.Test;
import org.springframework.beans.factory.annotation.Autowired;
import org.springframework.boot.test.context.SpringBootTest;
@SpringBootTest
class Springboot08ShiroApplicationTests {
@Autowired
private AccountMapper mapper;
@Test
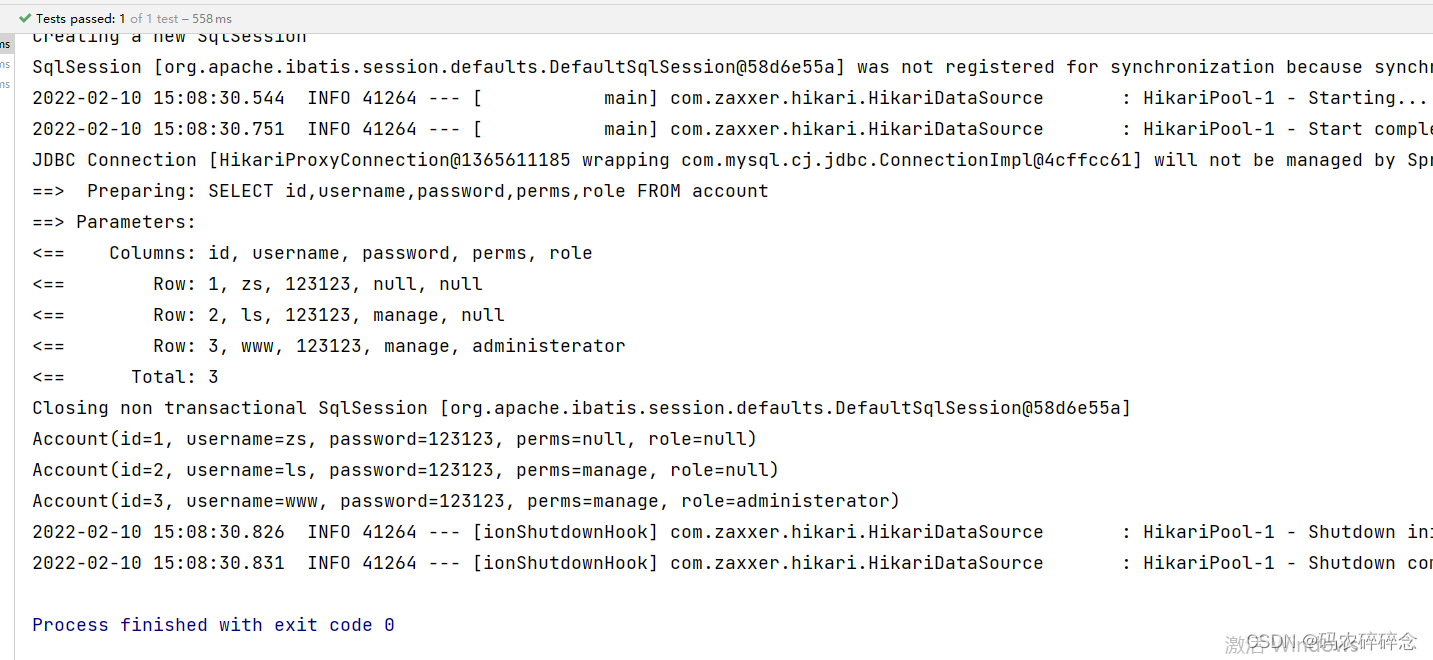
void contextLoads() {
mapper.selectList(null).forEach(System.out::println);
}
}
运行:
7. service接口类和实现类
新建service接口类:src/main/java/com/xxx/service/AccountService.java
代码:
package com.xxx.service;

import com.xxx.entity.Account;

public interface AccountService {

    public Account finByUsername(String name);
}
新建service实现类:src/main/java/com/xxx/service/impl/AccountServiceImpl.java
代码:
package com.xxx.service.impl;

import com.baomidou.mybatisplus.core.conditions.query.QueryWrapper;
import com.xxx.entity.Account;
import com.xxx.mapper.AccountMapper;
import com.xxx.service.AccountService;
import org.springframework.beans.factory.annotation.Autowired;
import org.springframework.stereotype.Service;

@Service
public class AccountServiceImpl implements AccountService {

    @Autowired
    private AccountMapper accountMapper;

    @Override
    public Account finByUsername(String username) {
        QueryWrapper wrapper = new QueryWrapper();
        wrapper.eq("username", username);
        return accountMapper.selectOne(wrapper);
    }
}
测试类:src/test/java/com/xxx/service/AccountServiceTest.java
代码:
package com.xxx.service;
import com.xxx.entity.Account;
import org.junit.jupiter.api.Test;
import org.springframework.beans.factory.annotation.Autowired;
import org.springframework.boot.test.context.SpringBootTest;
import static org.junit.jupiter.api.Assertions.*;
@SpringBootTest
class AccountServiceTest {
@Autowired
private AccountService accountService;
@Test
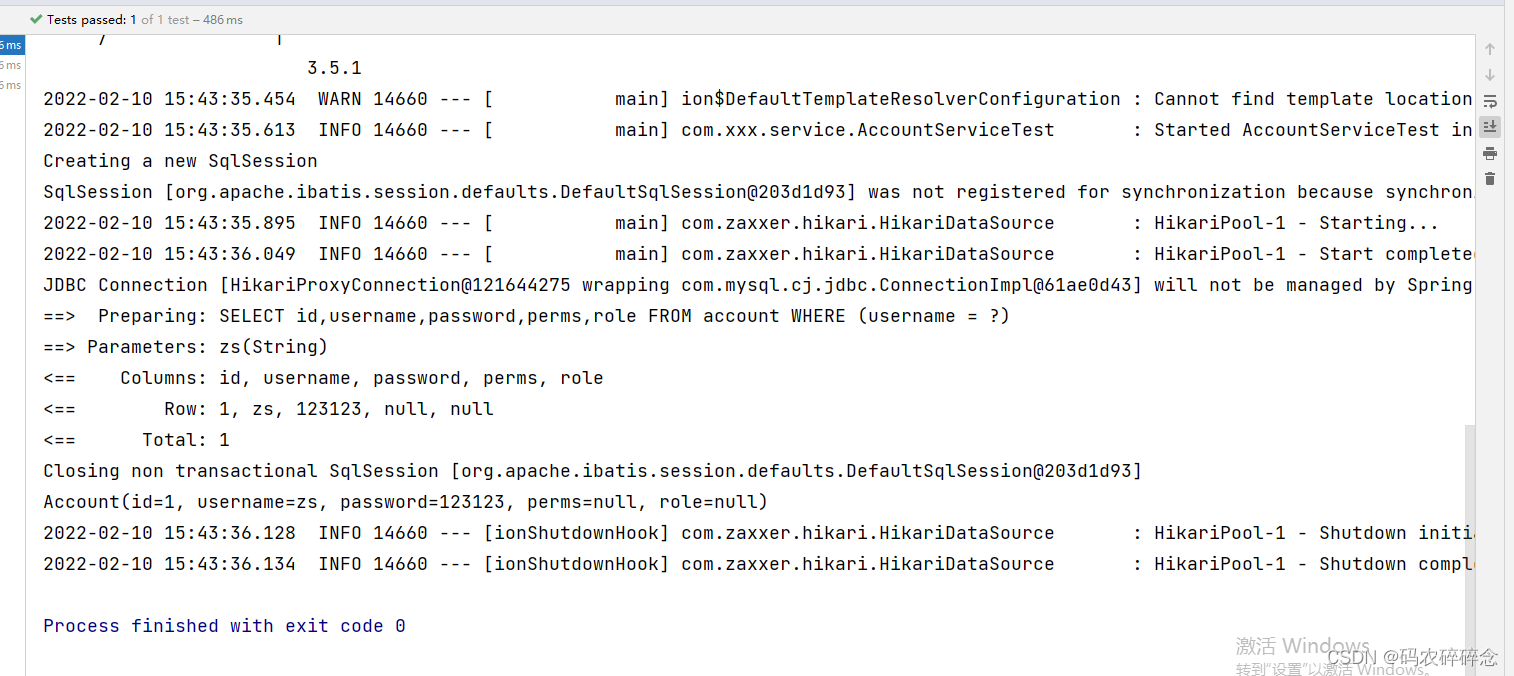
void Test(){
Account zs = accountService.finByUsername("zs");
System.out.println(zs);
}
}
运行结果:
8. realm
路径:src/main/java/com/xxx/config/ShiroConfig.java
代码:
package com.xxx.config;

import com.xxx.realm.AccountRealm;
import org.apache.shiro.web.mgt.DefaultWebSecurityManager;
import org.apache.shiro.spring.web.ShiroFilterFactoryBean;
import org.springframework.beans.factory.annotation.Qualifier;
import org.springframework.context.annotation.Bean;
import org.springframework.context.annotation.Configuration;

@Configuration
public class ShiroConfig {


    @Bean
    public ShiroFilterFactoryBean shiroFilterFactoryBean(@Qualifier("securityManager") DefaultWebSecurityManager securityManager) {
        ShiroFilterFactoryBean factoryBean = new ShiroFilterFactoryBean();
        factoryBean.setSecurityManager(securityManager);
        return factoryBean;
    }

    @Bean
    public DefaultWebSecurityManager securityManager(@Qualifier("accountRealm") AccountRealm accountRealm) {
        DefaultWebSecurityManager manager = new DefaultWebSecurityManager();
        manager.setRealm(accountRealm);
        return manager;
    }

    @Bean
    public AccountRealm accountRealm() {
        return new AccountRealm();
    }

}
3. realm编写认证和授权规则
1. 需求
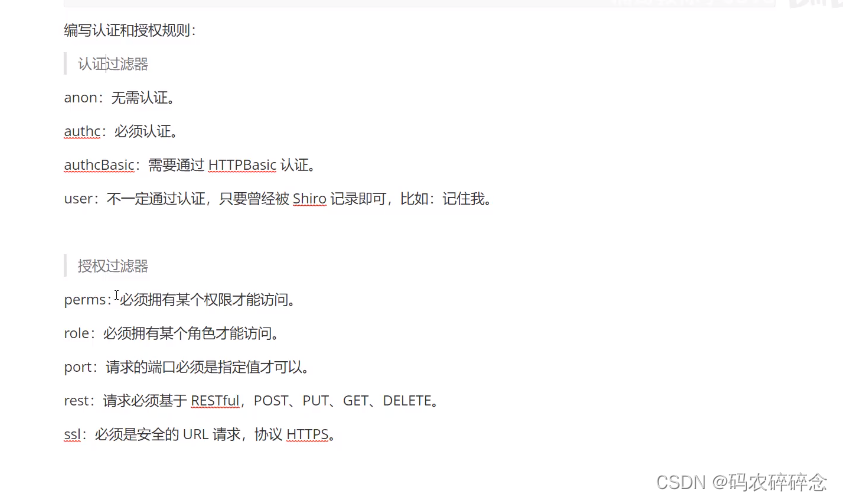
2. 编写规则
路径:src/main/java/com/xxx/config/ShiroConfig.java
代码:
package com.xxx.config;

import com.xxx.realm.AccountRealm;
import org.apache.shiro.web.mgt.DefaultWebSecurityManager;
import org.apache.shiro.spring.web.ShiroFilterFactoryBean;
import org.springframework.beans.factory.annotation.Qualifier;
import org.springframework.context.annotation.Bean;
import org.springframework.context.annotation.Configuration;

import java.util.Hashtable;
import java.util.Map;

@Configuration
public class ShiroConfig {


    @Bean
    public ShiroFilterFactoryBean shiroFilterFactoryBean(@Qualifier("securityManager") DefaultWebSecurityManager securityManager) {
        ShiroFilterFactoryBean factoryBean = new ShiroFilterFactoryBean();
        factoryBean.setSecurityManager(securityManager);
        //权限设置 认证和授权
        Map<String, String> map = new Hashtable<>();
        map.put("/main","authc");//访问main页面,必须是登录状态
        map.put("/manage","perms[manage]");//访问manage页面,必须有manage权限
        map.put("/administrator","roles[administrator]");//访问administrator页面,必须有administrator角色
        factoryBean.setFilterChainDefinitionMap(map);
        return factoryBean;
    }

    @Bean
    public DefaultWebSecurityManager securityManager(@Qualifier("accountRealm") AccountRealm accountRealm) {
        DefaultWebSecurityManager manager = new DefaultWebSecurityManager();
        manager.setRealm(accountRealm);
        return manager;
    }

    @Bean
    public AccountRealm accountRealm() {
        return new AccountRealm();
    }

}
3. 配置thymeleaf
路径:src/main/resources/application.yaml
代码:
spring:
  # 数据库配置
  datasource:
    driver-class-name: com.mysql.cj.jdbc.Driver
    username: root
    password: root
    url: jdbc:mysql://localhost:3306/mybatis
  #thymeleaf配置
  thymeleaf:
    prefix: classpath:/templates/
    suffix: .html
#mybatis-plus 配置
mybatis-plus:
  configuration:
    log-impl: org.apache.ibatis.logging.stdout.StdOutImpl
4. 控制层创建
路径:src/main/java/com/xxx/controller/AccountController.java
代码
package com.xxx.controller;

import org.springframework.stereotype.Controller;
import org.springframework.web.bind.annotation.GetMapping;
import org.springframework.web.bind.annotation.PathVariable;

@Controller
public class AccountController {
    @GetMapping("/{url}")
    public String redirect(@PathVariable("url") String url) {
        return url;
    }
}
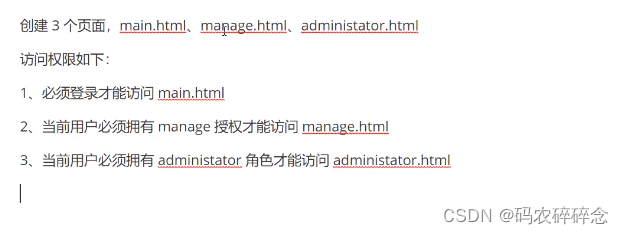
5. 页面创建
1. main 页面
路径:src/main/resources/templates/main.html
代码
<!DOCTYPE html>
<html lang="en">
<head>
    <link rel="shortcut icon" href="../resources/favicon.ico" th:href="@{/static/favicon.ico}"/>
    <meta charset="UTF-8">
    <title>Title</title>
</head>
<body>
<h1>main 首页</h1>

</body>
</html>
2. manage 页面
路径:src/main/resources/templates/manage.html
代码
<!DOCTYPE html>
<html lang="en">
<head>
    <link rel="shortcut icon" href="../resources/favicon.ico" th:href="@{/static/favicon.ico}"/>
    <meta charset="UTF-8">
    <title>manage</title>
</head>
<body>
<h1>manage </h1>
</body>
</html>
3. administrator页面
路径:src/main/resources/templates/administrator.html
代码
<!DOCTYPE html>
<html lang="en">
<head>
    <link rel="shortcut icon" href="../resources/favicon.ico" th:href="@{/static/favicon.ico}"/>
    <meta charset="UTF-8">
    <title>administrator</title>
</head>
<body>
<h1>administrator </h1>
</body>
</html>
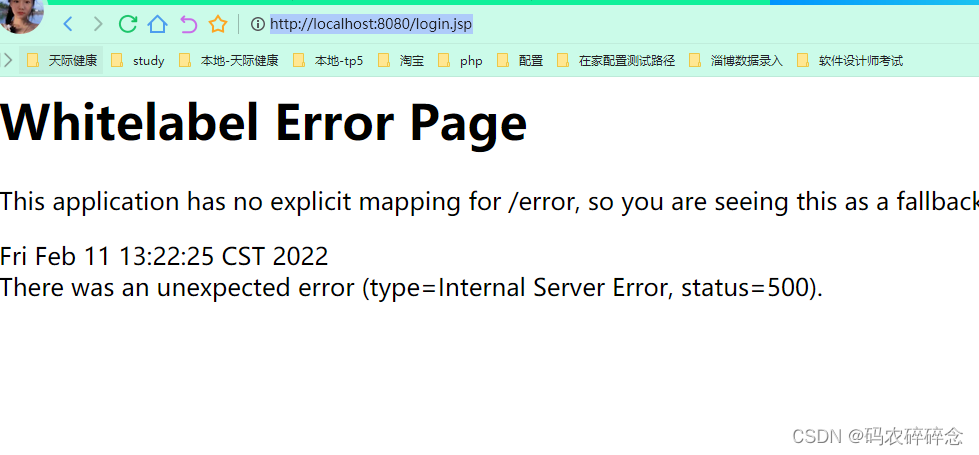
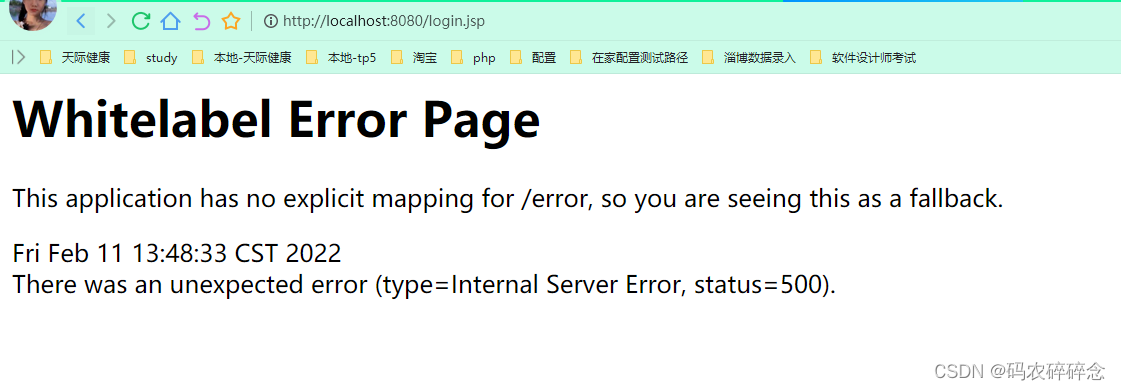
4.配置成功测试
访问:http://localhost:8080/main 报错,跳转到http://localhost:8080/login.jsp
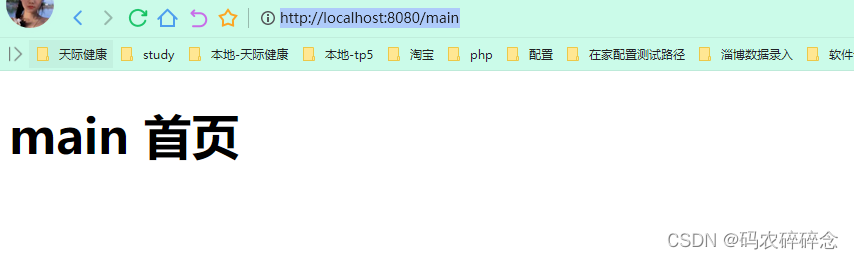
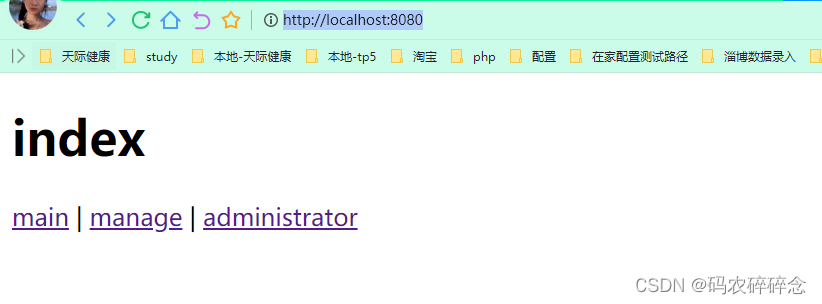
5. 取消配置测试
路径:src/main/java/com/xxx/config/ShiroConfig.java
@Configuration 注释掉配置就不会被加载
代码:
package com.xxx.config;

import com.xxx.realm.AccountRealm;
import org.apache.shiro.web.mgt.DefaultWebSecurityManager;
import org.apache.shiro.spring.web.ShiroFilterFactoryBean;
import org.springframework.beans.factory.annotation.Qualifier;
import org.springframework.context.annotation.Bean;
import org.springframework.context.annotation.Configuration;

import java.util.Hashtable;
import java.util.Map;

//@Configuration
public class ShiroConfig {


    @Bean
    public ShiroFilterFactoryBean shiroFilterFactoryBean(@Qualifier("securityManager") DefaultWebSecurityManager securityManager) {
        ShiroFilterFactoryBean factoryBean = new ShiroFilterFactoryBean();
        factoryBean.setSecurityManager(securityManager);
        //权限设置 认证和授权
        Map<String, String> map = new Hashtable<>();
        map.put("/main","authc");//访问main页面,必须是登录状态
        map.put("/manage","perms[manage]");//访问manage页面,必须有manage权限
        map.put("/administrator","roles[administrator]");//访问administrator页面,必须有administrator角色
        factoryBean.setFilterChainDefinitionMap(map);
        return factoryBean;
    }

    @Bean
    public DefaultWebSecurityManager securityManager(@Qualifier("accountRealm") AccountRealm accountRealm) {
        DefaultWebSecurityManager manager = new DefaultWebSecurityManager();
        manager.setRealm(accountRealm);
        return manager;
    }

    @Bean
    public AccountRealm accountRealm() {
        return new AccountRealm();
    }

}
测试地址:http://localhost:8080/main
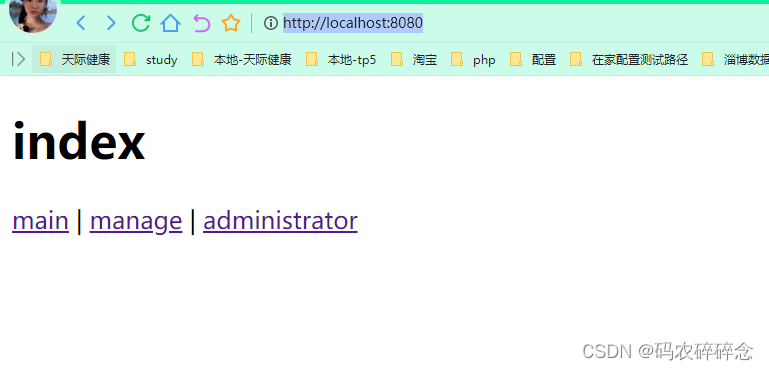
6. 配置index页面
创建地址:src/main/resources/templates/index.html
代码:
<!DOCTYPE html>
<html lang="en">
<head>
    <link rel="shortcut icon" href="../resources/favicon.ico" th:href="@{/static/favicon.ico}"/>
    <meta charset="UTF-8">
    <title>Title</title>
</head>
<body>
<h1>index</h1>
<a href="/main">main</a>  |
<a href="/manage">manage</a>  |
<a href="/administrator">administrator</a>

</body>
</html>
访问:http://localhost:8080/
点击main
7. 配置登录页
修改跳转页为登录页
路径:src/main/java/com/xxx/config/ShiroConfig.java
代码:
package com.xxx.config;

import com.xxx.realm.AccountRealm;
import org.apache.shiro.web.mgt.DefaultWebSecurityManager;
import org.apache.shiro.spring.web.ShiroFilterFactoryBean;
import org.springframework.beans.factory.annotation.Qualifier;
import org.springframework.context.annotation.Bean;
import org.springframework.context.annotation.Configuration;

import java.util.Hashtable;
import java.util.Map;

@Configuration
public class ShiroConfig {


    @Bean
    public ShiroFilterFactoryBean shiroFilterFactoryBean(@Qualifier("securityManager") DefaultWebSecurityManager securityManager) {
        ShiroFilterFactoryBean factoryBean = new ShiroFilterFactoryBean();
        factoryBean.setSecurityManager(securityManager);
        //权限设置 认证和授权
        Map<String, String> map = new Hashtable<>();
        map.put("/main", "authc");//访问main页面,必须是登录状态
        map.put("/manage", "perms[manage]");//访问manage页面,必须有manage权限
        map.put("/administrator", "roles[administrator]");//访问administrator页面,必须有administrator角色
        factoryBean.setFilterChainDefinitionMap(map);
        //设置登录页面
        factoryBean.setLoginUrl("/login");
        return factoryBean;
    }

    @Bean
    public DefaultWebSecurityManager securityManager(@Qualifier("accountRealm") AccountRealm accountRealm) {
        DefaultWebSecurityManager manager = new DefaultWebSecurityManager();
        manager.setRealm(accountRealm);
        return manager;
    }

    @Bean
    public AccountRealm accountRealm() {
        return new AccountRealm();
    }

}
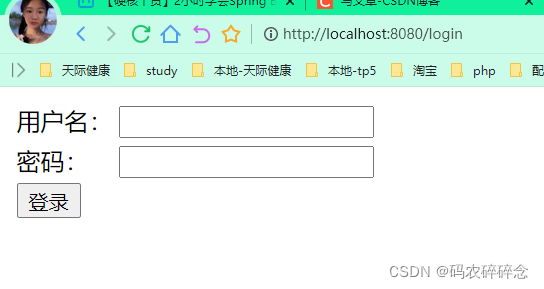
创建登录页面:src/main/resources/templates/login.html
代码:
<!DOCTYPE html>
<html lang="en"
     xmlns:th="http://www.thymeleaf.org">
<head>
    <link rel="shortcut icon" href="../resources/favicon.ico" th:href="@{/static/favicon.ico}"/>
    <meta charset="UTF-8">
    <title>login</title>
</head>
<body>
<form action="/loginSubmit" method="post">
    <table>
        <span th:text="${msg}"></span>
        <tr>
            <td>用户名:</td>
            <td>
                <input type="text" name="username">
            </td>
        </tr>
        <tr>
            <td>密码:</td>
            <td>
                <input type="text" name="password">
            </td>
        </tr>
        <tr>
            <td>
                <input type="submit" value="登录">
            </td>
        </tr>
    </table>

</form>
</body>
</html>
访问:http://localhost:8080/
点击main跳转到http://localhost:8080/login 页面
4. Shiro整合thymeleaf
1. 提交方法
路径:src/main/java/com/xxx/controller/AccountController.java
代码 :
package com.xxx.controller;

import org.apache.shiro.SecurityUtils;
import org.apache.shiro.authc.AuthenticationException;
import org.apache.shiro.authc.IncorrectCredentialsException;
import org.apache.shiro.authc.UnknownAccountException;
import org.apache.shiro.authc.UsernamePasswordToken;
import org.apache.shiro.subject.Subject;
import org.springframework.stereotype.Controller;
import org.springframework.ui.Model;
import org.springframework.web.bind.annotation.GetMapping;
import org.springframework.web.bind.annotation.PathVariable;
import org.springframework.web.bind.annotation.PostMapping;
import org.springframework.web.bind.annotation.ResponseBody;

@Controller
public class AccountController {
    //页面跳转
    @GetMapping("/{url}")
    public String redirect(@PathVariable("url") String url) {
        return url;
    }
    //未授权跳转页面
    @GetMapping("/unauth")
    @ResponseBody
    public String unauth(){
        return  "未授权,无法访问";
    }

    //登录提交页面
    @PostMapping("/loginSubmit")
    //try catch 快捷键 “ctrl + alt + t”
    public String login(String username, String password, Model model) {
        Subject subject = SecurityUtils.getSubject();
        UsernamePasswordToken token = new UsernamePasswordToken(username, password);
        try {
            subject.login(token);
            return "index";
        } catch (UnknownAccountException e) {
            e.printStackTrace();
            model.addAttribute("msg", "用户名错误");
            return "login";
        } catch (IncorrectCredentialsException e) {
            e.printStackTrace();
            model.addAttribute("msg", "密码错误");
            return "login";
        }
    }
}
2. 认证授权
路径:src/main/java/com/xxx/realm/AccountRealm.java
代码 :
package com.xxx.realm;

import com.xxx.entity.Account;
import com.xxx.service.AccountService;
import org.apache.shiro.SecurityUtils;
import org.apache.shiro.authc.*;
import org.apache.shiro.authz.AuthorizationInfo;
import org.apache.shiro.authz.SimpleAuthorizationInfo;
import org.apache.shiro.realm.AuthorizingRealm;
import org.apache.shiro.subject.PrincipalCollection;
import org.apache.shiro.subject.Subject;
import org.springframework.beans.factory.annotation.Autowired;

import java.util.HashSet;
import java.util.Set;

public class AccountRealm extends AuthorizingRealm {
    @Autowired
    private AccountService accountService;

    @Override//实现方法 im 授权判断
    protected AuthorizationInfo doGetAuthorizationInfo(PrincipalCollection principalCollection) {
        //当前登录的用户信息
        Subject subject = SecurityUtils.getSubject();
        Account account = (Account) subject.getPrincipal();
        //设置角色
        Set<String> roles = new HashSet<>();
        roles.add(account.getRole());
        SimpleAuthorizationInfo info = new SimpleAuthorizationInfo(roles);
        //设置权限
        info.addStringPermission(account.getPerms());
        return info;
    }

    @Override//实现方法 im  认证 登录
    protected AuthenticationInfo doGetAuthenticationInfo(AuthenticationToken authenticationToken) throws AuthenticationException {
        UsernamePasswordToken token = (UsernamePasswordToken) authenticationToken;
        Account account = accountService.finByUsername(token.getUsername());
        if (account != null) {
            //验证密码
            return new SimpleAuthenticationInfo(account, account.getPassword(), getName());
        }
        return null;
    }
}
3. 设置未授权页面
路径:src/main/java/com/xxx/config/ShiroConfig.java
代码:
package com.xxx.config;

import com.xxx.realm.AccountRealm;
import org.apache.shiro.web.mgt.DefaultWebSecurityManager;
import org.apache.shiro.spring.web.ShiroFilterFactoryBean;
import org.springframework.beans.factory.annotation.Qualifier;
import org.springframework.context.annotation.Bean;
import org.springframework.context.annotation.Configuration;

import java.util.Hashtable;
import java.util.Map;

@Configuration
public class ShiroConfig {


    @Bean
    public ShiroFilterFactoryBean shiroFilterFactoryBean(@Qualifier("securityManager") DefaultWebSecurityManager securityManager) {
        ShiroFilterFactoryBean factoryBean = new ShiroFilterFactoryBean();
        factoryBean.setSecurityManager(securityManager);
        //权限设置 认证和授权
        Map<String, String> map = new Hashtable<>();
        map.put("/main", "authc");//访问main页面,必须是登录状态
        map.put("/manage", "perms[manage]");//访问manage页面,必须有manage权限
        map.put("/administrator", "roles[administrator]");//访问administrator页面,必须有administrator角色
        factoryBean.setFilterChainDefinitionMap(map);
        //设置登录页面
        factoryBean.setLoginUrl("/login");
        //设置未授权页面
        factoryBean.setUnauthorizedUrl("/unauth");
        return factoryBean;
    }

    @Bean
    public DefaultWebSecurityManager securityManager(@Qualifier("accountRealm") AccountRealm accountRealm) {
        DefaultWebSecurityManager manager = new DefaultWebSecurityManager();
        manager.setRealm(accountRealm);
        return manager;
    }

    @Bean
    public AccountRealm accountRealm() {
        return new AccountRealm();
    }

}
4. 登录显示当前用户名
1. 登录页面修改
路径:src/main/resources/templates/index.html
地址:
<!DOCTYPE html>
<html lang="en" xmlns:th="http://www.thymeleaf.org">
<head>
    <link rel="shortcut icon" href="../resources/favicon.ico" th:href="@{/static/favicon.ico}"/>
    <meta charset="UTF-8">
    <title>Title</title>
</head>
<body>
<h1>index</h1>
<div th:if="${session.account != null}">
    <span th:text="${session.account.username}+'欢迎回来'"></span>
</div>


<a href="/main">main</a> |
<a href="/manage">manage</a> |
<a href="/administrator">administrator</a>

</body>
</html>
2. 修改登录方法
路径:src/main/java/com/xxx/controller/AccountController.java
代码:
package com.xxx.controller;

import com.xxx.entity.Account;
import org.apache.shiro.SecurityUtils;
import org.apache.shiro.authc.AuthenticationException;
import org.apache.shiro.authc.IncorrectCredentialsException;
import org.apache.shiro.authc.UnknownAccountException;
import org.apache.shiro.authc.UsernamePasswordToken;
import org.apache.shiro.subject.Subject;
import org.springframework.stereotype.Controller;
import org.springframework.ui.Model;
import org.springframework.web.bind.annotation.GetMapping;
import org.springframework.web.bind.annotation.PathVariable;
import org.springframework.web.bind.annotation.PostMapping;
import org.springframework.web.bind.annotation.ResponseBody;

@Controller
public class AccountController {
    //页面跳转
    @GetMapping("/{url}")
    public String redirect(@PathVariable("url") String url) {
        return url;
    }

    //未授权跳转页面
    @GetMapping("/unauth")
    @ResponseBody
    public String unauth() {
        return "未授权,无法访问";
    }

    //登录提交页面
    @PostMapping("/loginSubmit")
    //try catch 快捷键 “ctrl + alt + t”
    public String login(String username, String password, Model model) {
        Subject subject = SecurityUtils.getSubject();
        UsernamePasswordToken token = new UsernamePasswordToken(username, password);
        try {
             //获取登录成功后的信息
            subject.login(token);
            Account account = (Account) subject.getPrincipal();
            subject.getSession().setAttribute("account", account);
            return "index";
        } catch (UnknownAccountException e) {
            e.printStackTrace();
            model.addAttribute("msg", "用户名错误");
            return "login";
        } catch (IncorrectCredentialsException e) {
            e.printStackTrace();
            model.addAttribute("msg", "密码错误");
            return "login";
        }
    }


}
5. 退出
1. 登录页面修改
路径:src/main/resources/templates/index.html
代码
<!DOCTYPE html>
<html lang="en" xmlns:th="http://www.thymeleaf.org">
<head>
    <link rel="shortcut icon" href="../resources/favicon.ico" th:href="@{/static/favicon.ico}"/>
    <meta charset="UTF-8">
    <title>Title</title>
</head>
<body>
<h1>index</h1>
<div th:if="${session.account != null}">
    <span th:text="${session.account.username}+'欢迎回来'"></span>
    <a href="/logout">退出</a>
</div>


<a href="/main">main</a> |
<a href="/manage">manage</a> |
<a href="/administrator">administrator</a>

</body>
</html>
2. 添加退出方法
路径:src/main/java/com/xxx/controller/AccountController.java
代码:
package com.xxx.controller;

import com.xxx.entity.Account;
import org.apache.shiro.SecurityUtils;
import org.apache.shiro.authc.AuthenticationException;
import org.apache.shiro.authc.IncorrectCredentialsException;
import org.apache.shiro.authc.UnknownAccountException;
import org.apache.shiro.authc.UsernamePasswordToken;
import org.apache.shiro.subject.Subject;
import org.springframework.stereotype.Controller;
import org.springframework.ui.Model;
import org.springframework.web.bind.annotation.GetMapping;
import org.springframework.web.bind.annotation.PathVariable;
import org.springframework.web.bind.annotation.PostMapping;
import org.springframework.web.bind.annotation.ResponseBody;

@Controller
public class AccountController {
    //页面跳转
    @GetMapping("/{url}")
    public String redirect(@PathVariable("url") String url) {
        return url;
    }

    //未授权跳转页面
    @GetMapping("/unauth")
    @ResponseBody
    public String unauth() {
        return "未授权,无法访问";
    }

    //登录提交页面
    @PostMapping("/loginSubmit")
    //try catch 快捷键 “ctrl + alt + t”
    public String login(String username, String password, Model model) {
        Subject subject = SecurityUtils.getSubject();
        UsernamePasswordToken token = new UsernamePasswordToken(username, password);
        try {
            //获取登录成功后的信息
            subject.login(token);
            Account account = (Account) subject.getPrincipal();
            subject.getSession().setAttribute("account", account);
            return "index";
        } catch (UnknownAccountException e) {
            e.printStackTrace();
            model.addAttribute("msg", "用户名错误");
            return "login";
        } catch (IncorrectCredentialsException e) {
            e.printStackTrace();
            model.addAttribute("msg", "密码错误");
            return "login";
        }
    }

//退出登录
    @GetMapping("/logout")
    public String logout() {
        Subject subject = SecurityUtils.getSubject();
        subject.logout();
        return "login";
    }
}
6. 根据登录不同的用户显示不同的权限
1. 引入依赖
pom.xml
 <dependency>
    <groupId>com.github.theborakompanioni</groupId>
    <artifactId>thymeleaf-extras-shiro</artifactId>
    <version>2.0.0</version>
 </dependency>
2. 配置类添加ShiroDialect
路径:src/main/java/com/xxx/config/ShiroConfig.java
代码:
package com.xxx.config;

import at.pollux.thymeleaf.shiro.dialect.ShiroDialect;
import com.xxx.realm.AccountRealm;
import org.apache.shiro.web.mgt.DefaultWebSecurityManager;
import org.apache.shiro.spring.web.ShiroFilterFactoryBean;
import org.springframework.beans.factory.annotation.Qualifier;
import org.springframework.context.annotation.Bean;
import org.springframework.context.annotation.Configuration;

import java.util.Hashtable;
import java.util.Map;

@Configuration
public class ShiroConfig {


    @Bean
    public ShiroFilterFactoryBean shiroFilterFactoryBean(@Qualifier("securityManager") DefaultWebSecurityManager securityManager) {
        ShiroFilterFactoryBean factoryBean = new ShiroFilterFactoryBean();
        factoryBean.setSecurityManager(securityManager);
        //权限设置 认证和授权
        Map<String, String> map = new Hashtable<>();
        map.put("/main", "authc");//访问main页面,必须是登录状态
        map.put("/manage", "perms[manage]");//访问manage页面,必须有manage权限
        map.put("/administrator", "roles[administrator]");//访问administrator页面,必须有administrator角色
        factoryBean.setFilterChainDefinitionMap(map);
        //设置登录页面
        factoryBean.setLoginUrl("/login");
        //设置未授权页面
        factoryBean.setUnauthorizedUrl("/unauth");
        return factoryBean;
    }
    //配置类添加DefaultWebSecurityManager
    @Bean
    public DefaultWebSecurityManager securityManager(@Qualifier("accountRealm") AccountRealm accountRealm) {
        DefaultWebSecurityManager manager = new DefaultWebSecurityManager();
        manager.setRealm(accountRealm);
        return manager;
    }
    //配置类添加AccountRealm
    @Bean
    public AccountRealm accountRealm() {
        return new AccountRealm();
    }

    //配置类添加ShiroDialect
    @Bean
    public ShiroDialect shiroDialect() {
        return new ShiroDialect();

    }

}
3. index页面
路径:src/main/resources/templates/index.html
代码
<!DOCTYPE html>
<html lang="en" xmlns:th="http://www.thymeleaf.org"
      xmlns:shiro="http://www.thymeleaf.org/thymeleaf-extras-shiro">
<head>
    <link rel="shortcut icon" href="../resources/favicon.ico" th:href="@{/static/favicon.ico}"/>
    <meta charset="UTF-8">
    <title>Title</title>
</head>
<body>
<h1>index</h1>
<div th:if="${session.account != null}">
    <span th:text="${session.account.username}+'欢迎回来'"></span>
    <a href="/logout">退出</a>
</div>


<a href="/main">main</a> |
<!--判断权限-->
<div shiro:hasPermission="manage"><a href="/manage">manage</a> |</div>
<!--判断角色-->
<div shiro:hasRole="administrator"><a href="/administrator">administrator</a></div>


</body>
</html>
十四、鸡汤分析开源项目
1. 路径
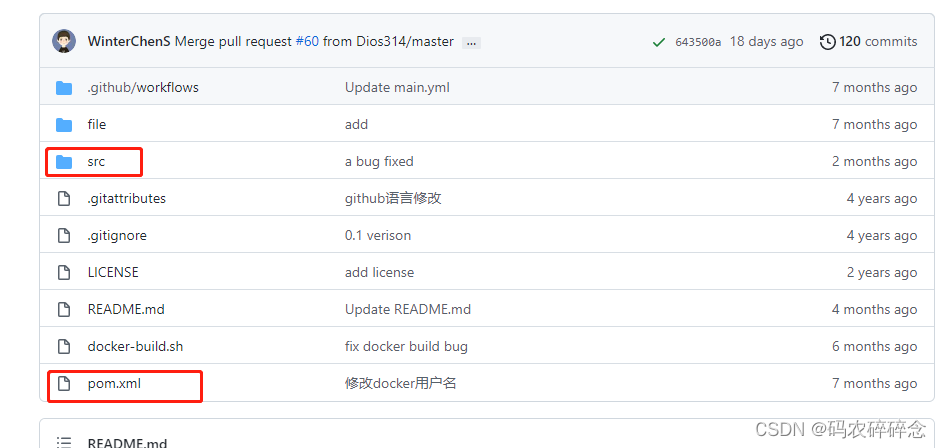
git 路径: https://github.com/WinterChenS/my-site?tdsourcetag=s_pcqq_aiomsg
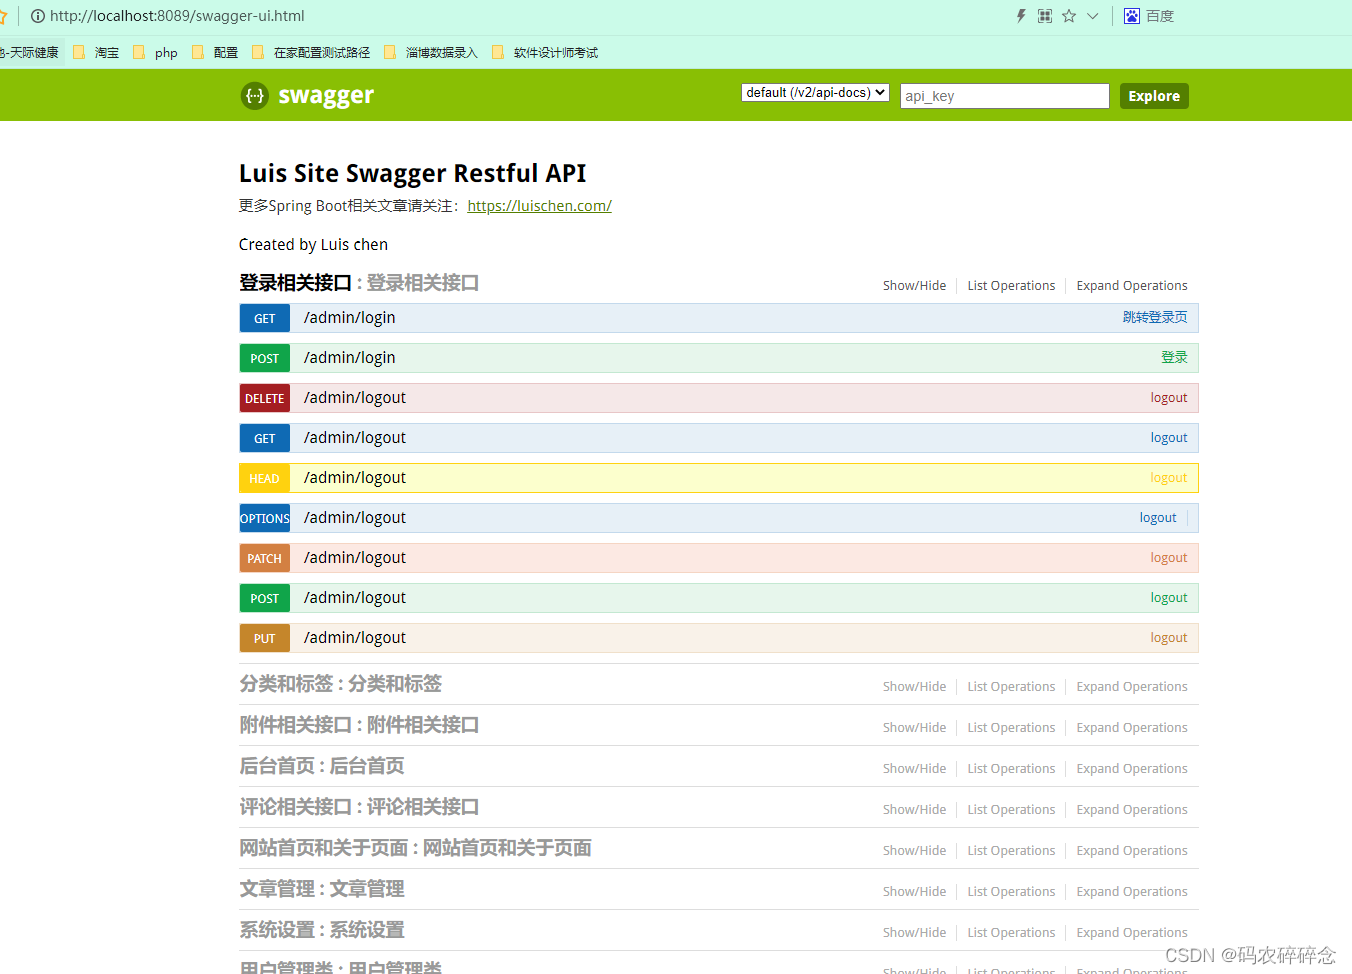
前台地址:http://winterchen.com:8089/
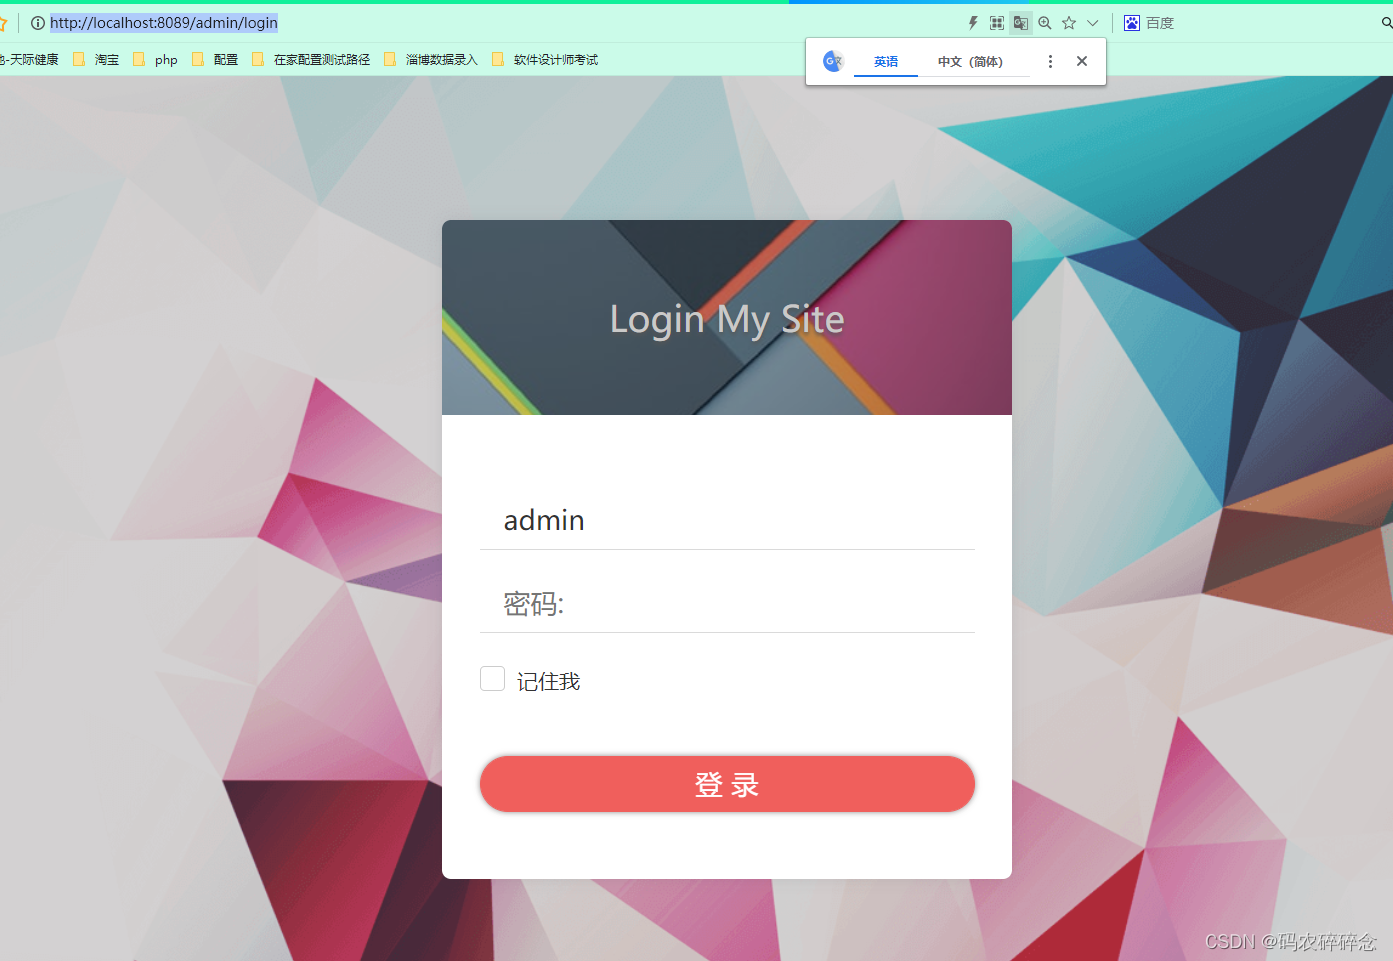
后台地址:http://winterchen.com:8089/admin/login
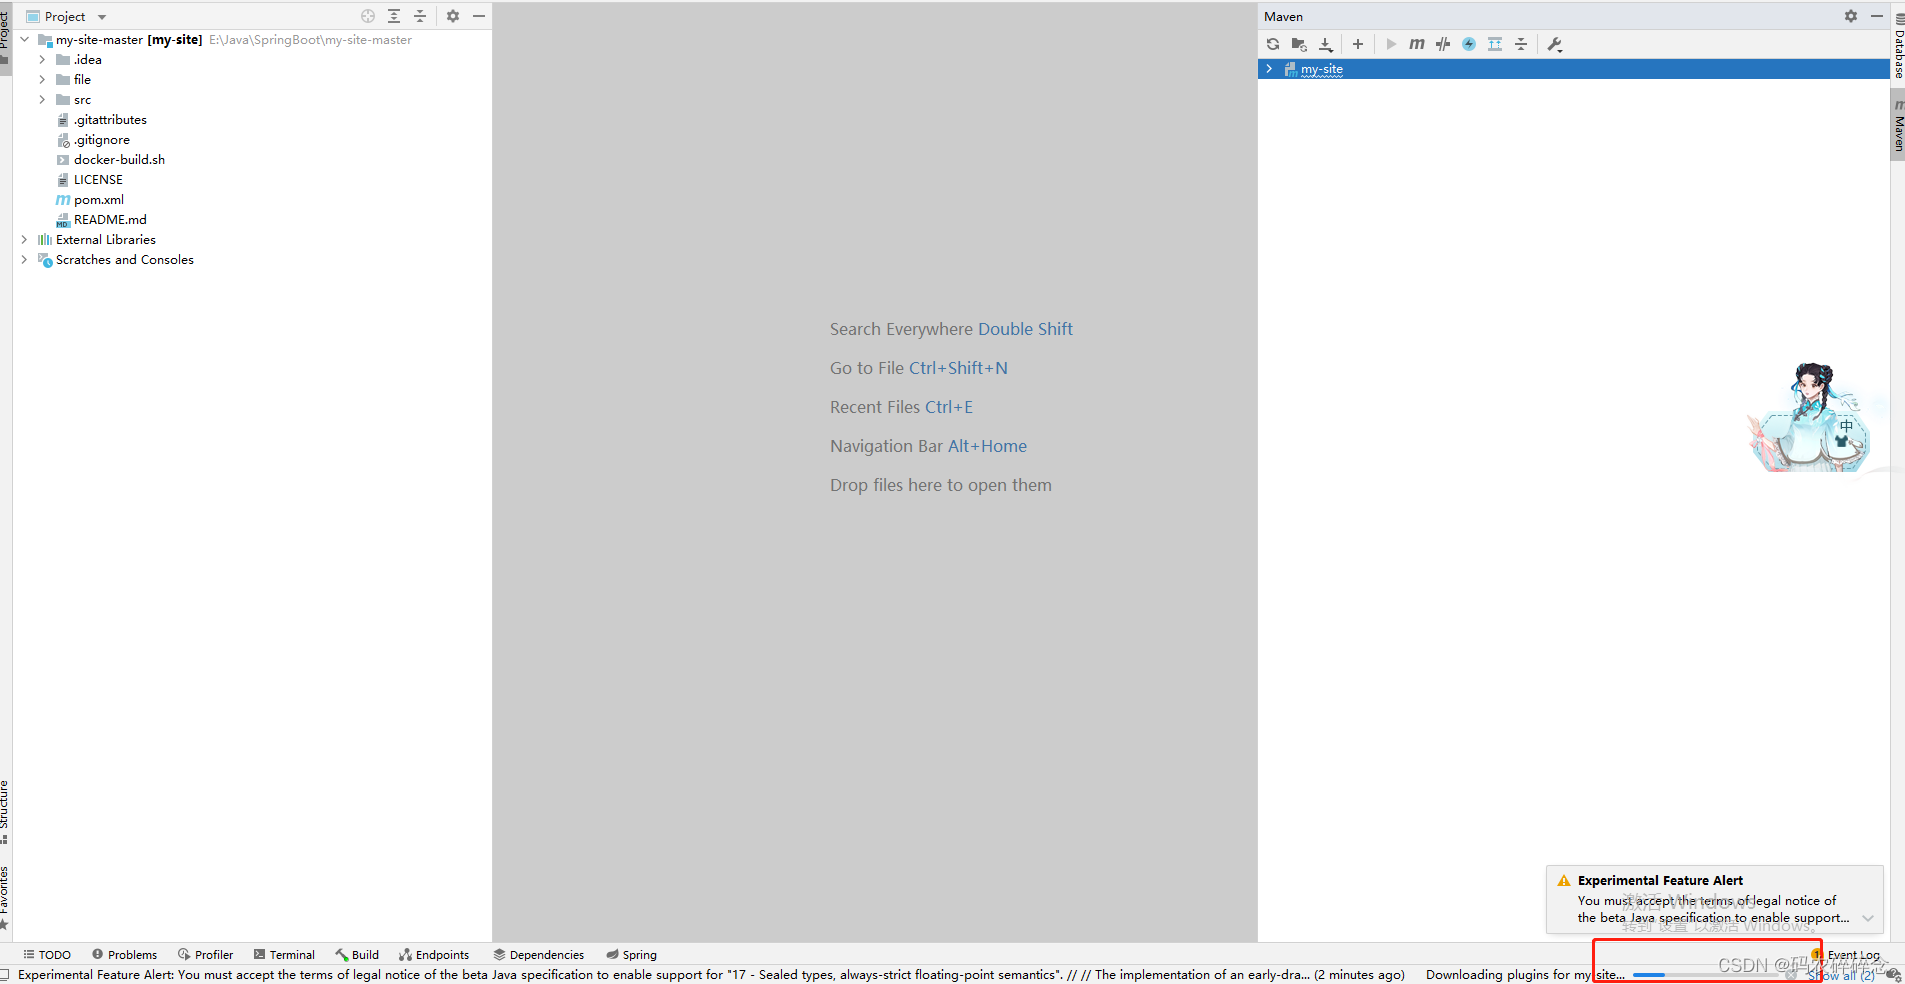
标准的springboot项目:
2.搭建项目
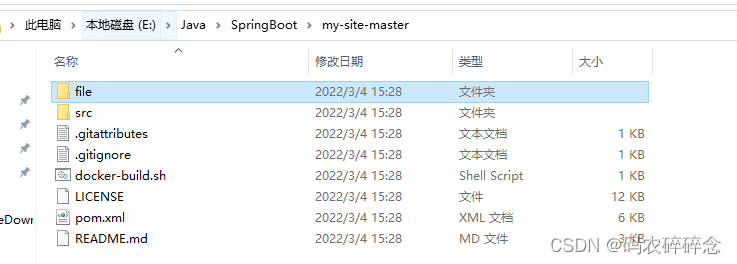
1. 解压项目
下载解压项目
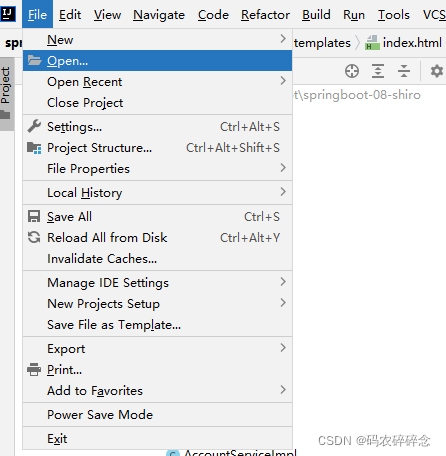
2. ide打开项目
1. file->open
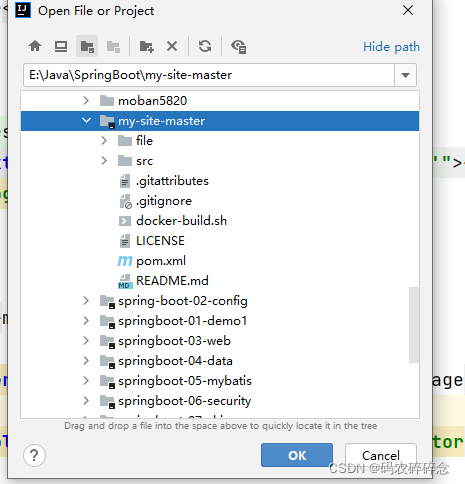
2. 选择打开的项目点击ok
3. 等待加载
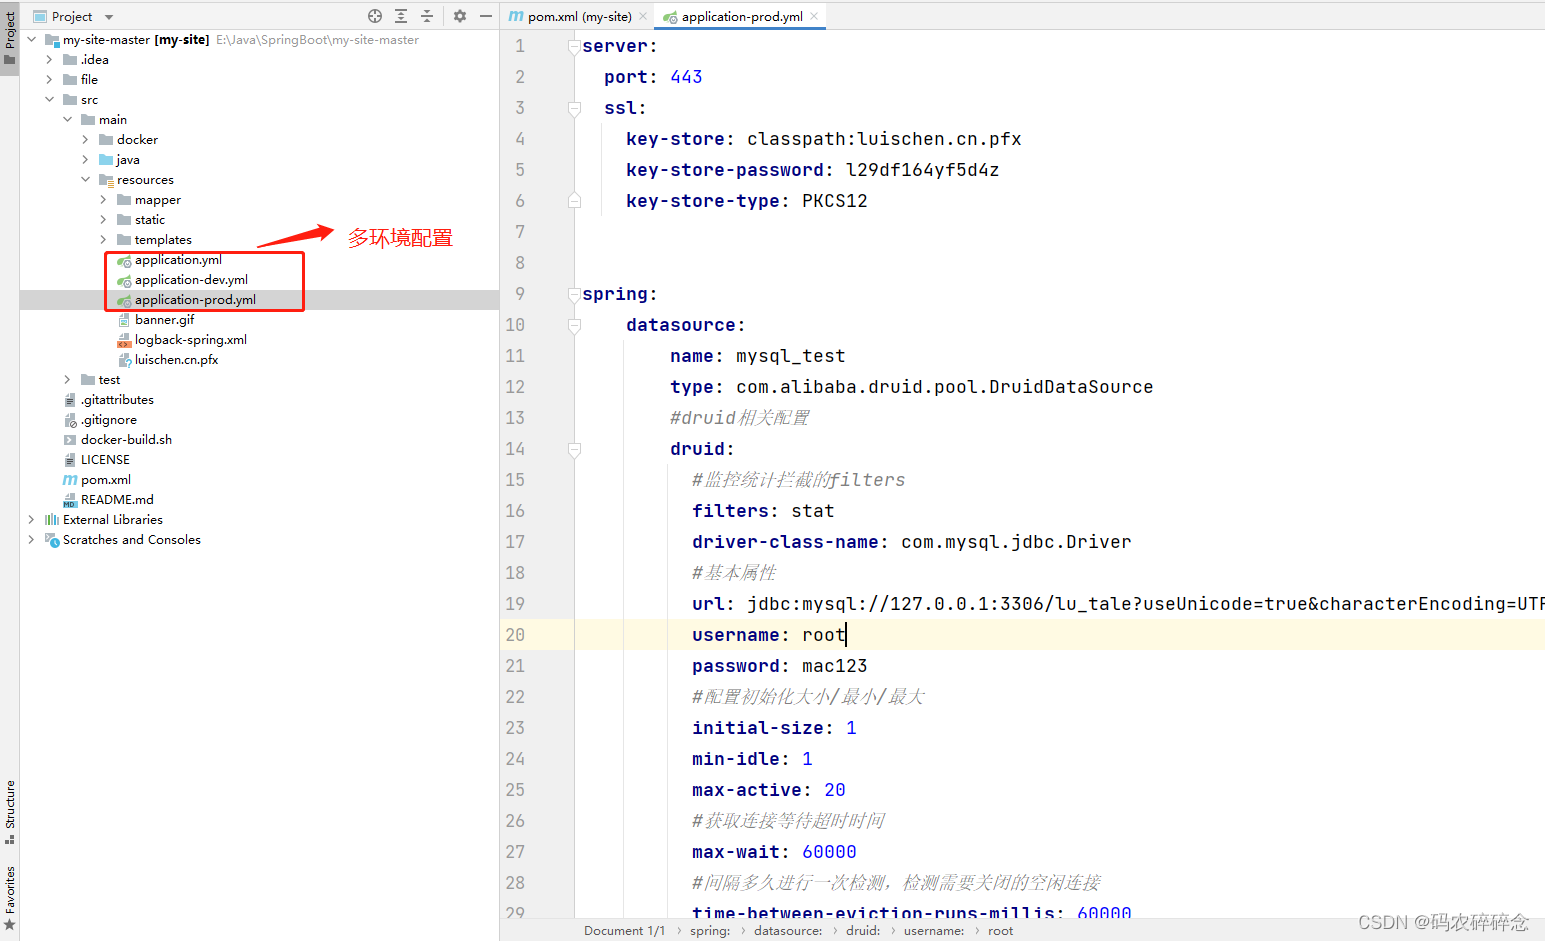
3. 分析项目
1. 多环境配置
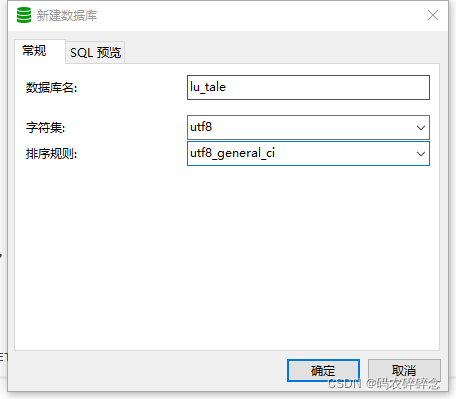
2. 创建数据库
1. 创建lu_tale
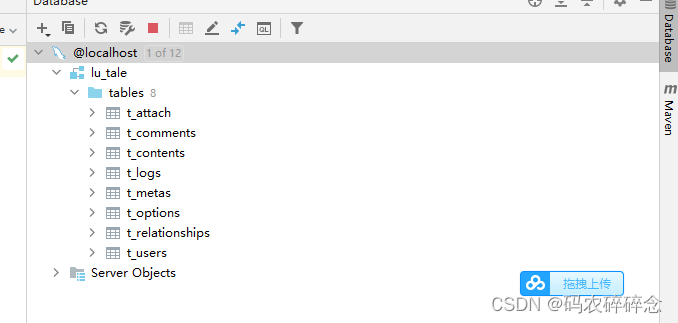
2. 新建表
/*
 Navicat Premium Data Transfer

 Source Server         : mycould
 Source Server Type    : MariaDB
 Source Server Version : 50556
 Source Host           : 118.25.36.41
 Source Database       : lu_tale

 Target Server Type    : MariaDB
 Target Server Version : 50556
 File Encoding         : utf-8

 Date: 05/03/2018 17:01:52 PM
*/

SET NAMES utf8mb4;
SET FOREIGN_KEY_CHECKS = 0;

-- ----------------------------
--  Table structure for `t_attach`
-- ----------------------------
DROP TABLE IF EXISTS `t_attach`;
CREATE TABLE `t_attach` (
  `id` int(11) unsigned NOT NULL AUTO_INCREMENT,
  `fname` varchar(100) NOT NULL DEFAULT '',
  `ftype` varchar(50) DEFAULT '',
  `fkey` text NOT NULL,
  `authorId` int(10) DEFAULT NULL,
  `created` int(10) NOT NULL,
  PRIMARY KEY (`id`)
) ENGINE=InnoDB AUTO_INCREMENT=33 DEFAULT CHARSET=utf8 ROW_FORMAT=COMPACT;


-- ----------------------------
--  Table structure for `t_comments`
-- ----------------------------
DROP TABLE IF EXISTS `t_comments`;
CREATE TABLE `t_comments` (
  `coid` int(10) unsigned NOT NULL AUTO_INCREMENT,
  `cid` int(10) unsigned DEFAULT '0',
  `created` int(10) unsigned DEFAULT '0',
  `author` varchar(200) DEFAULT NULL,
  `authorId` int(10) unsigned DEFAULT '0',
  `ownerId` int(10) unsigned DEFAULT '0',
  `mail` varchar(200) DEFAULT NULL,
  `url` varchar(200) DEFAULT NULL,
  `ip` varchar(64) DEFAULT NULL,
  `agent` varchar(200) DEFAULT NULL,
  `content` text,
  `type` varchar(16) DEFAULT 'comment',
  `status` varchar(16) DEFAULT 'approved',
  `parent` int(10) unsigned DEFAULT '0',
  PRIMARY KEY (`coid`),
  KEY `cid` (`cid`),
  KEY `created` (`created`)
) ENGINE=InnoDB DEFAULT CHARSET=utf8 ROW_FORMAT=COMPACT;

-- ----------------------------
--  Table structure for `t_contents`
-- ----------------------------
DROP TABLE IF EXISTS `t_contents`;
CREATE TABLE `t_contents` (
  `cid` int(10) unsigned NOT NULL AUTO_INCREMENT,
  `title` varchar(200) DEFAULT NULL,
  `titlePic` varchar(55) DEFAULT NULL,
  `slug` varchar(200) DEFAULT NULL,
  `created` int(10) unsigned DEFAULT '0',
  `modified` int(10) unsigned DEFAULT '0',
  `content` text COMMENT '内容文字',
  `authorId` int(10) unsigned DEFAULT '0',
  `type` varchar(16) DEFAULT 'post',
  `status` varchar(16) DEFAULT 'publish',
  `tags` varchar(200) DEFAULT NULL,
  `categories` varchar(200) DEFAULT NULL,
  `hits` int(10) unsigned DEFAULT '0',
  `commentsNum` int(10) unsigned DEFAULT '0',
  `allowComment` tinyint(1) DEFAULT '1',
  `allowPing` tinyint(1) DEFAULT '1',
  `allowFeed` tinyint(1) DEFAULT '1',
  PRIMARY KEY (`cid`),
  UNIQUE KEY `slug` (`slug`),
  KEY `created` (`created`)
) ENGINE=InnoDB AUTO_INCREMENT=27 DEFAULT CHARSET=utf8 ROW_FORMAT=COMPACT;

-- ----------------------------
--  Table structure for `t_logs`
-- ----------------------------
DROP TABLE IF EXISTS `t_logs`;
CREATE TABLE `t_logs` (
  `id` int(11) unsigned NOT NULL AUTO_INCREMENT COMMENT '主键编号',
  `action` varchar(100) DEFAULT NULL COMMENT '事件',
  `data` varchar(2000) DEFAULT NULL COMMENT '数据',
  `authorId` int(10) DEFAULT NULL COMMENT '作者编号',
  `ip` varchar(20) DEFAULT NULL COMMENT 'ip地址',
  `created` int(10) DEFAULT NULL,
  PRIMARY KEY (`id`)
) ENGINE=InnoDB AUTO_INCREMENT=77 DEFAULT CHARSET=utf8 ROW_FORMAT=COMPACT;

-- ----------------------------
--  Table structure for `t_metas`
-- ----------------------------
DROP TABLE IF EXISTS `t_metas`;
CREATE TABLE `t_metas` (
  `mid` int(10) unsigned NOT NULL AUTO_INCREMENT,
  `name` varchar(200) DEFAULT NULL,
  `slug` varchar(200) DEFAULT NULL,
  `type` varchar(32) NOT NULL DEFAULT '',
  `contentType` varchar(32) DEFAULT NULL,
  `description` varchar(200) DEFAULT NULL,
  `sort` int(10) unsigned DEFAULT '0',
  `parent` int(10) unsigned DEFAULT '0',
  PRIMARY KEY (`mid`),
  KEY `slug` (`slug`)
) ENGINE=InnoDB AUTO_INCREMENT=41 DEFAULT CHARSET=utf8 ROW_FORMAT=COMPACT;

-- ----------------------------
--  Table structure for `t_options`
-- ----------------------------
DROP TABLE IF EXISTS `t_options`;
CREATE TABLE `t_options` (
  `name` varchar(32) NOT NULL DEFAULT '',
  `value` varchar(1000) DEFAULT '',
  `description` varchar(200) DEFAULT NULL,
  PRIMARY KEY (`name`)
) ENGINE=InnoDB DEFAULT CHARSET=utf8 ROW_FORMAT=COMPACT;

-- ----------------------------
--  Records of `t_options`
-- ----------------------------
BEGIN;
INSERT INTO `t_options` VALUES ('baidu_site_verification', null, '百度网站验证码'), ('google_site_verification', null, 'google网站验证码'), ('site_description', null, '网站描述'), ('site_keywords', null, null), ('site_record', null, '备案号'), ('site_title', null, '网站标题'), ('social_csdn', null, 'csdn'), ('social_github', null, 'github'), ('social_jianshu', null, '简书地址'), ('social_resume', null, '简历地址'), ('social_twitter', null, 'twitter'), ('social_weibo', null, '微博地址'), ('social_zhihu', null, '知乎地址');
COMMIT;

-- ----------------------------
--  Table structure for `t_relationships`
-- ----------------------------
DROP TABLE IF EXISTS `t_relationships`;
CREATE TABLE `t_relationships` (
  `cid` int(10) unsigned NOT NULL,
  `mid` int(10) unsigned NOT NULL,
  PRIMARY KEY (`cid`,`mid`)
) ENGINE=InnoDB DEFAULT CHARSET=utf8 ROW_FORMAT=COMPACT;

-- ----------------------------
--  Table structure for `t_users`
-- ----------------------------
DROP TABLE IF EXISTS `t_users`;
CREATE TABLE `t_users` (
  `uid` int(10) unsigned NOT NULL AUTO_INCREMENT,
  `username` varchar(32) DEFAULT NULL,
  `password` varchar(64) DEFAULT NULL,
  `email` varchar(200) DEFAULT NULL,
  `homeUrl` varchar(200) DEFAULT NULL,
  `screenName` varchar(32) DEFAULT NULL,
  `created` int(10) unsigned DEFAULT '0',
  `activated` int(10) unsigned DEFAULT '0',
  `logged` int(10) unsigned DEFAULT '0',
  `groupName` varchar(16) DEFAULT 'visitor',
  PRIMARY KEY (`uid`),
  UNIQUE KEY `name` (`username`),
  UNIQUE KEY `mail` (`email`)
) ENGINE=InnoDB AUTO_INCREMENT=2 DEFAULT CHARSET=utf8 ROW_FORMAT=COMPACT;

-- ----------------------------
--  Records of `t_users` password 123456
-- ----------------------------
BEGIN;
INSERT INTO `t_users` VALUES ('1', 'admin', 'a66abb5684c45962d887564f08346e8d', '1034683568@qq.com', null, 'admin', '1490756162', '0', '0', 'visitor');
COMMIT;

SET FOREIGN_KEY_CHECKS = 1;
3. ide 链接
3. 运行
1. 报错
IDEA Error:(15, 16) java: 程序包sun.misc不存在 或import sun.misc.BASE64Decoder无法找到
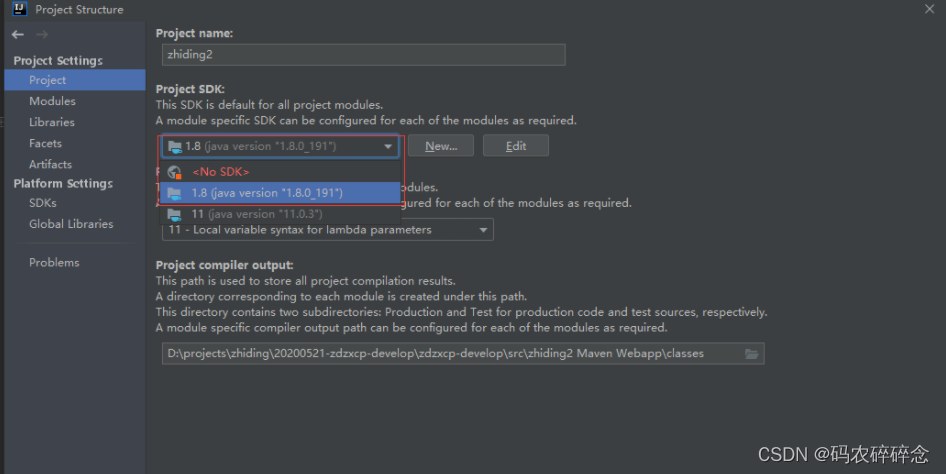
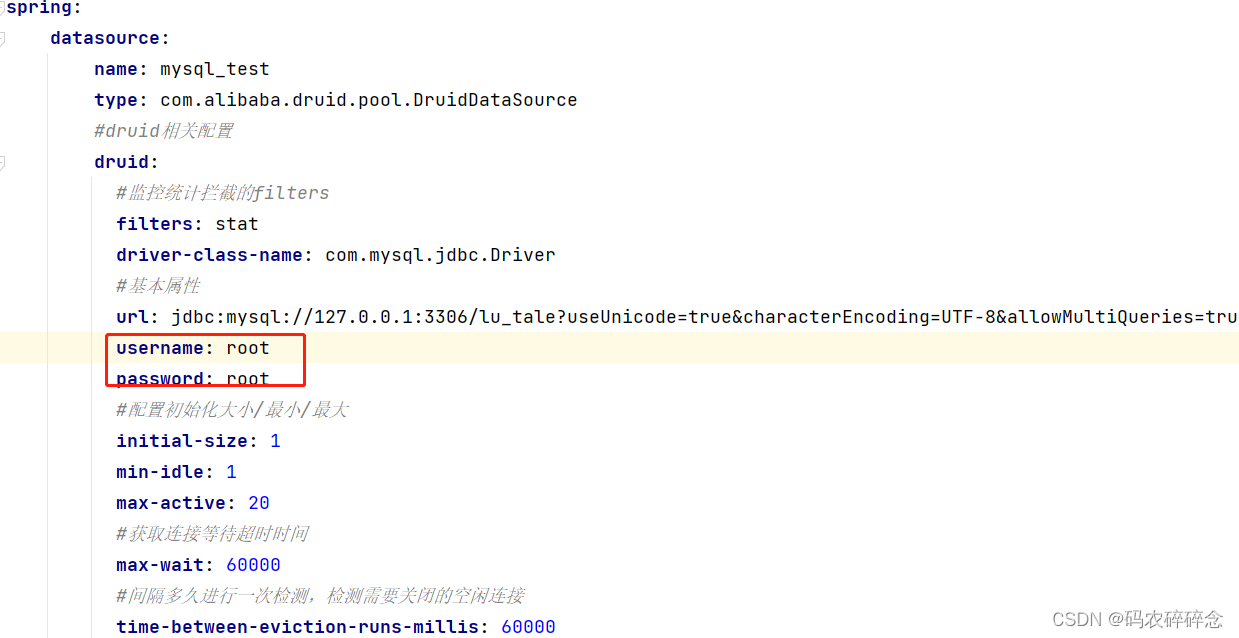
数据库链接失败
查看用户名或者密码是否错误
2. 运行
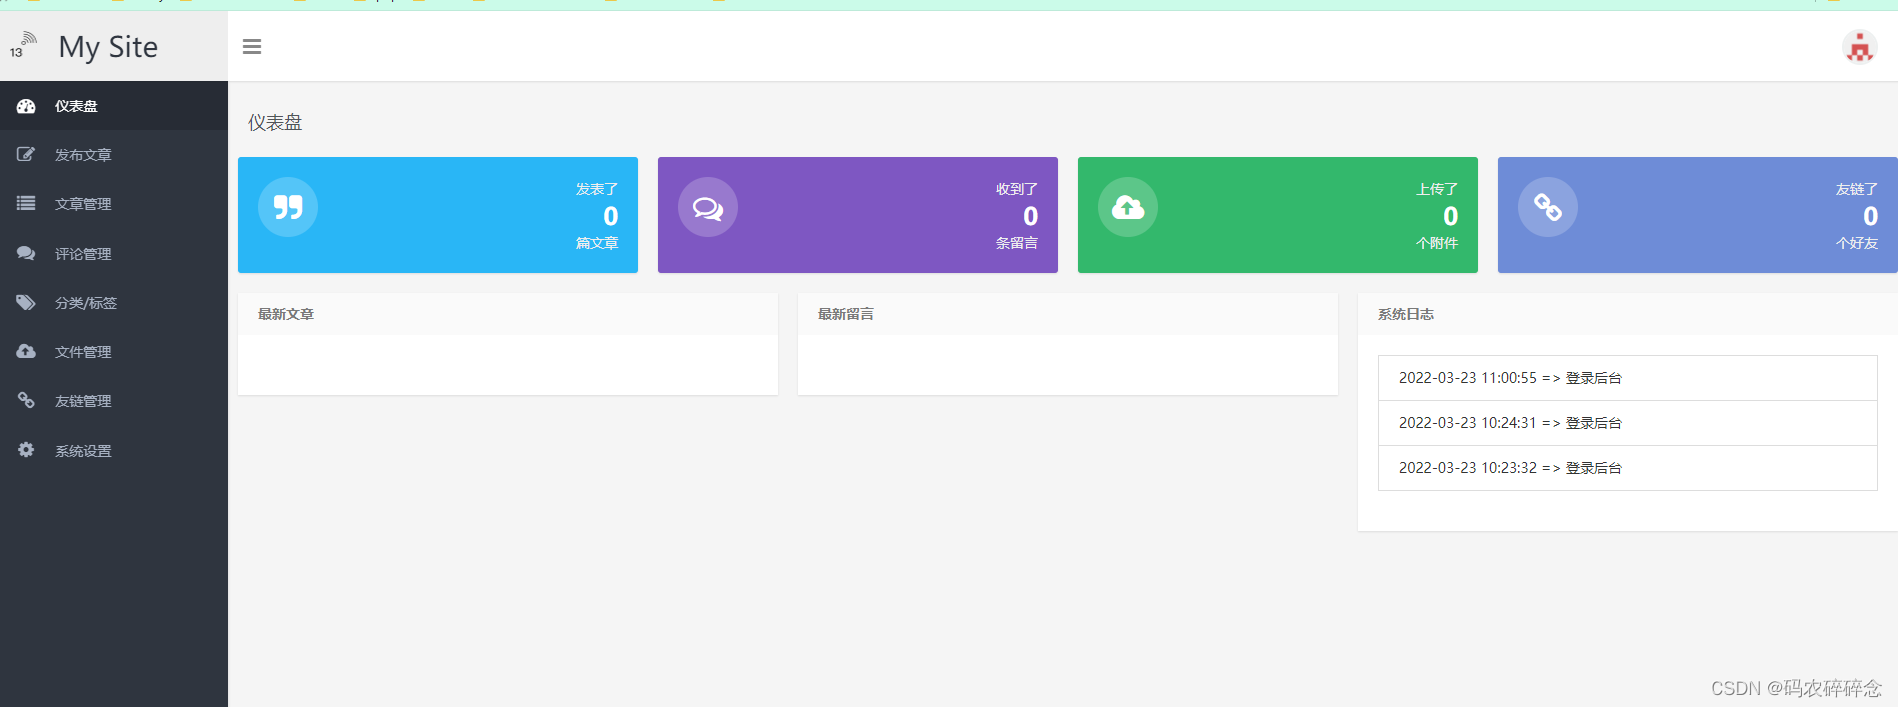
路径:http://localhost:8089/
后台路径:http://localhost:8089/admin/
用户名:admin 密码:123456
十五、Swagger
1. Swagger简介
前后端分离
-
前端 -> 前端控制层、视图层
-
后端 -> 后端控制层、服务层、数据访问层
-
前后端通过API进行交互
-
前后端相对独立且松耦合
产生的问题
- 前后端集成,前端或者后端无法做到“及时协商,尽早解决”,最终导致问题集中爆发
解决方案
- 首先定义schema [ 计划的提纲 ],并实时跟踪最新的API,降低集成风险
Swagger
-
号称世界上最流行的API框架
-
Restful Api 文档在线自动生成器 => API 文档 与API 定义同步更新
-
直接运行,在线测试API
-
支持多种语言 (如:Java,PHP等)
2. SpringBoot集成Swagger
访问测试 :http://localhost:8080/swagger-ui.html ,可以看到swagger的界面;
SpringBoot集成Swagger => springfox,两个jar包
-
Springfox-swagger2
-
swagger-springmvc
使用Swagger
- 要求:jdk 1.8 + 否则swagger2无法运行
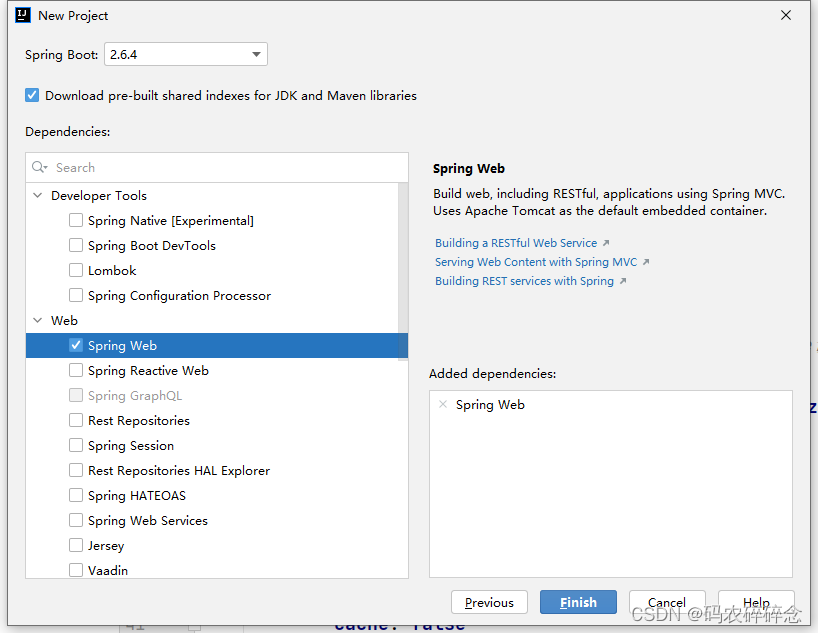
1. 新建SpringBoot-web项目
1. File->New Project
项目名称:springboot-09-swagger

2. 选择依赖,点击Finish
3. pom.xml导入依赖
<!-- https://mvnrepository.com/artifact/io.springfox/springfox-swagger2 -->
<dependency>
   <groupId>io.springfox</groupId>
   <artifactId>springfox-swagger2</artifactId>
   <version>2.9.2</version>
</dependency>
<!-- https://mvnrepository.com/artifact/io.springfox/springfox-swagger-ui -->
<dependency>
   <groupId>io.springfox</groupId>
   <artifactId>springfox-swagger-ui</artifactId>
   <version>2.9.2</version>
</dependency>
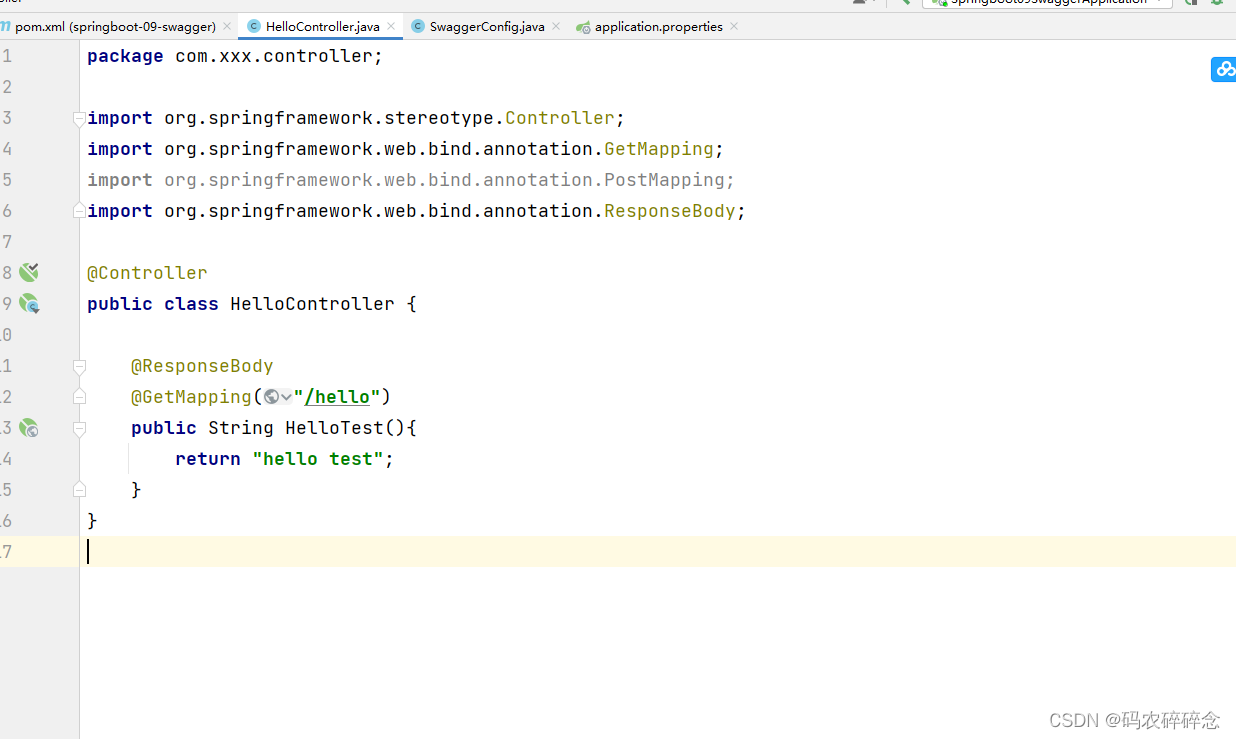
4. 新建HelloController类
路径:src/main/java/com/xxx/controller/HelloController.java
代码:
package com.xxx.controller;

import org.springframework.stereotype.Controller;
import org.springframework.web.bind.annotation.GetMapping;
import org.springframework.web.bind.annotation.ResponseBody;

@Controller
public class HelloController {

    @ResponseBody
    @GetMapping("HelloTest")
    public String HelloTest(){
        return "hello test";
    }
}
5. 测试运行
路径:http://localhost:8080/HelloTest

2. 编写配置类-SwaggerConfig
1. 创建配置类
路径:src/main/java/com/xxx/config/SwaggerConfig.java
代码:
package com.xxx.config;


import org.springframework.context.annotation.Configuration;
import springfox.documentation.swagger2.annotations.EnableSwagger2;

@Configuration
@EnableSwagger2
public class SwaggerConfig {

}
3. 配置文件
解决高版本SpringBoot整合swagger时启动报错:Failed to start bean ‘documentationPluginsBootstrapper’; nested exception is java.lang.NullPointerException问题
1. 方法一:配置文件
路径:src/main/resources/application.properties
代码:
spring.mvc.pathmatch.matching-strategy=ant_path_matcher
2. 方法二:配置 WebMvcConfigurer.java
路径:src/main/java/com/xxx/config/WebMvcConfigurer.java
代码
package com.clesun.brandarchive.config;

import org.springframework.context.annotation.Configuration;
import org.springframework.web.servlet.config.annotation.ResourceHandlerRegistry;
import org.springframework.web.servlet.config.annotation.WebMvcConfigurationSupport;

/**
 * 解决高版本springboot整合swagger启动报错Failed to start bean 'documentationPluginsBootstrapper' 问题
 * @author Administrator
 */
@Configuration
public class WebMvcConfigurer extends WebMvcConfigurationSupport {

    /**
     * 发现如果继承了WebMvcConfigurationSupport,则在yml中配置的相关内容会失效。 需要重新指定静态资源
     * @param registry
     */
    @Override
    public void addResourceHandlers(ResourceHandlerRegistry registry) {
        registry.addResourceHandler("/**").addResourceLocations(
                "classpath:/static/");
        registry.addResourceHandler("swagger-ui.html", "doc.html").addResourceLocations(
                "classpath:/META-INF/resources/");
        registry.addResourceHandler("/webjars/**").addResourceLocations(
                "classpath:/META-INF/resources/webjars/");
        super.addResourceHandlers(registry);
    }

}
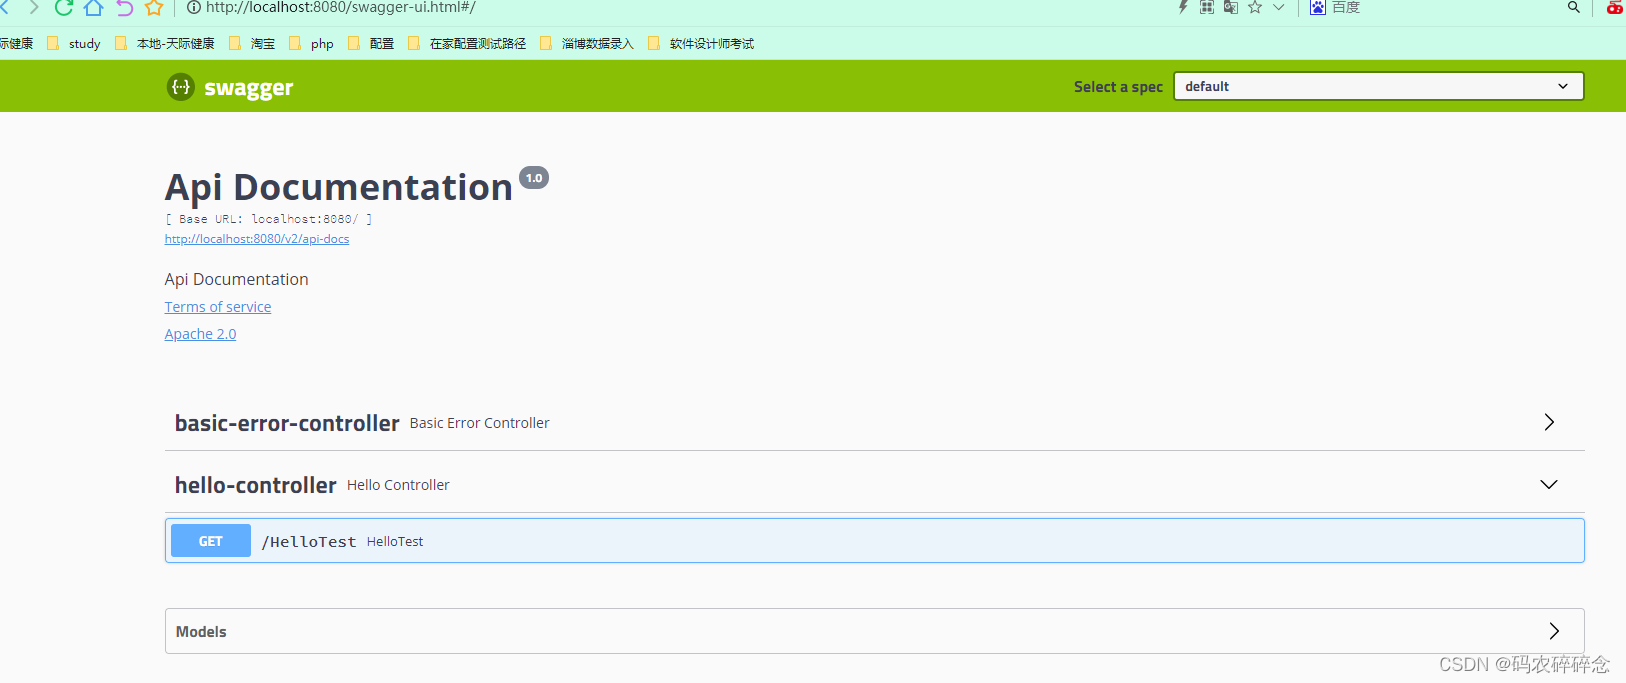
4. 运行
访问:http://localhost:8080/swagger-ui.html
3. 配置Swagger
1、配置Docket实例来配置Swaggger
Swagger实例Bean是Docket,所以通过配置Docket实例来配置Swaggger。
路径:src/main/java/com/xxx/config/SwaggerConfig.java
代码:
@Bean //配置docket以配置Swagger具体参数
public Docket docket() {
   return new Docket(DocumentationType.SWAGGER_2);
}
2、可以通过apiInfo()属性配置文档信息
路径:src/main/java/com/xxx/config/SwaggerConfig.java
代码:
//配置文档信息
private ApiInfo apiInfo() {
   Contact contact = new Contact("联系人名字", "http://xxx.xxx.com/联系人访问链接", "联系人邮箱");
   return new ApiInfo(
           "Swagger学习", // 标题
           "学习演示如何配置Swagger", // 描述
           "v1.0", // 版本
           "http://terms.service.url/组织链接", // 组织链接
           contact, // 联系人信息
           "Apach 2.0 许可", // 许可
           "许可链接", // 许可连接
           new ArrayList<>()// 扩展
  );
}
3、Docket 实例关联上 apiInfo()
路径:src/main/java/com/xxx/config/SwaggerConfig.java
代码:
@Bean
public Docket docket() {
   return new Docket(DocumentationType.SWAGGER_2).apiInfo(apiInfo());
}
4. 全部SwaggerConfig配置代码
路径:src/main/java/com/xxx/config/SwaggerConfig.java
代码:
package com.xxx.config;


import org.springframework.context.annotation.Bean;
import org.springframework.context.annotation.Configuration;
import springfox.documentation.service.ApiInfo;
import springfox.documentation.service.Contact;
import springfox.documentation.spi.DocumentationType;
import springfox.documentation.spring.web.plugins.Docket;
import springfox.documentation.swagger2.annotations.EnableSwagger2;

import java.util.ArrayList;

@Configuration
@EnableSwagger2
public class SwaggerConfig {

    @Bean //配置docket以配置Swagger具体参数
    public Docket docket() {
        return new Docket(DocumentationType.SWAGGER_2).apiInfo(apiInfo());
    }

    //配置信息
    private ApiInfo apiInfo() {
        Contact contact = new Contact("联系人名字", "https://xxx.xxx.com/联系人访问链接", "联系人邮箱");
        return new ApiInfo(
                "Swagger学习",//标题
                "学习演示如何配置Swagger",//描述
                "v1.0",//版本
                "http://terms.service.url/组织链接",//组织链接
                contact,//联系人信息
                "Apach  2.0 许可",//许可
                "许可链接",//许可链接
                new ArrayList<>()//扩展
        );

    }
}
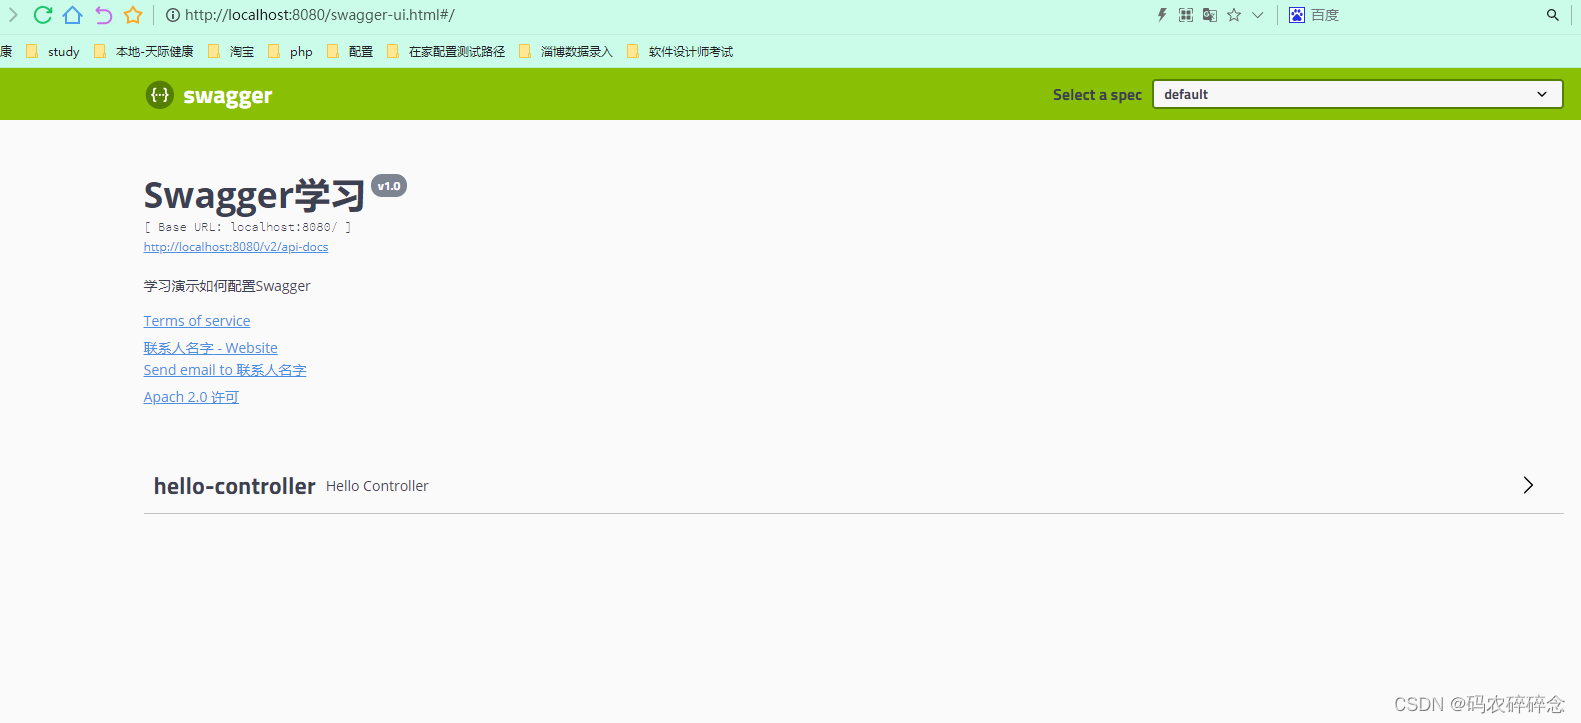
5. 测试
访问: http://localhost:8080/swagger-ui.html

4. 配置扫描接口
1、配置包路径配置扫描
构建Docket时通过select()方法配置怎么扫描接口。
路径:src/main/java/com/xxx/config/SwaggerConfig.java
代码:
@Bean
public Docket docket() {
   return new Docket(DocumentationType.SWAGGER_2)
      .apiInfo(apiInfo())
      .select()// 通过.select()方法,去配置扫描接口,RequestHandlerSelectors配置如何扫描接口
      .apis(RequestHandlerSelectors.basePackage("com.kuang.swagger.controller"))
      .build();
}
2、重启项目测试
由于我们配置根据包的路径扫描接口,所以我们只能看到一个类
访问: http://localhost:8080/swagger-ui.html
3、配置其他方式扫描接口
除了通过包路径配置扫描接口外,还可以通过配置其他方式扫描接口,这里注释一下所有的配置方式:
any() // 扫描所有,项目中的所有接口都会被扫描到
none() // 不扫描接口
// 通过方法上的注解扫描,如withMethodAnnotation(GetMapping.class)只扫描get请求
withMethodAnnotation(final Class<? extends Annotation> annotation)
// 通过类上的注解扫描,如.withClassAnnotation(Controller.class)只扫描有controller注解的类中的接口
withClassAnnotation(final Class<? extends Annotation> annotation)
basePackage(final String basePackage) // 根据包路径扫描接口
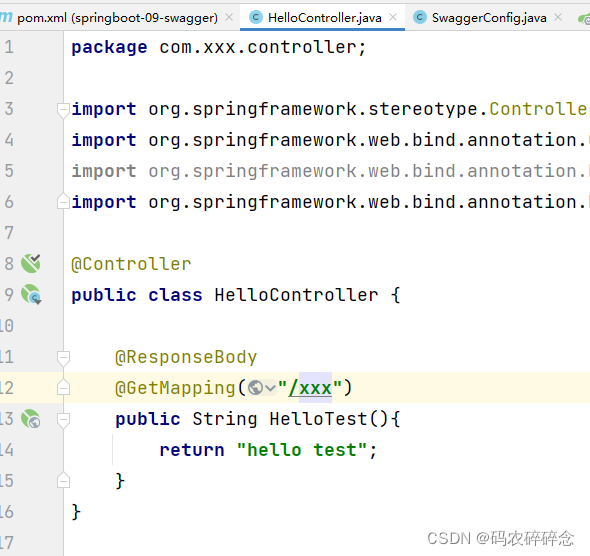
4、配置接口扫描过滤
1. 配置
路径:src/main/java/com/xxx/config/SwaggerConfig.java
代码:
@Bean
public Docket docket() {
   return new Docket(DocumentationType.SWAGGER_2)
      .apiInfo(apiInfo())
      .select()// 通过.select()方法,去配置扫描接口,RequestHandlerSelectors配置如何扫描接口
      .apis(RequestHandlerSelectors.basePackage("com.kuang.swagger.controller"))
       // 配置如何通过path过滤,即这里只扫描请求以/xxx开头的接口
      .paths(PathSelectors.ant("/xxx/**"))
      .build();
}
2. 这里的可选值还有
any() // 任何请求都扫描
none() // 任何请求都不扫描
regex(final String pathRegex) // 通过正则表达式控制
ant(final String antPattern) // 通过ant()控制
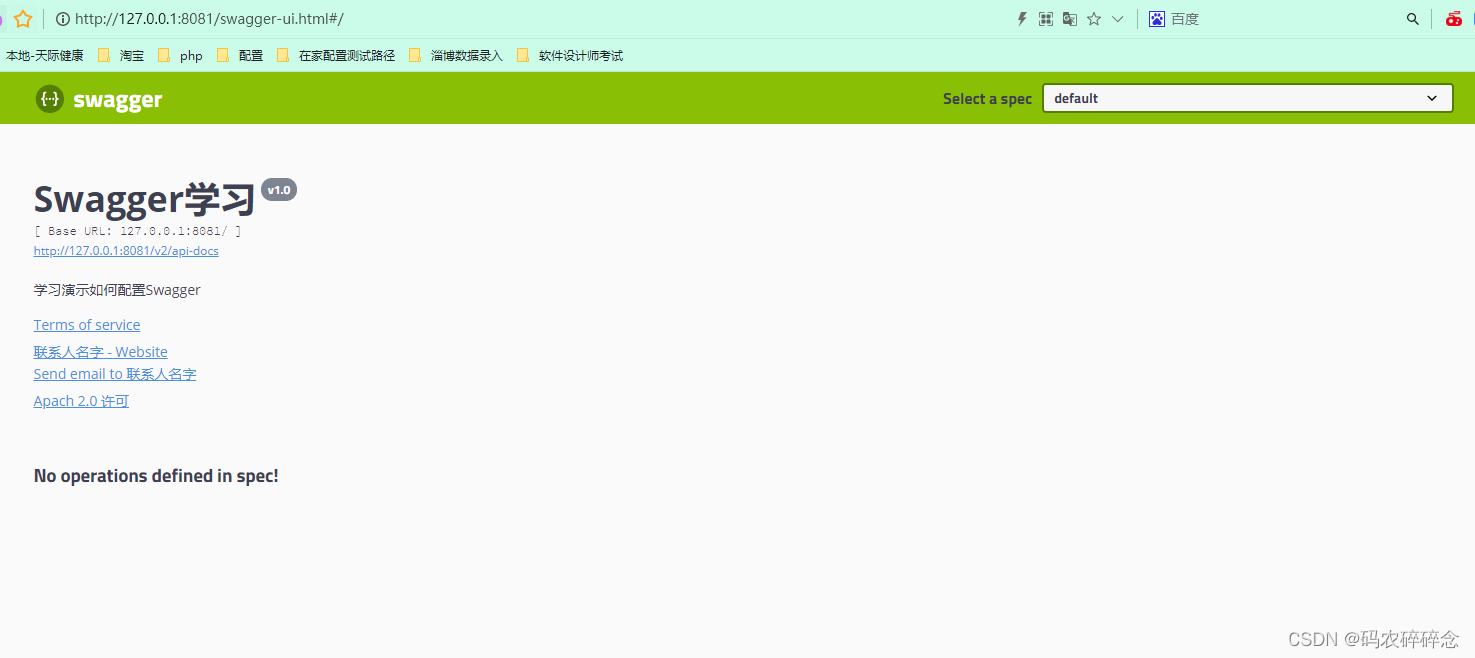
3. 运行测试
1. 以hello开头的
路径:http://127.0.0.1:8081/swagger-ui.html
运行后不显示
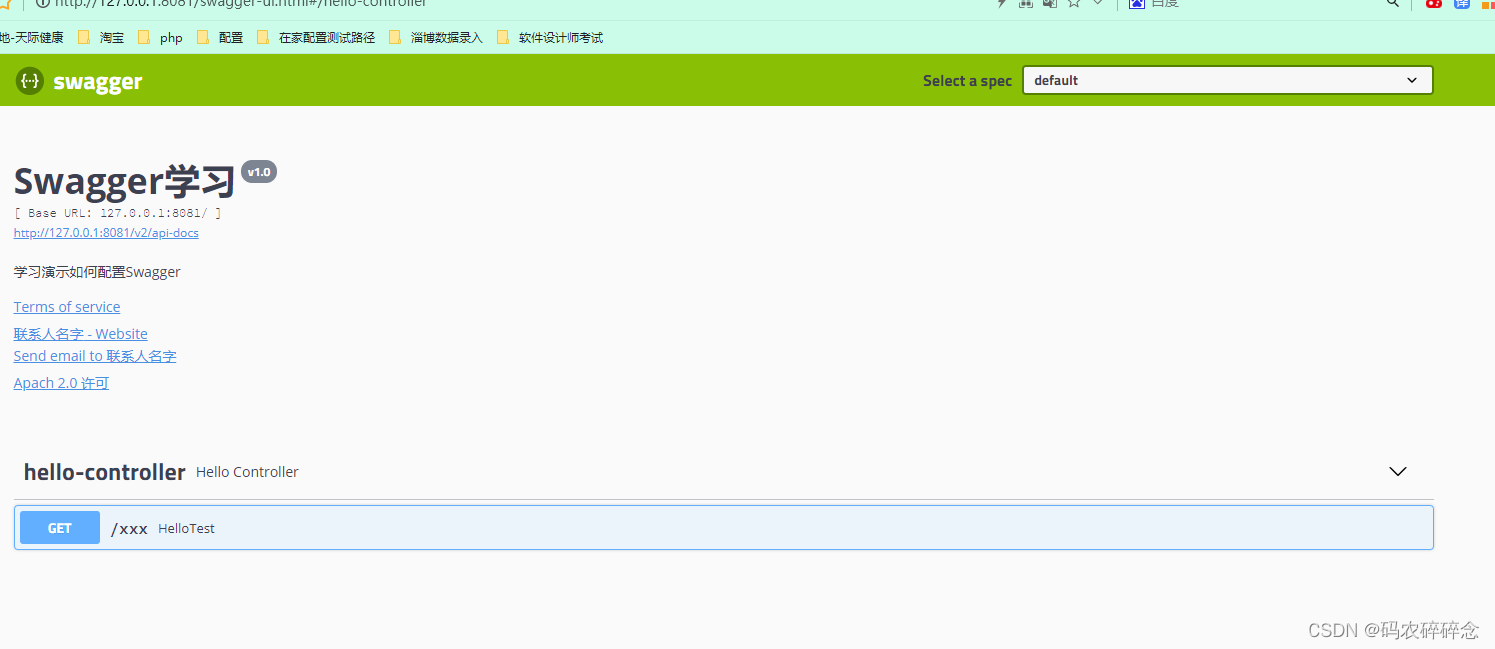
2 . 以xxx开头的
路径:http://127.0.0.1:8081/swagger-ui.html
测试结果
5、全部SwaggerConfig配置代码
路径:src/main/java/com/xxx/config/SwaggerConfig.java
代码:
package com.xxx.config;


import org.springframework.context.annotation.Bean;
import org.springframework.context.annotation.Configuration;
import springfox.documentation.builders.PathSelectors;
import springfox.documentation.builders.RequestHandlerSelectors;
import springfox.documentation.service.ApiInfo;
import springfox.documentation.service.Contact;
import springfox.documentation.spi.DocumentationType;
import springfox.documentation.spring.web.plugins.Docket;
import springfox.documentation.swagger2.annotations.EnableSwagger2;

import java.util.ArrayList;

@Configuration
@EnableSwagger2
public class SwaggerConfig {

    @Bean //配置docket以配置Swagger具体参数
    public Docket docket() {
        return new Docket(DocumentationType.SWAGGER_2)
                .apiInfo(apiInfo())
                .select()// 通过.select()方法,去配置扫描接口,RequestHandlerSelectors配置如何扫描接口
                .apis(RequestHandlerSelectors.basePackage("com.xxx.controller"))
                // 配置如何通过path过滤,即这里只扫描请求以/xxx开头的接口
                .paths(PathSelectors.ant("/xxx/**"))
                .build();
    }

    //配置信息
    private ApiInfo apiInfo() {
        Contact contact = new Contact("联系人名字", "https://xxx.xxx.com/联系人访问链接", "联系人邮箱");
        return new ApiInfo(
                "Swagger学习",//标题
                "学习演示如何配置Swagger",//描述
                "v1.0",//版本
                "http://terms.service.url/组织链接",//组织链接
                contact,//联系人信息
                "Apach  2.0 许可",//许可
                "许可链接",//许可链接
                new ArrayList<>()//扩展
        );

    }
}
5. 配置Swagger开关
1、配置是否启用swagger
通过enable()方法配置是否启用swagger,如果是false,swagger将不能在浏览器中访问了
路径:src/main/java/com/xxx/config/SwaggerConfig.java
代码:
@Bean
public Docket docket() {
   return new Docket(DocumentationType.SWAGGER_2)
      .apiInfo(apiInfo())
      .enable(false) //配置是否启用Swagger,如果是false,在浏览器将无法访问
      .select()// 通过.select()方法,去配置扫描接口,RequestHandlerSelectors配置如何扫描接口
      .apis(RequestHandlerSelectors.basePackage("com.kuang.swagger.controller"))
       // 配置如何通过path过滤,即这里只扫描请求以/xxx开头的接口
      .paths(PathSelectors.ant("/xxx/**"))
      .build();
}
2、动态配置当配置是否启用swagger
如何动态配置当项目处于test、dev环境时显示swagger,处于prod时不显示?
1. 新建开发环境dev
路径:src/main/resources/application-dev.properties
# 开发环境 生产环境
server.port=8081
2. 新建正式环境pro
路径:src/main/resources/application-pro.properties
代码:
# 正式环境
server.port=8082
3. 配置激活环境
路径:src/main/resources/application.properties
代码:
spring.mvc.pathmatch.matching-strategy=ant_path_matcher
# 切换环境
 spring.profiles.active=dev
4. 修改代码
如果是dev 或者test环境显示
路径:src/main/java/com/xxx/config/SwaggerConfig.java
代码:
@Bean
public Docket docket(Environment environment) {
   // 设置要显示swagger的环境
   Profiles of = Profiles.of("dev", "test");
   // 判断当前是否处于该环境
   // 通过 enable() 接收此参数判断是否要显示
   boolean flag = environment.acceptsProfiles(of);

   return new Docket(DocumentationType.SWAGGER_2)
      .apiInfo(apiInfo())
      .enable(flag) //配置是否启用Swagger,如果是false,在浏览器将无法访问
      .select()// 通过.select()方法,去配置扫描接口,RequestHandlerSelectors配置如何扫描接口
      .apis(RequestHandlerSelectors.basePackage("com.xxx.controller"))
       // 配置如何通过path过滤,即这里只扫描请求以/xxx开头的接口
      .paths(PathSelectors.ant("/xxx/**"))
      .build();
}
完整代码如下
路径:src/main/java/com/xxx/config/SwaggerConfig.java
代码:
package com.xxx.config;


import org.springframework.context.annotation.Bean;
import org.springframework.context.annotation.Configuration;
import org.springframework.core.env.Environment;
import org.springframework.core.env.Profiles;
import springfox.documentation.builders.PathSelectors;
import springfox.documentation.builders.RequestHandlerSelectors;
import springfox.documentation.service.ApiInfo;
import springfox.documentation.service.Contact;
import springfox.documentation.spi.DocumentationType;
import springfox.documentation.spring.web.plugins.Docket;
import springfox.documentation.swagger2.annotations.EnableSwagger2;

import java.util.ArrayList;

@Configuration
@EnableSwagger2
public class SwaggerConfig {

    @Bean //配置docket以配置Swagger具体参数
    public Docket docket(Environment environment) {
        //设置要显示的swagger环境
        Profiles profiles = Profiles.of("dev", "test");
        //通过environment.acceptsProfiles判断是否处在自己设定的环境中
        boolean flag = environment.acceptsProfiles(profiles);

        return new Docket(DocumentationType.SWAGGER_2)
                .apiInfo(apiInfo())
                .enable(flag)//配置是否启用Swagger,如果是false,在浏览器将无法访问
                .select()// 通过.select()方法,去配置扫描接口,RequestHandlerSelectors配置如何扫描接口
                .apis(RequestHandlerSelectors.basePackage("com.xxx.controller"))
                // 配置如何通过path过滤,即这里只扫描请求以/xxx开头的接口
                .paths(PathSelectors.ant("/xxx/**"))
                .build();
    }

    //配置信息
    private ApiInfo apiInfo() {
        Contact contact = new Contact("联系人名字", "https://xxx.xxx.com/联系人访问链接", "联系人邮箱");
        return new ApiInfo(
                "Swagger学习",//标题
                "学习演示如何配置Swagger",//描述
                "v1.0",//版本
                "http://terms.service.url/组织链接",//组织链接
                contact,//联系人信息
                "Apach  2.0 许可",//许可
                "许可链接",//许可链接
                new ArrayList<>()//扩展
        );

    }
}
5. 测试
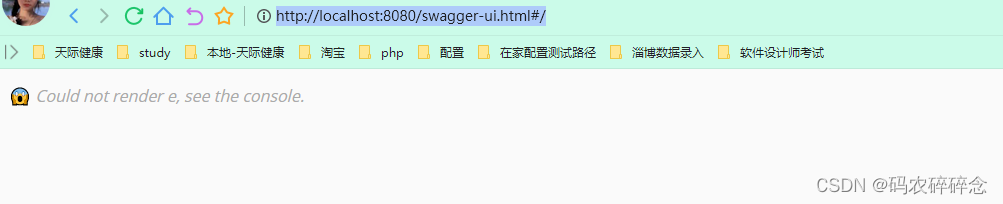
1. 选择默认环境
路径:src/main/resources/application.properties
代码:
spring.mvc.pathmatch.matching-strategy=ant_path_matcher
# 切换环境
# spring.profiles.active=dev
访问:http://localhost:8080/swagger-ui.html#/
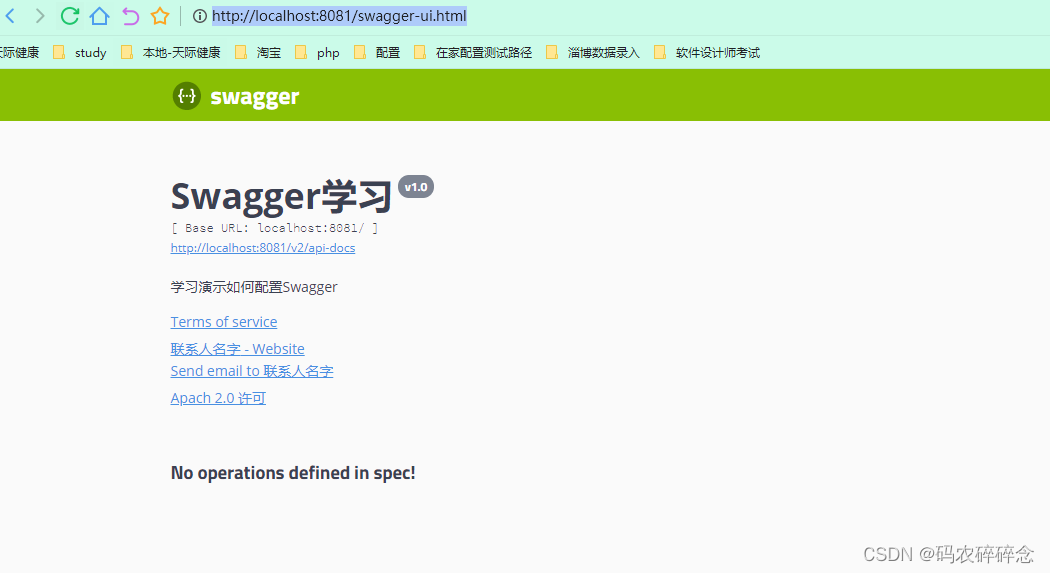
2. 选择dev环境
路径:src/main/resources/application.properties
代码:
spring.mvc.pathmatch.matching-strategy=ant_path_matcher
# 切换环境
 spring.profiles.active=dev
访问:http://localhost:8081/swagger-ui.html
6. 配置API分组
如果没有配置分组,默认是default。
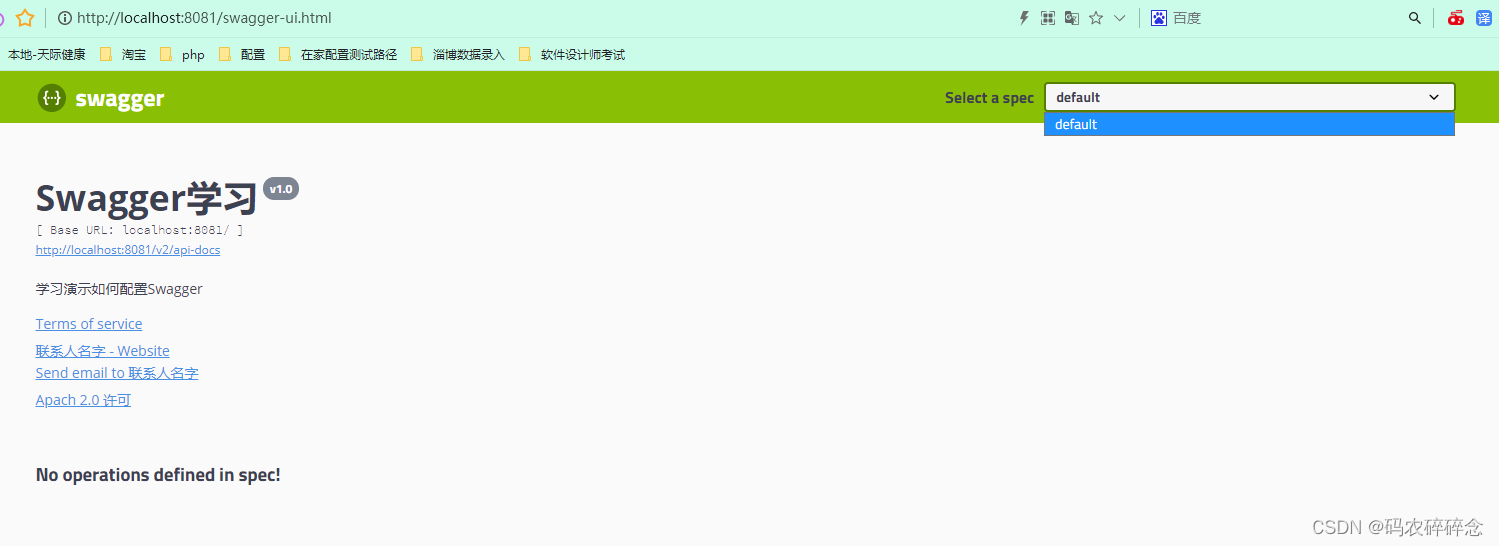
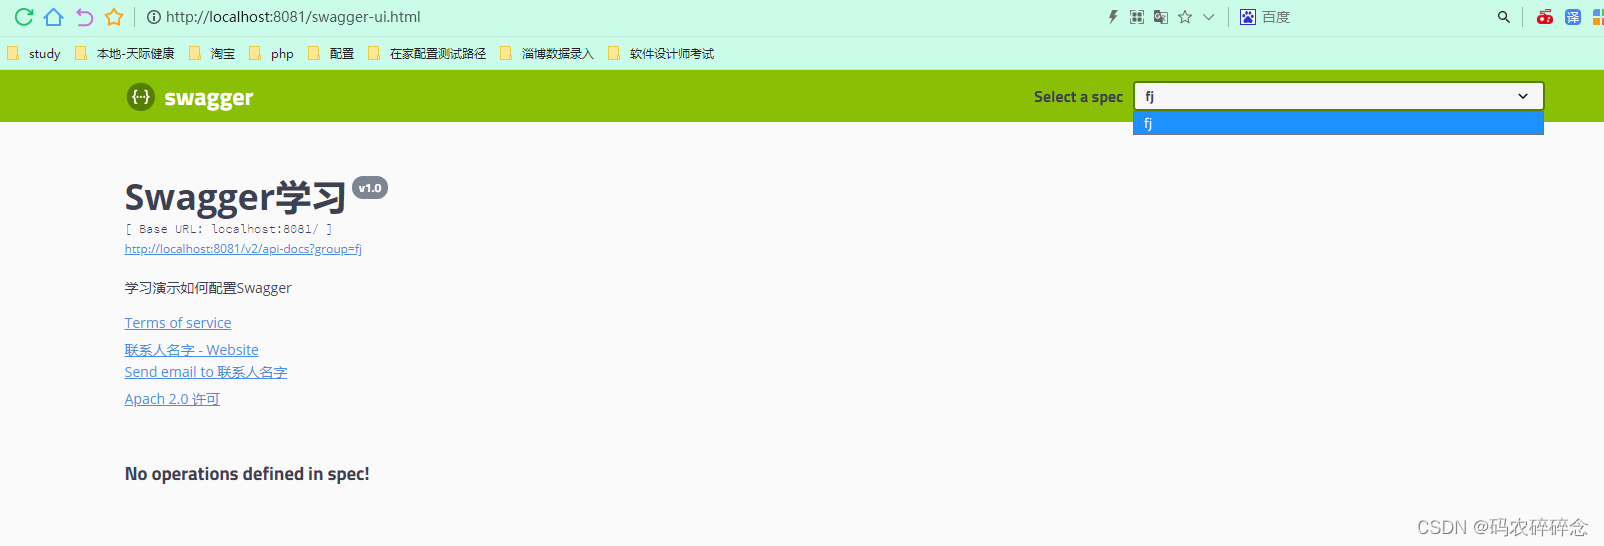
1. 通过groupName()方法即可配置分组
路径:src/main/java/com/xxx/config/SwaggerConfig.java
代码:
@Bean
public Docket docket(Environment environment) {
   return new Docket(DocumentationType.SWAGGER_2).apiInfo(apiInfo())
      .groupName("fj") // 配置分组
       // 省略配置....
}
访问:http://localhost:8081/swagger-ui.html
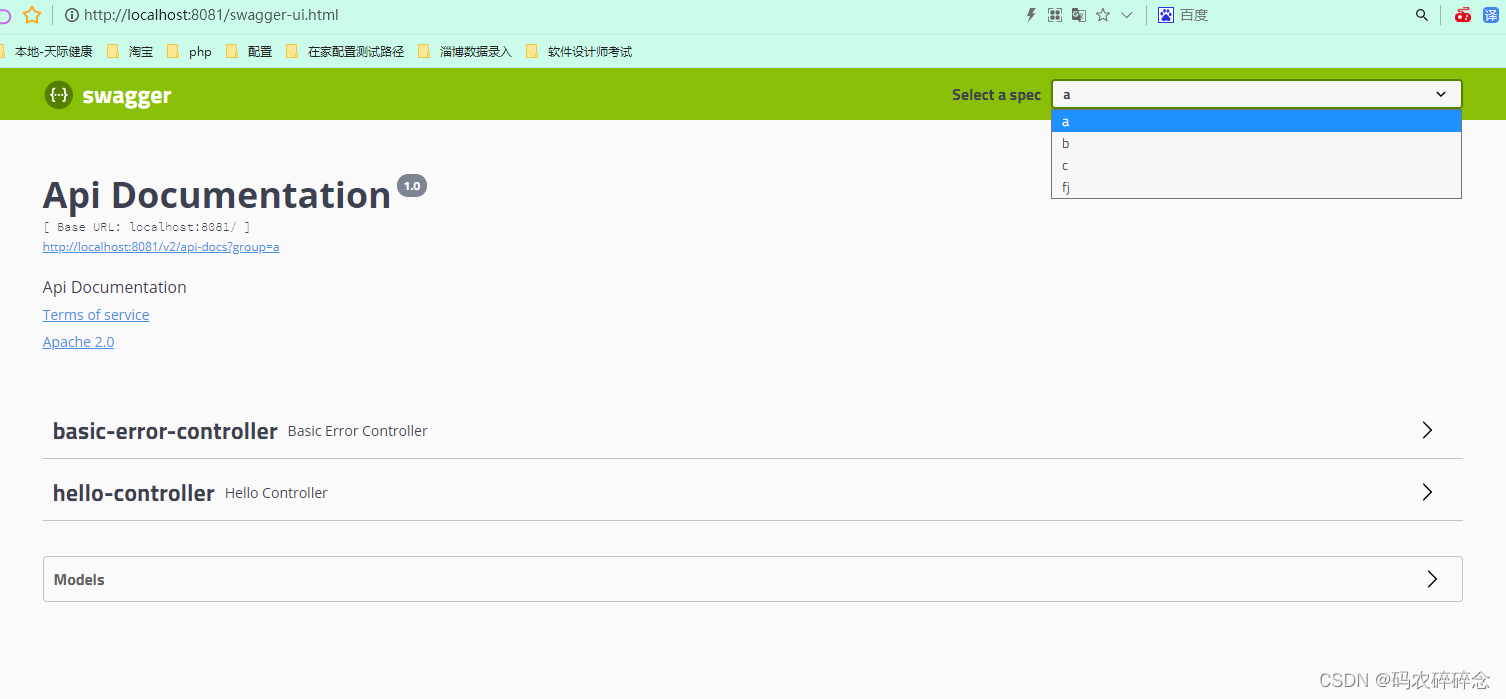
2. 如何配置多个分组
配置多个分组只需要配置多个docket即可:
  @Bean
    public Docket docket1() {
        return new Docket(DocumentationType.SWAGGER_2).groupName("a");
    }
    @Bean
    public Docket docket2() {
        return new Docket(DocumentationType.SWAGGER_2).groupName("b");
    }
    @Bean
    public Docket docket3() {
        return new Docket(DocumentationType.SWAGGER_2).groupName("c");
    }
全部代码
路径:src/main/java/com/xxx/config/SwaggerConfig.java
代码:
package com.xxx.config;


import org.springframework.context.annotation.Bean;
import org.springframework.context.annotation.Configuration;
import org.springframework.core.env.Environment;
import org.springframework.core.env.Profiles;
import springfox.documentation.builders.PathSelectors;
import springfox.documentation.builders.RequestHandlerSelectors;
import springfox.documentation.service.ApiInfo;
import springfox.documentation.service.Contact;
import springfox.documentation.spi.DocumentationType;
import springfox.documentation.spring.web.plugins.Docket;
import springfox.documentation.swagger2.annotations.EnableSwagger2;

import java.util.ArrayList;

@Configuration
@EnableSwagger2
public class SwaggerConfig {

    @Bean
    public Docket docket1() {
        return new Docket(DocumentationType.SWAGGER_2).groupName("a");
    }
    @Bean
    public Docket docket2() {
        return new Docket(DocumentationType.SWAGGER_2).groupName("b");
    }
    @Bean
    public Docket docket3() {
        return new Docket(DocumentationType.SWAGGER_2).groupName("c");
    }
    @Bean //配置docket以配置Swagger具体参数
    public Docket docket(Environment environment) {
        //设置要显示的swagger环境
        Profiles profiles = Profiles.of("dev", "test");
        //通过environment.acceptsProfiles判断是否处在自己设定的环境中
        boolean flag = environment.acceptsProfiles(profiles);

        return new Docket(DocumentationType.SWAGGER_2)
                .groupName("fj")
                .apiInfo(apiInfo())
                .enable(flag)//配置是否启用Swagger,如果是false,在浏览器将无法访问
                .select()// 通过.select()方法,去配置扫描接口,RequestHandlerSelectors配置如何扫描接口
                .apis(RequestHandlerSelectors.basePackage("com.xxx.controller"))
                // 配置如何通过path过滤,即这里只扫描请求以/xxx开头的接口
                .paths(PathSelectors.ant("/xxx/**"))
                .build();
    }

    //配置信息
    private ApiInfo apiInfo() {
        Contact contact = new Contact("联系人名字", "https://xxx.xxx.com/联系人访问链接", "联系人邮箱");
        return new ApiInfo(
                "Swagger学习",//标题
                "学习演示如何配置Swagger",//描述
                "v1.0",//版本
                "http://terms.service.url/组织链接",//组织链接
                contact,//联系人信息
                "Apach  2.0 许可",//许可
                "许可链接",//许可链接
                new ArrayList<>()//扩展
        );

    }
}
重启项目查看即可
7. 实体配置
1、新建一个实体类
路径:src/main/java/com/xxx/pojo/User.java
代码:
package com.xxx.pojo;

public class User {
    public String username;
    public String password;
}
2. 实现一个接口返回值是实体类(即使是泛型)的接口
路径:src/main/java/com/xxx/controller/HelloController.java
代码:
package com.xxx.controller;

import com.xxx.pojo.User;
import org.springframework.stereotype.Controller;
import org.springframework.web.bind.annotation.GetMapping;
import org.springframework.web.bind.annotation.PostMapping;
import org.springframework.web.bind.annotation.ResponseBody;

@Controller
public class HelloController {

    @ResponseBody
    @GetMapping("/hello")
    public String HelloTest() {
        return "hello test";
    }

    @GetMapping("/user")
    public User user() {
        return new User();
    }
}
3. 重启查看测试
注意:注释掉路径过滤,否则不显示接口
路径:src/main/java/com/xxx/config/SwaggerConfig.java
代码:
  @Bean //配置docket以配置Swagger具体参数
    public Docket docket(Environment environment) {
          //... 以上配置省略
          // 配置如何通过path过滤,即这里只扫描请求以/xxx开头的接口
          // .paths(PathSelectors.ant("/xxx/**"))
             .build();
    }
访问:http://127.0.0.1:8081/swagger-ui.html?urls.primaryName=fj#/hello-controller
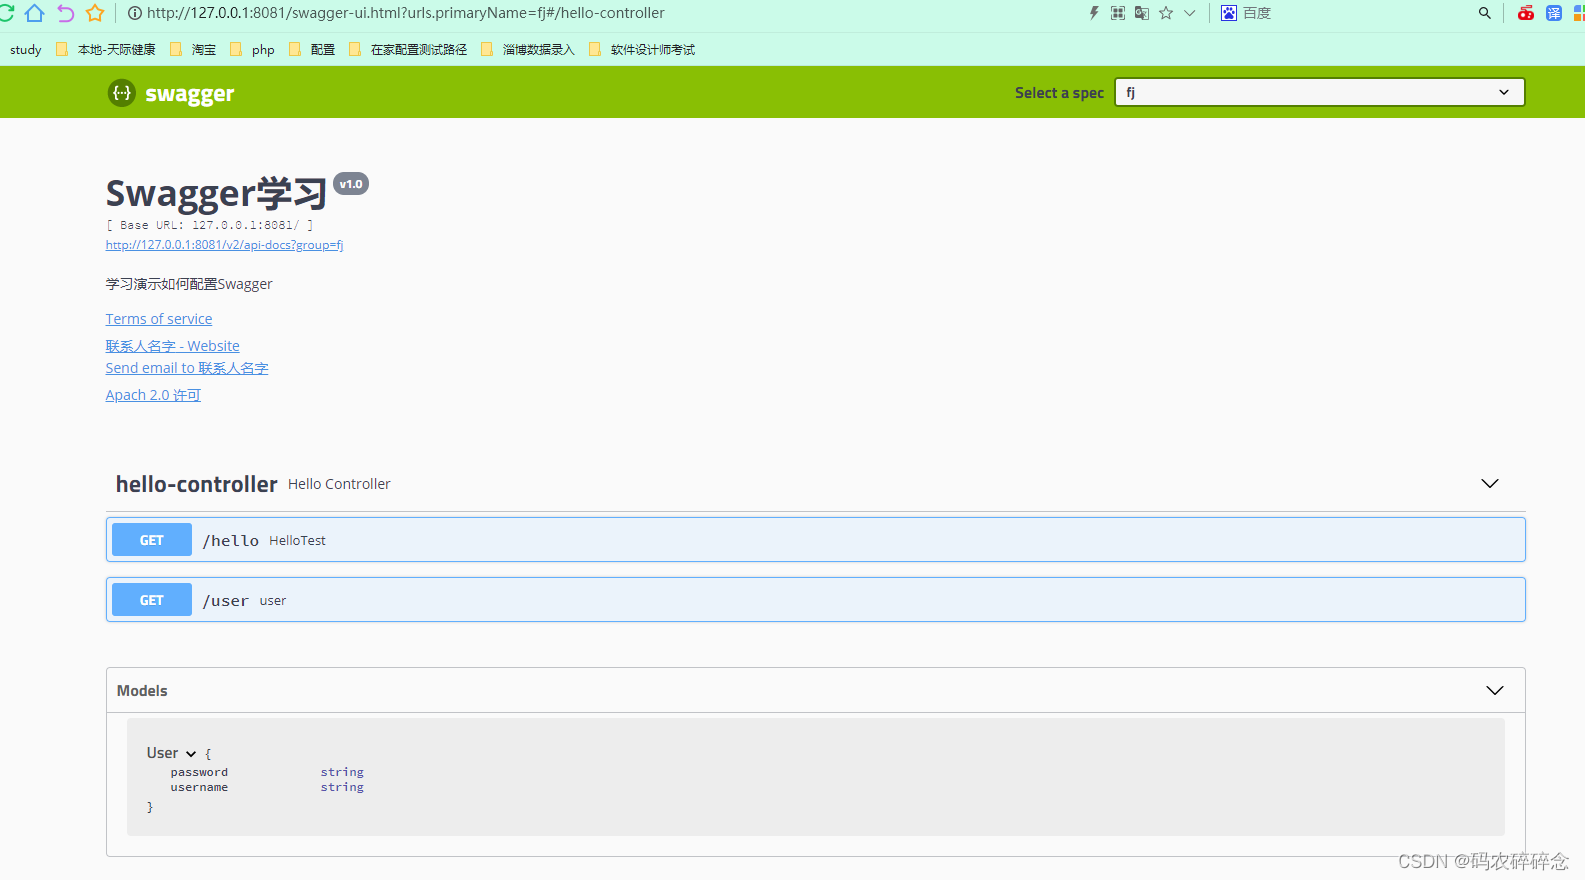
4. 添加注释注解
注:并不是因为@ApiModel这个注解让实体显示在这里了,而是只要出现在接口方法的返回值上的实体都会显示在这里,而@ApiModel和@ApiModelProperty这两个注解只是为实体添加注释的。
- @ApiModel为类添加注释
- @ApiModelProperty为类属性添加注释
路径:src/main/java/com/xxx/pojo/User.java
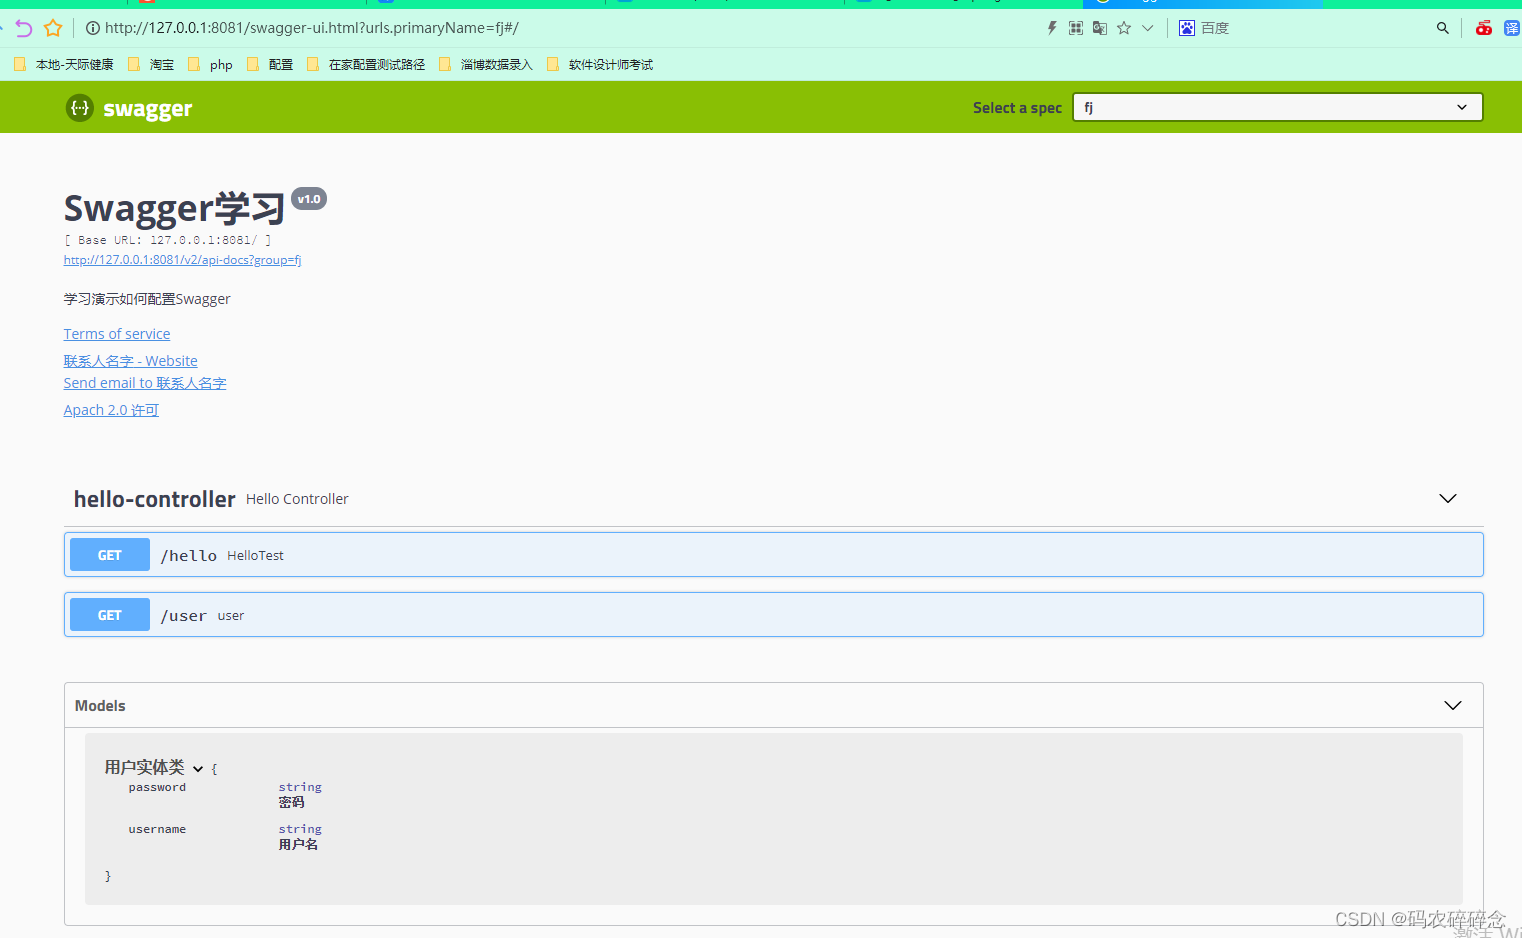
代码:
package com.xxx.pojo;

import io.swagger.annotations.ApiModel;
import io.swagger.annotations.ApiModelProperty;

@ApiModel("用户实体类")
public class User {
    @ApiModelProperty("用户名")
    public String username;
    @ApiModelProperty("密码")
    public String password;
}
运行
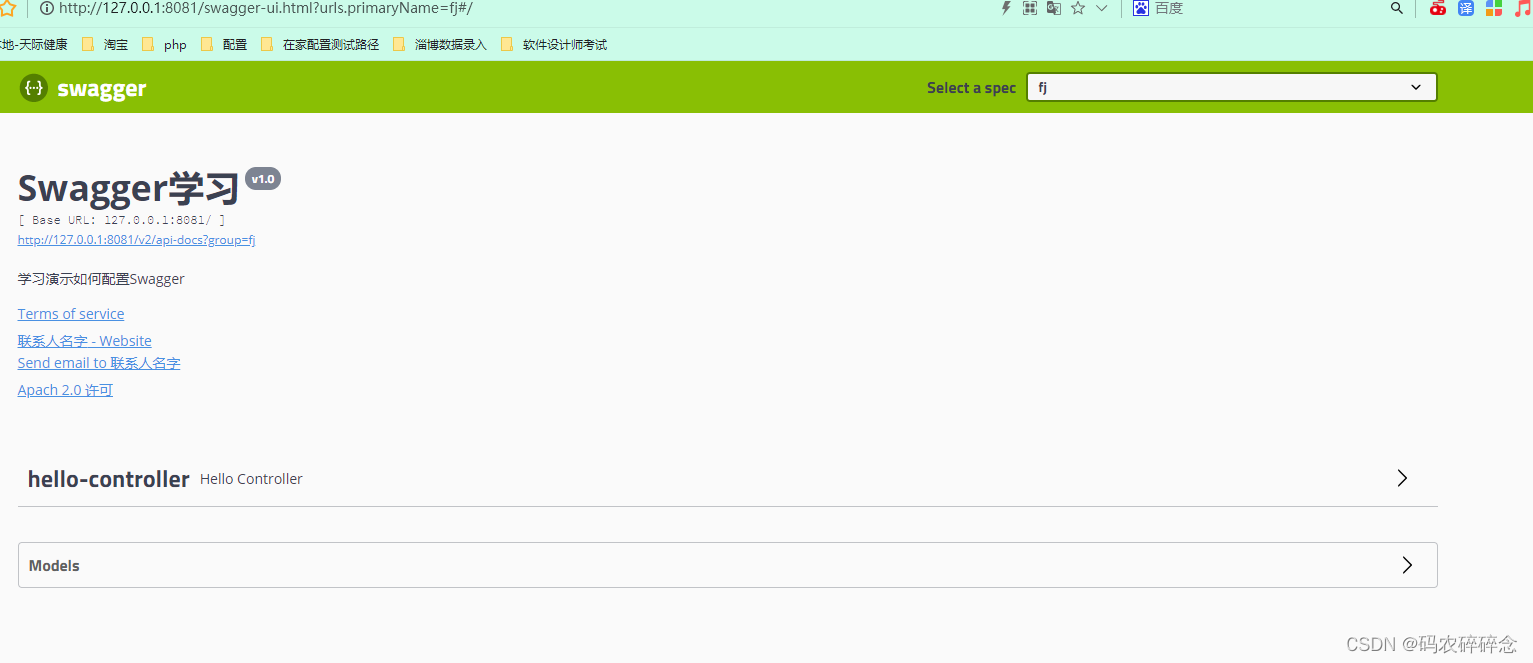
访问:http://127.0.0.1:8081/swagger-ui.html?urls.primaryName=fj#/
8. 常用注解
1. 常用注解说明
Swagger的所有注解定义在io.swagger.annotations包下
下面列一些经常用到的,未列举出来的可以另行查阅说明:
| Swagger注解 | 简单说明 |
|---|---|
| @Api(tags = “xxx模块说明”) | 作用在模块类上 |
| @ApiOperation(“xxx接口说明”) | 作用在接口方法上 |
| @ApiModel(“xxxPOJO说明”) | 作用在模型类上:如VO、BO |
| @ApiModelProperty(value = “xxx属性说明”,hidden = true) | 作用在类方法和属性上,hidden设置为true可以隐藏该属性 |
| @ApiParam(“xxx参数说明”) | 作用在参数、方法和字段上,类似@ApiModelProperty |
2. 实例说明
我们也可以给请求的接口配置一些注释
路径:src/main/java/com/xxx/controller/HelloController.java
代码:
package com.xxx.controller;
import com.xxx.pojo.User;
import io.swagger.annotations.ApiOperation;
import io.swagger.annotations.ApiParam;
import org.springframework.stereotype.Controller;
import org.springframework.web.bind.annotation.*;
@Controller
public class HelloController {
/* 方法注解 */
@ApiOperation(value = "desc of method", notes = "")
@GetMapping(value = "/hello")
@ResponseBody
public Object hello( /* 参数注解 required:必填 */ @ApiParam(value = "desc of param", required = true) @RequestParam String name) {
return "Hello " + name + "!";
}
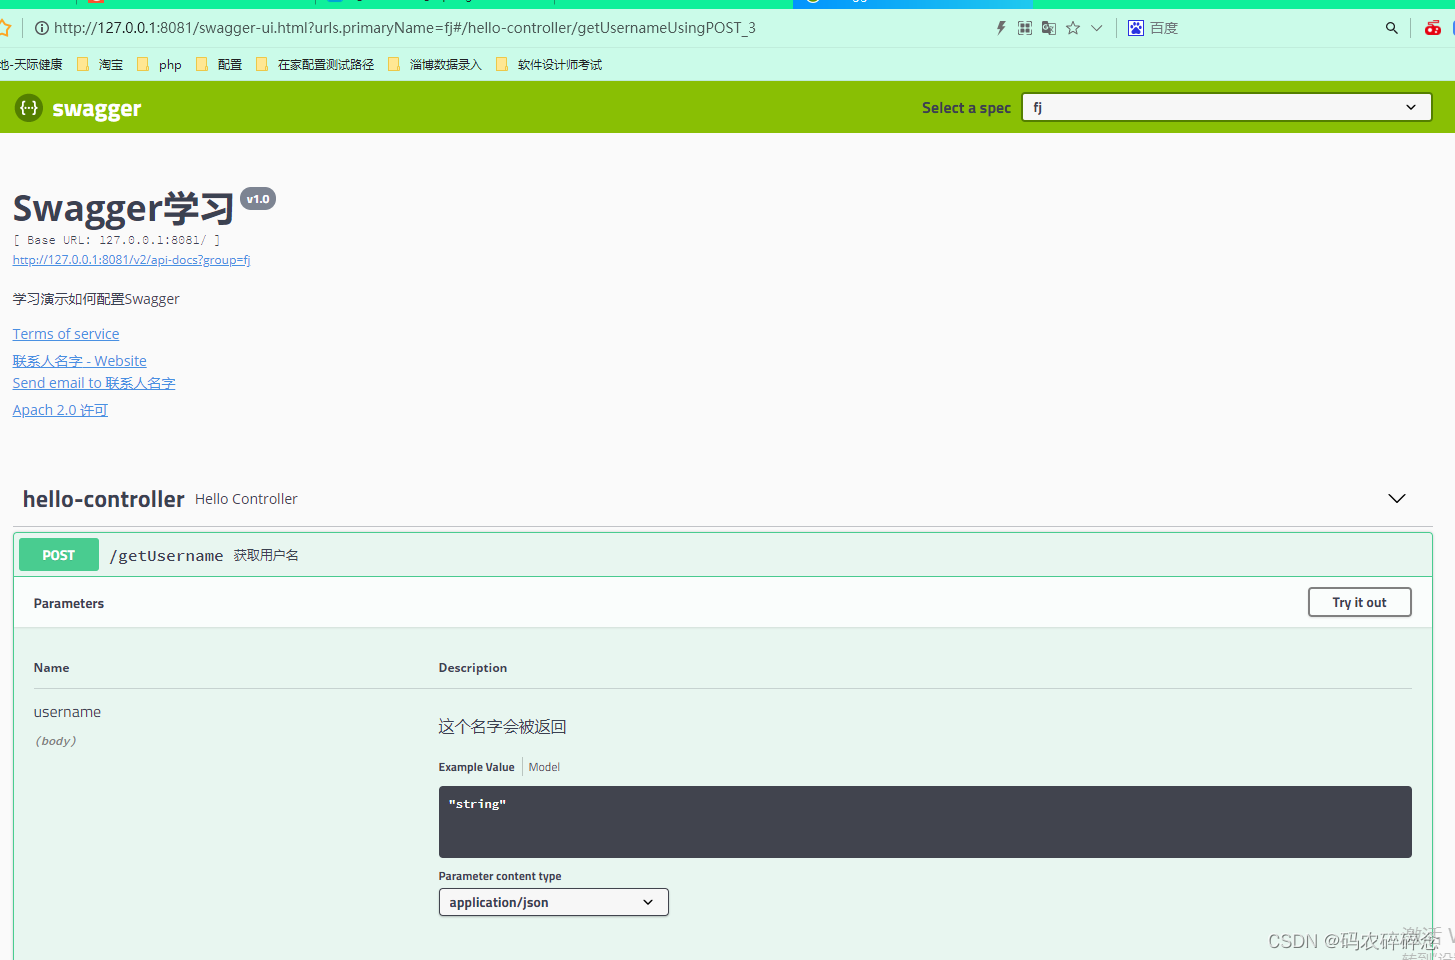
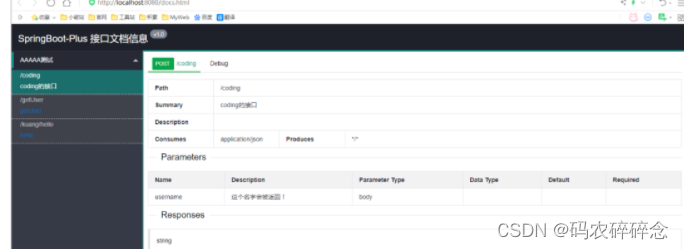
@ApiOperation("获取用户名")
@PostMapping("/getUsername")
@ResponseBody
public String getUsername(@ApiParam("这个名字会被返回") @RequestParam String username) {
return "hello" + username;
}
@ApiOperation("添加用户")
@PostMapping("/addUser")// @RequestBody
@ResponseBody
public User user(@RequestBody User user) {
return user;
}
}
测试结果
访问:http://127.0.0.1:8081/swagger-ui.html?urls.primaryName=fj
方法上加了注释@ApiOperation
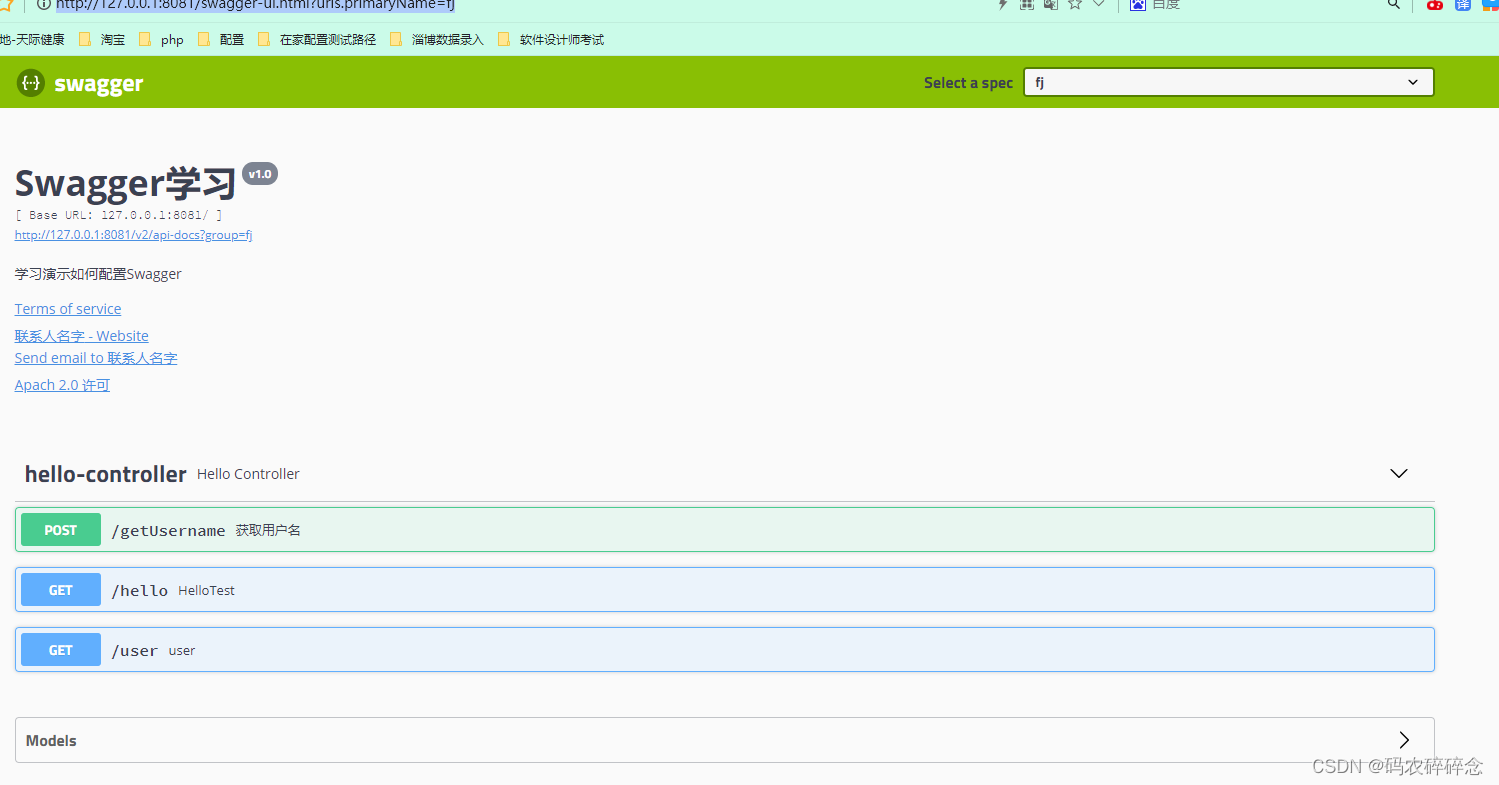
参数上加了注释@ApiParam
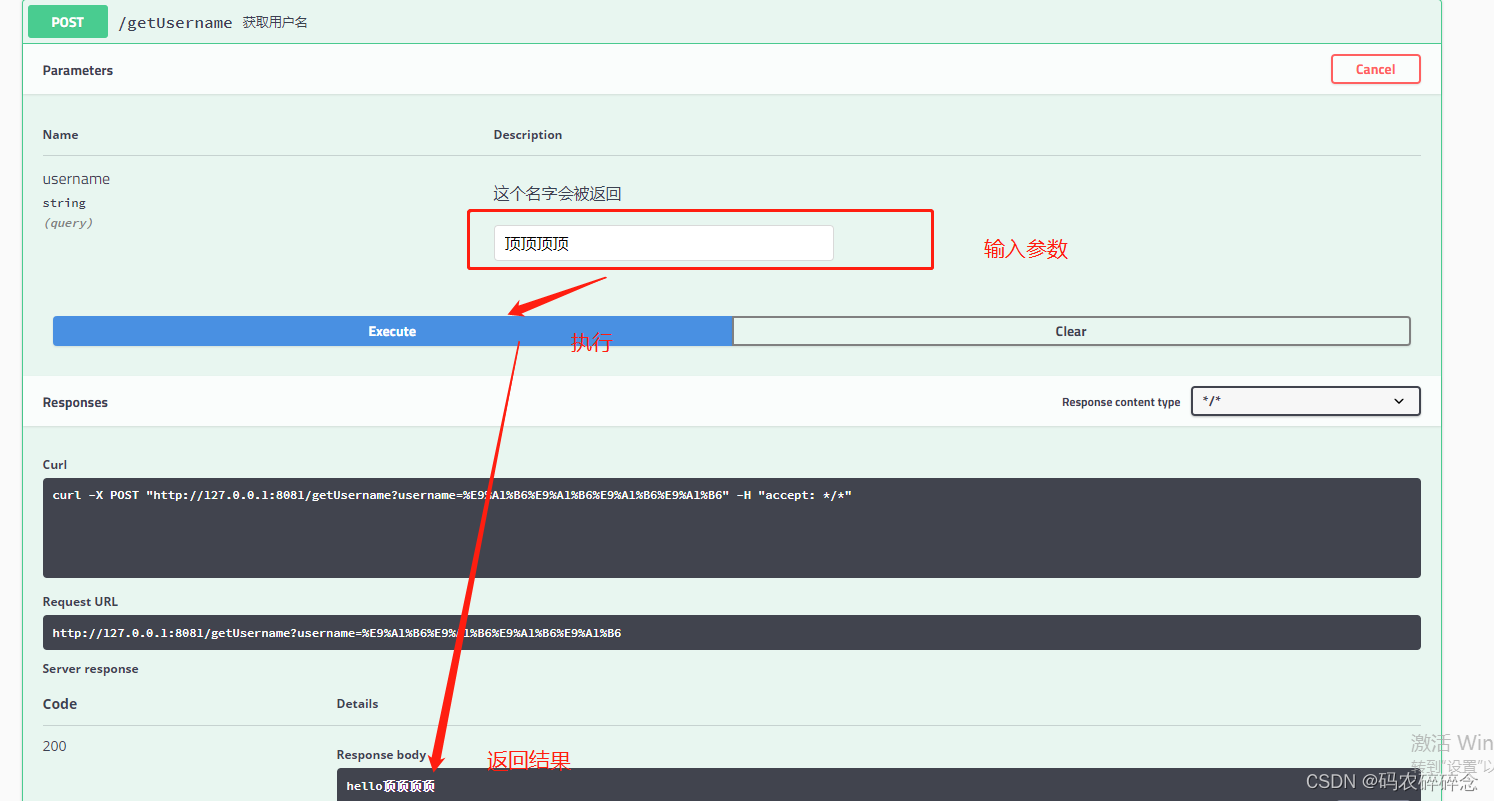
测试运行接口Try it out
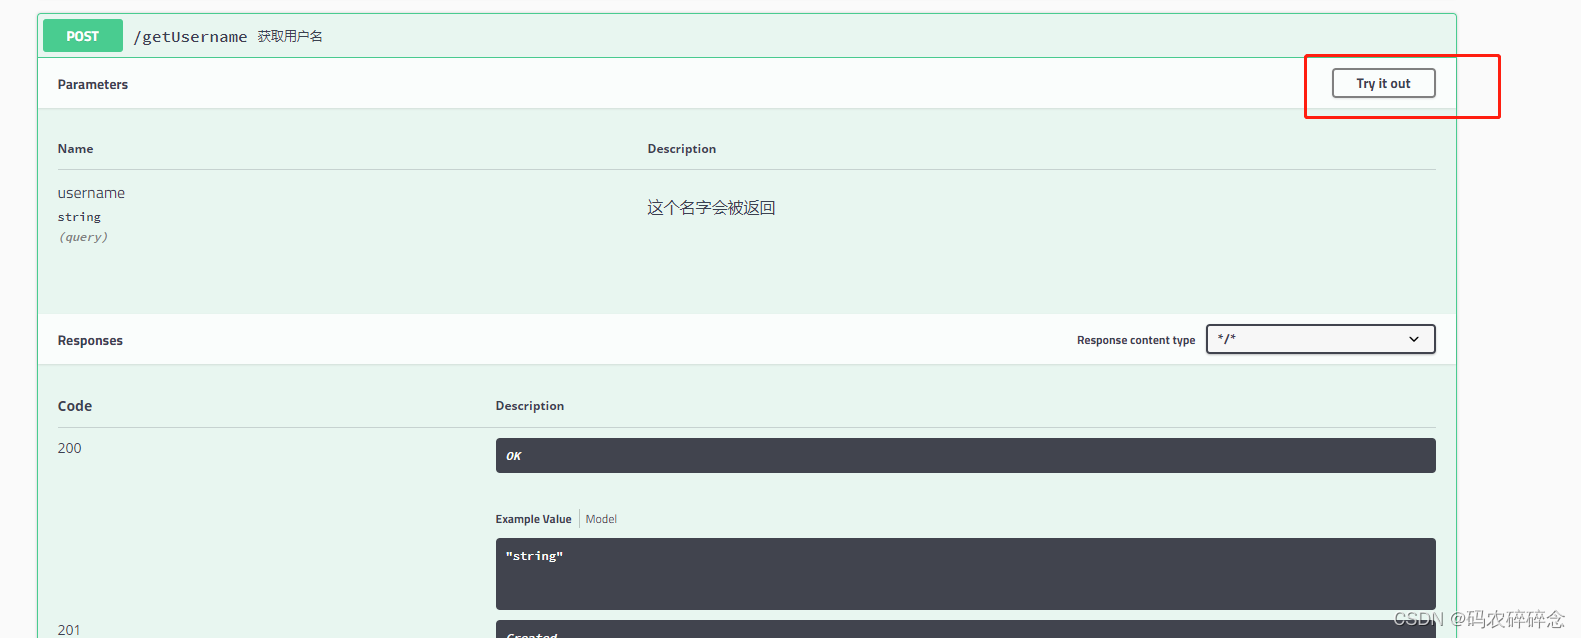
执行接口
9. 拓展:其他皮肤
我们可以导入不同的包实现不同的皮肤定义:
1、默认
访问 http://localhost:8080/swagger-ui.html
<dependency>
   <groupId>io.springfox</groupId>
   <artifactId>springfox-swagger-ui</artifactId>
   <version>2.9.2</version>
</dependency>
2、bootstrap-ui
访问 http://localhost:8080/doc.html
<!-- 引入swagger-bootstrap-ui包 /doc.html-->
<dependency>
   <groupId>com.github.xiaoymin</groupId>
   <artifactId>swagger-bootstrap-ui</artifactId>
   <version>1.9.1</version>
</dependency>

3、Layui-ui
访问 http://localhost:8080/docs.html
<!-- 引入swagger-ui-layer包 /docs.html-->
<dependency>
   <groupId>com.github.caspar-chen</groupId>
   <artifactId>swagger-ui-layer</artifactId>
   <version>1.1.3</version>
</dependency>
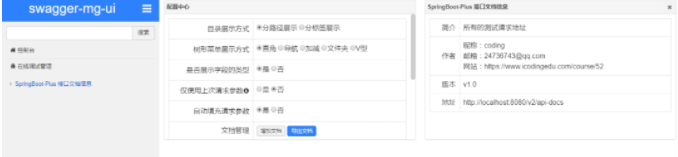
4、mg-ui
访问 http://localhost:8080/document.html
<!-- 引入swagger-ui-layer包 /document.html-->
<dependency>
   <groupId>com.zyplayer</groupId>
   <artifactId>swagger-mg-ui</artifactId>
   <version>1.0.6</version>
</dependency>
十六、异步、定时、邮件任务
1. 异步任务
1. 新建环境
创建springboot-10-task项目
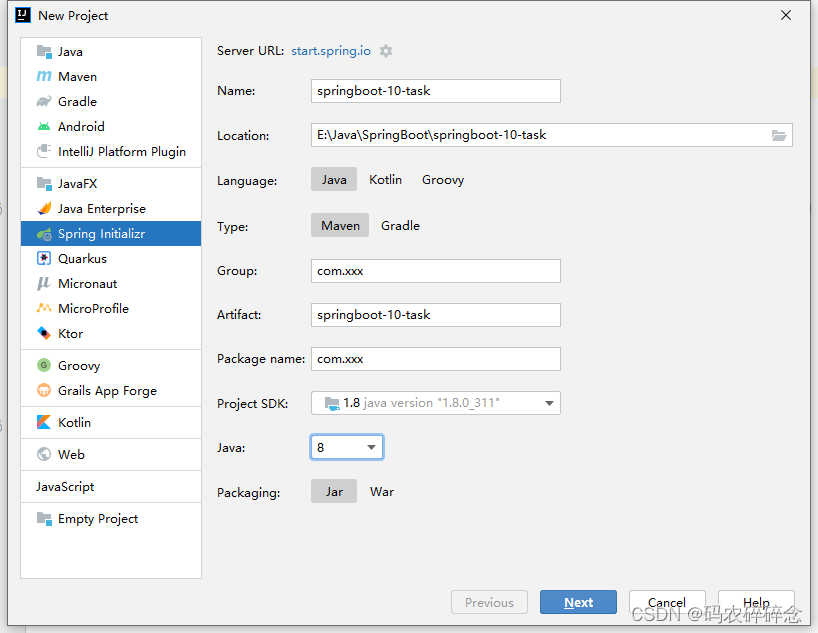
选择依赖,finish

2. 延时测试
1. 创建服务层
路径:src/main/java/com/xxx/service/AsyncService.java
代码:
package com.xxx.service;

import org.springframework.stereotype.Service;

@Service
public class AsyncService {
    //CTRL+ALT+T
    public void hello() {
        try {
            Thread.sleep(3000);
        } catch (InterruptedException e) {
            e.printStackTrace();
        }
        System.out.println("数据正在处理。。。。。");
    }
}
2. 控制层
路径:src/main/java/com/xxx/controller/AsyncController.java
代码:
package com.xxx.controller;

import com.xxx.service.AsyncService;
import org.springframework.web.bind.annotation.RequestMapping;
import org.springframework.web.bind.annotation.RestController;

import javax.annotation.Resource;

@RestController
public class AsyncController {
    @Resource
    AsyncService asyncService;

    @RequestMapping("/hello")
    public String hello() {
        asyncService.hello();//停止三秒
        return "ok";

    }
}
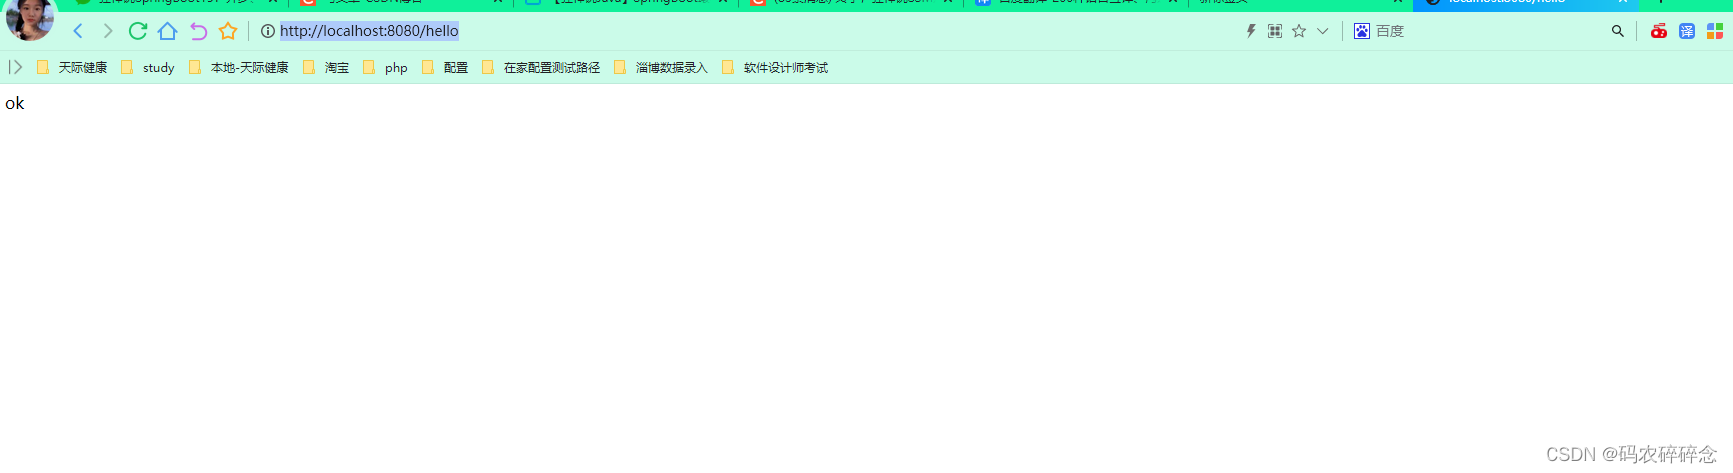
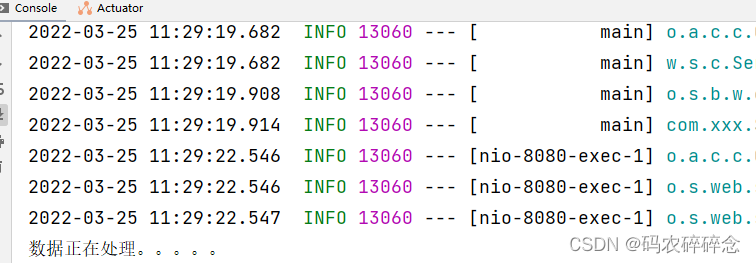
3. 测试
访问:http://localhost:8080/hello
控制台打印出数据
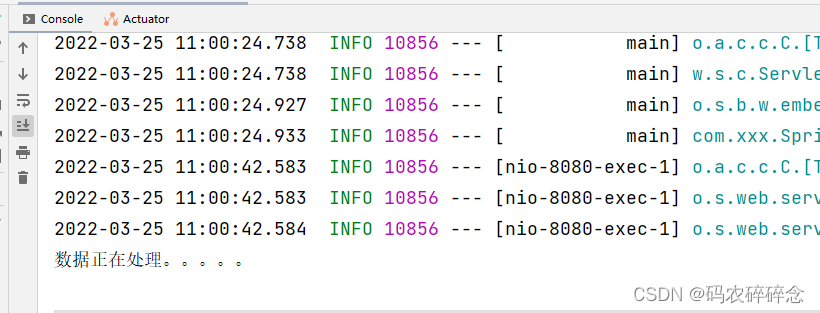
转三秒出现ok
3. 实现异步
1. service层方法添加异步注解@Async
路径:src/main/java/com/xxx/service/AsyncService.java
代码:
package com.xxx.service;

import org.springframework.scheduling.annotation.Async;
import org.springframework.stereotype.Service;

@Service
public class AsyncService {
    //CTRL+ALT+T
    //告诉Spring这是一个异步方法
    @Async
    public void hello() {
        try {
            Thread.sleep(3000);
        } catch (InterruptedException e) {
            e.printStackTrace();
        }
        System.out.println("数据正在处理。。。。。");
    }
}
2. 启动类添加注解@EnableAsync
路径:src/main/java/com/xxx/Springboot10TaskApplication.java
代码:
package com.xxx;

import org.springframework.boot.SpringApplication;
import org.springframework.boot.autoconfigure.SpringBootApplication;
import org.springframework.scheduling.annotation.EnableAsync;

@EnableAsync//开启异步注解功能
@SpringBootApplication
public class Springboot10TaskApplication {

    public static void main(String[] args) {
        SpringApplication.run(Springboot10TaskApplication.class, args);
    }

}
3. 测试
访问:http://localhost:8080/hello
瞬间出现ok

三秒后控制台打印出数据
2. 邮件任务
邮件发送,在我们的日常开发中,也非常的多,Springboot也帮我们做了支持
-
邮件发送需要引入spring-boot-start-mail
-
SpringBoot 自动配置MailSenderAutoConfiguration
-
定义MailProperties内容,配置在application.yml中
-
自动装配JavaMailSender
-
测试邮件发送
1. 引入依赖
<dependency>
   <groupId>org.springframework.boot</groupId>
   <artifactId>spring-boot-starter-mail</artifactId>
</dependency>
点击spring-boot-starter-mail 进去发现有三个依赖
路径:spring-boot-starter-mail-2.6.5.pom
代码:
<dependencies>
    <dependency>
      <groupId>org.springframework.boot</groupId>
      <artifactId>spring-boot-starter</artifactId>
      <version>2.6.5</version>
      <scope>compile</scope>
    </dependency>
    <dependency>
      <groupId>org.springframework</groupId>
      <artifactId>spring-context-support</artifactId>
      <version>5.3.17</version>
      <scope>compile</scope>
    </dependency>
    <dependency>
      <groupId>com.sun.mail</groupId>
      <artifactId>jakarta.mail</artifactId>
      <version>1.6.7</version>
      <scope>compile</scope>
    </dependency>
  </dependencies>
1. 查看自动配置类
路径:查看自动配置类:MailSenderAutoConfiguration
这个类中没有注册bean
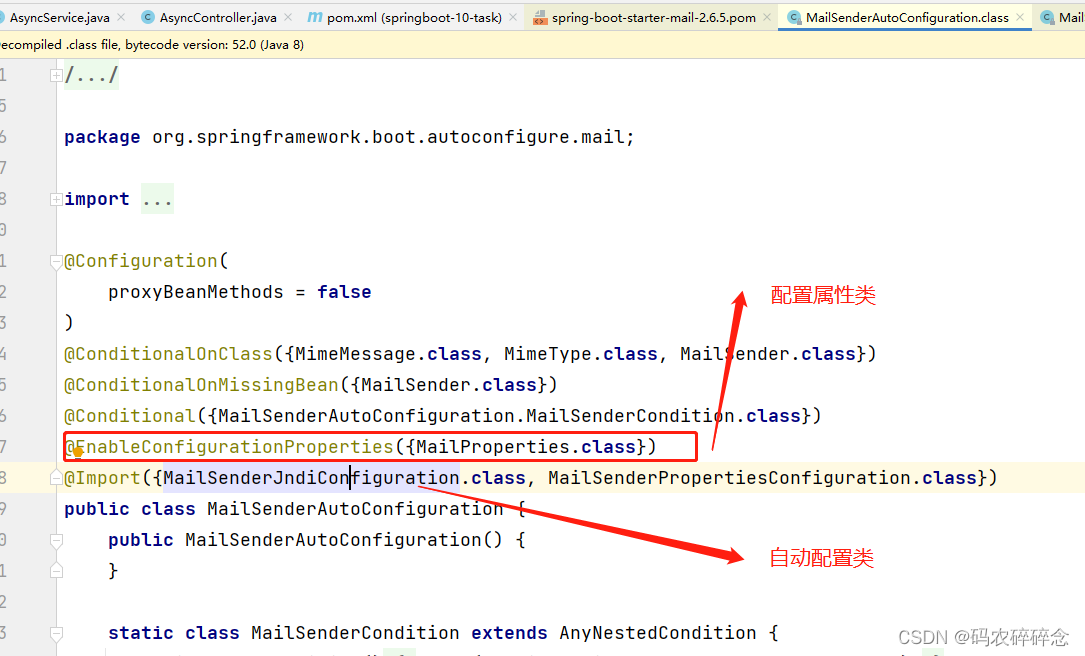
点开MailSenderJndiConfiguration.class这个类中存在bean,JavaMailSenderImpl
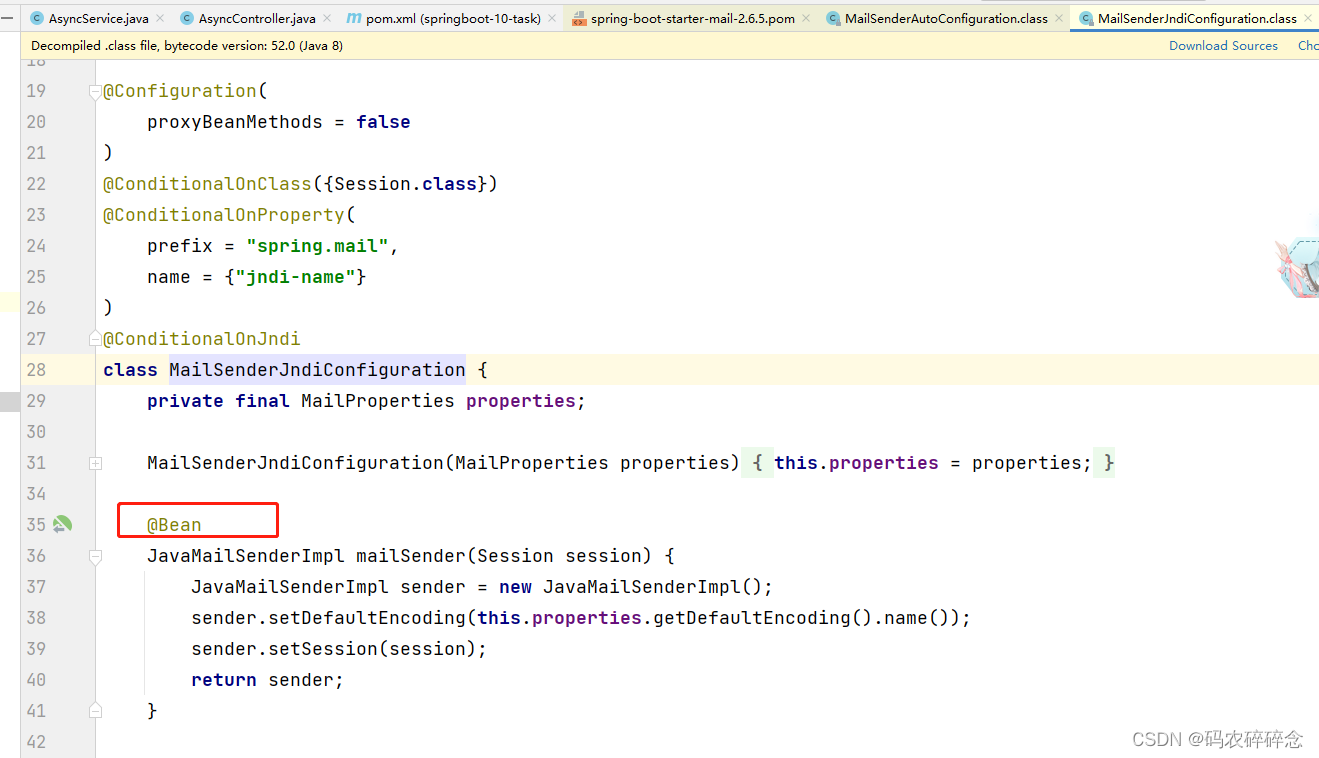
点击private final MailProperties properties;中的MailProperties然后我们去看下配置文件
package org.springframework.boot.autoconfigure.mail;

import java.nio.charset.Charset;
import java.nio.charset.StandardCharsets;
import java.util.HashMap;
import java.util.Map;
import org.springframework.boot.context.properties.ConfigurationProperties;

@ConfigurationProperties(
    prefix = "spring.mail"
)
public class MailProperties {
    private static final Charset DEFAULT_CHARSET;
    private String host;
    private Integer port;
    private String username;
    private String password;
    private String protocol = "smtp";
    private Charset defaultEncoding;
    private Map<String, String> properties;
    private String jndiName;
2. 获取邮箱授权码
在QQ邮箱中的设置->账户->开启pop3和smtp服务
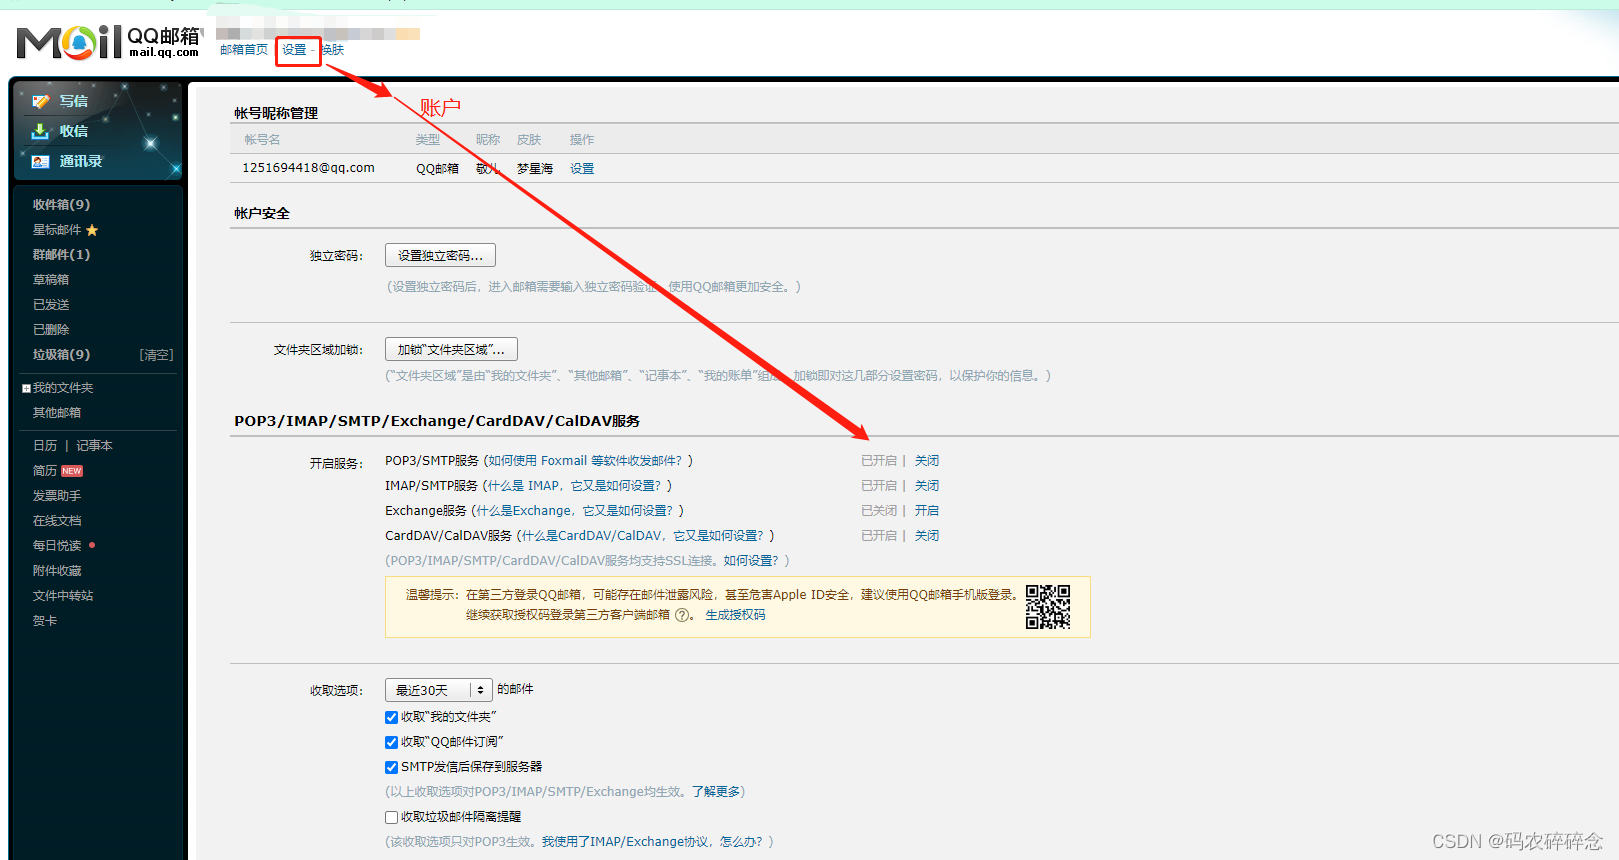
提示生成授权码,点击蓝色的生成授权码

弹窗需要发送短信
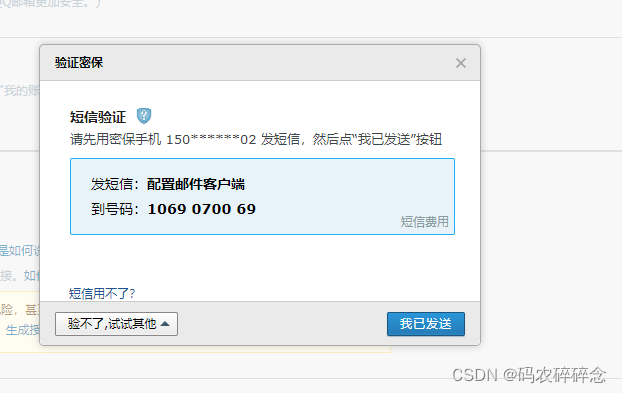
发送完成生成授权码
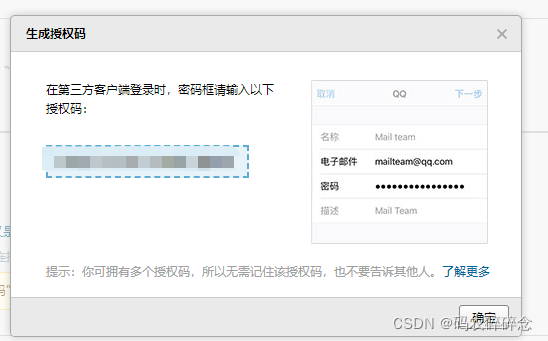
3. 配置文件
路径:src/main/resources/application.properties
代码:
# 你的qq用户名
spring.mail.username=1251695517@qq.com
# 你的qq授权码
spring.mail.password=htqcvvncsufngbih
spring.mail.host=smtp.qq.com
#开启加密
spring.mail.properties.mail.smtp.ssl.enable=true
4. 简单邮件发送
1. 编写代码
路径: com/xxx/Springboot10TaskApplicationTests.java
代码:
package com.xxx;
import org.junit.jupiter.api.Test;
import org.springframework.boot.test.context.SpringBootTest;
import org.springframework.mail.SimpleMailMessage;
import org.springframework.mail.javamail.JavaMailSenderImpl;
import javax.annotation.Resource;
@SpringBootTest
class Springboot10TaskApplicationTests {
@Resource
JavaMailSenderImpl mailSender;
//邮件设置1:一个简单的邮件
@Test
void contextLoads() {
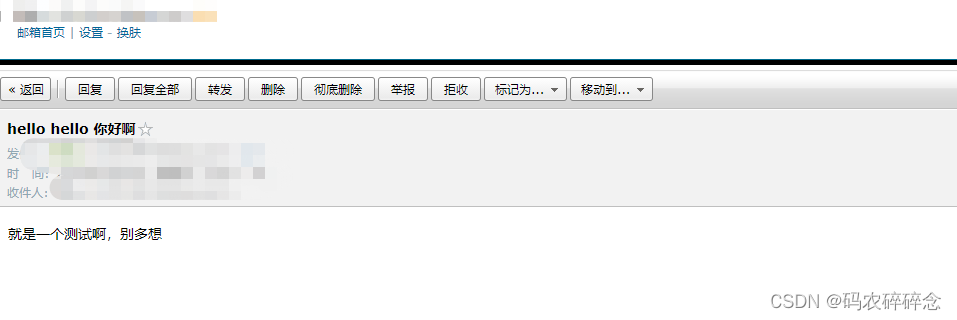
SimpleMailMessage mailMessage = new SimpleMailMessage();
mailMessage.setSubject("hello hello 你好啊");
mailMessage.setText("就是一个测试啊,别多想");
mailMessage.setTo("1251695517@qq.com");
mailMessage.setFrom("1251695517@qq.com");
mailSender.send(mailMessage);
}
}
2. 查看邮件
4. 复杂邮件发送
1. 编写代码
路径: com/xxx/Springboot10TaskApplicationTests.java
代码:
package com.xxx;

import org.junit.jupiter.api.Test;
import org.springframework.boot.test.context.SpringBootTest;
import org.springframework.mail.SimpleMailMessage;
import org.springframework.mail.javamail.JavaMailSenderImpl;
import org.springframework.mail.javamail.MimeMessageHelper;


import javax.annotation.Resource;
import javax.mail.MessagingException;
import javax.mail.internet.MimeMessage;
import java.io.File;

@SpringBootTest
class Springboot10TaskApplicationTests {
    @Resource
    JavaMailSenderImpl mailSender;

    //邮件设置1:一个简单的邮件
    @Test
    void contextLoads() {
        SimpleMailMessage mailMessage = new SimpleMailMessage();
        mailMessage.setSubject("hello hello 你好啊");
        mailMessage.setText("就是一个测试啊,别多想");
        mailMessage.setTo("1251695517@qq.com");
        mailMessage.setFrom("1251695517@qq.com");
        mailSender.send(mailMessage);

    }

    //邮件设置2:一个复杂的邮件
    @Test
    void contextLoads2() throws MessagingException {
        //邮件设置2:一个复杂的邮件
        MimeMessage mimeMessage = mailSender.createMimeMessage();
        MimeMessageHelper helper = new MimeMessageHelper(mimeMessage, true);
        //正文
        helper.setSubject("复杂邮件测试");
        helper.setText("<p style='color:red'>复杂邮件测试文本</p>",true);
        //附件
        helper.addAttachment("img.jpg",new File("C:\\Users\\f'j\\Pictures\\Saved Pictures\\gaitubao_sanmao_jpg.jpg"));
        helper.addAttachment("img2.jpg",new File("C:\\Users\\f'j\\Pictures\\Saved Pictures\\gaitubao_a_jpg.jpg"));
        //发送
        helper.setTo("1251695517@qq.com");
        helper.setFrom("1251695517@qq.com");
        mailSender.send(mimeMessage);
    }

}
2. 查看邮件
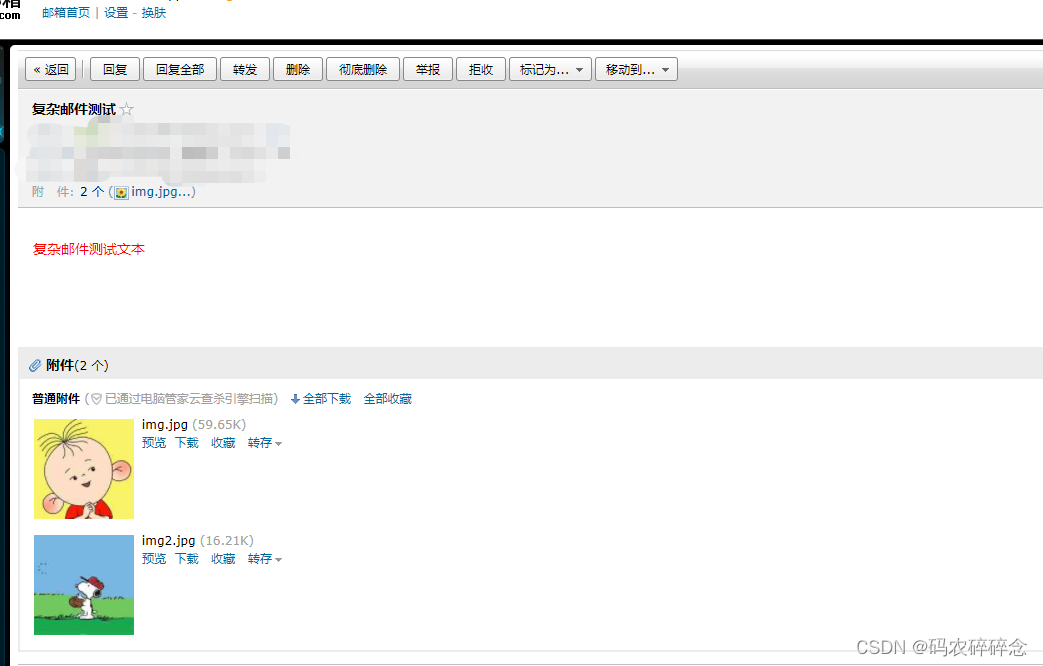
3. 定时任务
1. 定时任务讲解
项目开发中经常需要执行一些定时任务,比如需要在每天凌晨的时候,分析一次前一天的日志信息,Spring为我们提供了异步执行任务调度的方式,提供了两个接口。
-
TaskExecutor接口 ----> 任务执行者
-
TaskScheduler接口 ----> 任务调度者
两个注解:
-
@EnableScheduling —> 开启定时任务注解功能
-
@Scheduled —> 什么时候执行
2. cron表达式介绍
cron表达式格式:
-
{秒数} {分钟} {小时} {日期} {月份} {星期} {年份(可为空)}
cron表达式:
| 字段 | 允许值 | 允许的特殊字符 |
|---|---|---|
| 秒(Seconds) | 0~59的整数 | ,- * / 四个字符 |
| 分(Minutes) | 0~59的整数 | , - * / 四个字符 |
| 小时(Hours) | 0~23的整数 | ,- * / 四个字符 |
| 日期(DayofMonth) | 1~31的整数(但是你需要考虑你月的天数) | ,- * ? / L W C 八个字符 |
| 月份(Month) | 1~12的整数或者 JAN-DEC | ,- * / 四个字符 |
| 秒(Seconds) | 0~59的整数 | ,- * / 四个字符 |
| 星期(DayofWeek) | 1~7的整数或者 SUN-SAT (1=SUN) | , - * ? / L C # 八个字符 |
| 年(可选,留空)(Year) | 1970~2099 | , - * / 四个字符 |
cron表达式特殊字符说明:
| 特殊字符 | 说明 |
|---|---|
| * | 表示匹配该域的任意值。假如在Minutes域使用*, 即表示每分钟都会触发事件。 |
| ? | 只能用在DayofMonth和DayofWeek两个域。它也匹配域的任意值,但实际不会。因为DayofMonth和DayofWeek会相互影响。例如想在每月的20日触发调度,不管20日到底是星期几,则只能使用如下写法: 13 13 15 20 * ?, 其中最后一位只能用?,而不能使用*,如果使用*表示不管星期几都会触发,实际上并不是这样。 |
| - | 表示范围。例如在Minutes域使用5-20,表示从5分到20分钟每分钟触发一次 。 |
| / | 表示起始时间开始触发,然后每隔固定时间触发一次。例如在Minutes域使用5/20,则意味着5分钟触发一次,而25,45等分别触发一次。 |
| , | 表示列出枚举值。例如:在Minutes域使用5,20,则意味着在5和20分每分钟触发一次。 |
| L | 表示最后,只能出现在DayofWeek和DayofMonth域。如果在DayofWeek域使用5L,意味着在最后的一个星期四触发。 |
| W | 表示有效工作日(周一到周五),只能出现在DayofMonth域,系统将在离指定日期的最近的有效工作日触发事件。例如:在 DayofMonth使用5W,如果5日是星期六,则将在最近的工作日:星期五,即4日触发。如果5日是星期天,则在6日(周一)触发;如果5日在星期一到星期五中的一天,则就在5日触发。另外一点,W的最近寻找不会跨过月份 。 |
| LW | 这两个字符可以连用,表示在某个月最后一个工作日,即最后一个星期五。 |
| # | 用于确定每个月第几个星期几,只能出现在DayofMonth域。例如在4#2,表示某月的第二个星期三。 |
| C | 和calendar联系后计算过的值 |
cron表达式经典案例:
| 表达式 | 简介 |
|---|---|
| “30 * * * * ?” | 每半分钟触发任务 |
| “30 10 * * * ?” | 每小时的10分30秒触发任务 |
| “30 10 1 * * ?” | 每天1点10分30秒触发任务 |
| “30 10 1 20 * ?” | 每月20号1点10分30秒触发任务 |
| “30 10 1 20 10 ? *” | 每年10月20号1点10分30秒触发任务 |
| “30 10 1 20 10 ? 2011” | 2011年10月20号1点10分30秒触发任务 |
| “30 10 1 ? 10 * 2011” | 2011年10月每天1点10分30秒触发任务 |
| “30 10 1 ? 10 SUN 2011” | 2011年10月每周日1点10分30秒触发任务 |
| “15,30,45 * * * * ?” | 每15秒,30秒,45秒时触发任务 |
| “15-45 * * * * ?” | 15到45秒内,每秒都触发任务 |
| “15/5 * * * * ?” | 每分钟的每15秒开始触发,每隔5秒触发一次 |
| “15-30/5 * * * * ?” | 每分钟的15秒到30秒之间开始触发,每隔5秒触发一次 |
| “0 0/3 * * * ?” | 每小时的第0分0秒开始,每三分钟触发一次 |
| “0 15 10 ? * MON-FRI” | 星期一到星期五的10点15分0秒触发任务 |
| “0 15 10 L * ?” | 每个月最后一天的10点15分0秒触发任务 |
| “0 15 10 LW * ?” | 每个月最后一个工作日的10点15分0秒触发任务 |
| “0 15 10 ? * 5L” | 每个月最后一个星期四的10点15分0秒触发任务 |
| “0 15 10 ? * 5#3” | 每个月第三周的星期四的10点15分0秒触发任务 |
其他案例
(1)0/2 * * * * ?   表示每2秒 执行任务
(1)0 0/2 * * * ?   表示每2分钟 执行任务
(1)0 0 2 1 * ?   表示在每月的1日的凌晨2点调整任务
(2)0 15 10 ? * MON-FRI   表示周一到周五每天上午10:15执行作业
(3)0 15 10 ? 6L 2002-2006   表示2002-2006年的每个月的最后一个星期五上午10:15执行作
(4)0 0 10,14,16 * * ?   每天上午10点,下午2点,4点
(5)0 0/30 9-17 * * ?   朝九晚五工作时间内每半小时
(6)0 0 12 ? * WED   表示每个星期三中午12点
(7)0 0 12 * * ?   每天中午12点触发
(8)0 15 10 ? * *   每天上午10:15触发
(9)0 15 10 * * ?     每天上午10:15触发
(10)0 15 10 * * ?   每天上午10:15触发
(11)0 15 10 * * ? 2005   2005年的每天上午10:15触发
(12)0 * 14 * * ?     在每天下午2点到下午2:59期间的每1分钟触发
(13)0 0/5 14 * * ?   在每天下午2点到下午2:55期间的每5分钟触发
(14)0 0/5 14,18 * * ?     在每天下午2点到2:55期间和下午6点到6:55期间的每5分钟触发
(15)0 0-5 14 * * ?   在每天下午2点到下午2:05期间的每1分钟触发
(16)0 10,44 14 ? 3 WED   每年三月的星期三的下午2:10和2:44触发
(17)0 15 10 ? * MON-FRI   周一至周五的上午10:15触发
(18)0 15 10 15 * ?   每月15日上午10:15触发
(19)0 15 10 L * ?   每月最后一日的上午10:15触发
(20)0 15 10 ? * 6L   每月的最后一个星期五上午10:15触发
(21)0 15 10 ? * 6L 2002-2005   2002年至2005年的每月的最后一个星期五上午10:15触发
(22)0 15 10 ? * 6#3   每月的第三个星期五上午10:15触发
3. 实现定时任务
1. 编写服务类
路径:src/main/java/com/xxx/service/ScheduledService.java
代码:
package com.xxx.service;

import org.springframework.scheduling.annotation.Scheduled;
import org.springframework.stereotype.Service;

@Service
public class ScheduledService {
    //在一个特定的时间执行这行代码
    // 秒 分 时 日 月 周几
    // 周0到周7 每到0秒执行
    @Scheduled(cron = "0 * * * * 0-7")
    public void hello() {
        System.out.println("hello,你被执行了");
    }
}
2. 启动类添加定时任务注解
路径:src/main/java/com/xxx/Springboot10TaskApplication.java
代码:
package com.xxx;

import org.springframework.boot.SpringApplication;
import org.springframework.boot.autoconfigure.SpringBootApplication;
import org.springframework.scheduling.annotation.EnableAsync;
import org.springframework.scheduling.annotation.EnableScheduling;

@EnableAsync//开启异步注解功能
@EnableScheduling //开启定时注解功能
@SpringBootApplication
public class Springboot10TaskApplication {

    public static void main(String[] args) {
        SpringApplication.run(Springboot10TaskApplication.class, args);
    }

}
3. 执行测试
运行启动类,每过0秒控制台输入
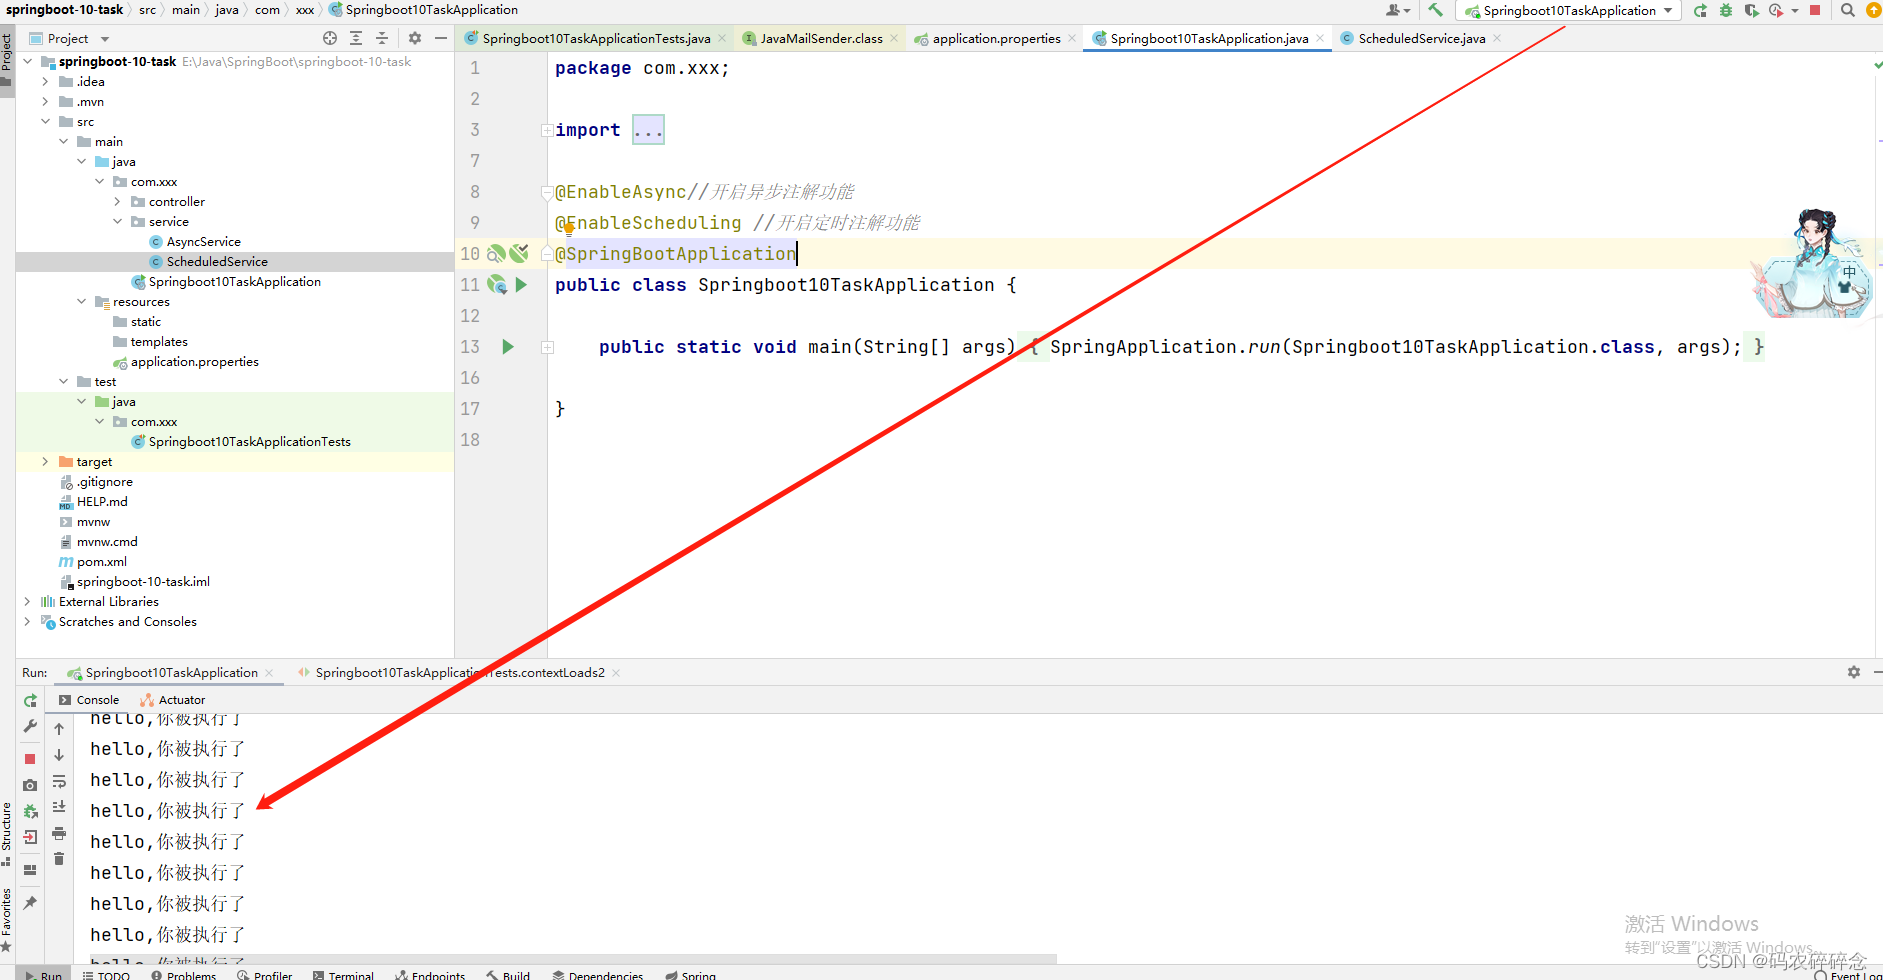
十七、Springboot整合Redis
SpringBoot 操作数据都是使用 ——SpringData
Spring官网:https://spring.io/
SpringBoot 操作数据:
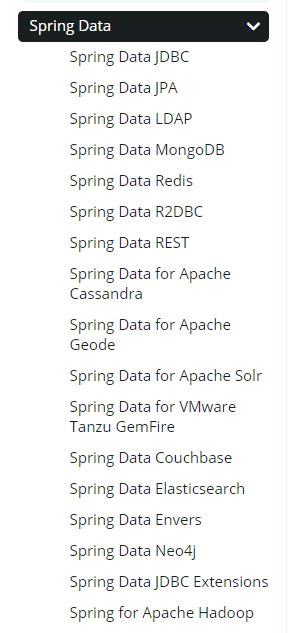
SpringData也是和SpringBoot 齐名的项目
说明:在Springboot2.x之后,原来使用的Jedis被替换为了Lettuce
- Jedis:采用的直连,多个线程操作,是不安全的,如果避免不安全使用Jedis Pool 连接池 !更像BIO模式
- Lettuce:采用netty,实例可以在多个线程中进行共享,不存在线程不安全的情况,可以减少线程数量!更像Nio模式
1. 创建项目
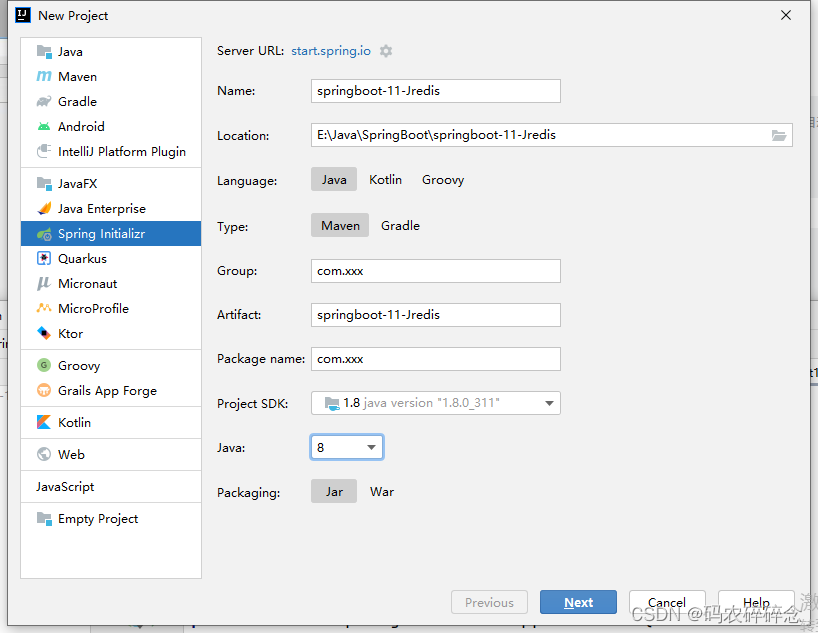
选择依赖
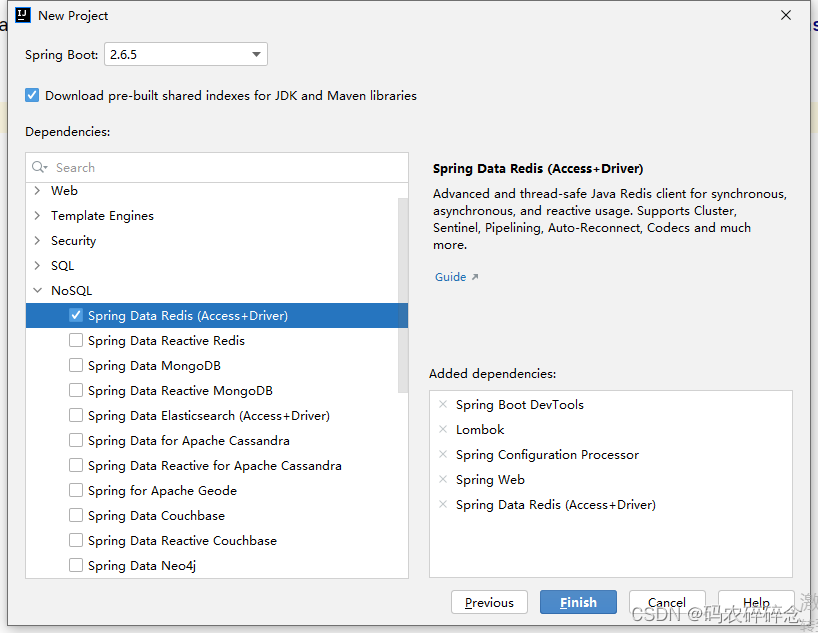
2. 配置
# SpringBoot 所有的配置类,都有一个自动配置类 RedisAutoConfiguration
# 自动配置类都会绑定一个properties文件 RedisProperties
1. 查看配置类
在项目目录 External Libraries 下面,查找SpringBoot自动配置,找到RedisAutoConfiguration
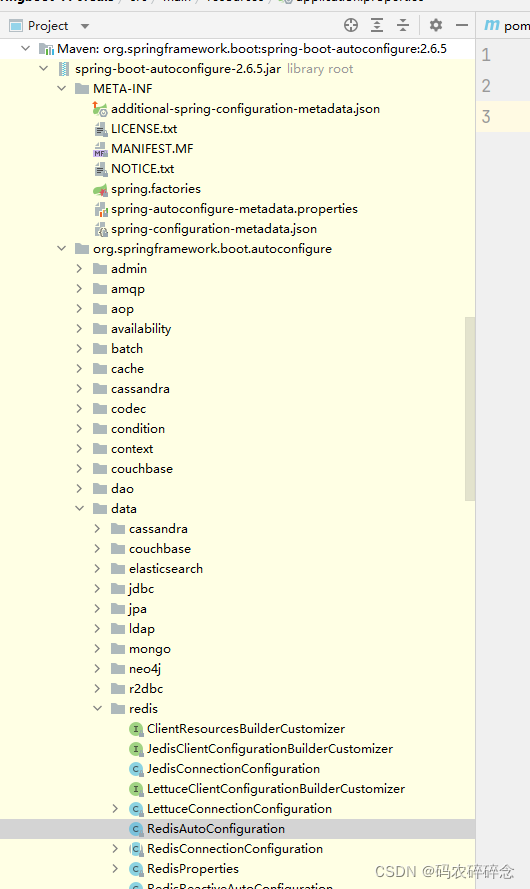
点击属性类

查看Redis配置属性
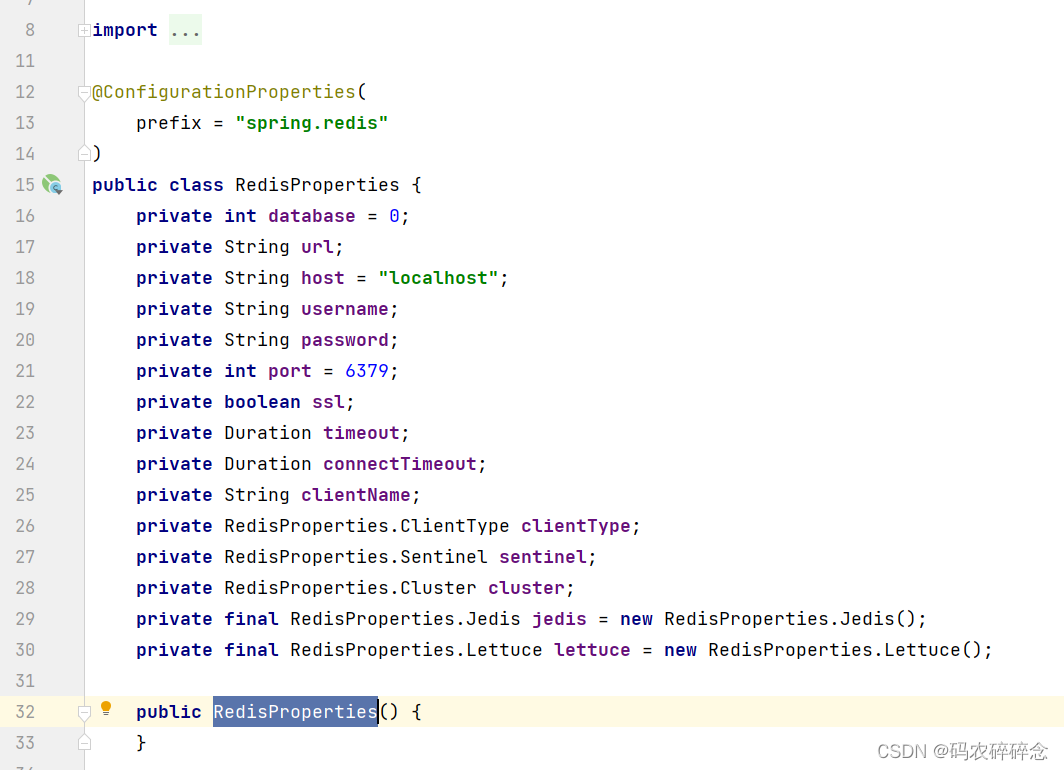
2. 配置文件配置
1. 开启本地redis
查看密码windows 系统redis密码在redis.windows.conf 文件下的requirepass root

登录redis
D:\WorkSoftware\Redis>redis-cli.exe -h 127.0.0.1 -p 6379
127.0.0.1:6379> set kk 123
(error) NOAUTH Authentication required.
127.0.0.1:6379> auth root
OK
127.0.0.1:6379> set kk 123
OK
127.0.0.1:6379> get kk
"123"
127.0.0.1:6379>
2. 配置SpringBoot 配置文件
路径:src/main/resources/application.properties
代码:
# SpringBoot 所有的配置类,都有一个自动配置类 RedisAutoConfiguration
# 自动配置类都会绑定一个properties文件 RedisProperties
#配置redis
spring.redis.host=127.0.0.1
spring.redis.port=6379
spring.redis.password=root
3. 链接测试
路径:com/xxx/Springboot11JredisApplicationTests.java
代码:
package com.xxx;

import org.junit.jupiter.api.Test;
import org.springframework.boot.test.context.SpringBootTest;
import org.springframework.data.redis.connection.RedisConnection;
import org.springframework.data.redis.core.RedisTemplate;

import javax.annotation.Resource;

@SpringBootTest
class Springboot11JredisApplicationTests {

    @Resource
   private RedisTemplate redisTemplate;

    @Test
    void contextLoads() {
        /** redisTemplate 操作不同的数据类型,API 和 Redis 中的是一样的
         * opsForValue 类似于 Redis 中的 String
         * opsForList 类似于 Redis 中的 List
         * opsForSet 类似于 Redis 中的 Set
         * opsForHash 类似于 Redis 中的 Hash
         * opsForZSet 类似于 Redis 中的 ZSet
         * opsForGeo 类似于 Redis 中的 Geospatial
         * opsForHyperLogLog 类似于 Redis 中的 HyperLogLog
         */

        // 除了基本的操作,常用的命令都可以直接通过redisTemplate操作,比如事务……

        // 和数据库相关的操作都需要通过连接操作
        //RedisConnection connection = redisTemplate.getConnectionFactory().getConnection();
        //connection.flushDb();

        redisTemplate.opsForValue().set("key", "呵呵");
        System.out.println(redisTemplate.opsForValue().get("key"));
    }

}
测试结果:
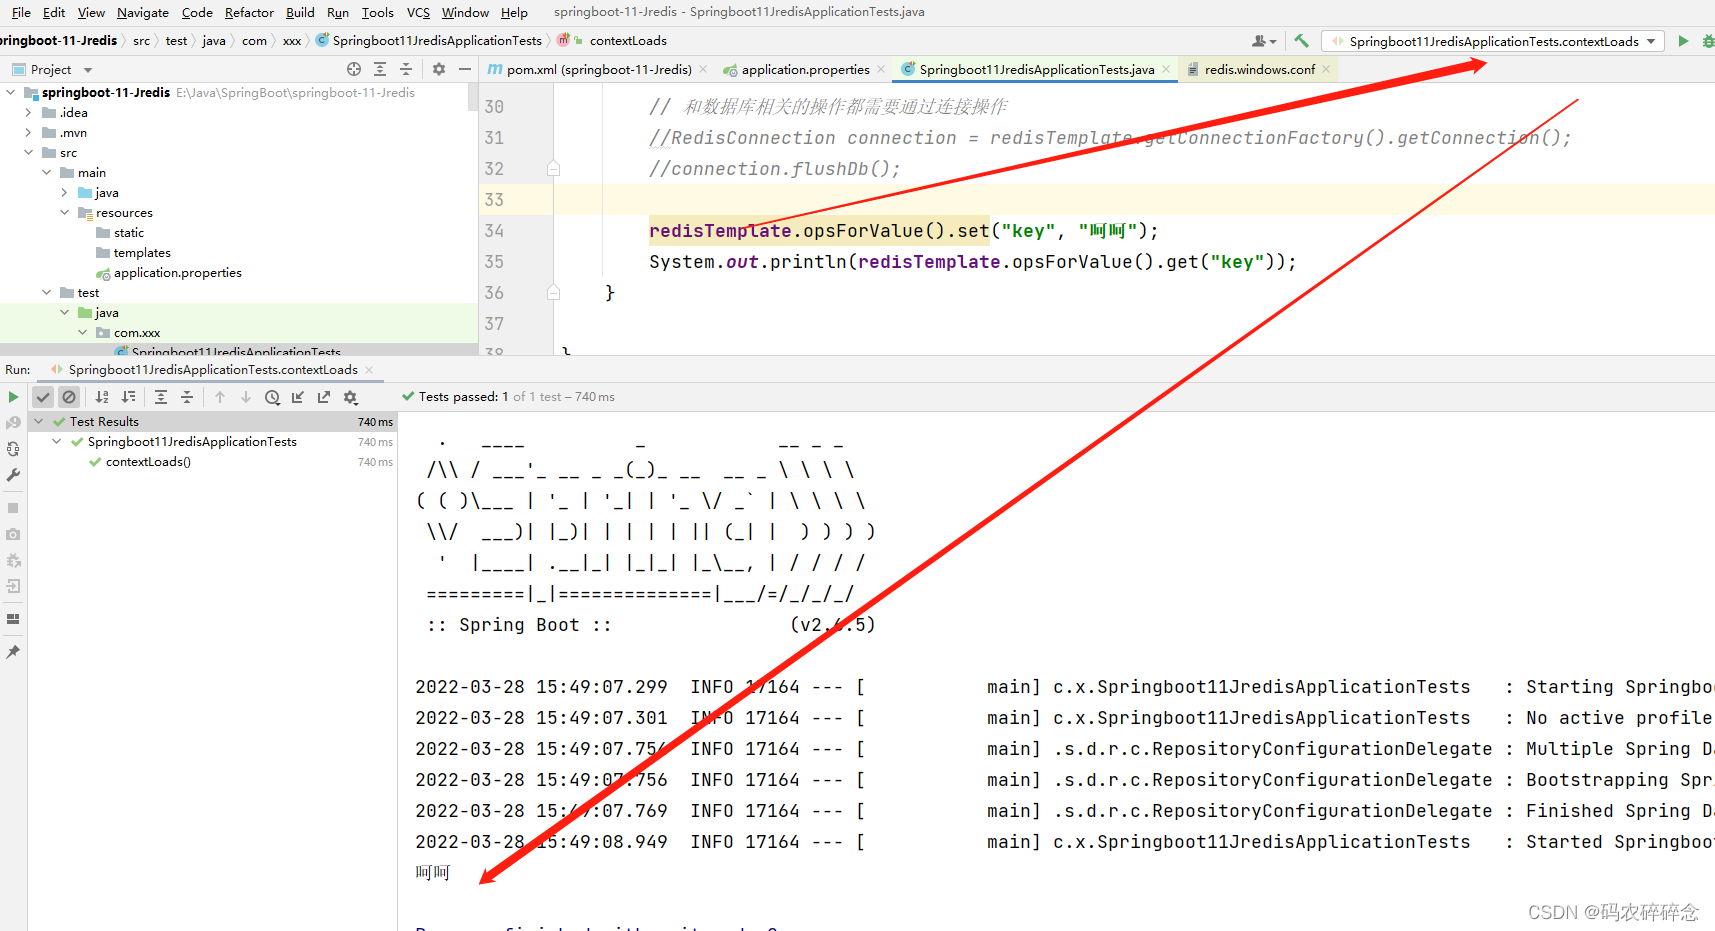


 被折叠的 条评论
为什么被折叠?
被折叠的 条评论
为什么被折叠?
 到【灌水乐园】发言


