


一:OAuth2认证
认证服务器生成token ,为客户端
资源服务器进行验证
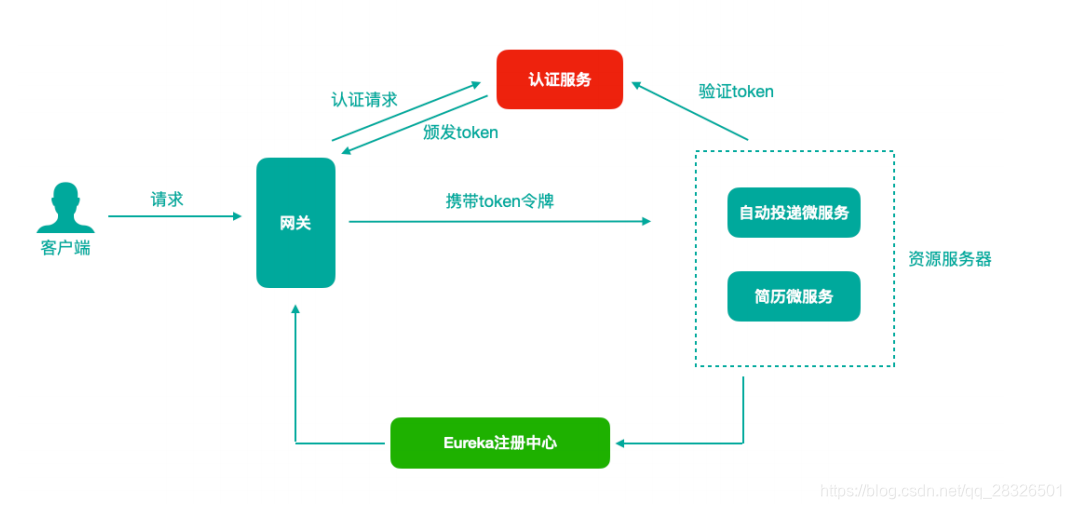
OAuth2的颁发Token授权⽅式
【1】授权码(authorization-code)
【2】密码式(password)提供⽤户名+密码换取token令牌
【3】隐藏式(implicit)
【4】客户端凭证(client credentials
1:认证服务器创建
【1】:服务创建及pom文件
<!--导⼊spring cloud oauth2依赖-->
        <dependency>
            <groupId>org.springframework.cloud</groupId>
            <artifactId>spring-cloud-starter-oauth2</artifactId>
            <exclusions>
                <exclusion>
                    <groupId>org.springframework.security.oauth.boot</groupId>
                    <artifactId>spring-security-oauth2-autoconfigure</artifactId>
                </exclusion>
            </exclusions>
        </dependency>
        <dependency>
            <groupId>org.springframework.security.oauth.boot</groupId>
            <artifactId>spring-security-oauth2-autoconfigure</artifactId>
            <version>2.1.11.RELEASE</version>
        </dependency>
        <dependency>
            <groupId>org.springframework.security.oauth</groupId>
            <artifactId>spring-security-oauth2</artifactId>
            <version>2.3.4.RELEASE</version>
        </dependency>
【2】:添加配置文件OauthServerConfiger及SecurityConfiger
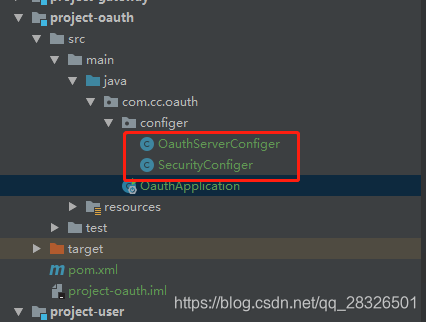
OauthServerConfiger:
package com.cc.oauth.configer;

import org.springframework.beans.factory.annotation.Autowired;
import org.springframework.context.annotation.Configuration;
import org.springframework.http.HttpMethod;
import org.springframework.security.authentication.AuthenticationManager;
import org.springframework.security.oauth2.config.annotation.configurers.ClientDetailsServiceConfigurer;
import org.springframework.security.oauth2.config.annotation.web.configuration.AuthorizationServerConfigurerAdapter;
import org.springframework.security.oauth2.config.annotation.web.configuration.EnableAuthorizationServer;
import org.springframework.security.oauth2.config.annotation.web.configurers.AuthorizationServerEndpointsConfigurer;
import org.springframework.security.oauth2.config.annotation.web.configurers.AuthorizationServerSecurityConfigurer;
import org.springframework.security.oauth2.provider.token.AuthorizationServerTokenServices;
import org.springframework.security.oauth2.provider.token.DefaultTokenServices;
import org.springframework.security.oauth2.provider.token.TokenStore;
import org.springframework.security.oauth2.provider.token.store.InMemoryTokenStore;

/**
 *  当前类未oauth2 server配置类。需要继承AuthorizationServerConfigurerAdapter
 * @author cc
 * @date 19:19
 * @return null
 */
@Configuration
@EnableAuthorizationServer//开启认证服务器功能
public class OauthServerConfiger extends AuthorizationServerConfigurerAdapter {

    @Autowired
    private AuthenticationManager authenticationManagerBean;

    /**
     * 认证服务最终以api接口的方式对外提供服务(校验合法性并生成令牌,校验令牌等)
     * 以api接口方式对外的话,就涉及到接口的访问权限,我们需要在这里进行必要的配置
     * @author cc
     * @date 2021/6/20 19:25
     * @param security
     */
    @Override
    public void configure(AuthorizationServerSecurityConfigurer security) throws Exception {
        super.configure(security);
        security
                //允许客户端表单认证
                .allowFormAuthenticationForClients()
                //开启端口/oauth/token_keyde 访问权限
                .tokenKeyAccess("permitAll()")
                //开启端口/oauth_token的访问权限
                .checkTokenAccess("permitAll()");
    }

    /**
     * 客户端详情配置 比如客户端id:client_id。客户端密码:secret
     * @author cc
     * @date 2021/6/20 19:22
     * @param clients
     */
    @Override
    public void configure(ClientDetailsServiceConfigurer clients) throws Exception {
        super.configure(clients);
        clients.inMemory()//客户端信息存储方式,此为内存可以存在数据库
                .withClient("cc123")//添加一个客户端,指定客户端id
                .secret("abc123")//客户端密码
                .resourceIds("userId")//指定客户端所能访问资源id清单资源服务器id
                .authorizedGrantTypes("password","refresh_token")//认证类型/令牌颁发模式,可以配置多,但不一定都用,具体那种颁发方式,客户端调用的时候传递参数指定
                .scopes("all");//客户端的权限范围
    }

    /**
     * 配置token令牌管理相关
     * @author cc
     * @date 2021/6/20 19:24
     * @param endpoints
     */
    @Override
    public void configure(AuthorizationServerEndpointsConfigurer endpoints) throws Exception {
        super.configure(endpoints);
        endpoints
                .tokenStore(tokenStore())//指定token的存储方式
                .tokenServices(authorizationServerTokenServices())//token服务的一个描述,可以认为是token生成细节的描述。比如有效时间多少等
                .authenticationManager(authenticationManagerBean)//指定认证管理器,随后注入一个到当前类使用即可
                .allowedTokenEndpointRequestMethods(HttpMethod.GET, HttpMethod.POST);
    }

    //该方法用于创建tokenStore对象(令牌存储对象).token以什么形式存储
    public TokenStore tokenStore(){
        return new InMemoryTokenStore();
    }

    //该方法用户获取一个token服务对象(该对象描述了token有效期等信息)
    public AuthorizationServerTokenServices authorizationServerTokenServices(){
        //使用默认实现
        DefaultTokenServices defaultTokenServices = new DefaultTokenServices();
        //是否开启令牌刷新
        defaultTokenServices.setSupportRefreshToken(true);
        //存储对象
        defaultTokenServices.setTokenStore(tokenStore());
        //设置令牌有效时间(一般设置为两个小时),access_token就是我们请求资源需携带的令牌
        defaultTokenServices.setAccessTokenValiditySeconds(200);
        //设置刷新令牌的有效时间
        defaultTokenServices.setRefreshTokenValiditySeconds(259200);//3天
        return defaultTokenServices;

    }
}
关于 TokenStore:
【1】InMemoryTokenStore 默认采⽤,它可以完美的⼯作在单服务器上(即访问并发量 压⼒不⼤ 的情况下,并且它在失败的时候不会进⾏备份),⼤多数的项⽬都可以 使⽤这个版本的实现来进⾏ 尝试,你可以在开发的时候使⽤它来进⾏ 管理,因为不会被保存到磁盘中,所以更易于调试。
【2】JdbcTokenStore 这是⼀个基于JDBC的实现版本,令牌会被保存进关系型数据库。使⽤ 这个版本的实现时, 你可以在不同的服务器之间共享令牌信息,使⽤ 这个版本的时候请注意把"spring-jdbc"这个依赖加⼊到你的 classpath 当中。
【3】JwtTokenStore 这个版本的全称是 JSON Web Token(JWT),它可以 把令牌相关的数据进⾏编码(因此对于后端服务来说,它不需要进⾏存 储,这将是⼀个重⼤优势),缺点就是这个令牌占⽤的空间会⽐较⼤, 如果你加⼊了⽐较多⽤户凭证信息,JwtTokenStore 不会保存任何数 据。
SecurityConfiger
package com.cc.oauth.configer;

import org.springframework.beans.factory.annotation.Autowired;
import org.springframework.context.annotation.Bean;
import org.springframework.context.annotation.Configuration;
import org.springframework.security.authentication.AuthenticationManager;
import org.springframework.security.config.annotation.authentication.builders.AuthenticationManagerBuilder;
import org.springframework.security.config.annotation.web.configuration.WebSecurityConfigurerAdapter;
import org.springframework.security.core.userdetails.User;
import org.springframework.security.core.userdetails.UserDetails;
import org.springframework.security.crypto.password.NoOpPasswordEncoder;
import org.springframework.security.crypto.password.PasswordEncoder;

import java.util.ArrayList;

/**
 * 该配置类,主要处理用户名和密码的校验等事宜
 * @author cc
 * @data 2021年06月20日 20:25
 */
@Configuration
public class SecurityConfiger extends WebSecurityConfigurerAdapter {

    /**
     * 注册一个认证管理对象到容器
     */
    @Bean
    @Override
    public AuthenticationManager authenticationManagerBean() throws Exception {
        return super.authenticationManagerBean();
    }
    /**
     * 密码编码对象(密码不进行加密处理)
     * @author cc
     * @date 2021/6/20 20:40
     * @return org.springframework.security.crypto.password.PasswordEncoder
     */
    @Bean
    public PasswordEncoder passwordEncoder(){
        return NoOpPasswordEncoder.getInstance();
    }

    @Autowired
    private PasswordEncoder passwordEncoder;

    /**
     *  处理用户名和密码验证事宜
     *  1)客户端传递username和password参数到认证服务器
     *  2)⼀般来说,username和password会存储在数据库中的⽤户表中
     *  3)根据⽤户表中数据,验证当前传递过来的⽤户信息的合法性
     */
    @Override
    protected void configure(AuthenticationManagerBuilder auth) throws Exception {
        //在这个方法中就可以去关联数据库了,当前我们先把用户信息配置在内存中
        //实例化一个用户对象(相当于数据库表中的一条用户记录)
        UserDetails user = new User("cc","123456", new ArrayList<>());
        auth.inMemoryAuthentication()
                .withUser(user).passwordEncoder(passwordEncoder);
    }


}
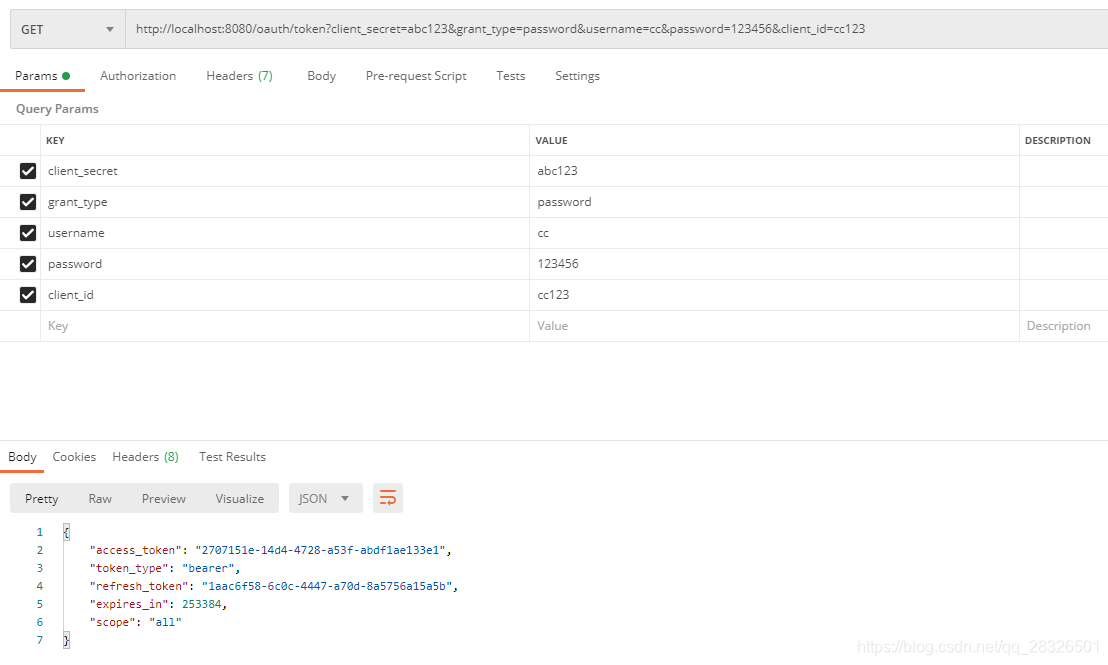
【3】:postman进行调用验证
endpoint:/oauth/token
生成token携带的参数
client_id:客户端id
client_secret:客户单密码
grant_type:指定使⽤哪种颁发类型,password
username:⽤户名
password:密码
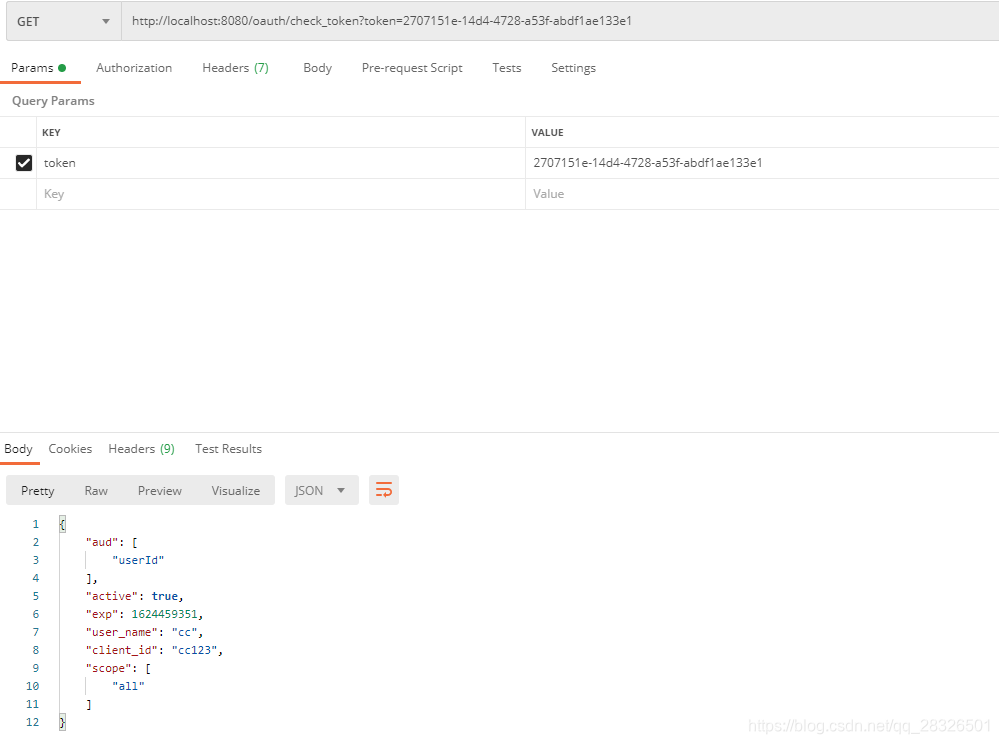
验证token:http://localhost:8080/oauth/check_token?token=2707151e-14d4-4728-a53f-abdf1ae133e1

2:资源服务器
【1】:pom文件同认证服务器
【2】:创建配置文件ResourceServerConfiger
package com.cc.user.configer;

import org.springframework.context.annotation.Configuration;
import org.springframework.security.config.annotation.web.builders.HttpSecurity;
import org.springframework.security.config.annotation.web.configuration.EnableWebSecurity;
import org.springframework.security.config.http.SessionCreationPolicy;
import org.springframework.security.oauth2.config.annotation.web.configuration.EnableResourceServer;
import org.springframework.security.oauth2.config.annotation.web.configuration.ResourceServerConfigurerAdapter;
import org.springframework.security.oauth2.config.annotation.web.configurers.ResourceServerSecurityConfigurer;
import org.springframework.security.oauth2.provider.token.RemoteTokenServices;

/**
 * @author cc
 * @data 2021年06月20日 21:56
 */
@Configuration
@EnableResourceServer //开启资源服务器功能
@EnableWebSecurity //开启web访问安全
public class ResourceServerConfiger extends ResourceServerConfigurerAdapter {

    /**
     *  该方法用于定义资源服务器向远程认证服务器发起请求,进行token校验等事宜
     * @author cc
     * @date 2021/6/20 21:59
     * @param resources
     */
    @Override
    public void configure(ResourceServerSecurityConfigurer resources) throws Exception {
        //设置当前资源器服务id
        resources.resourceId("userId");
        //定义token服务对象
        RemoteTokenServices remoteTokenServices = new RemoteTokenServices();
        //校验端点/接口设置
        remoteTokenServices.setCheckTokenEndpointUrl("http://localhost:8080/oauth/check_token");
        //携带客户端id和客户端验证码
        remoteTokenServices.setClientId("cc123");
        remoteTokenServices.setClientSecret("abc123");
        resources.tokenServices(remoteTokenServices);
    }

    /**
     *  设置不需token验证的API接口
     * @author cc
     * @date 2021/6/20 22:02
     * @param http
     */
    @Override
    public void configure(HttpSecurity http) throws Exception {
        http    //设置session的创建策略(根据需要创建即可)
                .sessionManagement().sessionCreationPolicy(SessionCreationPolicy.IF_REQUIRED)
                .and()
                .authorizeRequests()
                .antMatchers("/user/**").authenticated()//user前缀验证
                .antMatchers("/demo/**").authenticated()//demo前缀验证
                .anyRequest().permitAll();//其余请求不认证

    }
}
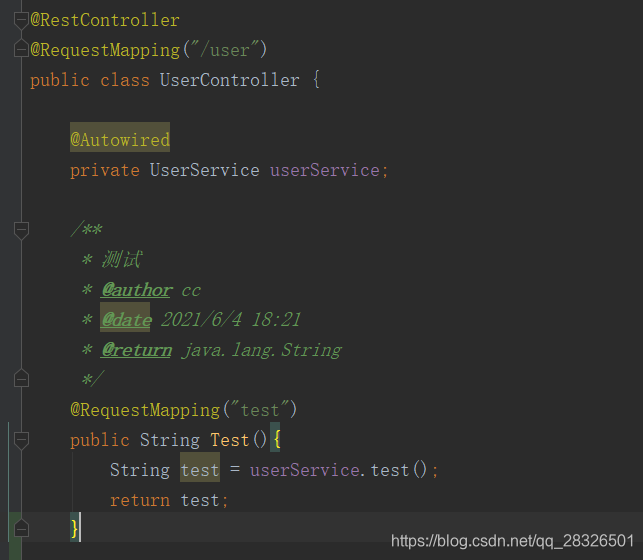
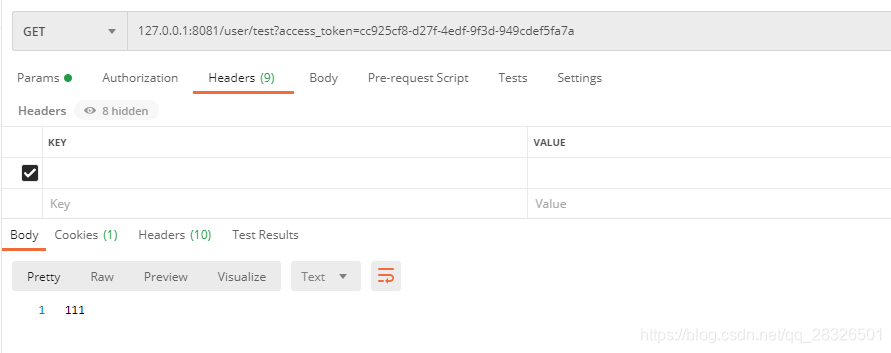
【4】测试:
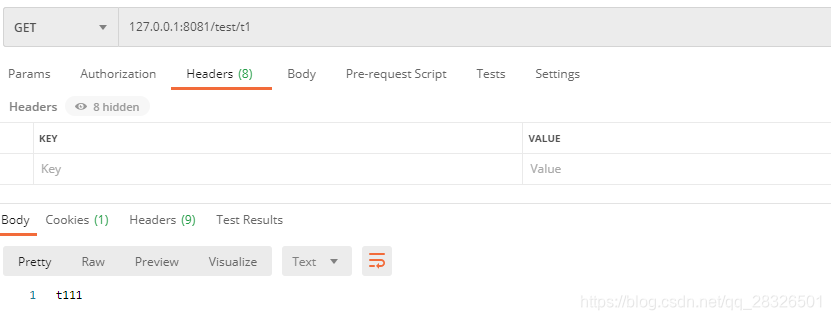
二:JWT改造
问题:认证服务器颁发token且存储在认证服务器,后期我们访问资源服务器时携带token,资源服务器再访问认证服务器进行验证。资源服务器多时会给认证服务器造成访问压力。另外,资源服务器向认证服务器check_token,获取的也是⽤户信息 UserInfo,能否把⽤户信息存储到令牌中,让客户端⼀直持有这个令牌,令 牌的验证也在资源服务器进⾏,这样避免和认证服务器频繁的交互......
1、认证服务器改造
修改OauthServerConfiger配置类
使用jwt令牌
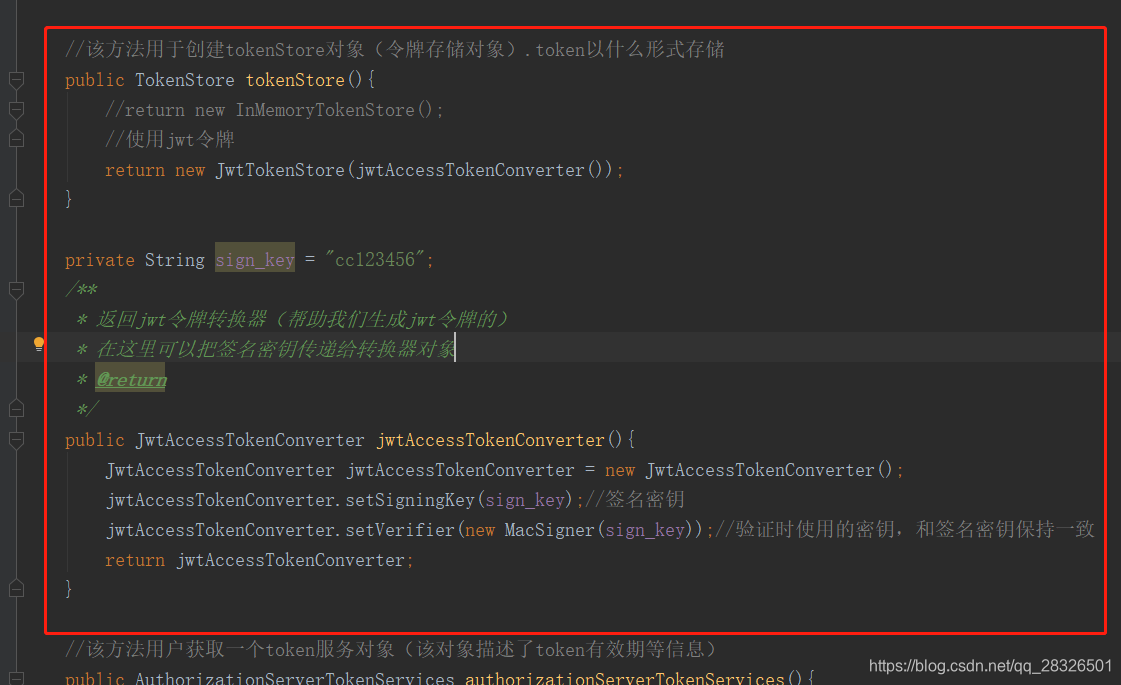
//该方法用于创建tokenStore对象(令牌存储对象).token以什么形式存储
public TokenStore tokenStore(){
//return new InMemoryTokenStore();
//使用jwt令牌
return new JwtTokenStore(jwtAccessTokenConverter());
}
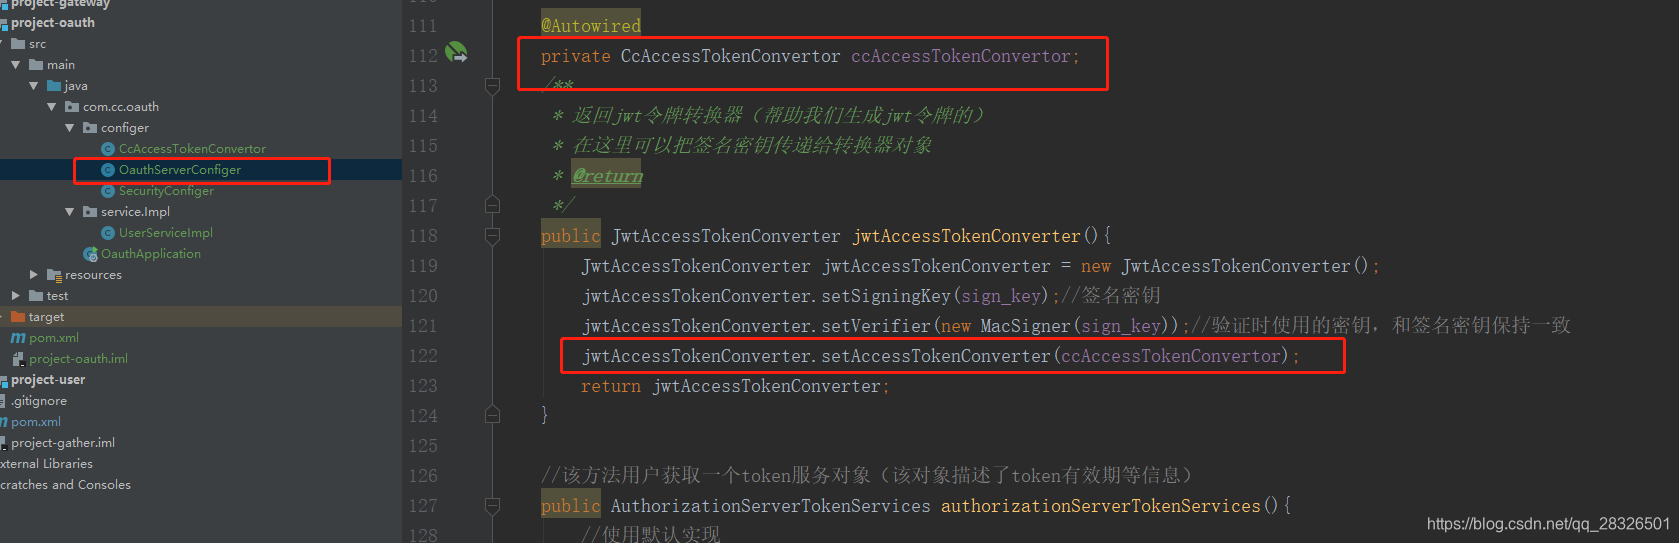
private String sign_key = "cc123456";
/**
* 返回jwt令牌转换器(帮助我们生成jwt令牌的)
* 在这里可以把签名密钥传递给转换器对象
* @return
*/
public JwtAccessTokenConverter jwtAccessTokenConverter(){
JwtAccessTokenConverter jwtAccessTokenConverter = new JwtAccessTokenConverter();
jwtAccessTokenConverter.setSigningKey(sign_key);//签名密钥
jwtAccessTokenConverter.setVerifier(new MacSigner(sign_key));//验证时使用的密钥,和签名密钥保持一致
return jwtAccessTokenConverter;
}2、改造资源服务器校验jwt令牌
不需要和远程认证服务器交互,添加本地tokenStore
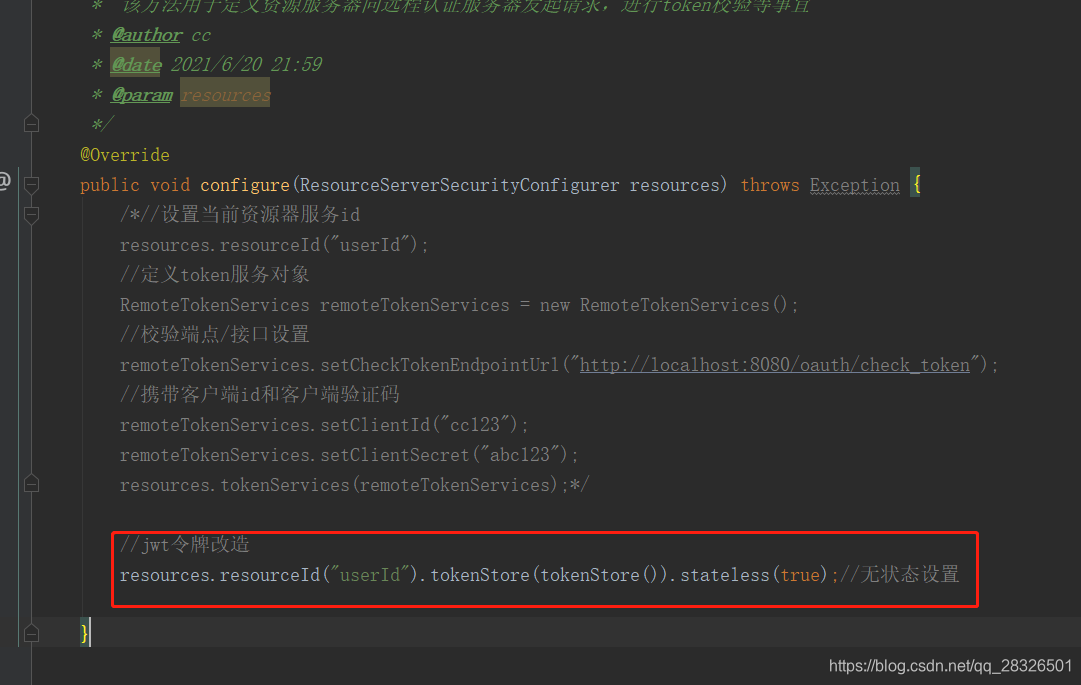
本地tokenStore方法与认证服务一致,直接拷贝过来即可

package com.cc.user.configer;
import org.springframework.context.annotation.Configuration;
import org.springframework.security.config.annotation.web.builders.HttpSecurity;
import org.springframework.security.config.annotation.web.configuration.EnableWebSecurity;
import org.springframework.security.config.http.SessionCreationPolicy;
import org.springframework.security.jwt.crypto.sign.MacSigner;
import org.springframework.security.oauth2.config.annotation.web.configuration.EnableResourceServer;
import org.springframework.security.oauth2.config.annotation.web.configuration.ResourceServerConfigurerAdapter;
import org.springframework.security.oauth2.config.annotation.web.configurers.ResourceServerSecurityConfigurer;
import org.springframework.security.oauth2.provider.token.RemoteTokenServices;
import org.springframework.security.oauth2.provider.token.TokenStore;
import org.springframework.security.oauth2.provider.token.store.JwtAccessTokenConverter;
import org.springframework.security.oauth2.provider.token.store.JwtTokenStore;
/**
* @author cc
* @data 2021年06月20日 21:56
*/
@Configuration
@EnableResourceServer //开启资源服务器功能
@EnableWebSecurity //开启web访问安全
public class ResourceServerConfiger extends ResourceServerConfigurerAdapter {
/**
* 该方法用于定义资源服务器向远程认证服务器发起请求,进行token校验等事宜
* @author cc
* @date 2021/6/20 21:59
* @param resources
*/
@Override
public void configure(ResourceServerSecurityConfigurer resources) throws Exception {
/*//设置当前资源器服务id
resources.resourceId("userId");
//定义token服务对象
RemoteTokenServices remoteTokenServices = new RemoteTokenServices();
//校验端点/接口设置
remoteTokenServices.setCheckTokenEndpointUrl("http://localhost:8080/oauth/check_token");
//携带客户端id和客户端验证码
remoteTokenServices.setClientId("cc123");
remoteTokenServices.setClientSecret("abc123");
resources.tokenServices(remoteTokenServices);*/
//jwt令牌改造
resources.resourceId("userId").tokenStore(tokenStore()).stateless(true);//无状态设置
}
/**
* 设置不需token验证的API接口
* @author cc
* @date 2021/6/20 22:02
* @param http
*/
@Override
public void configure(HttpSecurity http) throws Exception {
http //设置session的创建策略(根据需要创建即可)
.sessionManagement().sessionCreationPolicy(SessionCreationPolicy.IF_REQUIRED)
.and()
.authorizeRequests()
.antMatchers("/user/**").authenticated()//user前缀验证
.antMatchers("/demo/**").authenticated()//demo前缀验证
.anyRequest().permitAll();//其余请求不认证
}
//该方法用于创建tokenStore对象(令牌存储对象).token以什么形式存储
public TokenStore tokenStore(){
//return new InMemoryTokenStore();
//使用jwt令牌
return new JwtTokenStore(jwtAccessTokenConverter());
}
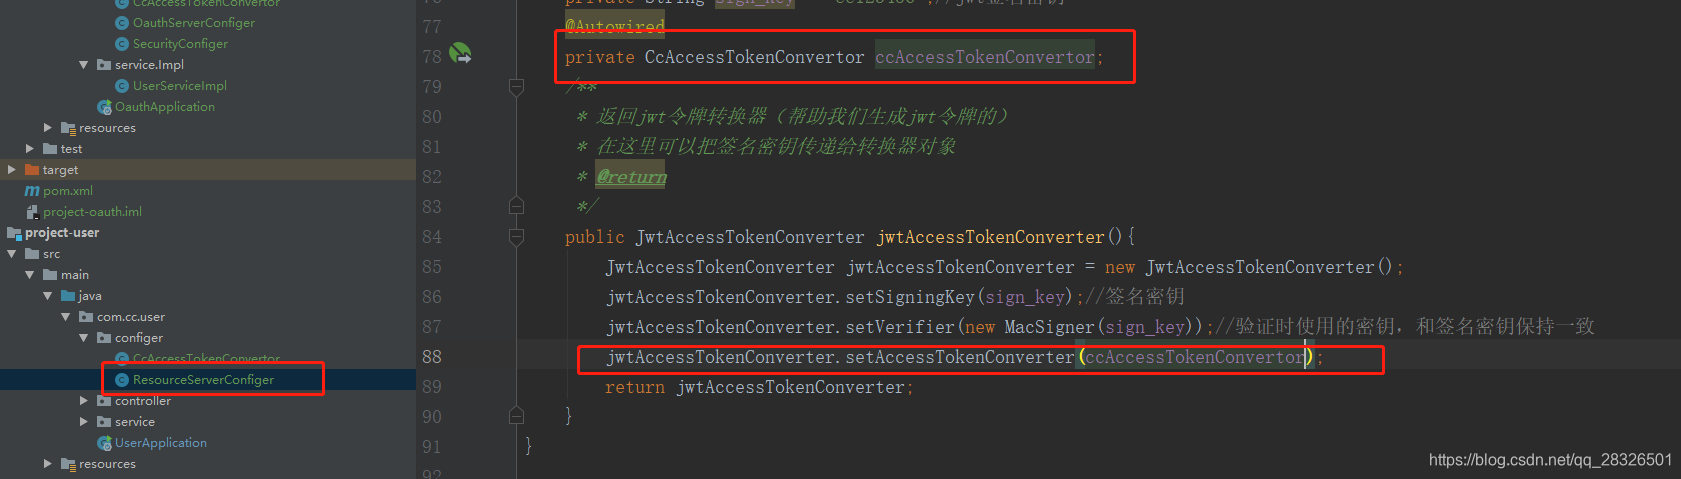
private String sign_key = "cc123456";//jwt签名密钥
/**
* 返回jwt令牌转换器(帮助我们生成jwt令牌的)
* 在这里可以把签名密钥传递给转换器对象
* @return
*/
public JwtAccessTokenConverter jwtAccessTokenConverter(){
JwtAccessTokenConverter jwtAccessTokenConverter = new JwtAccessTokenConverter();
jwtAccessTokenConverter.setSigningKey(sign_key);//签名密钥
jwtAccessTokenConverter.setVerifier(new MacSigner(sign_key));//验证时使用的密钥,和签名密钥保持一致
return jwtAccessTokenConverter;
}
}
三:其余改造
1、从数据库加载Oauth2客户端
【1】:创建表名和数据。(表名及字段固定)
CREATE TABLE `oauth_client_details` (
 `client_id` varchar(48) NOT NULL,
 `resource_ids` varchar(256) DEFAULT NULL,
 `client_secret` varchar(256) DEFAULT NULL,
 `scope` varchar(256) DEFAULT NULL,
 `authorized_grant_types` varchar(256) DEFAULT NULL,
 `web_server_redirect_uri` varchar(256) DEFAULT NULL,
 `authorities` varchar(256) DEFAULT NULL,
 `access_token_validity` int(11) DEFAULT NULL,
 `refresh_token_validity` int(11) DEFAULT NULL,
 `additional_information` varchar(4096) DEFAULT NULL,
 `autoapprove` varchar(256) DEFAULT NULL,
 PRIMARY KEY (`client_id`)
) ENGINE=InnoDB DEFAULT CHARSET=utf8;
【2】:配置客户端主配置:OauthServerConfiger
 /**
     * 客户端详情配置 比如客户端id:client_id。客户端密码:secret
     * @author cc
     * @date 2021/6/20 19:22
     * @param clients
     */
    @Override
    public void configure(ClientDetailsServiceConfigurer clients) throws Exception {
        super.configure(clients);
        //从内存中加载客户端详情
        /*clients.inMemory()//客户端信息存储方式,此为内存可以存在数据库
                .withClient("cc123")//添加一个客户端,指定客户端id
                .secret("abc123")//客户端密码
                .resourceIds("userId")//指定客户端所能访问资源id清单资源服务器id
                .authorizedGrantTypes("password","refresh_token")//认证类型/令牌颁发模式,可以配置多,但不一定都用,具体那种颁发方式,客户端调用的时候传递参数指定
                .scopes("all");//客户端的权限范围*/
        //从数据库中加载客户端详情
        clients.withClientDetails(createJdbcClientDetailsService());
    }
    @Autowired
    private DataSource dataSource;

    @Bean
    public JdbcClientDetailsService createJdbcClientDetailsService(){
        JdbcClientDetailsService jdbcClientDetailsService = new JdbcClientDetailsService(dataSource);
        return jdbcClientDetailsService;
    }
2、认证服务从数据库进行用户验证
【1】:创建用户表(表名字段不需要固定)
【2】:开发UserDetailsService接⼝的实现类,根据⽤户名从数据库加载⽤户信息
package com.cc.oauth.service.Impl;

import com.cc.common.entity.CcUser;
import com.cc.common.mapper.CcUserMapper;
import org.springframework.beans.factory.annotation.Autowired;
import org.springframework.security.core.userdetails.User;
import org.springframework.security.core.userdetails.UserDetails;
import org.springframework.security.core.userdetails.UserDetailsService;
import org.springframework.security.core.userdetails.UsernameNotFoundException;
import org.springframework.stereotype.Service;
import java.util.ArrayList;

/**
 * @author cc
 * @data 2021年06月22日 22:20
 */
@Service
public class UserServiceImpl implements UserDetailsService {

    @Autowired
    private CcUserMapper ccUserMapper;

    @Override
    public UserDetails loadUserByUsername(String username) throws UsernameNotFoundException {
        CcUser ccUser = new CcUser();
        ccUser.setName(username);
        ccUser =ccUserMapper.selectOne(ccUser);
        return new User(ccUser.getName(), ccUser.getPassWord(), new ArrayList<>());
    }
}
【3】:修改配置类SecurityConfiger
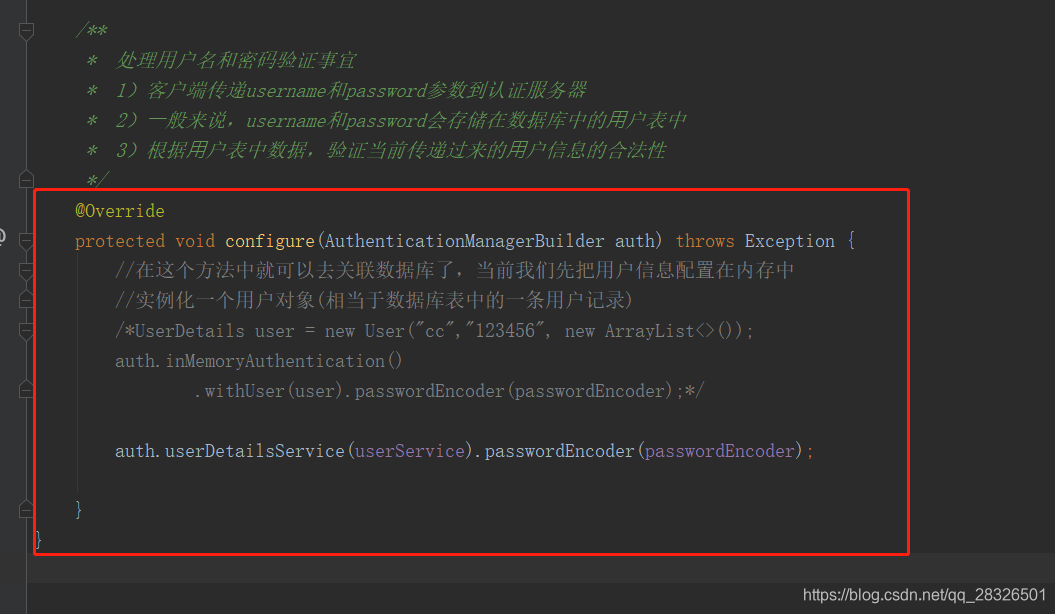
@Override
    protected void configure(AuthenticationManagerBuilder auth) throws Exception {
        //在这个方法中就可以去关联数据库了,当前我们先把用户信息配置在内存中
        //实例化一个用户对象(相当于数据库表中的一条用户记录)
        /*UserDetails user = new User("cc","123456", new ArrayList<>());
        auth.inMemoryAuthentication()
                .withUser(user).passwordEncoder(passwordEncoder);*/

        auth.userDetailsService(userService).passwordEncoder(passwordEncoder);

    }
3、OAuth2的JWT信息扩展
【1】:认证服务器生成jwt令牌时存入扩展信息
继承DefaultAccessTokenConverter类,重写convertAccessToken⽅法存⼊扩 展信息
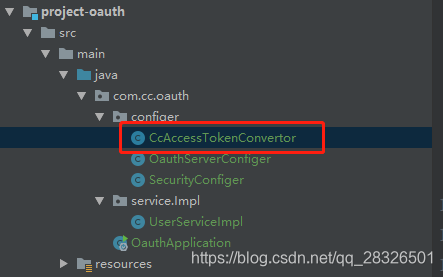
package com.cc.oauth.configer;

import org.springframework.security.oauth2.common.OAuth2AccessToken;
import org.springframework.security.oauth2.provider.OAuth2Authentication;
import org.springframework.security.oauth2.provider.token.DefaultAccessTokenConverter;
import org.springframework.stereotype.Component;
import java.util.Map;

/**
 * @author cc
 * @data 2021年06月22日 23:57
 */
@Component
public class CcAccessTokenConvertor extends DefaultAccessTokenConverter {

    @Override
    public Map<String, ?> convertAccessToken(OAuth2AccessToken token, OAuth2Authentication authentication) {
        Map<String, String > stringMap = (Map<String, String>) super.convertAccessToken(token, authentication);
        stringMap.put("cc", "111");
        return stringMap;
    }
}
【2】:将自定义的转换器对象注入
4、资源服务获得JWT令牌扩展信息
【1】继承DefaultAccessTokenConverter,重 写extractAuthentication提取⽅法,把载荷信息设置到认证对象的details属性中
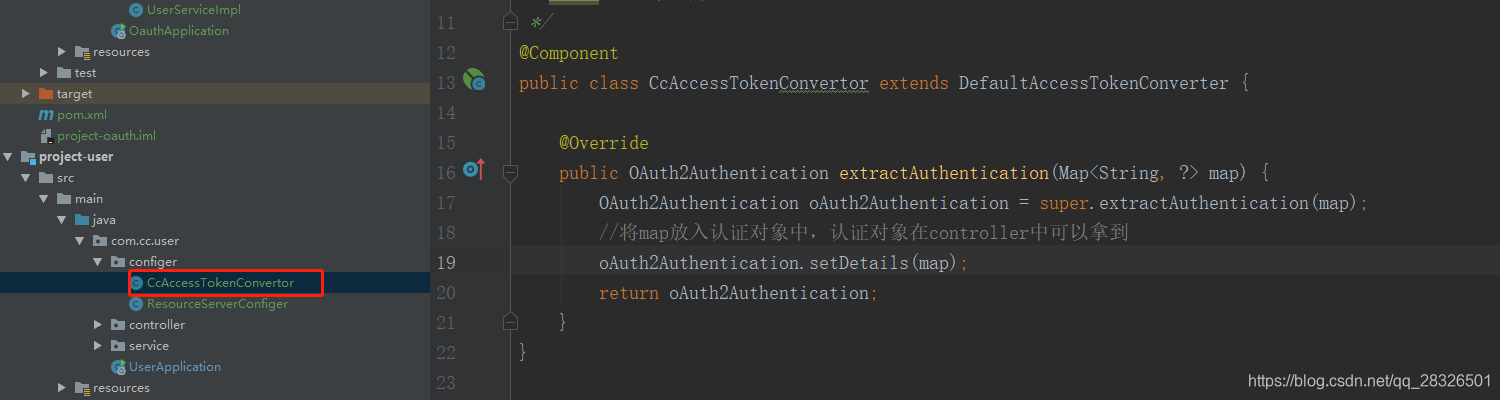
package com.cc.user.configer;

import org.springframework.security.oauth2.provider.OAuth2Authentication;
import org.springframework.security.oauth2.provider.token.DefaultAccessTokenConverter;
import org.springframework.stereotype.Component;
import java.util.Map;

/**
 * @author cc
 * @data 2021年06月22日 23:57
 */
@Component
public class CcAccessTokenConvertor extends DefaultAccessTokenConverter {

    @Override
    public OAuth2Authentication extractAuthentication(Map<String, ?> map) {
        OAuth2Authentication oAuth2Authentication = super.extractAuthentication(map);
        //将map放入认证对象中,认证对象在controller中可以拿到
        oAuth2Authentication.setDetails(map);
        return oAuth2Authentication;
    }
}
【2】:将自定义的转换器对象注入
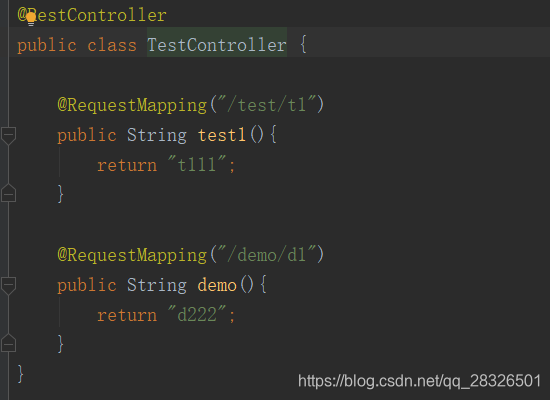
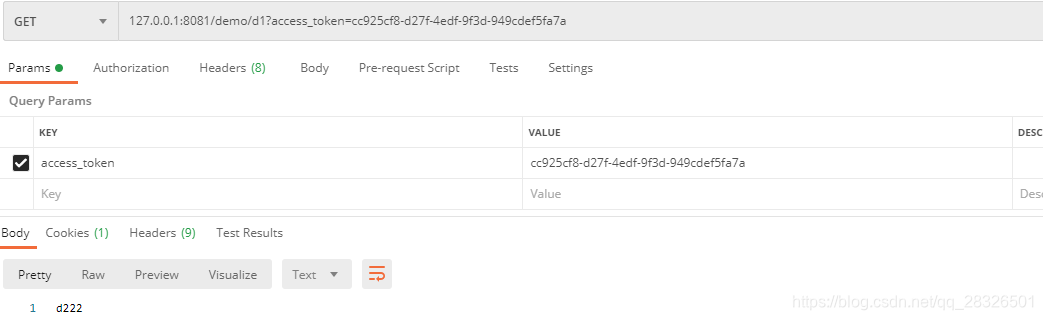
【3】:业务类中可以获取

 @RequestMapping("/demo/d1")
    public String demo(){
        OAuth2AuthenticationDetails  details = (OAuth2AuthenticationDetails) SecurityContextHolder.getContext().getAuthentication().getDetails();
        LinkedHashMap<String, String > map = (LinkedHashMap<String, String>) details.getDecodedDetails();
        String cc = map.get("cc");
        return cc;
    }


 682
682

 被折叠的 条评论
为什么被折叠?
被折叠的 条评论
为什么被折叠?
 到【灌水乐园】发言


