


 博客介绍了页面表单提交及后台处理的流程,包括页面引入js、使用beginForm生成表单、通过js提交表单、编写后台代码以及界面展示等步骤,还给出了具体验证可参考的博主链接。
1、页面引入js
<script src="~/Scripts/common/jquery.form.js"></script>
<script src="~/Scripts/jquery.validate.min.js"></script>
<script src="~/Scripts/jquery.validate.unobtrusive.js"></script>
<script src="~/Scripts/layer/layer.js"></script>
2、beginForm生成表单
@using (Html.BeginForm("EditPassword", "Login", FormMethod.Post, new { @Id = "forminfo" }))
{
    @Html.AntiForgeryToken()

    <div class="form-horizontal">
        <hr />
        @Html.ValidationSummary(true, "", new { @class = "text-danger" })
        @*@Html.HiddenFor(model => model.ID)*@
        @*<div class="form-group">
                @Html.LabelFor(model => model.Name, htmlAttributes: new { @class = "control-label col-md-2" })
                <div class="col-md-10">
                    @Html.EditorFor(model => model.Name, new { htmlAttributes = new { @class = "form-control" } })
                    @Html.ValidationMessageFor(model => model.Name, "", new { @class = "text-danger" })
                </div>
            </div>*@
        <div class="form-group">
            @Html.LabelFor(model => model.OldPass, htmlAttributes: new { @class = "control-label col-md-2" })
            <div class="col-md-2">
                @Html.PasswordFor(model => model.OldPass, htmlAttributes: new { @class = "form-control" })
                @Html.ValidationMessageFor(model => model.OldPass, "", new { @class = "text-danger" })
            </div>
        </div>
        <div class="form-group">
            @Html.LabelFor(model => model.Password1, htmlAttributes: new { @class = "control-label col-md-2" })
            <div class="col-md-2">
                @Html.PasswordFor(model => model.Password1, htmlAttributes: new { @class = "form-control" })
                @Html.ValidationMessageFor(model => model.Password1, "", new { @class = "text-danger" })
            </div>
        </div>
        <div class="form-group">
            @Html.LabelFor(model => model.Password2, htmlAttributes: new { @class = "control-label col-md-2" })
            <div class="col-md-2">
                @Html.PasswordFor(model => model.Password2, htmlAttributes: new { @class = "form-control" })
                @Html.ValidationMessageFor(model => model.Password2, "", new { @class = "text-danger" })
            </div>
        </div>

        <div class="form-group">
            <div class="col-md-offset-2 col-md-10">
                <input type="submit" id="sub" value="保存" class="btn btn-primary" />
            </div>
        </div>
    </div>
}
3、js提交
<script>

    $('#sub').on('click', function () {
        if (!$("#forminfo").valid()) {
            return;
        }
        $('#forminfo').on('submit', function () {
            $(this).ajaxSubmit({
                beforeSend: function (xhr) {//请求之前
                    var index = layer.load(1, {
                        shade: [0.5, '#000'] //0.5透明度的黑色背景
                    });
                },
                type: 'post', // 提交方式 get/post
                url: '/Login/EditPassword', // 需要提交的 url
                data: $("#forminfo").serialize(),
                contentType: "application/x-www-form-urlencoded; charset=utf-8",
                success: function (data) { // data 保存提交后返回的数据,一般为 json 数据
                    layer.closeAll('loading');
                    // 此处可对 data 作相关处理
                    if (data.result == "1") {
                        layer.msg(data.msg, { time: 1000 }, function () {
                            window.location.reload();
                        });
                    } else {
                        layer.msg(data.msg, { time: 1000 }, function () {
                            window.location.reload();
                        });
                    }
                    $(this).resetForm(); // 提交后重置表单
                },
                complete: function (xhr) {//请求完成
                    layer.closeAll('loading');
                },
                error: function (xhr, status, msg) {
                    //alert("状态码"+status+"; "+msg)
                    layer.msg('玩命加载中..');

                }
            });
            return false; // 阻止表单自动提交事件,必须返回false,否则表单会自己再做一次提交操作,并且页面跳转
        });
    });
</script>
4、后台代码
		[HttpPost]
        [ValidateAntiForgeryToken]
        public ActionResult EditPassword(UserEditPasswordDto UserEditPasswordDto)
        {
            if (ModelState.IsValid)
            {
                string cookieValue = CookieHelper.GetCookieValue("CurUser");
                cookieValue = DesEncrypt.Decrypt(cookieValue);
                var modelCookie = Newtonsoft.Json.JsonConvert.DeserializeObject<LoginUser>(cookieValue);
                if (null != modelCookie)
                {
                    UserEditPasswordDto.ID = modelCookie.Id;
                }

                if (UserEditPasswordDto.Password1 != UserEditPasswordDto.Password2)
                {
                    return Json(new { result = "0", msg = "两次输入密码不一致" });
                }
                var model = UserServices.Find<User>(UserEditPasswordDto.ID);
                if (null != model)
                {
                    if (model.Password != MD5Encrypt.Encrypt(UserEditPasswordDto.OldPass))
                    {
                        return Json(new { result = "0", msg = "旧密码错误" });
                    }
                    else
                    {
                        model.Password = MD5Encrypt.Encrypt(UserEditPasswordDto.Password1);
                    }
                    var result = UserServices.Update<User>(model);
                    if (result == 1)
                    {
                        return Json(new { result = "1", msg = "保存成功" });
                    }
                }
            }
            return Json(new { result = "0", msg = "操作失败,请联系管理员" });
        }
5、界面展示
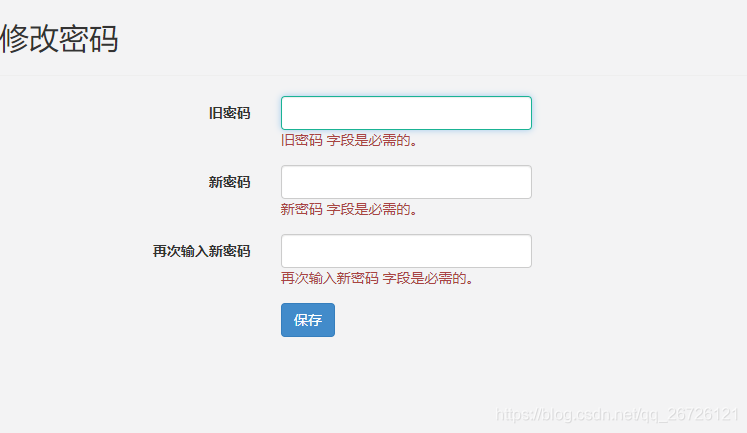
具体验证可参考这位博主:https://www.cnblogs.com/showstyle/p/3336369.html


 2618
2618

 被折叠的 条评论
为什么被折叠?
被折叠的 条评论
为什么被折叠?
 到【灌水乐园】发言


