


首先最开始我尝试使用ajax接入后台数据,并在前端便利挨个添加点,但是发现这样非常的卡顿,包括一个个添加的点和缩放时整个地图的卡顿
然后在官网案例中发现了GeoJSONLayer
然后解析了他的后台,并简化了他的代码,
首先后台给前台传输的是一个json,整个需要在后台自己拼接或者便利,JSON的具体格式为
{
	"features": [{
		"geometry": {
			"coordinates": [114.4, 14.6, 8.71], //经纬度,和携带的值(可做大小比对,具体可以看官网)
			"type": "Point"
		},
		"id": "TFG1KH5IVBWD9KSQ42RY3VKZB8XDFC5M",//这个是ID自己定义的
		"type": "Feature",
		"properties": {
			"属性": "值",
			"title": "值",
		}
	} , {
		"geometry": {
			"coordinates": [125.6, 11.3, 8.71],
			"type": "Point"
		},
		"id": "GLOC3YNVJTRD6EDR5D1IBTC1ZO2RZODU",//这个是ID
		"type": "Feature",
		"properties": {
			"属性": "值",
			"title": "值",
		}
	}],
	"metadata": {
		"status": "200"
	},
	"type": "FeatureCollection"
}
然后需要在后台进行拼接,我给出我自己的代码,仅供参考
  public JSONObject  getGeOJSON(String id) {
        List<RunTWay> resultBos=   runTyphoonService.queryWay(id);
        JSONObject jsonObject = new JSONObject();
        jsonObject.put("type", "FeatureCollection");
        JSONObject metadata = new JSONObject();
        metadata.put("status","200");
        jsonObject.put("metadata",metadata);
        JSONArray features=new JSONArray();
        RunTTyphoon runTTyphoon=this.runTyphoonService.getByIDTyphoon(id);
        for (RunTWay resultBo : resultBos) {
            JSONObject one=new JSONObject();
            one.put("id",resultBo.getId());
            one.put("type","Feature");
            JSONObject geometryOne=new JSONObject();
            geometryOne.put("type","Point");
            geometryOne.put("coordinates",new double[]{Double.parseDouble(Longitude), Double.parseDouble(Latitude),  8.71});//这里是经纬度和值
            one.put("geometry",geometryOne);
            JSONObject properties=new JSONObject();
            properties.put("属性名",对应的值);
 			...........添加各种属性
            one.put("properties",properties);
            features.add(one);
        }

        jsonObject.put("features",features);
        return jsonObject;
    }
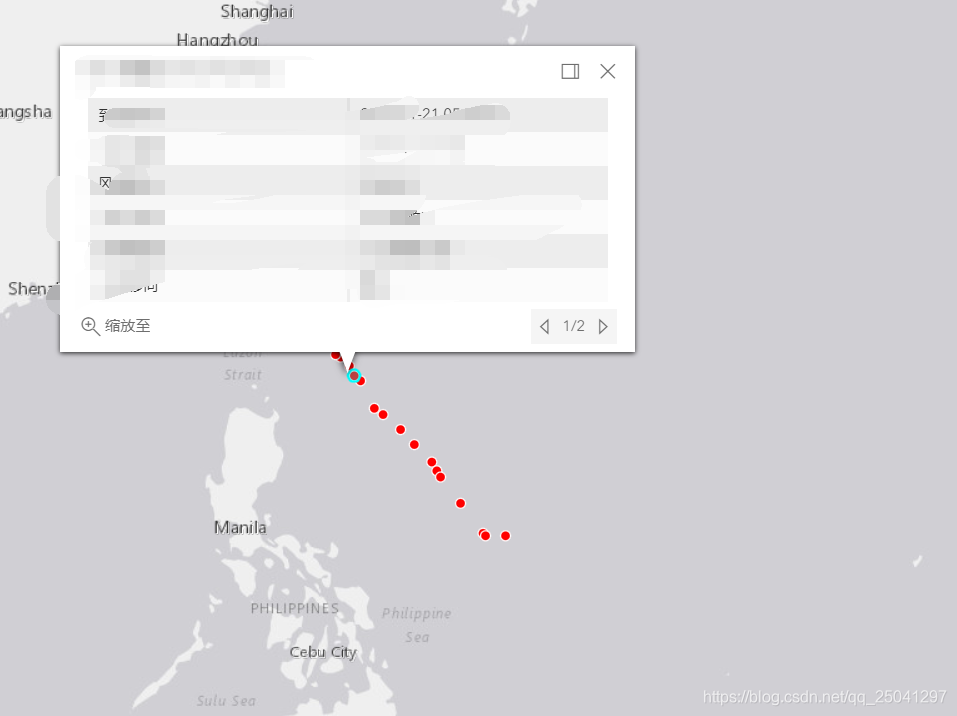
然后就是在前端显示,前端显示很简单,就使GeoJSONLayer进行添加就行
<%--
  Created by IntelliJ IDEA.
  User: DELL
  Date: 2020/6/3
  Time: 15:41
  To change this template use File | Settings | File Templates.
--%>
<%@ page contentType="text/html;charset=UTF-8" language="java" %>
<!DOCTYPE html>
<html>
<head>
    <meta charset="utf-8"/>
    <meta
            name="viewport"
            content="initial-scale=1,maximum-scale=1,user-scalable=no"
    />
    <title>GeoJSONLayer - 4.15</title>

    <style>
        html,
        body,
        #viewDiv {
            padding: 0;
            margin: 0;
            height: 100%;
            width: 100%;
        }
    </style>

    <link
            rel="stylesheet"
            href="https://js.arcgis.com/4.15/esri/themes/light/main.css"
    />
    <script src="https://js.arcgis.com/4.15/"></script>

    <script>
        require([
            "esri/Map",
            "esri/layers/GeoJSONLayer",
            "esri/views/MapView"
        ], function (Map, GeoJSONLayer, MapView) {
            // 如果GeoJSON文件与您的网站不在同一个域,则需要启用CORS服务器或代理。

            const template = {
                title: "{title}",
                content: [{
                    type: "fields", // Autocasts as new FieldsContent()
                    // Autocasts as new FieldInfo[]
                    fieldInfos: [		//这个就对应的点击后显示表格,和后台的属性名对应上
                        {
                            fieldName: "wayTime",
                            label: "到达时间",
                        }
                }]
            };

            const renderer = {	//样式选择
                type: "simple",
                field: "mag",
                symbol: {
                    type: "simple-marker",
                    color: "red",
                    outline: {
                        color: "white"
                    }, size: 6,
                }
            };

            const geojsonLayer = new GeoJSONLayer({
                url: "http://localhost:8083/NoIntercept/getTest.do?id=YMB3R1I2D4Z970VWN1E9E7BMY82892PR",//这块就是写上后台的链接,加上自己的一些参数,不需要在通过ajax进行获取
                copyright: "USGS Earthquakes",
                popupTemplate: template,
                renderer: renderer,
                // fields:fields
            });
            const map = new Map({
                basemap: "gray",
                layers: [geojsonLayer]
            });

            const view = new MapView({
                container: "viewDiv",
                center: [123.9634086609, 35.9595912264],
                zoom: 4,
                map: map
            });
        });
    </script>
</head>

<body>
<div id="viewDiv"></div>
</body>
</html>
具体效果如下


 3549
3549

 被折叠的 条评论
为什么被折叠?
被折叠的 条评论
为什么被折叠?
 到【灌水乐园】发言


