


记录一下Centos7.8安装dockers。
查看Linux系统信息
cat /etc/redhat-release![]()
一、首先更换yum源
CentOS 7 默认的 YUM 源是 CentOS 官方提供的,但是由于地理位置、网络等问题,可能
会导致使用 YUM 安装软件时速度非常慢。所以更换 CentOS 默认的 YUM 源为阿里云或者其他速度更快的源,我使用的是阿里的YUM源。
1. 备份当前的yum源配置文件
sudo mv /etc/yum.repos.d/CentOS-Base.repo /etc/yum.repos.d/CentOS-Base.repo.backup2. 下载阿里云的CentOS yum源配置文件
sudo curl -o /etc/yum.repos.d/CentOS-Base.repo http://mirrors.aliyun.com/repo/Centos-7.repo
3. 清除yum缓存并生成新的缓存
sudo yum clean all
sudo yum makecache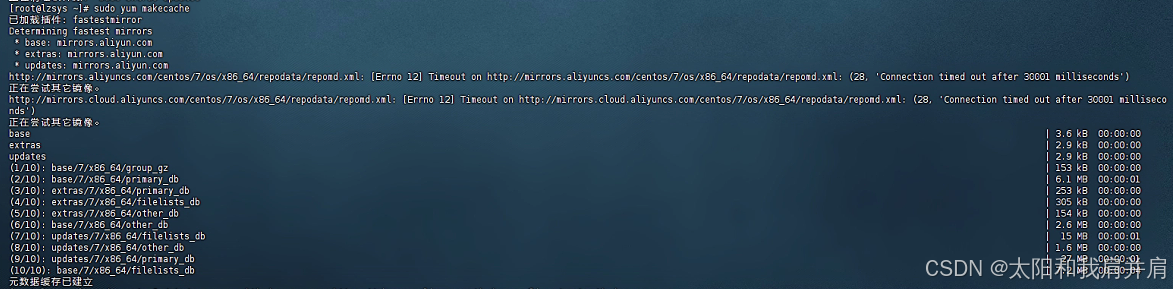
显示【元数据缓存已建立】即为安装成功。
二、docker安装
1、下载docker-ce的yum源
sudo wget -O /etc/yum.repos.d/docker-ce.repo https://mirrors.aliyun.com/docker-ce/linux/centos/docker-ce.repo
2、安装Docker
sudo yum -y install docker-ce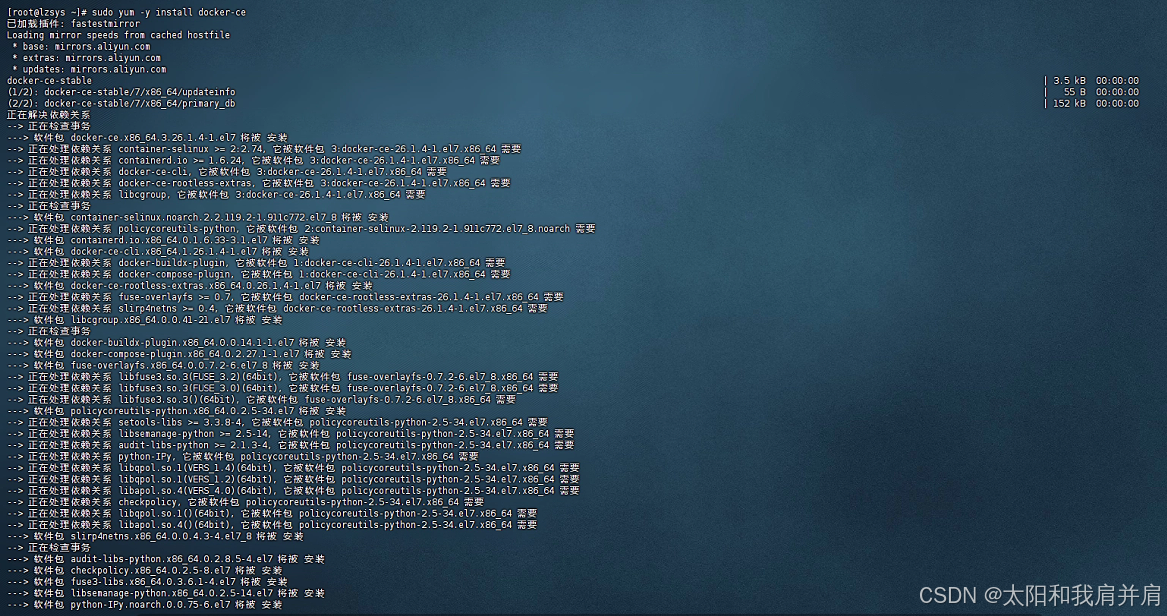
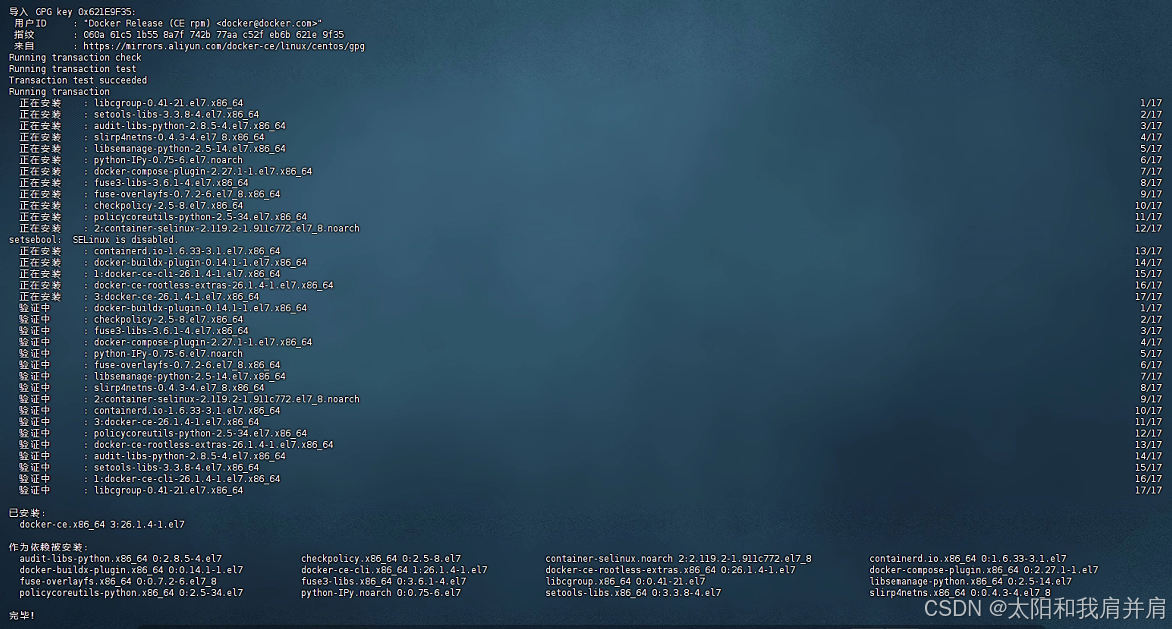
中间会有一小段安装过程,稍等一下,提示【完毕!】即为安装成功。
3、启动docker
(1)启动docker服务
# 启动docker服务
systemctl start docker
停止docker服务命令,后面可能会用到
# 停止docker服务
systemctl stop docker
如果停止失败,提示
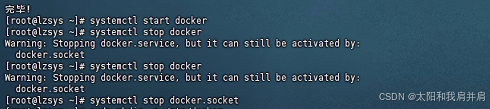
那么执行即可
systemctl stop docker.socket重启docker服务
# 重启docker服务
systemctl restart docker
(2)配置镜像加速
docker官方镜像仓库网速较差,我们需要设置国内镜像服务:
参考阿里云的镜像加速文档:https://cr.console.aliyun.com/cn-hangzhou/instances/mirrors
a./etc/docker文件夹不存在则创建
sudo mkdir -p /etc/dockerb.执行如下命令,会在/etc/docker中生成一个daemon.json文件
# 生成daemon.json文件
sudo tee /etc/docker/daemon.json <<-'EOF'
{
"registry-mirrors": ["https://seu8x20p.mirror.aliyuncs.com"]
}
EOF
c.加载daemon
# 加载daemon
sudo systemctl daemon-reload
此处一定要加载,否则会无效或报
![]()
d. 重启docker服务
sudo systemctl restart docker(3)配置docker 允许远程连接
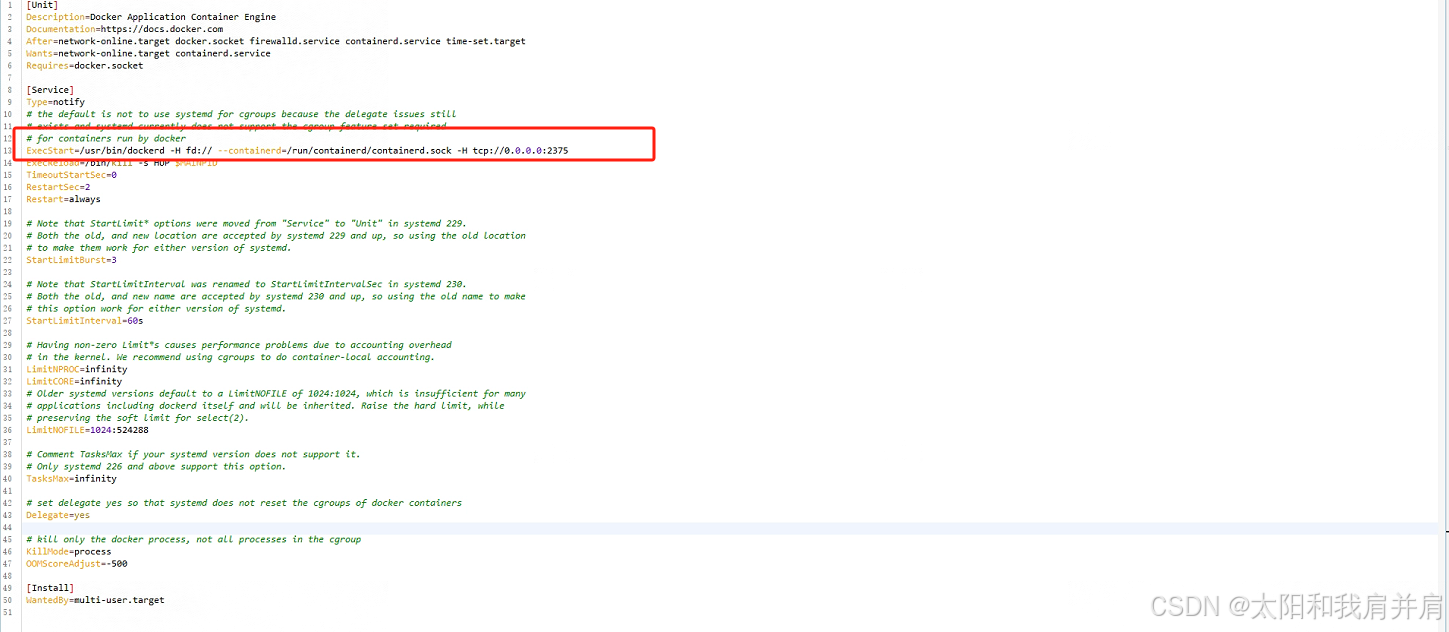
修改docker.service文件,进入目录 /usr/lib/systemd/system/docker.service
ExecStart后面增加 -H tcp://0.0.0.0:2375
[Unit]
Description=Docker Application Container Engine
Documentation=https://docs.docker.com
After=network-online.target docker.socket firewalld.service containerd.service time-set.target
Wants=network-online.target containerd.service
Requires=docker.socket

[Service]
Type=notify
# the default is not to use systemd for cgroups because the delegate issues still
# exists and systemd currently does not support the cgroup feature set required
# for containers run by docker
ExecStart=/usr/bin/dockerd -H fd:// --containerd=/run/containerd/containerd.sock -H tcp://0.0.0.0:2375
ExecReload=/bin/kill -s HUP $MAINPID
TimeoutStartSec=0
RestartSec=2
Restart=always

# Note that StartLimit* options were moved from "Service" to "Unit" in systemd 229.
# Both the old, and new location are accepted by systemd 229 and up, so using the old location
# to make them work for either version of systemd.
StartLimitBurst=3

# Note that StartLimitInterval was renamed to StartLimitIntervalSec in systemd 230.
# Both the old, and new name are accepted by systemd 230 and up, so using the old name to make
# this option work for either version of systemd.
StartLimitInterval=60s

# Having non-zero Limit*s causes performance problems due to accounting overhead
# in the kernel. We recommend using cgroups to do container-local accounting.
LimitNPROC=infinity
LimitCORE=infinity
# Older systemd versions default to a LimitNOFILE of 1024:1024, which is insufficient for many
# applications including dockerd itself and will be inherited. Raise the hard limit, while
# preserving the soft limit for select(2).
LimitNOFILE=1024:524288

# Comment TasksMax if your systemd version does not support it.
# Only systemd 226 and above support this option.
TasksMax=infinity

# set delegate yes so that systemd does not reset the cgroups of docker containers
Delegate=yes

# kill only the docker process, not all processes in the cgroup
KillMode=process
OOMScoreAdjust=-500

[Install]
WantedBy=multi-user.target
(4)重启docker服务
# 重启docker服务
sudo systemctl restart docker
(5)配置docker国内镜像源
编辑/etc/docker/daemon.json
{
  "registry-mirrors": [
  	"https://docker.m.daocloud.io",
	"https://dockerproxy.com",
	"https://docker.mirrors.ustc.edu.cn",
	"https://docker.nju.edu.cn"
  ]
}
(6)重启 Docker 服务
(此处也一定要加载damon-reload)
sudo systemctl daemon-reload
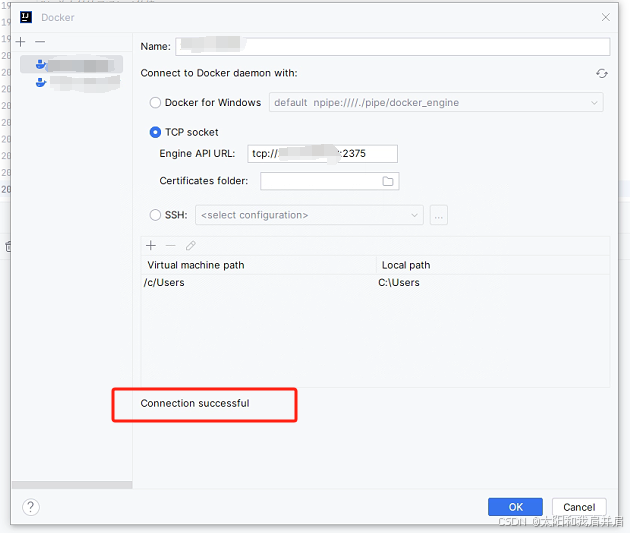
sudo systemctl restart docker至此结束,使用idea的docker插件测试一下
如果外部不能访问,先查看防火墙的状态
sudo firewall-cmd --state

# 或者
systemctl status firewalld
防火墙正在运行,那么查看防火墙是否开启了指定端口
firewall-cmd --zone=public --query-port=2375/tcp未开放2375端口,开放一下
# 开放
firewall-cmd --zone=public --add-port=2375/tcp --permanent
# 限制
firewall-cmd --zone=public --remove-port=2375/tcp --permanent
重新载入一下防火墙设置,使设置生效
firewall-cmd --reload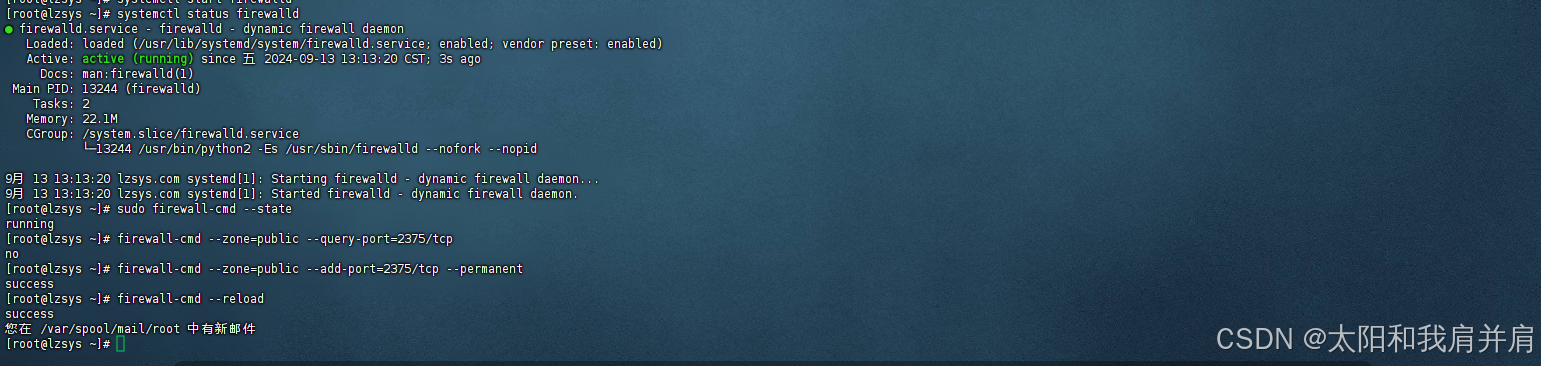
大功告成!!!


 被折叠的 条评论
为什么被折叠?
被折叠的 条评论
为什么被折叠?
 到【灌水乐园】发言


