


 本文详细介绍如何快速搭建ZooKeeper集群,包括安装配置、集群节点设置及启动步骤。通过具体实例,帮助读者掌握ZooKeeper集群部署流程。
最近比较有空,赶紧挤出时间来总结前段时间的知识。
zookeeper的集群搭建非常快捷方便,下面简单说一下。
1.安装zookeeper,去官网下载压缩包解压到一个路径下
首先到解压目录下进入conf目录,执行命令cp zoo_sample.cfg zoo.cfg,复制一份配置文件,zookeeper运行期间读取的配置文件就是zoo.cfg
2.配置集群节点机器的serverid,看到我们zoo.cfg中默认配置dataDir的路径是/tmp/zookeeper,这个路径最好修改一下,因为服务器会定时清理这个tmp文件夹,我们先把dataDir修改为自定义的/usr/local/apps/zookeeper,没有的话就自己创建文件夹,然后进入/usr/local/apps/zookeeper文件夹创建一个myid文件,内容就是我们的serverid,这是我的定义
1-》192.168.0.15
2-》192.168.0.14
3-》192.168.0.13
192.168.0.15 的myid内容
1其他的机器的同样地方也需要设置myid
3.进入 zookeeper解压路径的配置文件夹下面,设置集群机器配置,同样也是编辑zoo.cfg,我们把每台机器的内容都修改为如下内容:
# The number of milliseconds of each tick
tickTime=2000
# The number of ticks that the initial
# synchronization phase can take
initLimit=10
# The number of ticks that can pass between
# sending a request and getting an acknowledgement
syncLimit=5
# the directory where the snapshot is stored.
# do not use /tmp for storage, /tmp here is just
# example sakes.
dataDir=/usr/local/apps/zookeeper
# the port at which the clients will connect
clientPort=2181
# the maximum number of client connections.
# increase this if you need to handle more clients
#maxClientCnxns=60
#
# Be sure to read the maintenance section of the
# administrator guide before turning on autopurge.
#
# http://zookeeper.apache.org/doc/current/zookeeperAdmin.html#sc_maintenance
#
# The number of snapshots to retain in dataDir
#autopurge.snapRetainCount=3
# Purge task interval in hours
# Set to "0" to disable auto purge feature
#autopurge.purgeInterval=1
server.1=192.168.0.15:2888:3888
server.2=192.168.0.14:2888:3888
server.3=192.168.0.13:2888:3888
最下面的配置就是集群配置,
server.s=192.168.0.13:ssss:llll
上面的s表示就是机器ip对应的myid,ssss表示zookeeper集群内部数据同步时使用的端口可以自定义,llll表示集群内部选举时通信使用的端口,可以自定义。
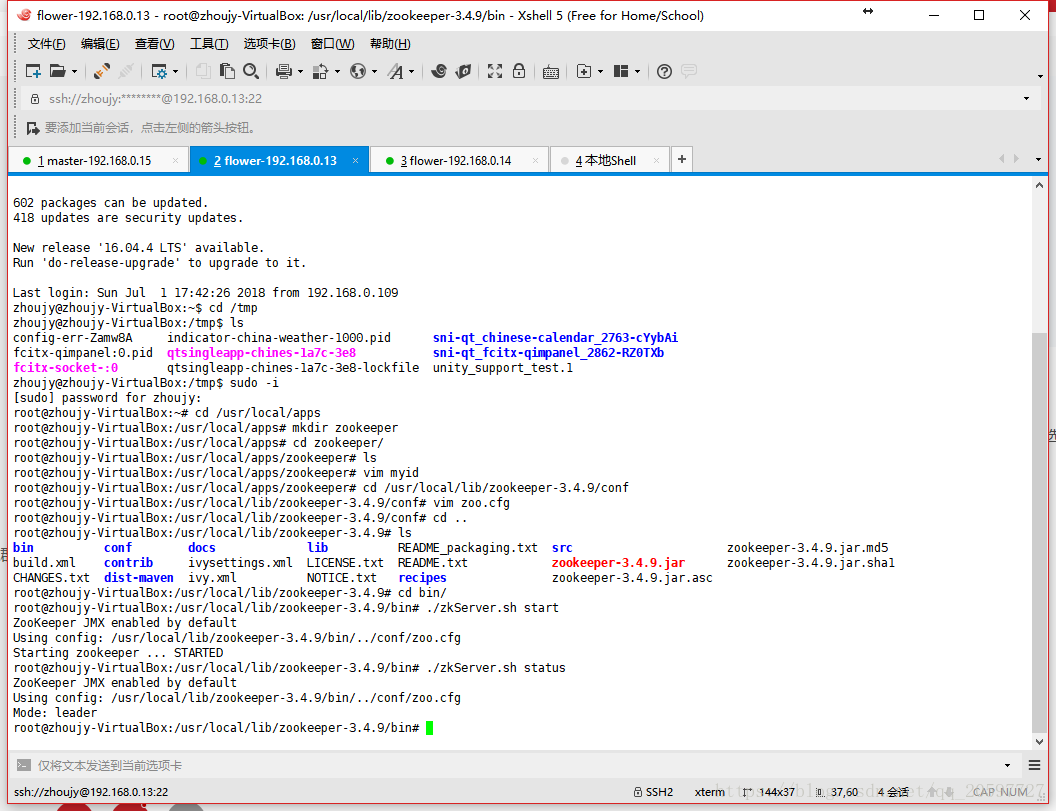
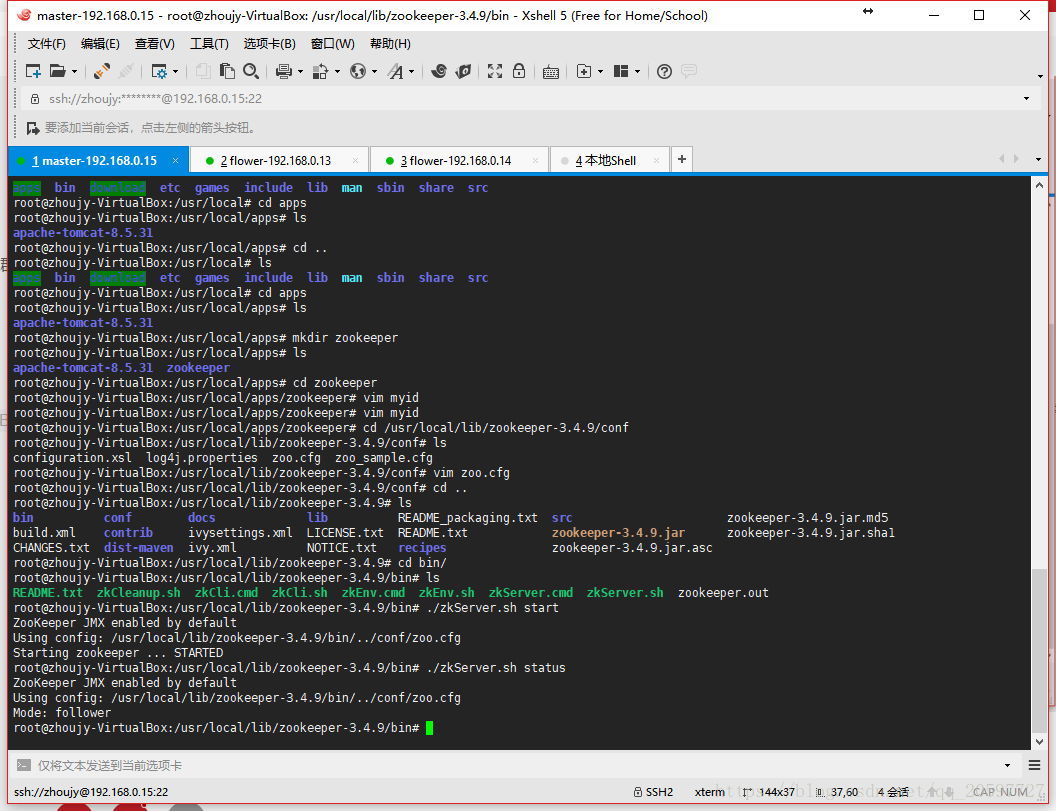
4.每台机器都设置好后就,就可以启动集群,在bin目录下 ./zkServer.sh start
leader节点
follower节点
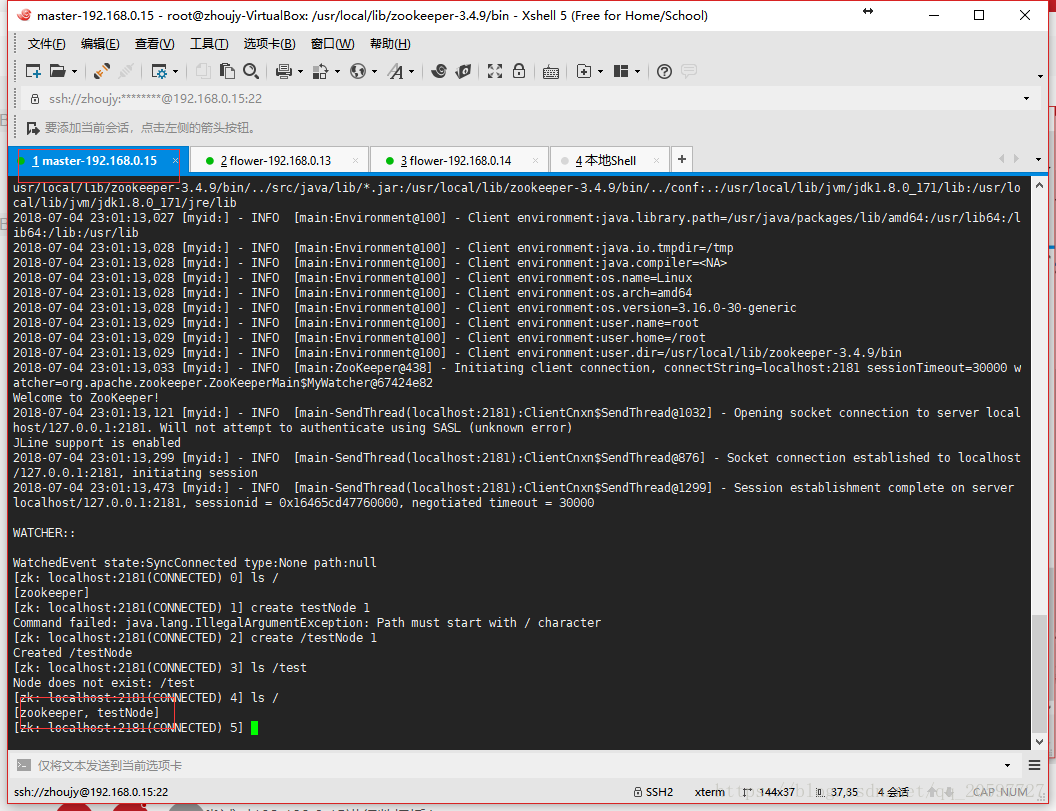
尝试对192.168.0.15进行数据插入,创建一个testNode
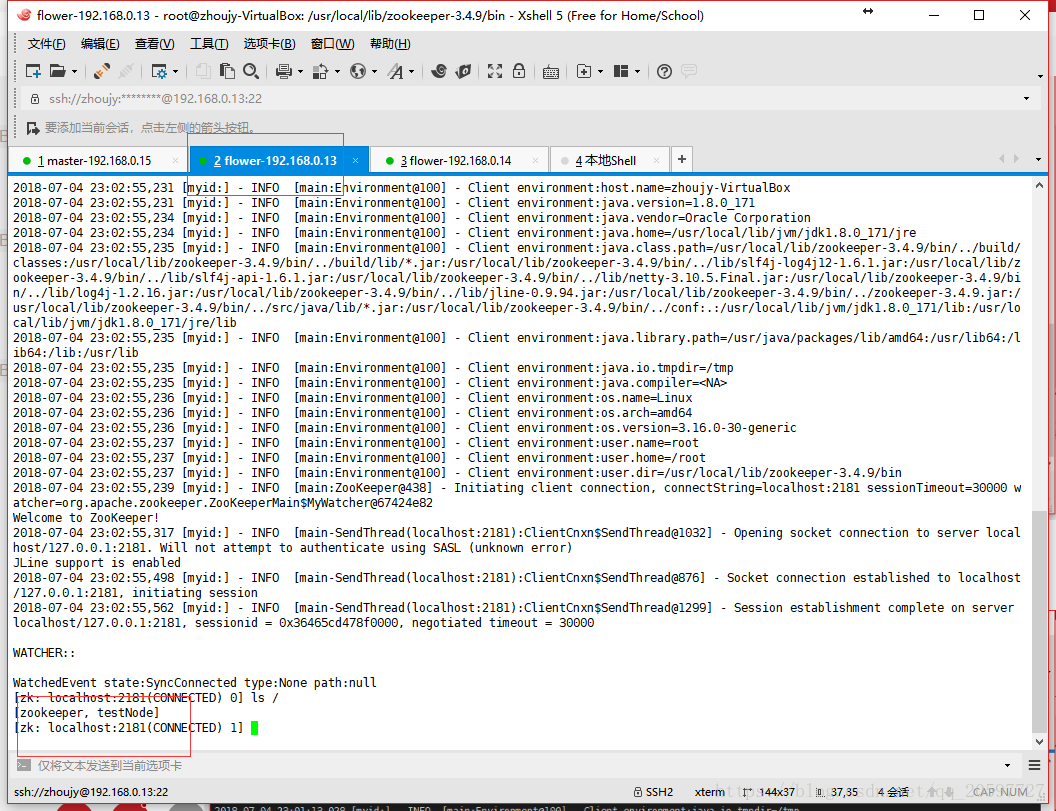
在192.168.0.13可以查询到同样数据
以上就是快速搭建一个zookeeper集群方式


 1424
1424

 被折叠的 条评论
为什么被折叠?
被折叠的 条评论
为什么被折叠?
 到【灌水乐园】发言


