


 本文通过实例演示了WPF中依赖属性的定义和使用方法,包括CLR属性封装、依赖属性注册及绑定操作,展示了TextBox控件间内容同步的效果。
先通过代码来看一个简单效果,看完后才方便讲解依赖属性的作用。
新建一个wpf项目,然后在布局里放上两个TextBox控件,MainWindow.xaml代码如下
<Window x:Class="WpfApplication20190826C.MainWindow"
        xmlns="http://schemas.microsoft.com/winfx/2006/xaml/presentation"
        xmlns:x="http://schemas.microsoft.com/winfx/2006/xaml"
        Title="MainWindow" Height="350" Width="525">
    <Grid>
        <Grid.RowDefinitions>
            <RowDefinition></RowDefinition>
            <RowDefinition></RowDefinition>
        </Grid.RowDefinitions>
        <Grid.ColumnDefinitions>
            <ColumnDefinition Width="Auto"></ColumnDefinition>
            <ColumnDefinition></ColumnDefinition>
        </Grid.ColumnDefinitions>
        <Label Content="textBox1:"/>
        <Label Content="textBox2:" Grid.Row="1"/>
        <TextBox Name="textBox1" Grid.Column="1" Margin="10"/>
        <TextBox Name="textBox2" Grid.Row="1" Grid.Column="1" Margin="10"/>
    </Grid>
</Window>
然后新建一个类Test.cs,用于写依赖属性
using System;
using System.Collections.Generic;
using System.Linq;
using System.Text;
//1.引入包
using System.Windows;
using System.Windows.Data;

namespace WpfApplication20190826C
{
    //2.继承自DependencyObject
    class Test : DependencyObject
    {
        //3.输入propdp后按两下Tab,生成如下代码


        public int MyProperty
        {
            get { return (int)GetValue(MyPropertyProperty); }
            set { SetValue(MyPropertyProperty, value); }
        }

        // Using a DependencyProperty as the backing store for MyProperty.  This enables animation, styling, binding, etc...
        public static readonly DependencyProperty MyPropertyProperty =
            DependencyProperty.Register("MyProperty", typeof(int), typeof(ownerclass), new UIPropertyMetadata(0));

    }
}
其中MyPropertyProperty 是依赖属性的一个实例,MyProperty是CLR属性,它用来把依赖属性即MyPropertyProperty进行封装。
我们需要修改一下依赖属性和CLR属性,修改后如下
public string Name
 {
            get { return (string)GetValue(NameProperty); }
            set { SetValue(NameProperty, value); }
 }

public static readonly DependencyProperty NameProperty =
            DependencyProperty.Register("Name", typeof(string), typeof(Test));
上面代码是把依赖属性重新命名为NameProperty,而它的CLR属性重命名为Name。另外把Name返回值类型由int改成了string,另外再修改一下对应关系,如下图
注意:DependencyProperty.Register()方法的第四个参数删掉了,只使用了3个参数

另外还需要加一个用于绑定依赖属性的方法,那么Test.cs的所有代码如下
using System;
using System.Collections.Generic;
using System.Linq;
using System.Text;
using System.Windows;
using System.Windows.Data;

namespace WpfApplication20190826C
{
    class Test : DependencyObject
    {

        //CLR属性进行封装
        public string Name
        {
            get { return (string)GetValue(NameProperty); }
            set { SetValue(NameProperty, value); }
        }

        //定义依赖属性
        public static readonly DependencyProperty NameProperty=DependencyProperty.Register("Name", typeof(string), typeof(Test));

        //SetBinding包装
        public BindingExpressionBase SetBinding(DependencyProperty dp, BindingBase binding)
        {
            return BindingOperations.SetBinding(this, dp, binding);
        }
    }
}
最后是MainWindow.xaml.cs的代码
using System;
using System.Collections.Generic;
using System.Linq;
using System.Text;
using System.Windows;
using System.Windows.Controls;
using System.Windows.Data;
using System.Windows.Documents;
using System.Windows.Input;
using System.Windows.Media;
using System.Windows.Media.Imaging;
using System.Windows.Navigation;
using System.Windows.Shapes;

namespace WpfApplication20190826C
{
    /// <summary>
    /// MainWindow.xaml 的交互逻辑
    /// </summary>
    public partial class MainWindow : Window
    {
        Test test;

        public MainWindow()
        {
            InitializeComponent();
            test = new Test();
            //将名为textBox1实例的Text属性附加到依赖属性中;
            Binding binding1 = new Binding("Text") { Source = textBox1 };
            test.SetBinding(Test.NameProperty, binding1);
            //将test.Name附加到textBox2.Text属性上
            Binding binding2 = new Binding("Name") { Source = test };
            textBox2.SetBinding(TextBox.TextProperty, binding2);
        }
    }
}
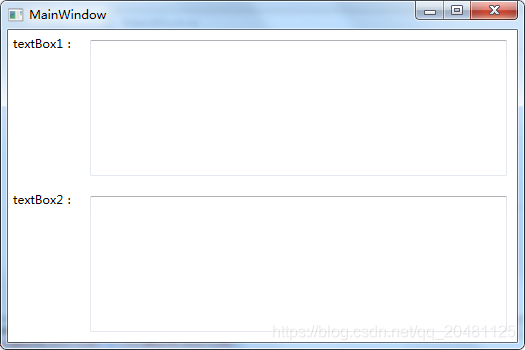
那么就大功告成了,效果如下:
当在textBox1中输入任何内容时,textBox2也会随之显示一样的内容。实际上textBox2是在引用textBox1中的内容。

那么,什么是依赖属性?
顾名思义就是它自己本身没有值,需要通过Binding从一个数据源上获取(依赖在别人身上)。
在定义依赖属性的时候,使用了static和readonly是为了保证DependencyProperty的索引值唯一。真正的值是存在一个Hashtable中的,是可读可写的。


 2430
2430

 被折叠的 条评论
为什么被折叠?
被折叠的 条评论
为什么被折叠?
 到【灌水乐园】发言


