


 本文介绍了一个比传统和UI框架的radio更具特色的选择器,可改造为自定义radio组件,示例中使用了element-ui的分割线和文字提示组件。还提到使用animate css动画库让页面更生动,使用时需添加特定类。
不管是和传统的radiobox还是市面上的UI框架的radio对比。我这个选择器更加显得花里胡哨。能给页面增加不少色彩。你可以稍微改造一下就能变成一个自己的radio组件。示例中使用了element-ui的el-divider分割线组件和el-tooltip文字提示组件。完整代码如下。因为我做了自动按需引入,所以部分依赖需要自己手动引入一下。
各种表情符号等Unicode到这里拿 Unicode 字符百科
<template>
  <div style="width: 500px;">
    <el-divider>当前主题</el-divider>
    <div class="ts-flex-justify--evenly ts-admin-layout--theme">
      <el-tooltip
          effect="dark"
          placement="bottom"
          v-for="(item, index) in themeList"
          :key="index"
          :content="item.title"
      >
        <div
            class="ts-admin-theme--item"
            :class="{'is-active' : current === item.value}"
            :style="{ backgroundColor: item.color }"
            @click="changeTheme(item.value)"
        />
      </el-tooltip>
    </div>
  </div>
</template>

<script lang='ts'>

export default defineComponent({
  setup() {

    const state = reactive({
      current: 1,
      themeList: [
        {
          title: '深色主题',
          value: 1,
          color: '#262626'
        },
        {
          title: '绿色主题',
          value: 2,
          color: '#009688'
        },
        {
          title: '浅色主题',
          value: 3,
          color: '#ffffff'
        },
        {
          title: '灰色模式',
          value: 4,
          color: '#575757'
        },
      ]
    })

    const changeTheme = (value: number) => {
      state.current = value
    }

    return {
      ...toRefs(state),
      changeTheme,
    }
  }
})
</script>

<style lang="scss">
  .ts-flex-justify-between, .ts-flex-justify--evenly {
    display: flex;
    flex-direction: row;
    justify-content: space-between;

    .ts-admin-theme--item {
      width: 25px;
      height: 25px;
      border: 1px solid #c4e8e5;
      border-radius: 50%;
      cursor: pointer;
      position: relative;
      &.active {
         border-color: red;

        &::before {
           content: '\2713';
           font-size: 14px;
           color: #fff;
           position: absolute;
           top: -1px;
           left: 3px;
        }
      }
    }
  }

  .ts-admin-layout--theme {
    .ts-admin-theme--item {
      width: 60px;
      height: 60px;
      border: 5px solid #c4e8e5;
      &.is-active {
        &::before {
          content: '\1F61B';
          font-size: 48px;
          color: #0960BD;
          position: absolute;
          top: -5px;
          left: -3px;
        }
      }
    }
  }
</style>
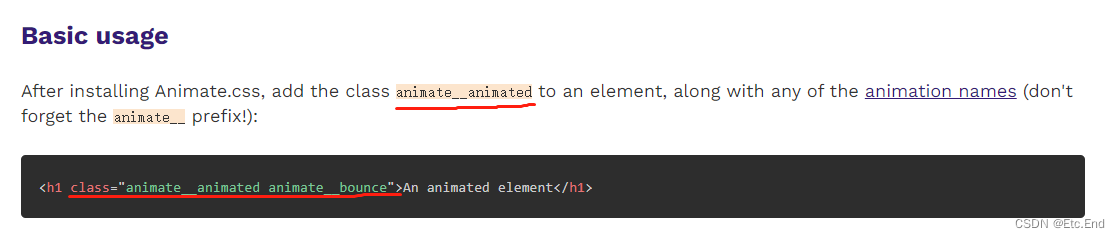
接下来使用animate css动画库让页面动起来,显得更加的生动👇👇👇👇👇👇
// 安装库
npm install animate.css
// 引入
import 'animate.css'
注意使用animate的时候一定要加上animate__animated类,不然不起作用❗️❗️❗️❗️❗️❗️
<template>
  <div style="width: 500px;">
    <el-divider>当前主题</el-divider>
    <div class="ts-flex-justify--evenly ts-admin-layout--theme animate__animated animate__fadeInDown">
      <el-tooltip
          effect="dark"
          placement="bottom"
          v-for="(item, index) in themeList"
          :key="index"
          :content="item.title"
      >
        <div
            class="ts-admin-theme--item"
            :class="{'is-active' : current === item.value, 'animate__bounceIn' : current == item.value }"
            :style="{ backgroundColor: item.color }"
            @click="changeTheme(item.value)"
        />
      </el-tooltip>
    </div>
  </div>
</template>
我是Etc.End。如果文章对你有所帮助,能否帮我点个免费的赞和收藏😍。

👇 👇 👇 👇 👇 👇 👇 👇 👇 👇 👇 👇


 753
753

 被折叠的 条评论
为什么被折叠?
被折叠的 条评论
为什么被折叠?
 到【灌水乐园】发言


