


目录

Vue2 主要通过以下 4 个步骤来实现数据双向绑定的:
实现一个监听器 Observer:对数据对象进行遍历,包括子属性对象的属性,利用 Object.defineProperty() 对属性都加上 setter 和 getter。这样的话,给这个对象的某个值赋值,就会触发 setter,那么就能监听到了数据变化。
实现一个解析器 Compile:解析 Vue 模板指令,将模板中的变量都替换成数据,然后初始化渲染页面视图,并将每个指令对应的节点绑定更新函数,添加监听数据的订阅者,一旦数据有变动,收到通知,调用更新函数进行数据更新。
实现一个订阅者 Watcher:Watcher 订阅者是 Observer 和 Compile 之间通信的桥梁 ,主要的任务是订阅 Observer 中的属性值变化的消息,当收到属性值变化的消息时,触发解析器 Compile 中对应的更新函数。
实现一个订阅器 Dep:订阅器采用 发布-订阅 设计模式,用来收集订阅者 Watcher,对监听器 Observer 和 订阅者 Watcher 进行统一管理。
在浏览器打印vue,查看其属性方法,
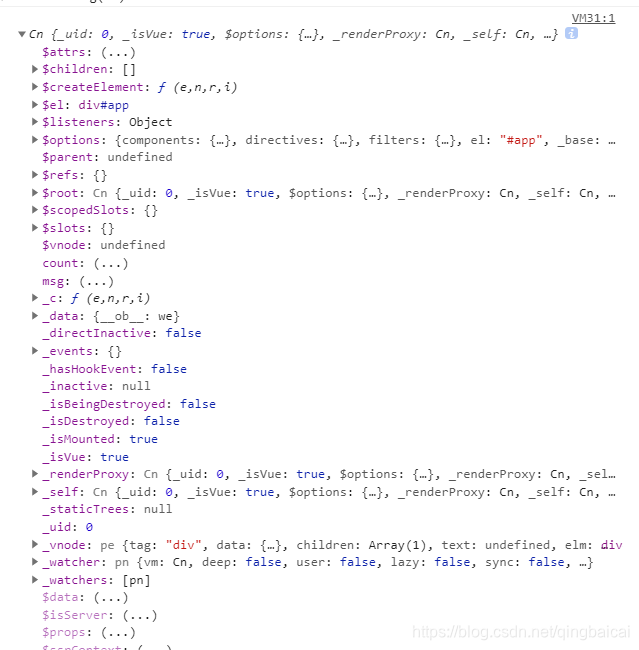
一、vue 基础功能
1、负责接收初始化的参数(option)
2、负责把data中的属性注入到Vue实例,转换成getter/setter
3、负责调用observer监听data中所有属性的变化
4、负责调用compiler解析指定/差值表达式
完成vue基本代码和html应用页面,并打印简化的demo
//需要实现功能
//1、通过属性保存选项的数据
//2、把data中的成员转换成getter、setter,注入到vue实例中
//3、
//4、

class Vue {
    constructor (options){
        //1、需要实现功能1通过属性保存选项的数据
        this.$options = options || {}
        this.$data = options && options.data || {}
        this.$el = typeof options.el === 'string'? document.querySelector(options.el): options.el
        //2、把data中的成员转换成getter、setter,注入到vue实例中
        this._proxyData(this.$data)
    }
    _proxyData (data){ //data转化为getter setter
        //遍历data所有属性,把data属性注入到vue实例中
        Object.keys(data).forEach(key => {
            Object.defineProperty(this, key , {
                enumerable: true, //可枚举
                configurable: true, //可配置
                get() {
                    return data[key]
                },
                set(newVal) {
                    if(newVal === data[key]){
                        return
                    }
                    data[key] = newVal
                }
            })
        })
    }
}
html应用页面
<!DOCTYPE html>
<html lang="en">
<head>
<meta charset="UTF-8">
<meta http-equiv="X-UA-Compatible" content="IE=edge">
<meta name="viewport" content="width=device-width, initial-scale=1.0">
<title>Document</title>
</head>
<body>
<div id="app">
<span>{{msg}} </span><span>{{ user.name }}</span>
<h3> 第{{count}}次登陆</h3>
<div v-text="msg"></div>
<input type="text" v-model="msg">
</div>
<!-- <script src="https://cdn.jsdelivr.net/npm/vue@2"></script> -->
<script src="./vue.js"></script>
<script src="./observer.js"></script>
<script src="./compiler.js"></script>
<script>
const vm = new Vue({
el: "#app",
data: {
msg: "Hello",
count: 1,
user : {
name: "gu"
}
}
})
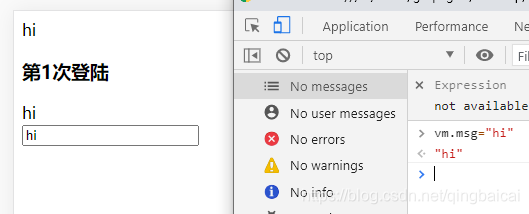
vm.msg = "Hi"
console.log(vm)
</script>
</body>
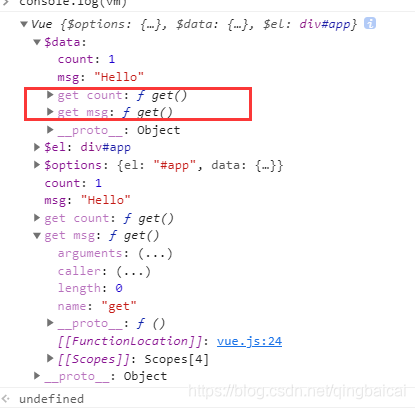
</html>打印简化的demo
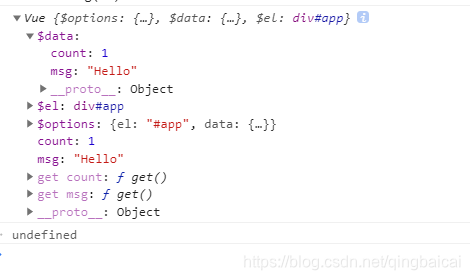
el和$data与注入代码一致
二、Observer浅析
基础功能:
1、负责把data选项中的属性转换成响应式数据
2、data中某个属性也是对象,把该属性转换成响应式数据
3、数据变化发送通知
添加observer基础代码
class Observer {
    constructor(data){
        this.walk(data)
    }
    walk (data) { //遍历所有属性
        if(!data || typeof data !== 'object') { //1、判断data是否是对象
            return
        }
        Object.keys(data).forEach(key=>{
            this.defineReactive(data, key, data[key])
        })
    }
    defineReactive (obj, key, val) { //把属性转换为getter、setter
        this.walk(val) //如果val是对象则会把val内部属性转换为响应式属性
        let _this = this
        Object.defineProperty(obj, key, {
            enumerable: true, //可枚举
            configurable: true, //可配置
            get() {
                return val
            },
            set (newVal) {

            }
        })
    }
}
监听对象属性
 defineReactive (obj, key, val) { //把属性转换为getter、setter
        this.walk(val) //如果val是对象则会把val内部属性转换为响应式属性
        Object.defineProperty(obj, key, {
         //...
        })
}
将属性复制的时候如何重新绑定
set(newVal) {
    if(newVal === val){
        return
    }
    val = newVal
    this.walk(newVal) //如果新属性绑定的是对象,则将对象把属性转换为getter、setter

}
Object.defineProperty() 方法会直接在一个对象上定义一个新属性,或者修改一个对象的现有属性,并返回此对象。在 get 和 set 方法中,this 指向某个被访问和修改属性的对象。
三、Compiler类浅析
1、前置知识Node Types
文档、元素、属性以及 HTML 或 XML 文档的其他方面拥有不同的节点类型。
前置知识:HTML DOM 节点
存在 12 种不同的节点类型,其中可能会有不同节点类型的子节点:
| 节点类型 | 描述 | 子节点 | |
|---|---|---|---|
| 1 | Element | 代表元素 | Element, Text, Comment, ProcessingInstruction, CDATASection, EntityReference |
| 2 | Attr | 代表属性 | Text, EntityReference |
| 3 | Text | 代表元素或属性中的文本内容。 | None |
| 4 | CDATASection | 代表文档中的 CDATA 部分(不会由解析器解析的文本)。 | None |
| 5 | EntityReference | 代表实体引用。 | Element, ProcessingInstruction, Comment, Text, CDATASection, EntityReference |
| 6 | Entity | 代表实体。 | Element, ProcessingInstruction, Comment, Text, CDATASection, EntityReference |
| 7 | ProcessingInstruction | 代表处理指令。 | None |
| 8 | Comment | 代表注释。 | None |
| 9 | Document | 代表整个文档(DOM 树的根节点)。 | Element, ProcessingInstruction, Comment, DocumentType |
| 10 | DocumentType | 向为文档定义的实体提供接口 | None |
| 11 | DocumentFragment | 代表轻量级的 Document 对象,能够容纳文档的某个部分 | Element, ProcessingInstruction, Comment, Text, CDATASection, EntityReference |
| 12 | Notation | 代表 DTD 中声明的符号。 | None |
2、基础功能:
基础代码
1、负责编译模板,解析指令/差值表达式2、负责页面的首次渲染3、当数据变化后重新渲染视图
//实现功能
//1、编译模板,处理文本节点和元素节点
class Compiler {
    constructor(vm) {
        this.el = vm.$el
        this.vm = vm
    }
    //1、编译模板,处理文本节点和元素节点
    compiler (el) {

    }
    //2、编译元素节点,处理指令
    compilerElement (node) {

    }
    //3、编译文本节点,处理差值表达式
    compilerText (node) {

    }
    //4、判断元素属性是否是指令
    isDirective (attrName) {
        return attrName.startWith("v-")
    }
    //5、判断节点是否是文本节点
    isTextNode (node) {
        return node.nodeType === 3
    }
    //6、判断节点是否是元素节点
    isElementNode (node) {
        return node.nodeType === 1
    }
}
编译模板,分发处理文本节点和元素节点
//实现功能
//1、编译模板,处理文本节点和元素节点
class Compiler {
    constructor(vm) {
        this.el = vm.$el
        this.vm = vm
        this.compiler(this.el)
    }
    //1、编译模板,处理文本节点和元素节点
    compiler (el) {
        let childNodes = el.childNodes //伪数组
        Array.from(childNodes).forEach( node => {
            if ( this.isTextNode(node) ) { //处理文本节点
                this.compilerText (node)
            }else if ( this.isElementNode(node) ) { //处理元素节点
                this.compilerElement (node)
            }
            // 判断node节点,是否有子节点,如果有子节点,要递归调用compile
            if( node.childNodes && node.childNodes.length ){
                this.compiler(node)
            }
        })
    }

}
打印文本节点:
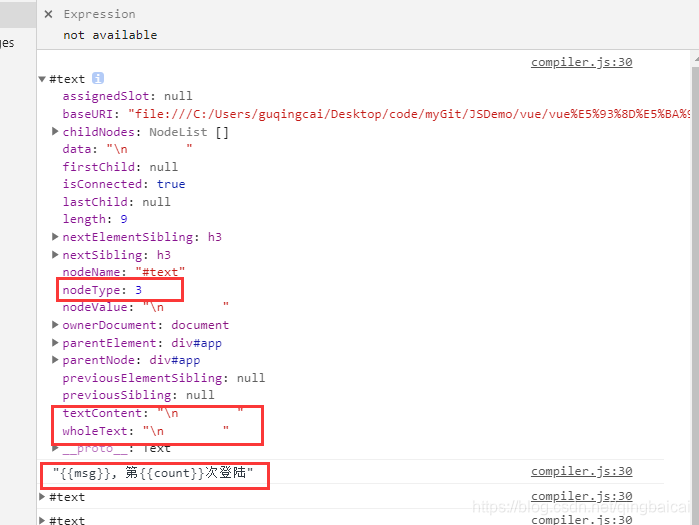
处理文本节点,仅能处理遇到的第一个
//3、编译文本节点,处理差值表达式
compilerText (node) {
//使用正则表达式 匹配是否是{{}}
//替换值
let reg = /\{\{(.+?)\}\}/
let val = node.textContent
console.log("RegExp.$1", RegExp.$1)
console.log("val", val)
if( reg.test(val) ){
let key = RegExp.$1.trim()
node.textContent = val.replace(reg, this.vm[key])
}
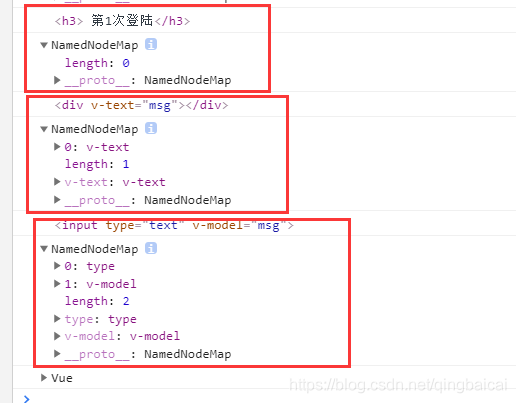
}打印元素节点:
compilerElement (node) {
    console.log(node)
    console.log(node.attributes)
}
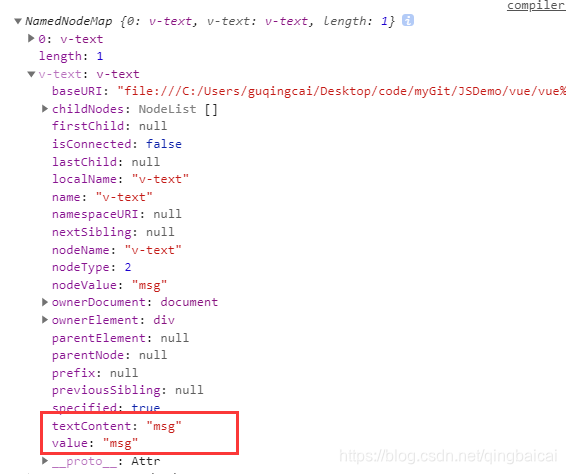
编译元素节点,处理指令
 //2、编译元素节点,处理指令
    compilerElement (node) {
        console.log(node)
        console.log(node.attributes)
        //遍历所有的属性节点
        Array.from(node.attributes).forEach((attr)=>{
            //判断是否是指令
            let attrName = attr.name
            if( this.isDirective(attrName) ){//判断元素属性是否是指令
                //v-text => text
                attrName = attrName.substr(2) //获取属性名
                let key = attr.value //属性值
                this.update(node, key, attrName)
            }
        })
    }
    //调用指定方法判断是元素属性还是文本节点
    update (node, key, attrName) {
        let upadteFn = this[attrName+"Updater"]
        upadteFn && upadteFn(node, this.vm[key])
    }
实现响应式机制
四、dep收集依赖
功能:1、收集依赖,添加观察者(watcher)2、通知所有观察者
基础代码
// 实现功能:收集依赖发送通知
// 1、存储所有的观察者
// 2、通知所有观察者
//实现方法为每一个响应式数据创建dep对象,在使用响应式数据的时候收集依赖、创建观察者对象。
// 当数据变化时通知所有观察者对象,调用update方法更新视图
class Dep {
    constructor () {
        //存储所有的观察者
        this.subs = []
    }
    //添加观察者
    addSub () {
        if (sub && sub.update) { //如果update方法,说明是之前定义的compiler
            this.subs.push(sub)
        }
    }
    //发送通知
    notify () {
        this.subs.forEach(sub => {
            sub.update()
        })
    }
}
在oberser收集依赖、发送通知
defineReactive (obj, key, val) { //把属性转换为getter、setter
        // watch基础功能
        // 2、!自身实例化的时候往dep对象中添加自己
        let dep = new Dep() //收集依赖

        this.walk(val) //如果val是对象则会把val内部属性转换为响应式属性
        let _this = this
        Object.defineProperty(obj, key, {
            enumerable: true, //可枚举
            configurable: true, //可配置
            get() {
                Dep.target && dep.addSub(Dep.target) //收集依赖
                return val
            },
            set (newVal) {
                if(newVal === val){
                    return
                }
                val = newVal
                _this.walk(newVal) //如果新属性绑定的是对象,则将对象把属性转换为getter、setter

            // watch基础功能
            // 1、!当数据变化出发以来,dep通知所有的watcher实例更新视图
                dep.notify()

            }
        })
    }
五、watcher浅析
基础功能
1、当数据变化出发以来,dep通知所有的watcher实例更新视图
2、自身实例化的时候往dep对象中添加自己
基础代码:
// watch基础功能

// 1、当数据变化出发以来,dep通知所有的watcher实例更新视图

// 2、自身实例化的时候往dep对象中添加自己

class Watcher {
    constructor (vm, key, cb) {
        this.vm = vm
        // data中的属性名称
        this.key = key
        // 回调函数负责更新视图
        this.cb = cb
        this.oldValue = vm[key]
    }
    //当数据发生变化的时候更新视图
    update () {
        let newValue = this.vm(this.key)
        if( this.oldValue === new val ) {
            return
        }
        this.cb(newValue)//更新视图
    }

}
dep需要收集watcher,实现方式:
1、把watcher对象记录到dep类的静态属性
2、触发get方法,在get方法中调用addSub
// watch基础功能

// 1、!当数据变化出发以来,dep通知所有的watcher实例更新视图

// 2、!自身实例化的时候往dep对象中添加自己

class Watcher {
    constructor (vm, key, cb) {
        this.vm = vm
        // data中的属性名称
        this.key = key
        // 回调函数负责更新视图
        this.cb = cb


        // dep需要收集watcher,实现方式:
        // 1、把watcher对象记录到dep类的静态属性
        // 2、触发get方法,在get方法中调用addSub

        // !!!1、把watcher对象记录到dep类的静态属性
        Dep.target = this

        this.oldValue = vm[key] //记录旧属性  !!!触发Observer的get方法,在get方法中调用addSub
        Dep.target = null //!!!防止重复添加

    }
    //当数据发生变化的时候更新视图
    update () {
        let newValue = this.vm(this.key)
        if( this.oldValue === new val ) {
            return
        }
        this.cb(newValue)//更新视图
    }

}
六、数据驱动浅析(整合完善功能)
数据响应式:数据模型仅仅是普通的javaScript对象,而当我们修改数据时,视图会进行更新,避免了繁琐的dom操作,提高了开发效率
双向绑定:数据改变;视图改变,数据也随之改变。
我们可以使用v-model在表单上创建双向数据绑定
数据驱动Vue最独特的特性之一
开发过程中,仅需要数据本身,不需要关心数据是如何渲染到视图。
1、插值表达式的更新处理。
在compiler处理文本节点时,创建watcher对象,当数据改变更新视图。
//3、编译文本节点,处理差值表达式
compilerText (node) {
//使用正则表达式 匹配是否是{{}}
let reg = /\{\{(.+?)\}\}/g //一个标签仅能识别一个双括号 如:<span>{{msg}} {{name}} </span>,{{name}}将无法识别,需要学习正则加强……
let val = node.textContent
console.log("node", node)
console.log("RegExp", RegExp)
// console.log("RegExp.$1", RegExp.$1)
if( reg.test(val) ){
let key = RegExp.$1.trim()
node.textContent = val.replace(reg, this.vm[key])
//!!!创建watcher对象,当数据改变更新视图 此处为插值表达式的处理
new Watcher(this.vm, key, (newValue)=>{
node.textContent = newValue
})
}
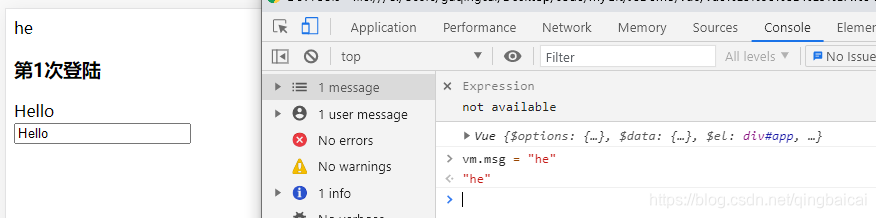
}查看浏览器,插值表达式发生变化
2、v-text、v-model的更新处理。
//调用指定方法判断是元素属性还是文本节点
    update (node, key, attrName) {
        let upadteFn = this[attrName+"Updater"].bind(this)
        upadteFn && upadteFn(node, key, this.vm[key])
    }
    //处理v-text指令
    textUpdater (node, key, value) {
        node.textContent = value
        new Watcher(this.vm, key, (newValue)=>{
            node.textContent = newValue
        })
    }
    //处理v-model
    modelUpdater (node, key, value) {
        node.value = value
        new Watcher(this.vm, key, (newValue)=>{
            node.value = newValue
        })
    }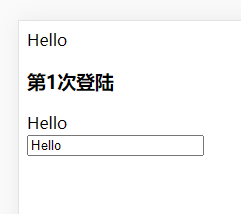
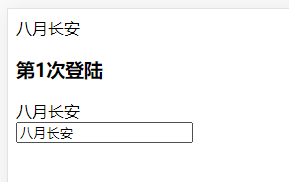
修改msg
七、双向绑定浅析
在input通过监听事件实现双向绑定,在处理v-mode指令的时候,为节点注册事件
//处理v-model
    modelUpdater (node, key, value) {
        node.value = value
        new Watcher(this.vm, key, (newValue)=>{
            node.value = newValue
        })
        //双向绑定
        node.addEventListener("input", ()=>{
            this.vm[key] = node.value
        })
    }


 被折叠的 条评论
为什么被折叠?
被折叠的 条评论
为什么被折叠?
 到【灌水乐园】发言


