


在日常开发中,我们经常使用Spring、Dubbo、Mybatis等框架的标签来配置我们的应用。那么这些第三方的框架如何被Spring解析到的?本文将实现一个自定义标签的案例。学习来Spring自定义标签之后,我们也能自定义标签,在阅读其他框架集成Spring框架的时候也能知道其原理
- 首先我们看看Spring源代码中spring-context包
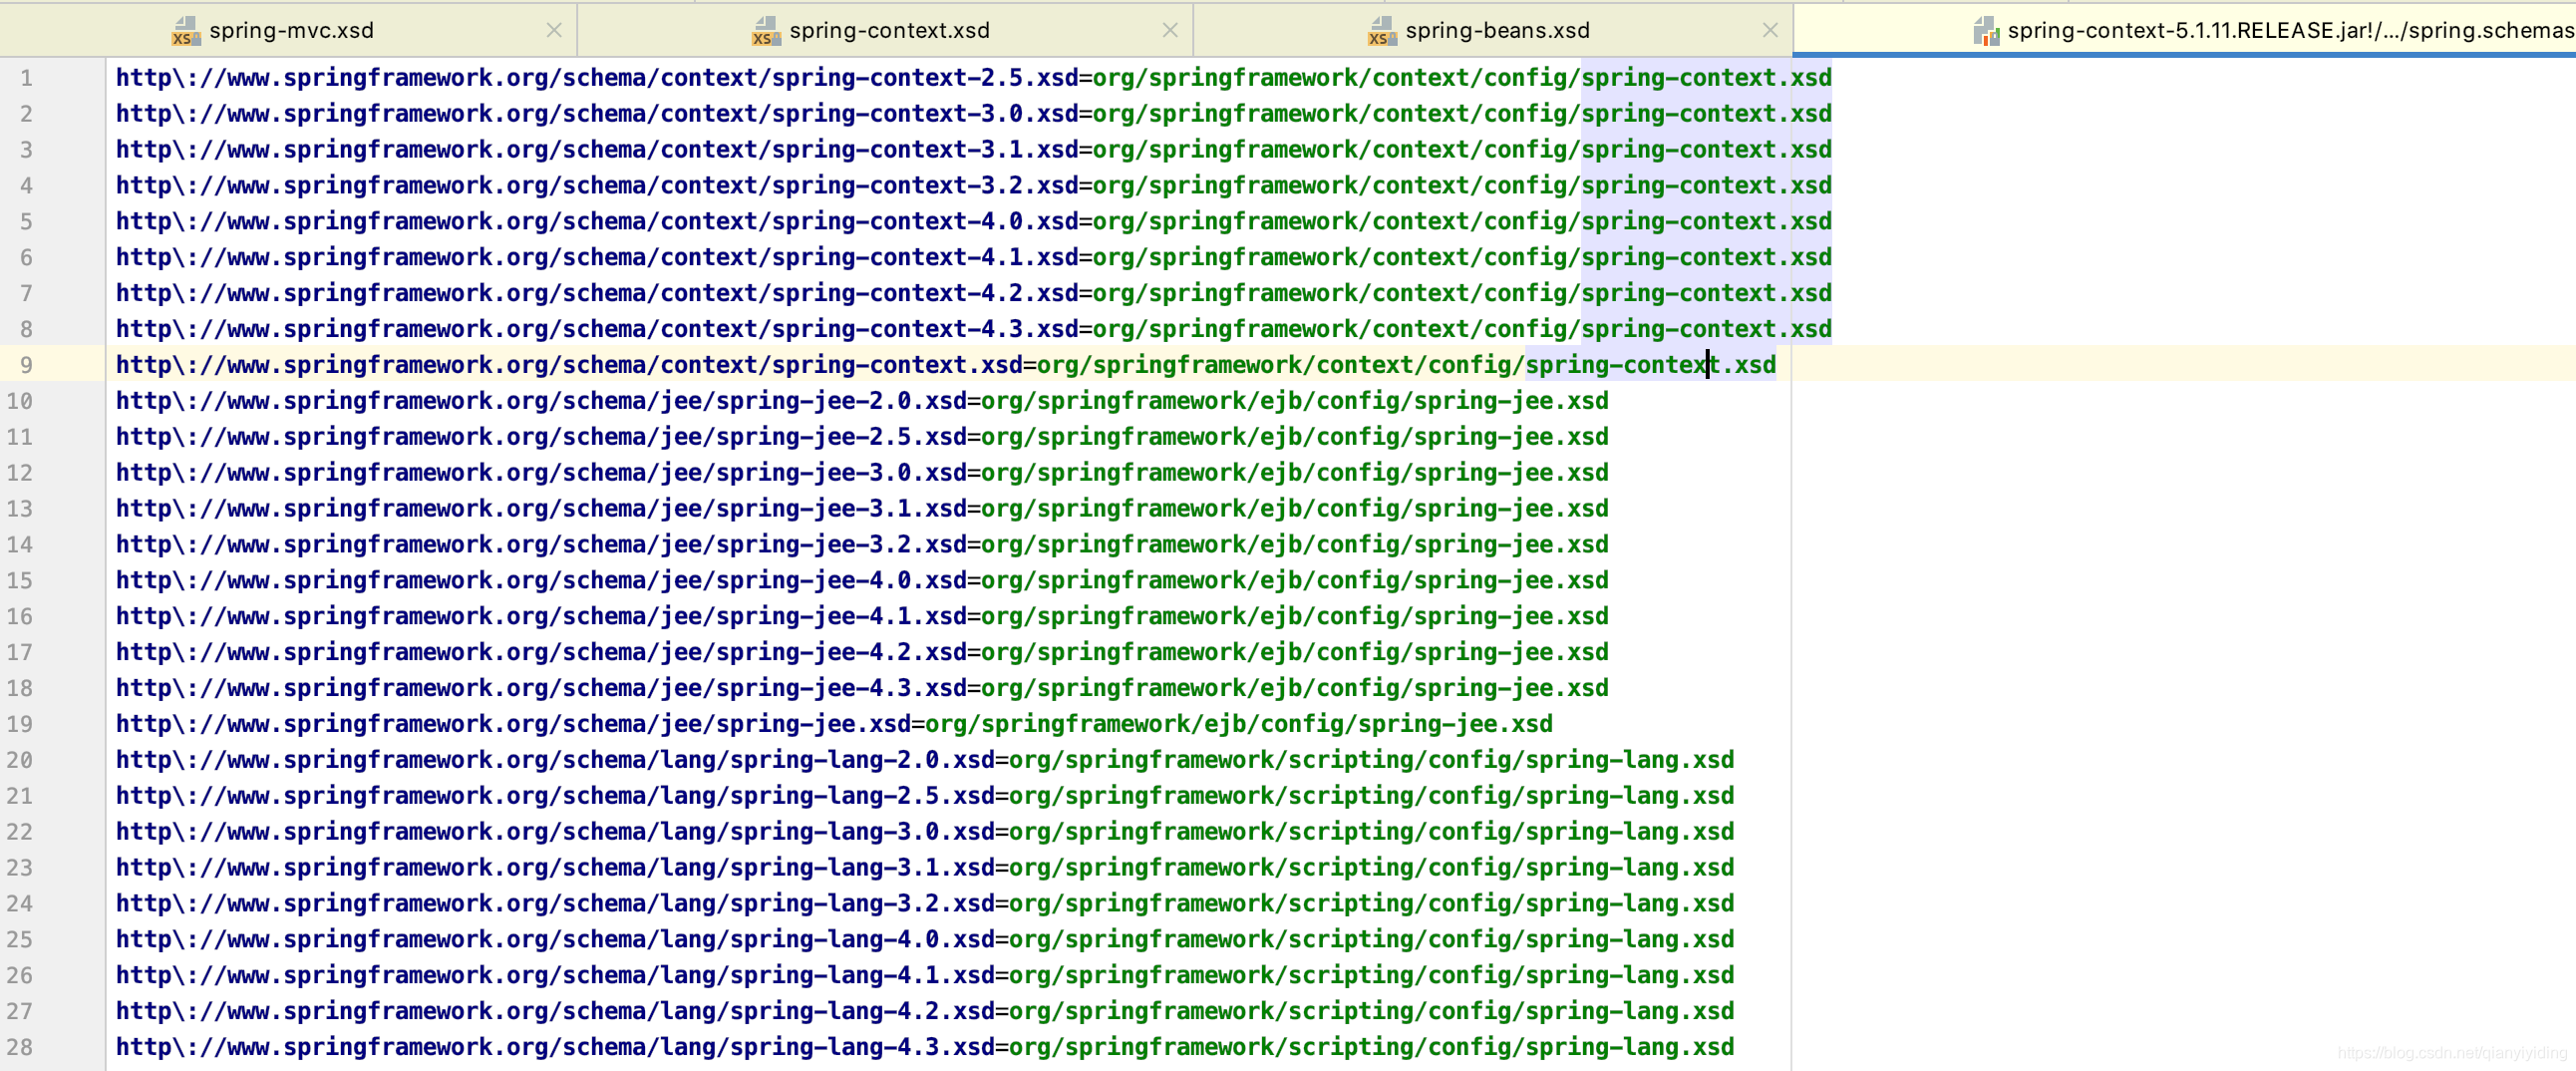
通过查看spring-context源代码可以看到代码中定义来大量的dtd和xsd文件。主要是用来约束我们的XML的规范,spring.handlers和spring.schemas文件主要是配置xml文件的位置和解析XML文件。
自定义标签的步骤
1.自定义一个xsd文件
这个xsd文件用来约束xml的标签,要让这个xsd文件生效,需要在项目的resource/META-INF配置2个文件.
2.定义spring.schemas
主要用一个url来映射第一步配置好的文件,告诉spring自定好的xsd的位置.
3.定义spring.handles
这个配置文件用来配置解析自定义标签的类
4.创建schema的解析类
定义解析类,需要继承NamespaceHandlerSupport。告诉Spring我们的schma处理器。可以解析标签
5.注册每个标签的解析类
标签对应的解析类,需要实现BeanDefinitionParser接口或者继承AbstractSingleBeanDefinitionParser
依照上面的步骤自定义标签以实现bean注册
<?xml version="1.0" encoding="UTF-8"?>
<xsd:schema xmlns:xsd="http://www.w3.org/2001/XMLSchema"
            xmlns="http://www.qianyi.com/schema/company" targetNamespace="http://www.qianyi.com/schema/company"
            elementFormDefault="qualified">
    <xsd:element name="company">
        <xsd:complexType>
            <xsd:attribute name="id" type="xsd:string" />
            <xsd:attribute name="name" type="xsd:string" />
            <xsd:attribute name="address" type="xsd:string" />
        </xsd:complexType>
    </xsd:element>
</xsd:schema>
创建文件,实现BeanDefinitionParser接口,用来解析XSD文件中的定义和组件定义
package person.me.parser;

import org.springframework.beans.factory.support.BeanDefinitionBuilder;
import org.springframework.beans.factory.xml.AbstractSingleBeanDefinitionParser;
import org.springframework.util.StringUtils;
import org.w3c.dom.Element;
import person.me.model.Company;

public class CompanyBeanDefinitionParser extends AbstractSingleBeanDefinitionParser {
    @Override
    protected Class getBeanClass(Element element) {
        return Company.class;
    }

    @Override
    protected void doParse(Element element, BeanDefinitionBuilder builder) {
        String id= element.getAttribute("id");
        String name= element.getAttribute("name");
        String address= element.getAttribute("address");
        if(StringUtils.hasText(id)){
            builder.addPropertyValue("id", id);
        }
        if(StringUtils.hasText(name)){
            builder.addPropertyValue("name", name);
        }
        if(StringUtils.hasText(name)){
            builder.addPropertyValue("address", name);
        }
    }
}
创建Handler文件,扩展自NamespaceHandlerSupport,将组件注册到Spring容器中。
package person.me.handle;

import org.springframework.beans.factory.xml.NamespaceHandlerSupport;
import person.me.parser.CompanyBeanDefinitionParser;
import person.me.parser.UserBeanDefinitionParser;

public class MyUserNamespaceHandler extends NamespaceHandlerSupport{

    @Override
    public void init() {
        registerBeanDefinitionParser("user",new UserBeanDefinitionParser());
        registerBeanDefinitionParser("company",new CompanyBeanDefinitionParser());
    }
}
定义解析文件
spring.handlers文件:
http\://www.qianyi.com/schema/user=person.me.handle.MyUserNamespaceHandler
http\://www.qianyi.com/schema/company=person.me.handle.MyUserNamespaceHandler
spring.schemas文件:
http\://www.qianyi.com/schema/user.xsd=META-INF/spring-user.xsd
http\://www.qianyi.com/schema/company.xsd=META-INF/spring-company.xsd
测试的配置文件
<?xml version="1.0" encoding="UTF-8"?>
<beans xmlns="http://www.springframework.org/schema/beans" xmlns:xsi="http://www.w3.org/2001/XMLSchema-instance"
       xmlns:user="http://www.qianyi.com/schema/user"
       xmlns:compay="http://www.qianyi.com/schema/company"
       xsi:schemaLocation="
        http://www.springframework.org/schema/beans http://www.springframework.org/schema/beans/spring-beans.xsd
        http://www.qianyi.com/schema/user http://www.qianyi.com/schema/user.xsd
        http://www.qianyi.com/schema/company http://www.qianyi.com/schema/company.xsd">

    <user:user id="id" name="qianyi"/>
    <compay:company id="company" name="公司名称" address="测试地址"/>
</beans>
测试类:
package person.me;

import org.junit.Test;
import org.springframework.context.ApplicationContext;
import org.springframework.context.support.ClassPathXmlApplicationContext;
import person.me.model.Company;
import person.me.model.User;

public class TagTest {

    @Test
    public void test(){
        ApplicationContext beans=new ClassPathXmlApplicationContext("classpath:application-customtag.xml");
        User user=(User)beans.getBean("id");
        System.out.println(user);

        Company company=(Company)beans.getBean("company");
        System.out.println(company.getAddress());
    }
}
测试结果
User{id='id', name='qianyi'}
公司名称
具体代码查看:
https://github.com/cqqianyi/spring-source-study/tree/main/spring-customer-tags


 623
623

 被折叠的 条评论
为什么被折叠?
被折叠的 条评论
为什么被折叠?
 到【灌水乐园】发言


