前言
本文尝试将opencv通过VideoCapture采集的实时图像数据作为opengl的纹理贴图。特地对Texture类进行了扩充。
使用cv::Mat作为纹理数据输入,来替代使用stbi_load从文件进行加载图像。本来想使用stbi_load_from_memory,但貌似不需要,直接使用Mat.data即可得到uchar*的数据作为glTexImage2D函数的最后一个参数。
创建纹理对象
code
Texture::Texture(cv::Mat &img, unsigned int unit)
{
  mUint = unit;

  // 生成纹理并且激活单元绑定
  glGenTextures(1, &mTexture);
  glActiveTexture(GL_TEXTURE0 + mUint);
  glBindTexture(GL_TEXTURE_2D, mTexture);

  glTexParameteri(GL_TEXTURE_2D, GL_TEXTURE_WRAP_S, GL_REPEAT);
  glTexParameteri(GL_TEXTURE_2D, GL_TEXTURE_WRAP_T, GL_REPEAT);
  // 需要的像素小于图片像素
  glTexParameteri(GL_TEXTURE_2D, GL_TEXTURE_MIN_FILTER, GL_LINEAR);
  // 需要的像素大于图片像素
  glTexParameteri(GL_TEXTURE_2D, GL_TEXTURE_MAG_FILTER, GL_LINEAR);

  if (img.data)
  {
    mWidth = img.cols;
    mHeight = img.rows;

    // 传输纹理数据
    glTexImage2D(GL_TEXTURE_2D, 0, GL_RGB, mWidth, mHeight, 0, GL_RGB, GL_UNSIGNED_BYTE, img.data);
    glGenerateMipmap(GL_TEXTURE_2D);
  }
  else
  {
    std::cout << "Failed to load texture" << std::endl;
  }
}
实验过程中发现,图像是反的,我们在使用stb_img的时候,会调用进行翻转。
stbi_set_flip_vertically_on_load(true);同样,在使用opencv得到图像时,对其也进行下反转即可,我们使用了以下
// 图像反转
cv::Mat dst;
cv::flip(img, dst, -1);
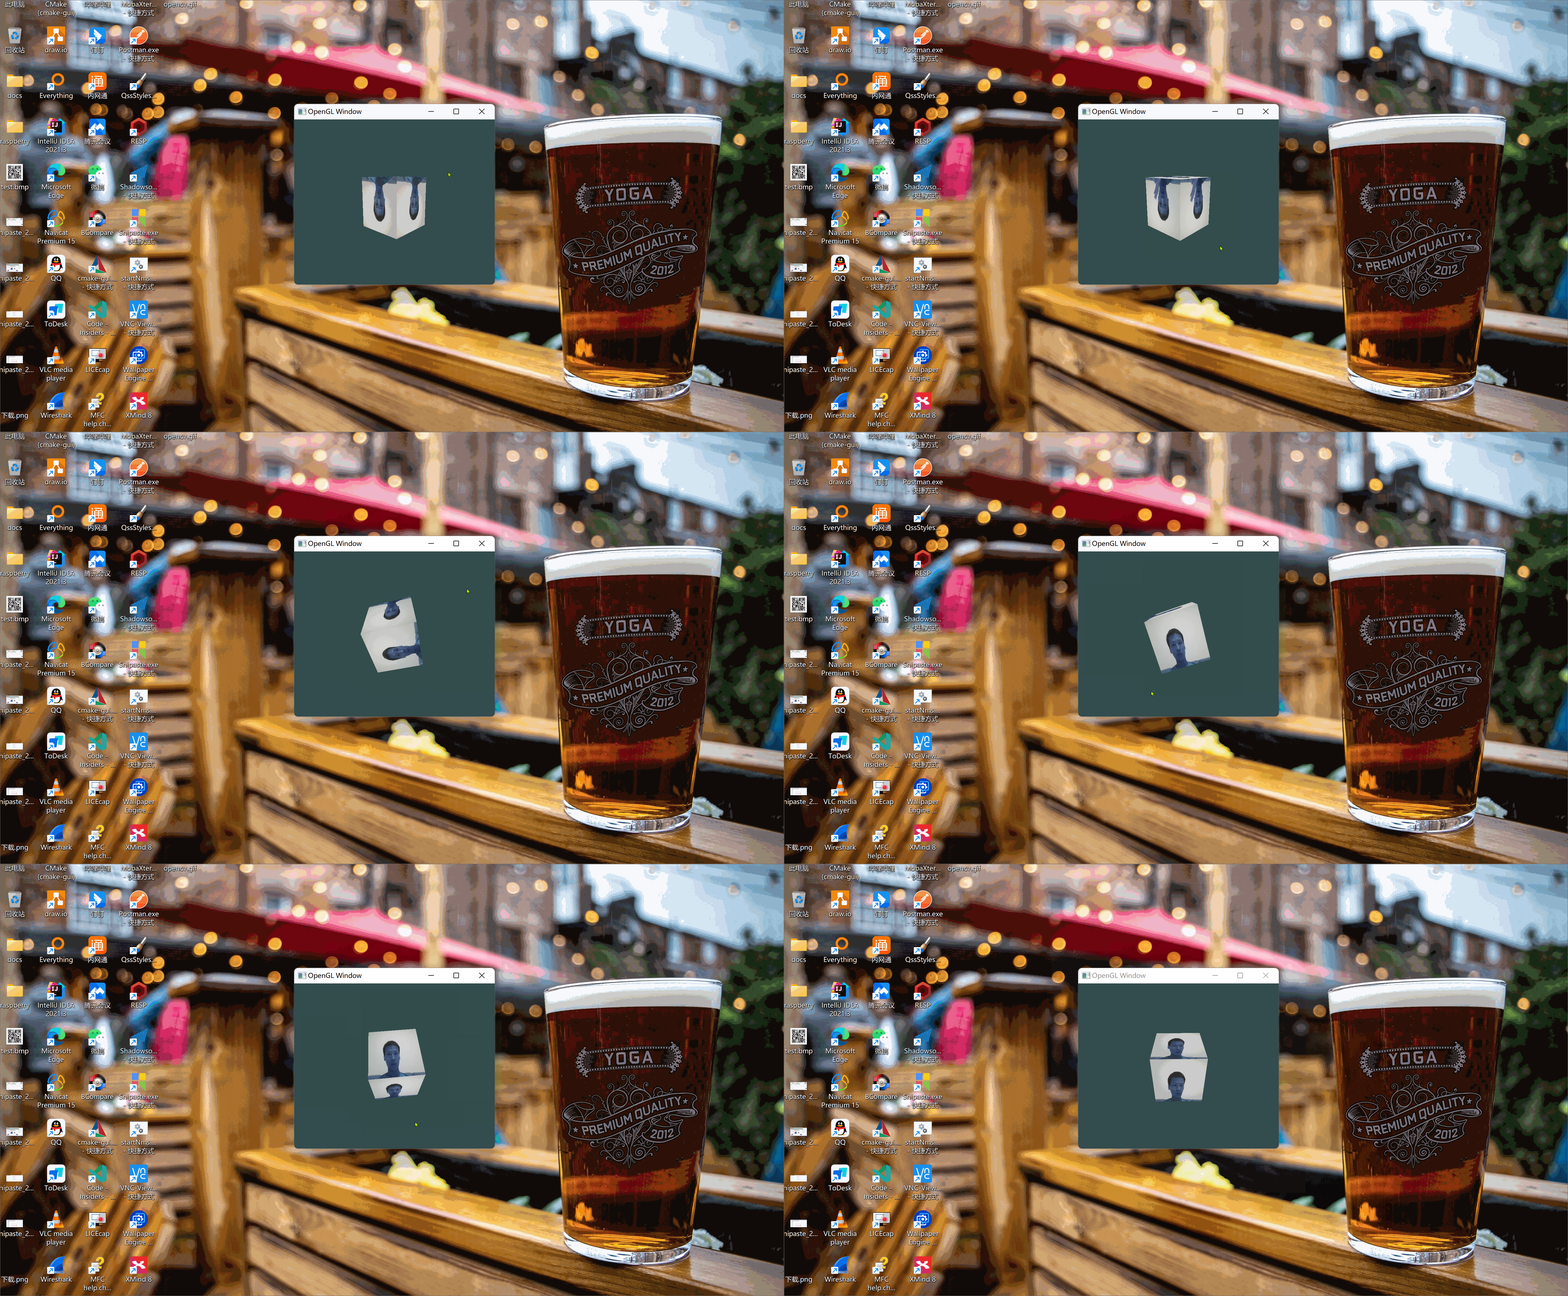
其余就是绘制box的基本流程,即创建vao、vbo等,这些属于基本操作,不在本文的讨论范畴,直接看效果。

到此为止,图像颜色还存在点问题,我穿的黄色衣服,怎么变成蓝色了?
glTexImage2D(GL_TEXTURE_2D, 0, GL_RGB, mWidth, mHeight, 0, GL_RGB, GL_UNSIGNED_BYTE, img.data);具体分析后找到问题原因:opencv视频采集到的颜色默认为BGR,所以我们在函数glTexImage2D中第七个参数是存在问题的,其表示原始数据的格式。 需要将其改为GL_BGR,修改后验证图像为真实颜色了。
部分代码
loop
int main()
{

  if (!app->init(800, 600))
  {
    return -1;
  }

  if (!capture.isOpened())
  {
      printf("[%s][%d]could not load video data...\n", __FUNCTION__, __LINE__);
      return -1;
  }

  // 设置窗口回调
  app->setCallbacks(OnResze, OnKey, OnMouse, OnCursor, OnScroll);

  /* 设置opengl视口以及清理颜色 */
  GL_CALL(glViewport(0, 0, 800, 600));
  GL_CALL(glClearColor(0.2f, 0.3f, 0.3f, 1.0f));

  prepareShader();
  prepareVAO();
  prepareCamera();
  prepareState();

  // 3 执行窗体循环
  while (capture.read(m_backgroundImage) && app->update())
  {
    cameraControl->update();
    render();
  }

  shader->end();

  // 4 退出程序前清理
  app->destroy();
  freePointers();
  return 0;
}
textture.cpp
Texture::Texture(cv::Mat &img, unsigned int unit)
{
  mUint = unit;

  // 生成纹理并且激活单元绑定
  glGenTextures(1, &mTexture);
  glActiveTexture(GL_TEXTURE0 + mUint);
  glBindTexture(GL_TEXTURE_2D, mTexture);

  glTexParameteri(GL_TEXTURE_2D, GL_TEXTURE_WRAP_S, GL_REPEAT);
  glTexParameteri(GL_TEXTURE_2D, GL_TEXTURE_WRAP_T, GL_REPEAT);
  // 需要的像素小于图片像素
  glTexParameteri(GL_TEXTURE_2D, GL_TEXTURE_MIN_FILTER, GL_LINEAR);
  // 需要的像素大于图片像素
  glTexParameteri(GL_TEXTURE_2D, GL_TEXTURE_MAG_FILTER, GL_LINEAR);

  if (img.data)
  {
    mWidth = img.cols;
    mHeight = img.rows;

    // 图像反转
    cv::Mat dst;
    cv::flip(img, dst, -1);

    // 传输纹理数据
    glTexImage2D(GL_TEXTURE_2D, 0, GL_RGB, mWidth, mHeight, 0, GL_RGB, GL_UNSIGNED_BYTE, dst.data);
    glGenerateMipmap(GL_TEXTURE_2D);
  }
  else
  {
    std::cout << "Failed to load texture" << std::endl;
  }
}
最终效果

以上就是使用opencv实时采集的图像作为opengl纹理贴图的数据的全过程,尝试贴图到球体上应该更酷了!


 被折叠的 条评论
为什么被折叠?


