 Android Studio 配置与优化


 本文介绍如何配置Android Studio的启动参数、调整内存分配、禁用不必要的插件及设置Gradle版本等优化措施,以提升开发效率。
在安装完首次运行之前
AS安装目录/bin/idea.properties
最后添加 为了防止启动是在从新安装新版本的sdk
disable.android.first.run=true


修改.AndroidStudio3.1文件夹
找到安装AndroidStudio的目录,bin/idea.properties,打开这个文件:


idea.config.path=${idea.home.path}/.AndroidStudio3.1/config
idea.system.path=${idea.home.path}/.AndroidStudio3.1/system

注意 AndroidStudio3.1 为你安装的版本
修改.gradle文件夹路径
file ===> settings ===> Build,Execution,Deployment ===> Gradle ===> Global Gradle settings,修改文件夹为自己要设置的文件夹:
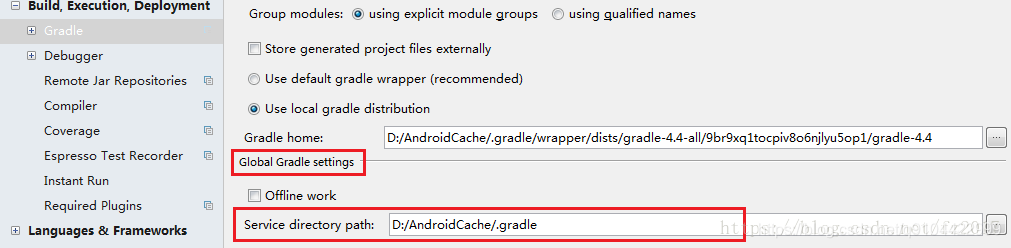
这种配置是全局配置gradle的位置
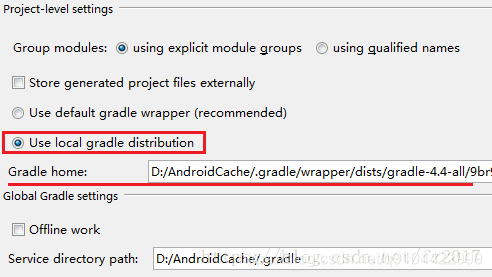
对某一个工程设置Gradle版本
如上图,还可以对每一个工程进行配置,当打开某一个工程时,可以针对那一个工程设置使用哪一个版本gradle编译:
经测试,这只是针对某一个工程,不会对每一个工程都生效


设置输入框背景
输入的颜色 值 为 202 234 206
当前行背景颜色


Mac 设置 左侧工程的背景颜色
点击右侧加号 选择all 然后添加你想要的颜色即可

鼠标悬浮提醒

解决 studio 运行编译慢的 办法
Android Studio每次升级/安装 Android Studio 之后最好都修改一下这个参数:到 Android Studio 安装目录,找到 bin/studio(64?).vmoptions(文件名可能因操作系统而不同,但大同小异),
然后把 -xmx 后面的数字改大一点,根据你的内存大小 来修改 比如 2048m 或4096m。
例如:修改android-studio/bin/studio.vmoptions studio64.vmoptions 两个文件的以下属性就可以了
-X
ms2048m
-Xmx2048m
-XX:MaxPermSize=2048m
-XX:ReservedCodeCacheSize=1024m
2,设置里面Settings->Plugins 关掉一下: CVS Integration, GitIntegration, GitHub, Google Cloud Tools for Android Studio, andSubversion Integration;
在 工程中的 gradle.properties 文件中 修改成 Xmx4096m
org.gradle.daemon=true
org.gradle.jvmargs=-Xmx4096m -XX:MaxPermSize=512m -XX:+HeapDumpOnOutOfMemoryError -Dfile.encoding=UTF-8
org.gradle.parallel=true
org.gradle.configureondemand=true
防止有些手机无法运行的 问题
错误提示
Installation failed with message Failed to finalize session : INSTALL_FAILED_INTERNAL_ERROR. It is possible that this issue is resolved by uninstalling an existing version of the apk if it is present, and then re-installing. WARNING: Uninstalling will remove the application data! Do you want to uninstall the existing application?
Android studio 报错 installation failed with message failed to finalize session:INSTALL_FAILED_INVALID_APK 解决方法
解决方案:
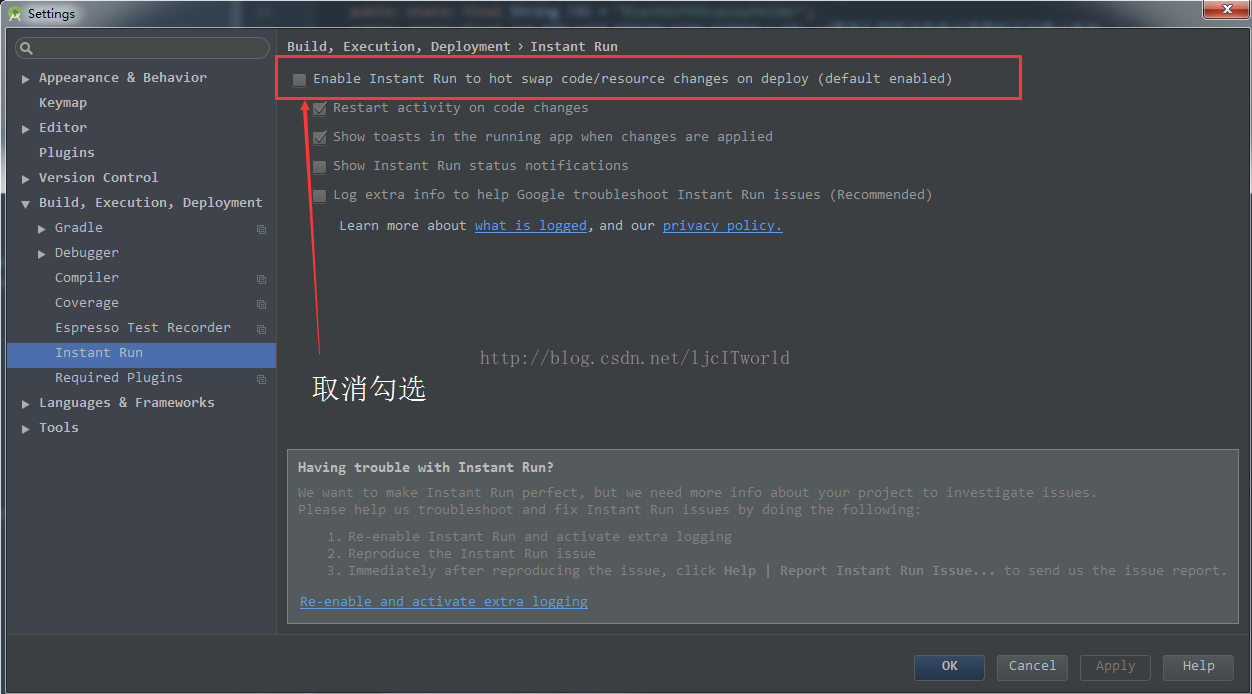
File->Setting->Build->Instant Run


 被折叠的 条评论
为什么被折叠?
被折叠的 条评论
为什么被折叠?
 到【灌水乐园】发言


