


WebGIS-Editor
介绍
GIS 图层管理器是地理信息软件一个重要的组成部分,是渲染地理数据的基础功能。每个项目的图层管理可能功能名称不同,但是核心功能都是一样的,是对地图中的数据图层进行显示、隐藏、删除、编辑等,有的项目还会根据图层的类型,进行相应的分组。
访问地址:http://www.crlkcloud.com/umv-dev/
图层管理
在 WebGIS-Editor 中,图层管理用于展示当前地图的显示的所有场景,并且可以对数据进行编辑。
- 图层显示和隐藏
- 添加和移除图层
- 图层编辑
- 图层定位
代码实现
界面
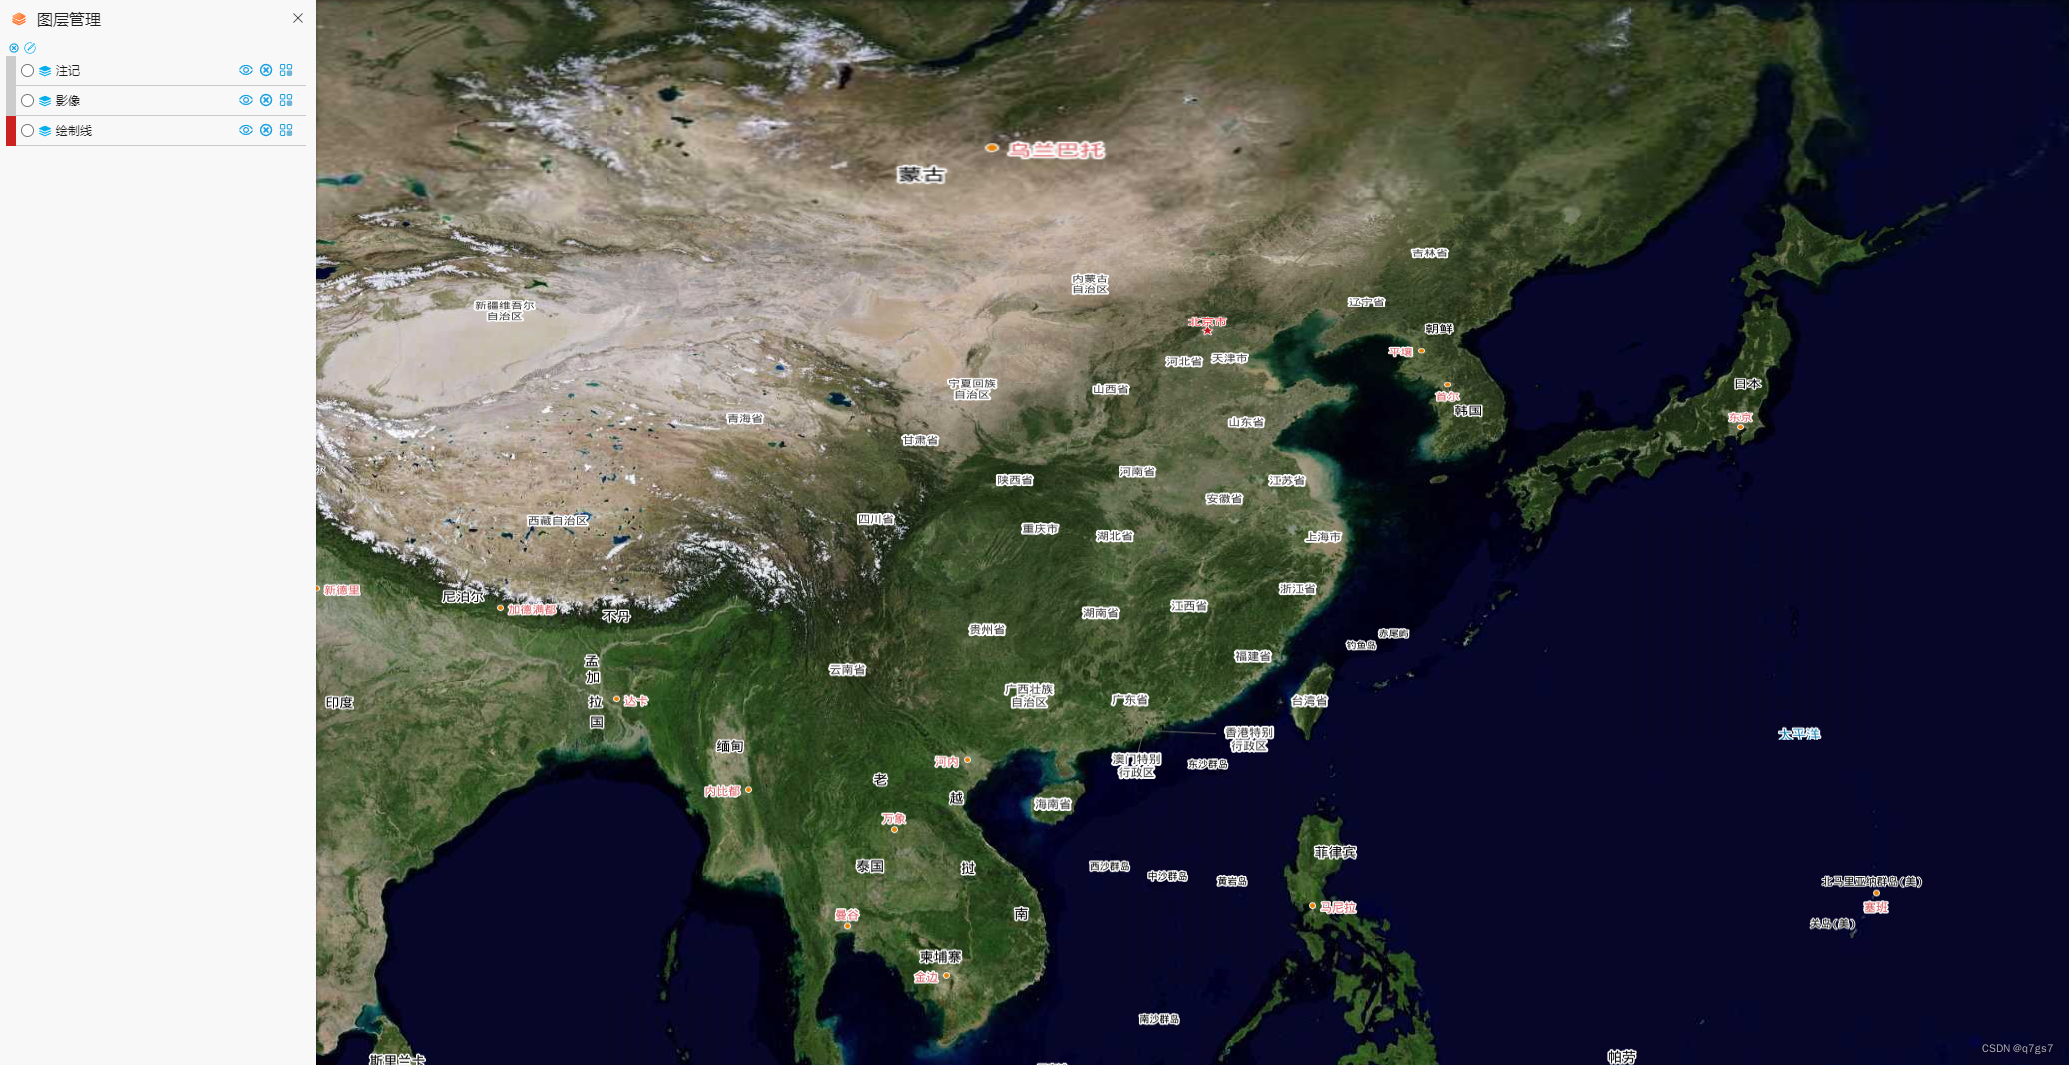
可以通过拖拽修改图层的层级
代码编写
添加图层
首先需要定义data 参数,包含服务地址、服务参数等信息,mapId参数为了区分图层,可以通过mapid 获取图层后,对图层进行操作
1、天地图
const param = JSON.parse(data.mapParam)
const imageURL = `${data.mapUrl}?SERVICE=${param.SERVICE}&REQUEST=${param.REQUEST}&VERSION=${param.VERSION}&LAYER=${param.LAYER}&STYLE=${param.STYLE}&TILEMATRIXSET=${param.TILEMATRIXSET}&FORMAT=${param.FORMAT}&TILEMATRIX={z}&TILEROW={y}&TILECOL={x}&tk=${param.tk}`
const urls = []
for (let index = 0; index < 8; index++) {
    // subdomains: ['t0', 't1', 't2', 't3', 't4', 't5', 't6', 't7'],
    urls.push(imageURL.replace('{s}', 't' + index))
}
const layer2 = new this._ol.layer.Tile({
    source: new this._ol.source.XYZ({
        urls: urls,
        attributions: 'ccgis TilesXYZ'
    })
})
layer2.id = data.mapId
2、WMS
const param = JSON.parse(data.mapParam)
layer2 = new this._ol.layer.Image({
    source: new this._ol.source.ImageWMS({
        ratio: 1,
        url: data.mapUrl,
        params: {
            layers: param.layers, // 需要加载的图层
            format: param.format, // 返回的数据格式
            transparent: param.transparent,
            opacity: param.opacity,
            exceptions: 'application/vnd.ogc.se_inimage'
            // crs: this._ol.CRS.EPSG4326
        }
    })
})
layer2.id = data.mapId
3、xyz 瓦片
const param = JSON.parse(data.mapParam)
const layer2 = new this._ol.layer.Tile({
    source: new this._ol.source.XYZ({
        url: data.mapUrl,
        minZoom: Number(param.minZoom),
        maxZoom: Number(param.maxZoom),
        attributions: param.attribution
    })
})
layer2.id = data.mapId
4、矢量数据
// 添加面数据
const polygon = new ol.geom.Polygon([[[-20, 20], [-20, -20], [20, -20], [20, 20], [-20, 20]]]);
const polygonSource = new ol.source.Vector({
    features: [new ol.Feature(polygon)],
    wrapX: false
});
const vectorLayer = new ol.layer.Vector({
    source: polygonSource,
    style: new ol.style.Style({
        stroke: new ol.style.Stroke({
            color: 'red',
            width: 3
        }),
        fill: new ol.style.Fill({
            color: 'rgba(0, 0, 255, 0.1)'
        })
    })
});

const layer2 = new this._ol.layer.Group();
layer2.getLayers().push(vectorLayer)
layer2.id = data.mapId
图层控制
图层存储在 toolLayers 图层组中,要对图层进行操作,首先需要在图层组中找到要操作的图层
1、显示/隐藏
const toolLayers = this._toolLayers
const layer2 = this.findLayer(data, toolLayers)
if (!layer2) return
if (param) {
    layer2.setVisible(param.visible)
}
2、修改层级
 const toolLayers = this._toolLayers
 const layer2 = this.findLayer(data, toolLayers)
 if (!layer2) return
 if (param) {
 	layer2.setZIndex(param.zIndex)
 }
3、删除图层
const toolLayers = this._toolLayers
const la = this.findLayer(data, toolLayers)
if (la) {
   toolLayers.getLayers().remove(la)
}


 1424
1424

 被折叠的 条评论
为什么被折叠?
被折叠的 条评论
为什么被折叠?
 到【灌水乐园】发言


