


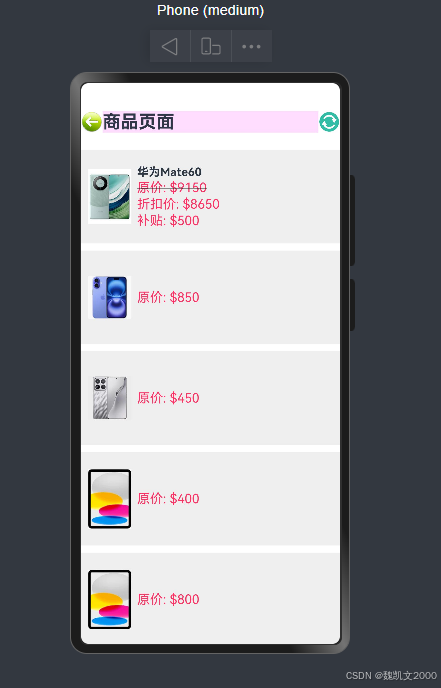
今天我想和大家聊一聊鸿蒙的ArkUI组件,在此之前我先展示一下这段代码的UI预览效果:
首先,我们先完成标题部分,也就是商品页面的这个Row,Row你可以理解为前端web的div,把页面分割成不同的部分, 我们可以创建一个新的文件命名为CommonComponents.ets:
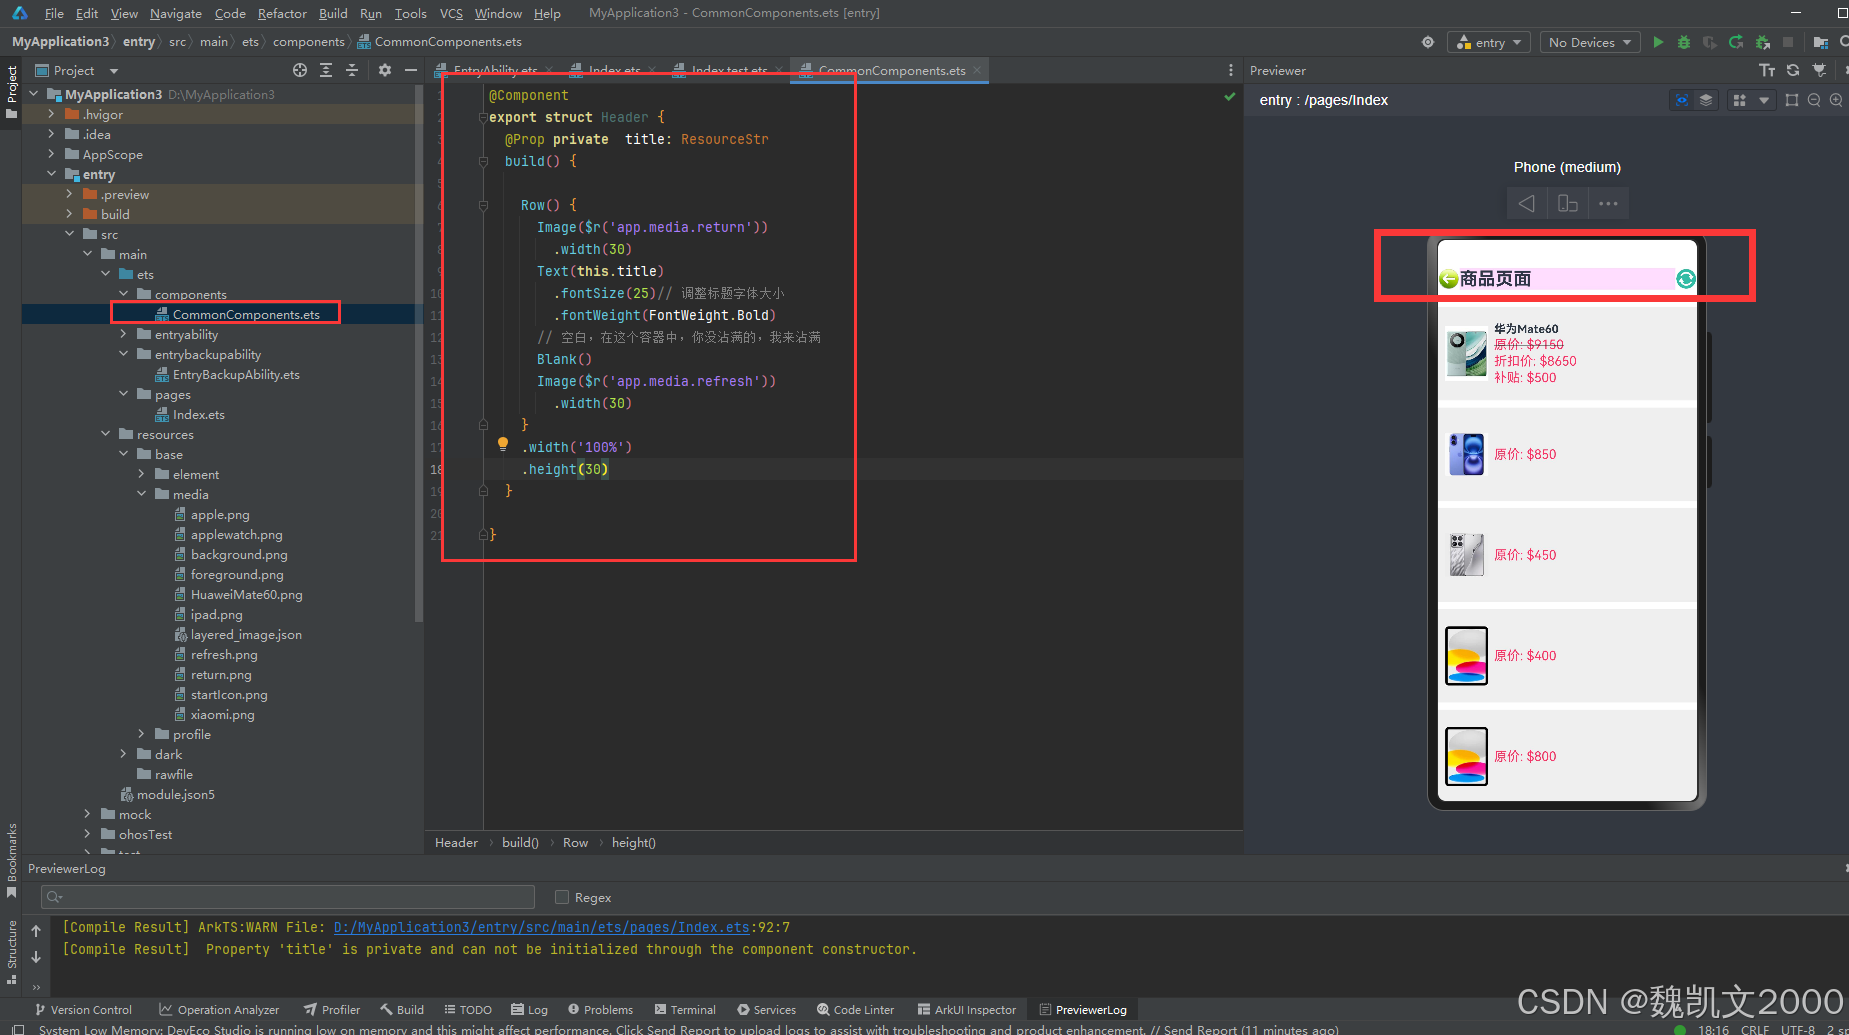
@Component
export struct Header {
  @Prop private  title: ResourceStr
  build() {

    Row() {
      Image($r('app.media.return'))
        .width(30)
      Text(this.title)
        .fontSize(25)// 调整标题字体大小
        .fontWeight(FontWeight.Bold)
      // 空白,在这个容器中,你没沾满的,我来沾满
      Blank()
      Image($r('app.media.refresh'))
        .width(30)
    }
    .width('100%')
    .height(30)
  }

}
@Prop 表示这是一个从父组件传递的属性。 目的是设置 title属性, 然后传到主的组件中去。设置第一个Row,里面添加各种属性,用 Blank( ) 把这两个![]() 和
和 ![]() 分离开, Blank() : 表示空白,在这个容器中,你没沾满的,我来沾满。 OK这些结束后,我们开始写主程序代码,只需要用import导入就好。
分离开, Blank() : 表示空白,在这个容器中,你没沾满的,我来沾满。 OK这些结束后,我们开始写主程序代码,只需要用import导入就好。
// 这个必须位于文件顶部
import {Header} from '../components/CommonComponents'
接着我们去创建组件Item的各种属性,比如名字,图片,价格,折扣这些属性。 代码部分这样写:
class Item {
  name: string
  image: ResourceStr
  price: number
  discount: number

  constructor(name: string, image: ResourceStr, price: number, discount: number) {
    this.name = name
    this.image = image
    this.price = price
    this.discount = discount
  }
}
再然后我们可以设置全局自定义构建函数, 这个位置很重要。 需要写在该函数的外面,不能写在它的里面,因为是全局变量。 !!!注意 !!! 这些全局变量都有关键字function, 但是我们后面讲到的局部变量是不可以写function的,否则会报错。
@Entry
@Component
struct ItemPage{
   ......
}
代码部分:
//   全局自定义构建函数   这个位置很重要。
 @Builder
 function ItemCard(item: Item){

   Row({ space: 8}) { // 减小 Row 内部组件的间距
     Image(item.image)
       .width(60) // 缩小图片宽度
     Column({ space: 2 }) { // 减小文字行间距
       Text(item.name)
         .fontSize(16) // 缩小文字字体大小
         .fontWeight(FontWeight.Bold)
       Text('原价: $' + item.price)
         .fontColor('#F36')
         .fontSize(14)
         .decoration({type:TextDecorationType.LineThrough})
       Text('折扣价: $'+(item.price - item.discount))
         .fontColor('#F36')
         .fontSize(14)
       Text('补贴: $'+item.discount)
         .fontColor('#F36')
         .fontSize(14)
     }
     .alignItems(HorizontalAlign.Start)
   }
   .width('100%')
   .height(130) // 减小 Row 的高度
   .backgroundColor('#EFEFEF')
   .padding(10) // 减少内边距

}


// 全局公共样式函数
 @Styles function fillScreen(){
   .width('100%')
   .height(130) // 减小 Row 的高度
   .backgroundColor('#EFEFEF')
   .padding(10) // 减少内边距
 }
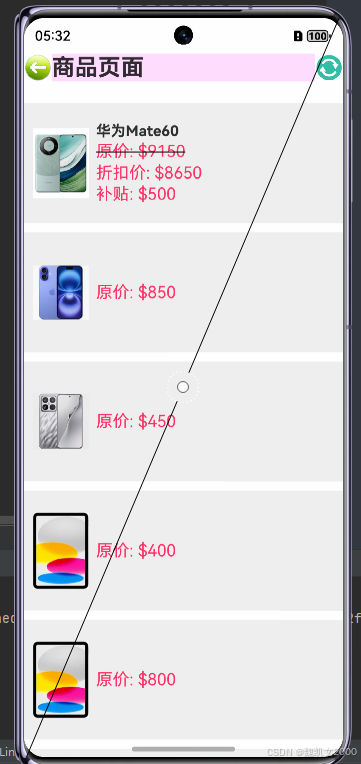
OK, 如果你还没理解全局变量没有关系,我们先理解后面的局部变量,以及For-each循环去遍历这几个Row的块。 我们可以从运行结果这张图看出,每一件商品都是一个块, 是一个Row,直接遍历打印!
 // 局部自定义构建函数, @Builder 后面不需要 + function, 只有全局需要
  @Builder
  ItemCard(item: Item){

  Row({ space: 8}) { // 减小 Row 内部组件的间距
    Image(item.image)
      .width(60) // 缩小图片宽度
    Column({ space: 2 }) { // 减小文字行间距
      if (item.discount){
      Text(item.name)
        .fontSize(16) // 缩小文字字体大小
        .fontWeight(FontWeight.Bold)
      Text('原价: $' + item.price)
        // .fontColor('#F36')
        // .fontSize(14)
        .priceText()
        .decoration({type:TextDecorationType.LineThrough})
      Text('折扣价: $'+(item.price - item.discount))
        // .fontColor('#F36')
        // .fontSize(14)
        .priceText()
      Text('补贴: $'+item.discount)
        // .fontColor('#F36')
        // .fontSize(14)
        .priceText()}
       else {
         Text('原价: $' + item.price)
           // .fontColor('#F36')
           // .fontSize(14)
           .priceText()
       }
    }
    .alignItems(HorizontalAlign.Start)
  }


    .fillScreen()

}

}
@Builder 是一个注解,用于标记 ItemCard 是一个构建函数(可能属于特定框架的声明式 UI 构建方法)
这是我的运行结果截图,在我的虚拟机上:
这是完整的代码:
// 这个必须位于文件顶部
import {Header} from '../components/CommonComponents'

class Item {
  name: string
  image: ResourceStr
  price: number
  discount: number

  constructor(name: string, image: ResourceStr, price: number, discount: number) {
    this.name = name
    this.image = image
    this.price = price
    this.discount = discount
  }
}

// //    全局自定义构建函数   这个位置很重要。
// @Builder
// function ItemCard(item: Item){
//
//   Row({ space: 8}) { // 减小 Row 内部组件的间距
//     Image(item.image)
//       .width(60) // 缩小图片宽度
//     Column({ space: 2 }) { // 减小文字行间距
//       Text(item.name)
//         .fontSize(16) // 缩小文字字体大小
//         .fontWeight(FontWeight.Bold)
//       Text('原价: $' + item.price)
//         .fontColor('#F36')
//         .fontSize(14)
//         .decoration({type:TextDecorationType.LineThrough})
//       Text('折扣价: $'+(item.price - item.discount))
//         .fontColor('#F36')
//         .fontSize(14)
//       Text('补贴: $'+item.discount)
//         .fontColor('#F36')
//         .fontSize(14)
//     }
//     .alignItems(HorizontalAlign.Start)
//   }
//   .width('100%')
//   .height(130) // 减小 Row 的高度
//   .backgroundColor('#EFEFEF')
//   .padding(10) // 减少内边距
//
// }


// 全局公共样式函数
// @Styles function fillScreen(){
//   .width('100%')
//   .height(130) // 减小 Row 的高度
//   .backgroundColor('#EFEFEF')
//   .padding(10) // 减少内边距
// }

//   @Extend 继承必须写在全局位置。  这里不能使用 @Styles 因为它里面没有字体的属性,也就是说没有 .fontColor关键字 所以要用@Extend去继承Text文本属性
@Extend(Text) function priceText(){
      .fontColor('#F36')
      .fontSize(18)
}


@Entry
@Component
struct ItemPage {

  private items: Array<Item> = [
    new Item('华为Mate60', $r("app.media.HuaweiMate60"), 9150, 500),
    new Item('苹果16', $r('app.media.apple'), 850, 0),
    new Item('小米15', $r('app.media.xiaomi'), 450, 0),
    new Item('ipad4', $r('app.media.ipad'), 400, 0),
    new Item('ipad5', $r('app.media.ipad'), 800, 0),
    new Item('ipad6', $r('app.media.ipad'), 900, 0)
  ]


  //  写在内部,删除 function     局部公共样式函数
  // 这是每个Row的属性, 也就是每个小方块的属性
  @Styles  fillScreen(){
  .width('100%')
  .height(130) // 控制 Row 的高度
  .backgroundColor('#EFEFEF')
  .padding(10) // 控制内边距
}


  build() {
    Column({ space: 4 }) {
      Header({title:'商品页面'})
        .margin({bottom:20})
        .backgroundColor("#FdF")


      // 这是一个滑块,让用户可以自由滑动手机屏幕
      List({ space: 10 }) { // 控制 List 的子项间距 ( 也就是每个小方块之间的距离 )
        // 使用for-each 遍历每个Row, 也就是每个小块
        ForEach(
          this.items,
          (item: Item) => {
            ListItem() {
              // 一定要加this, 因为调用的函数在内部, 是局部函数
              this.ItemCard(item)
            }
          }
        )
      }
    }

  }

  // 局部自定义构建函数, @Builder 后面不需要 + function, 只有全局需要
  // 设置每一个小块的属性, 然后让主函数来调用它
  @Builder
  ItemCard(item: Item){

  Row({ space: 8}) {
    Image(item.image)
      .width(60) // 图片宽度
    Column({ space: 2 }) {
      // 如果存在折扣价的话, 那就进行以下一系列操作
      if (item.discount){
      Text(item.name)
        .fontSize(16)
        .fontWeight(FontWeight.Bold)
      Text('原价: $' + item.price)
        // .fontColor('#F36')
        // .fontSize(14)
        .priceText()
        // 把原价部分用杠划掉。
        .decoration({type:TextDecorationType.LineThrough})
      Text('折扣价: $'+(item.price - item.discount))
        // .fontColor('#F36')
        // .fontSize(14)
        .priceText()
      Text('补贴: $'+item.discount)
        // .fontColor('#F36')
        // .fontSize(14)
        .priceText()}

      // 没有折扣价的话, 直接显示原价就好
       else {
         Text('原价: $' + item.price)
           // .fontColor('#F36')
           // .fontSize(14)
           .priceText()
       }
    }
    // .alignItems:指定容器中子元素的对齐方式。
    // HorizontalAlign.Start:表示子元素在水平方向上从容器的起始位置对齐(一般为左对齐,取决于布局的方向)。
    .alignItems(HorizontalAlign.Start)
  }


  // .width('100%')
  // .height(130)
  // .backgroundColor('#EFEFEF')
  // .padding(10)

  // 调用每个Row的属性, 也就是每个小方块的属性。  省去了上述已经备注了的代码
    .fillScreen()

}

}
以上是完整的代码, 我想了一下,还是在备注中详细解释比较好,因为前端很多属性假如我单个拿出来讲解不利于大家去理解。
另外我附加上这些商品图片,免得大家还得去网上找了。


 被折叠的 条评论
为什么被折叠?
被折叠的 条评论
为什么被折叠?
 到【灌水乐园】发言


