Ubuntu Compile and Install Linux Kernel

本文详细介绍从获取Linux内核源代码到定制配置、编译、安装全过程。涵盖下载源码、依赖安装、配置选择、编译技巧及模块与内核安装步骤。
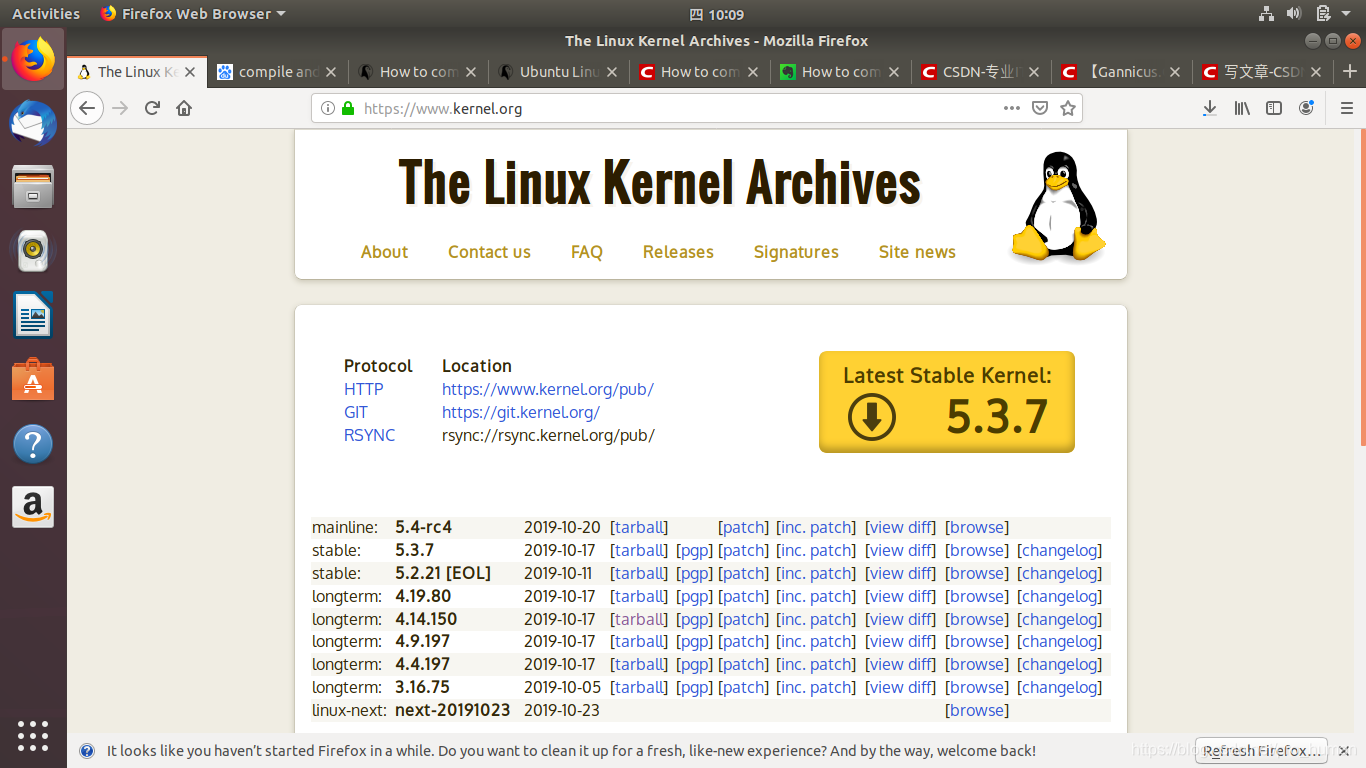
  1. Get Linux kernel source code from www.kernel.org

I choose linux-4.14.150.tar.gz to download the tarball
screen capture of www.kernel.org

  1. decompress the tarball
 tar -xvf linux-4.14.150.tar.xz
  1. Install build dependency tools
sudo apt-get install build-essential libncurses-dev bison flex libssl-dev libelf-dev
  1. Linux kernel default configuration
    Linux kernel default configuration is named as
    xxx_defconfig under arch/ folder,
cd  linux-4.14.150/arch
find -name *defconfig | grep x86 -i

you will see following search results

./x86/configs/x86_64_defconfig
./x86/configs/i386_defconfig
./um/configs/x86_64_defconfig

the x86_64_defconfig only contains the basic features, if to support multiple device drivers, it is better to use the current kernel configuration on ubuntu system

  1. Customize kernel configuration
cd  linux-4.14.150
cp /boot/config-4.8.0+ .config
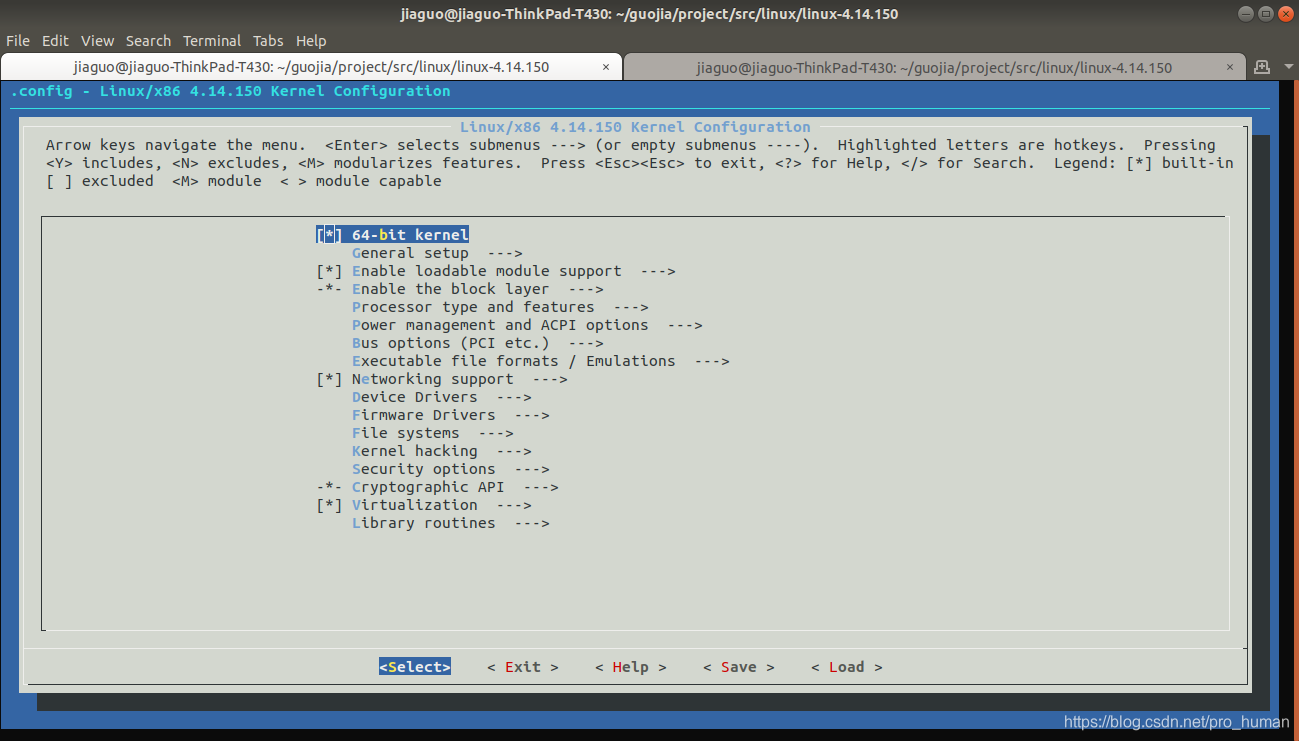
make menuconfig

using exist ubuntu 4.8.0 config, then make menuconfig to customize specific kernel configuration you want
screen cap for make menuconfig

  1. Compile Linux Kernel
cd  linux-4.14.150
make

or to speed up compiling use “make -j4”, here i use “make” to easy track the first scene if any bug happens during compiling
screen cap make started
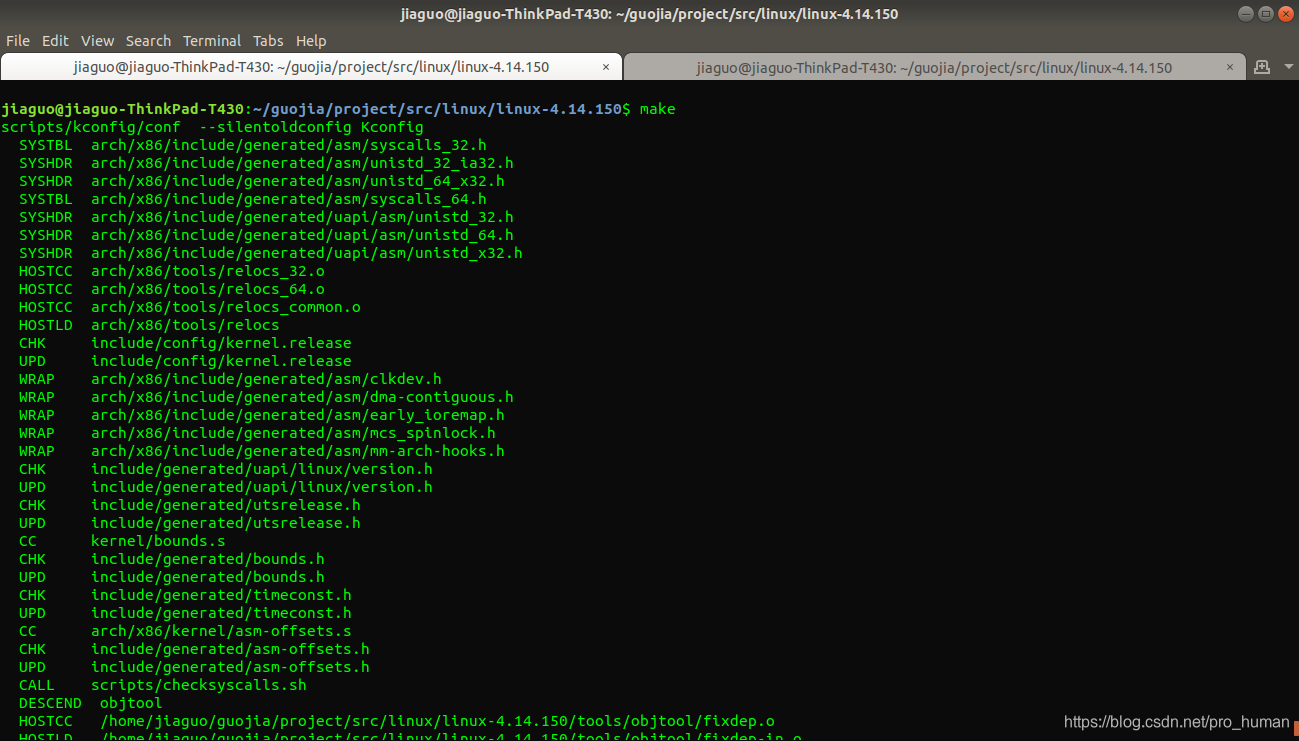
if finished compiling Linux kernel, following messages will be shown in your terminal

screen cap for finish kernel compilation

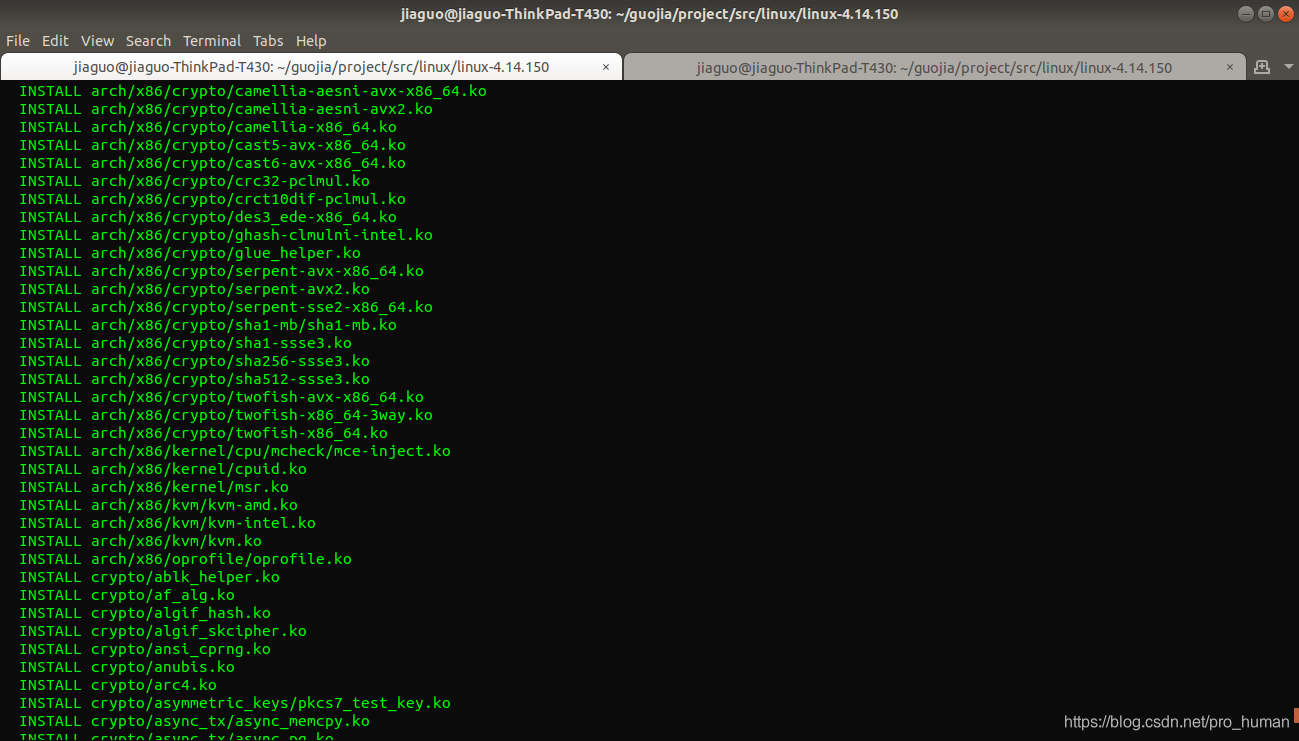
  1. Install Linux kernel modules
sudo make modules_install

在这里插入图片描述

  1. Install Linux kernel
sudo make install

you will see following messages shown in the terminal for boot menu entry generation

sh ./arch/x86/boot/install.sh 4.14.150 arch/x86/boot/bzImage \
	System.map "/boot"
run-parts: executing /etc/kernel/postinst.d/apt-auto-removal 4.14.150 /boot/vmlinuz-4.14.150
run-parts: executing /etc/kernel/postinst.d/initramfs-tools 4.14.150 /boot/vmlinuz-4.14.150
update-initramfs: Generating /boot/initrd.img-4.14.150
run-parts: executing /etc/kernel/postinst.d/unattended-upgrades 4.14.150 /boot/vmlinuz-4.14.150
run-parts: executing /etc/kernel/postinst.d/update-notifier 4.14.150 /boot/vmlinuz-4.14.150
run-parts: executing /etc/kernel/postinst.d/zz-update-grub 4.14.150 /boot/vmlinuz-4.14.150
Sourcing file `/etc/default/grub'
Generating grub configuration file ...
Found linux image: /boot/vmlinuz-5.0.0-27-generic
Found initrd image: /boot/initrd.img-5.0.0-27-generic
Found linux image: /boot/vmlinuz-5.0.0-23-generic
Found initrd image: /boot/initrd.img-5.0.0-23-generic
Found linux image: /boot/vmlinuz-4.14.150
Found initrd image: /boot/initrd.img-4.14.150
Found linux image: /boot/vmlinuz-4.8.0+
Found initrd image: /boot/initrd.img-4.8.0+
Adding boot menu entry for EFI firmware configuration
done
  1. reboot ubuntu and choose the boot entry for 4.14.150
<think> 我们被要求回答在Ubuntu 22.04上编译带有调试信息的内核的方法。参考引用中提到了编译内核的一般步骤,但需要特别关注如何开启调试信息。 通常,为了调试内核,我们需要在配置内核时启用调试选项,特别是内核符号和调试信息(如CONFIG_DEBUG_INFO)。在编译时,我们还需要确保编译器生成调试符号(例如,通过GCC的-g选项),但内核的Kconfig系统通常会处理这一点。 根据引用[3]的片段,我们看到在编译内核时有使用.config文件,并且通过合并配置文件(如android-13.config)来设置配置选项。我们可以手动编辑.config文件来确保调试选项被启用。 步骤: 1. 安装必要的编译工具和依赖 2. 获取内核源代码 3. 配置内核,确保启用CONFIG_DEBUG_INFO等调试选项 4. 编译内核 5. 安装内核 具体步骤: 1. 安装依赖: 在Ubuntu 22.04上,需要安装编译内核所需的包。命令如下: ```bash sudo apt update sudo apt install build-essential libncurses-dev bison flex libssl-dev libelf-dev ``` 2. 获取内核源代码: 可以从Ubuntu官方获取与当前系统版本对应的内核源代码,或者从kernel.org获取主线内核。这里以Ubuntu官方源为例: ```bash apt source linux-source ``` 或者,使用git获取特定版本的内核,例如: ```bash git clone git://git.launchpad.net/~ubuntu-kernel/ubuntu/+source/linux/+git/jammy ``` (注意:jammy是Ubuntu 22.04的代号) 3. 配置内核: 进入内核源码目录,然后复制当前系统的配置作为起点: ```bash cp /boot/config-$(uname -r) .config ``` 然后,运行`make menuconfig`(或`make oldconfig`、`make xconfig`等)来配置内核。在配置界面中,确保以下选项被启用: - CONFIG_DEBUG_INFO:在Kernel hacking -> Compile-time checks and compiler options -> Compile the kernel with debug info - 通常,我们也可以直接编辑.config文件,将`CONFIG_DEBUG_INFO`设置为`y`(即`CONFIG_DEBUG_INFO=y`)。 另外,为了更全面的调试,可能还需要启用其他调试选项,如: - CONFIG_DEBUG_INFO_DWARF4(或更高版本)以生成DWARF格式的调试信息(这对于使用gdb进行调试很有用) - CONFIG_GDB_SCRIPTS 以支持gdb脚本 如果使用编辑.config文件的方式,可以直接添加或修改以下行: ``` CONFIG_DEBUG_INFO=y CONFIG_DEBUG_INFO_DWARF4=y CONFIG_GDB_SCRIPTS=y ``` 然后运行`make oldconfig`(或`make olddefconfig`)来应用新的配置,并自动处理其他依赖选项。 4. 编译内核: 使用以下命令编译内核和模块: ```bash make -j$(nproc) bindeb-pkg # 生成Debian包,便于安装 或者 make -j$(nproc) # 编译内核 make -j$(nproc) modules # 编译模块 ``` 注意:使用`bindeb-pkg`目标会生成.deb安装包,这样安装起来更方便。 5. 安装内核: 如果使用`bindeb-pkg`,会在上层目录生成几个.deb文件,使用dpkg安装: ```bash sudo dpkg -i ../linux-image-*_*.deb sudo dpkg -i ../linux-headers-*_*.deb ``` 6. 重启系统: 安装完成后,重启系统并选择新内核启动。 验证: 启动后,检查内核配置: ```bash cat /boot/config-$(uname -r) | grep CONFIG_DEBUG_INFO ``` 应该会显示`CONFIG_DEBUG_INFO=y`。 此外,为了调试,我们可能还需要安装调试符号包(dbgsym),但上述编译过程生成的内核镜像已经包含调试信息。 注意:编译内核需要大量的时间和磁盘空间,确保有足够的资源。 引用[1]提到编译内核后需要重启,引用[2]提到了使用QEMU启动编译好的内核以及使用gdb调试,引用[3]展示了一个编译内核的日志片段,其中包含了配置选项的覆盖(如CONFIG_DEVMEM)。 因此,我们的重点在于配置步骤中打开调试选项。 相关问题: 1. 在Ubuntu 22.04上编译内核时遇到依赖问题怎么办? 2. 如何调整内核配置以减少编译时间? 3. 编译内核后如何验证调试信息是否包含在内核镜像中? 4. 如何使用gdb调试编译好的内核? 5. 如何为编译的内核生成调试符号包(dbgsym)? </think> ### 在 Ubuntu 22.04 编译带有调试信息的内核 以下是详细步骤,重点在于启用内核调试信息(通过 `CONFIG_DEBUG_INFO` 选项): #### 1. **安装编译依赖** ```bash sudo apt update sudo apt install build-essential libncurses-dev bison flex libssl-dev libelf-dev dwarves ``` > 📌 关键包 `dwarves` 用于处理 DWARF 调试信息格式,`libelf-dev` 支持 ELF 文件处理。 #### 2. **获取内核源码** ```bash # 方式1:获取Ubuntu官方内核源码 apt source linux-source-$(uname -r | cut -d'-' -f1) # 方式2:从kernel.org下载(如linux-6.8) wget https://cdn.kernel.org/pub/linux/kernel/v6.x/linux-6.8.tar.xz tar -xvf linux-6.8.tar.xz cd linux-6.8 ``` #### 3. **启用调试信息** ```bash # 复制当前系统配置作为基础 cp /boot/config-$(uname -r) .config # 启用调试符号(关键步骤) ./scripts/config --enable DEBUG_INFO \ --enable DEBUG_INFO_DWARF5 \ --enable GDB_SCRIPTS \ --set-val DEBUG_INFO_DWARF5 y ``` > ✅ **调试配置说明**: > - `DEBUG_INFO`:生成内核和模块的调试符号 > - `DEBUG_INFO_DWARF5`:使用最新 DWARF 调试格式 > - `GDB_SCRIPTS`:启用 GDB 调试脚本支持 [^2] #### 4. **配置内核选项** ```bash # 交互式菜单配置(可选) make menuconfig ``` 在菜单中验证: ``` Kernel hacking → Compile-time checks → [*] Compile the kernel with debug info → Debug information format → DWARF Version 5 ``` #### 5. **编译内核** ```bash # 启动编译(根据CPU核心数调整-j参数) make -j$(nproc) bindeb-pkg ``` > ⏳ 编译时间约1-3小时(取决于硬件),生成 `.deb` 安装包在父目录 #### 6. **安装内核** ```bash cd .. sudo dpkg -i linux-image-*.deb linux-headers-*.deb ``` #### 7. **验证调试信息** ```bash # 检查新内核配置 grep CONFIG_DEBUG_INFO /boot/config-$(uname -r) # 应显示:CONFIG_DEBUG_INFO=y # 使用GDB验证符号 gdb vmlinux (gdb) p init_task # 应显示符号地址而非"<symbol not found>" ``` ### 调试内核的附加说明 1. **QEMU调试**: 参考引用[2],使用以下命令启动调试: ```bash qemu-system-x86_64 -kernel arch/x86/boot/bzImage -append "root=/dev/sda console=ttyS0" -nographic -s -S ``` 在另一个终端用 GDB 连接: ```bash gdb vmlinux (gdb) target remote :1234 ``` 2. **性能优化**: - 编译时使用 `LOCALVERSION` 区分内核版本 - 启用 `CONFIG_DEBUG_INFO_REDUCED` 可减小调试文件大小 [^3] --- ### 相关问题 1. 如何在内核调试中设置硬件断点? 2. `DEBUG_INFO_DWARF4` 和 `DWARF5` 格式的主要区别是什么? 3. 如何为已安装的内核生成调试符号包(dbgsym)? 4. 使用 KGDB 进行远程内核调试需要配置哪些选项? 5. 如何解决内核编译时出现的模块签名验证错误? [^1]: 编译后需重启进入新内核 [^2]: GDB脚本支持交互式调试 [^3]: 调试信息大小优化配置
评论
成就一亿技术人!
拼手气红包6.0元
还能输入1000个字符
 
红包 添加红包
表情包 插入表情
 条评论被折叠 查看
添加红包

请填写红包祝福语或标题

红包个数最小为10个

红包金额最低5元

当前余额3.43前往充值 >
需支付:10.00
成就一亿技术人!
领取后你会自动成为博主和红包主的粉丝 规则
hope_wisdom
发出的红包
实付
使用余额支付
点击重新获取
扫码支付
钱包余额 0

抵扣说明:

1.余额是钱包充值的虚拟货币,按照1:1的比例进行支付金额的抵扣。
2.余额无法直接购买下载,可以购买VIP、付费专栏及课程。

余额充值