


 本文详细记录了在CentOS7环境中,利用Docker CE社区版创建名为hello的Docker镜像的全过程。从环境搭建,包括gcc及必要库的安装,到C语言程序的编写与编译,再到Dockerfile的编写与镜像的构建,直至镜像的运行与验证。
在centos7环境下使用docker-ce社区版,创建hello镜像的记录
参考链接:
代码操作
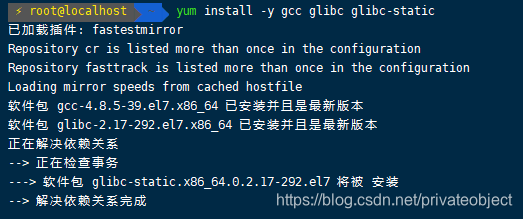
yum install -y gcc glibc glibc-static #安装c环境
pwd
/root/winsonzhao/hello-zyl
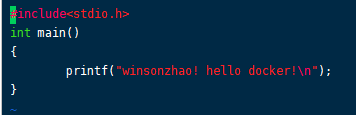
vim hello.c #编辑c文档
#include<stdio.h>
int main()
{
printf("winsonzhao! hello docker!\n");
}
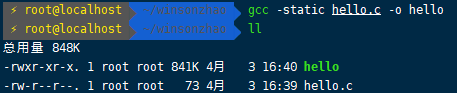
gcc -static hello.c -o hello #编译
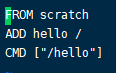
vim Dockerfile #创建镜像
FROM scratch #从头创建docker镜像,不依赖任何base镜像
ADD hello / #将本地的hello文件添加到镜像的根目录下/
CMD ["/hello"] #执行根目录下的hello文件
ls #创建docker前的所有的文件
Dockerfile hello hello.c
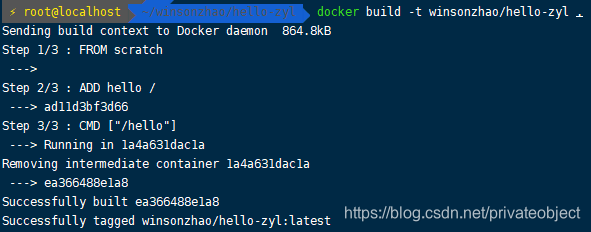
docker build -t winsonzhao/hello-zyl . #创建docker,-t后面接tag名称,.表示在当前目录下找dockerfile
Sending build context to Docker daemon 864.8kB
Step 1/3 : FROM scratch
--->
Step 2/3 : ADD hello /
---> ad11d3bf3d66
Step 3/3 : CMD ["/hello"]
---> Running in 1a4a631dac1a
Removing intermediate container 1a4a631dac1a
---> ea366488e1a8
Successfully built ea366488e1a8
Successfully tagged winsonzhao/hello-zyl:latest
docker images #镜像
REPOSITORY TAG IMAGE ID CREATED SIZE
winsonzhao/hello-zyl latest ea366488e1a8 11 seconds ago 861kB
docker run winsonzhao/hello-zyl #运行
winsonzhao! hello docker!安装gcc
当前目录

编辑hello.c
编译hello
编辑Dockerfile
当前目录下的文件
![]()
Docker创建hello镜像
镜像列表

运行镜像
![]()
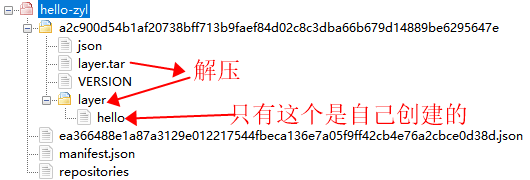
导出镜像
![]()

压缩包的结构
到此结束,d=====( ̄▽ ̄*)b


 781
781

 被折叠的 条评论
为什么被折叠?
被折叠的 条评论
为什么被折叠?
 到【灌水乐园】发言


