


环境
Homebrew🍺
Xcode命令行工具
PHP 8.0
Nginx
MySQL
-
安装Xcode命令行工具
执行命令 Xcode-select --install -
安装Homebew
点击访问 Homebrew 官网
按照指引,安装Homebrew
/bin/bash -c "$(curl -fsSL https://raw.githubusercontent.com/Homebrew/install/HEAD/install.sh)"
如果出现:
unable to access ‘https://github.com/Homebrew/brew/‘: LibreSSL SSL_connect: github.com:443
点击查看解决办法:Mac安装brew:unable to access ‘https://github.com/Homebrew/brew/‘: LibreSSL SSL_connect: github.com:443
- 使用Homebrew安装Nginx
安装Nginx:
brew install nginx
启动Nginx
brew services start nginx
- 安装PHP 7.4
brew install php #默认安装的最新版
brew install php@版本号 # 下载指定的php版本
- 配置PHP
brew info php # 查看使用brew安装php信息
vim php-fpm.conf # 在上一个命令里找到配置目录输入
查找 daemonize:直接键入/daemonize
修改值为yes并且保存
daemonize = yes # 安装默认的守护默认是未开启 daemonize = no
安装php拓展
通过Homebrew安装的php,自带了pecl。这是一个php拓展的包管理器,后续的拓展安装,仅仅需要通过该管理器安装即可。
后期使用brew 安装的php扩展会全部安装在pecl目录里
- 配置Nginx
1,通过brew info nginx 找到Nginx的配置目录
2,打开nginx.conf:vim nginx.conf
3,修改启动端口为80
找到listen关键词
server{
  listen 8080; // Nginx需要监听的接口
  server_name localhost;
  ...
}
server{
  listen 80; // Nginx需要监听的接口
  server_name localhost;
  ...
}
4,修改默认入口文件
在index这一行中,加入index.php,将其也作为入口文件。
location / {
    root   html;
    index  index.html index.htm index.php;
}
5,启用php流量转发
找到location ~.php$关键词,将注释删掉(删掉代码前面的’#’),启用php流量转发
location ~ .php$ {
    root           html;
    fastcgi_pass   127.0.0.1:9000;
    fastcgi_index  index.php;
    fastcgi_param  SCRIPT_FILENAME  /scripts$fastcgi_script_name;
    include        fastcgi_params;
}
6,配置php流量转发规则
修改location ~.php$中的fastcgi_param配置项
将其从SCRIPT_FILENAME /scripts$fastcgi_script_name
修改为SCRIPT_FILENAME d o c u m e n t r o o t document_root documentrootfastcgi_script_name
7,配置php伪静态
location / {
	 if (!-e $request_filename){
	  rewrite  ^(.*)$  /index.php?s=$1  last;   break;
	 }
}
- 安装MySQL
1,访问官网下载dmg安装包,mysql下载链接
2,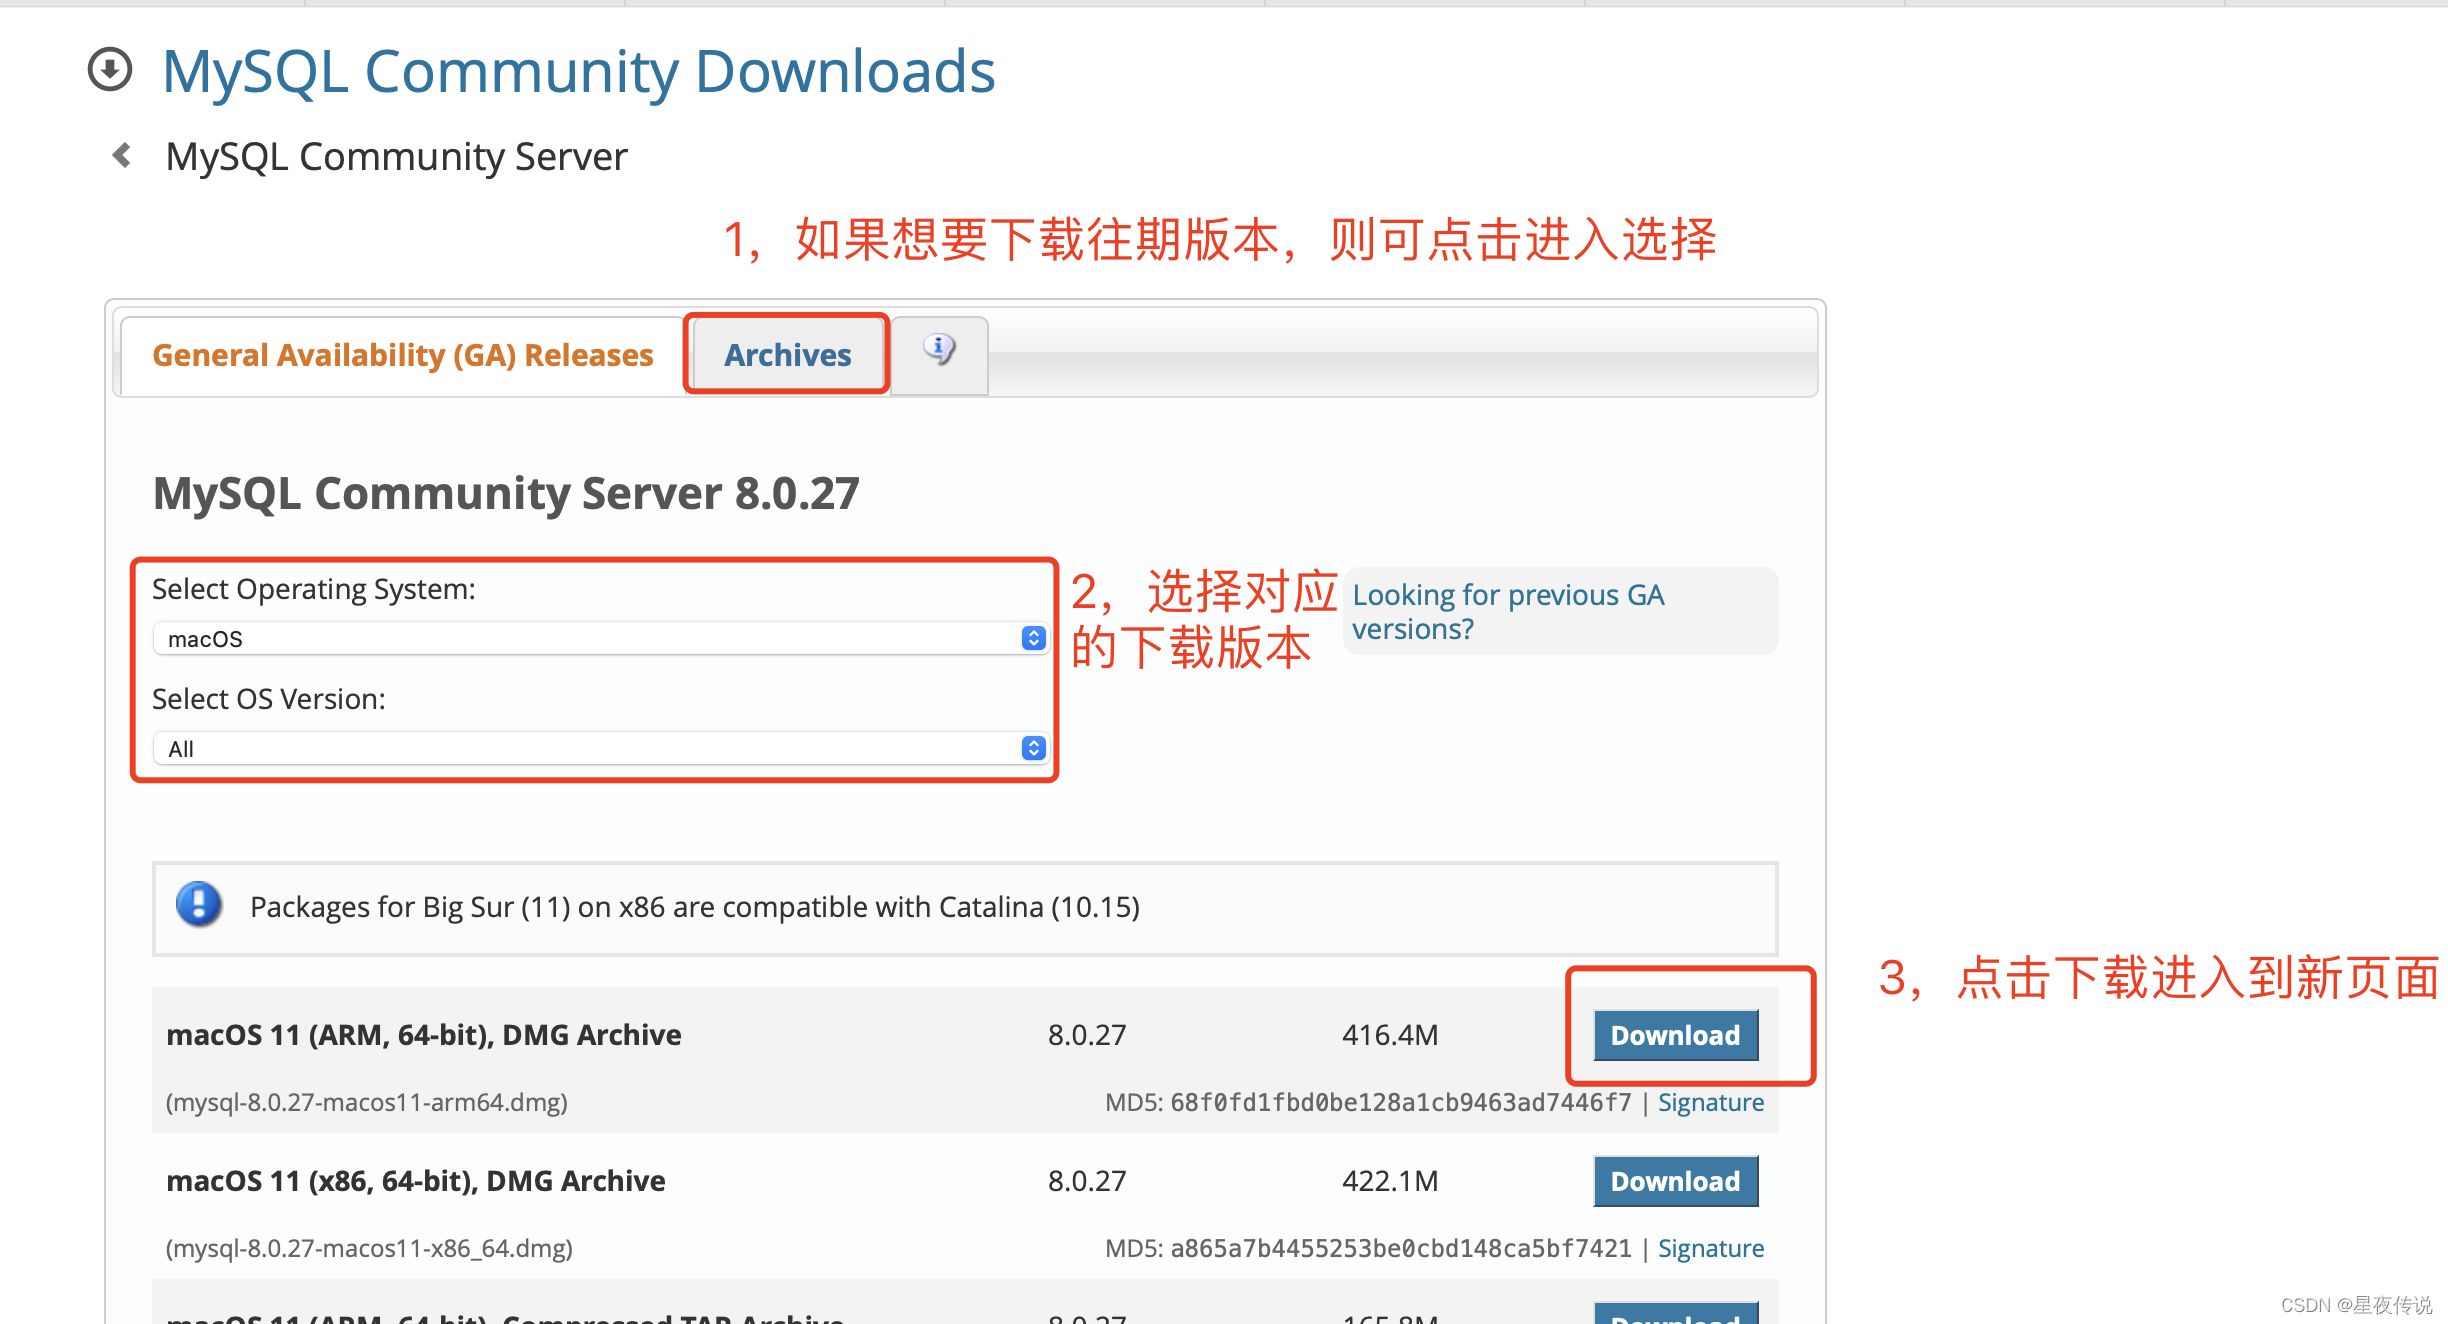
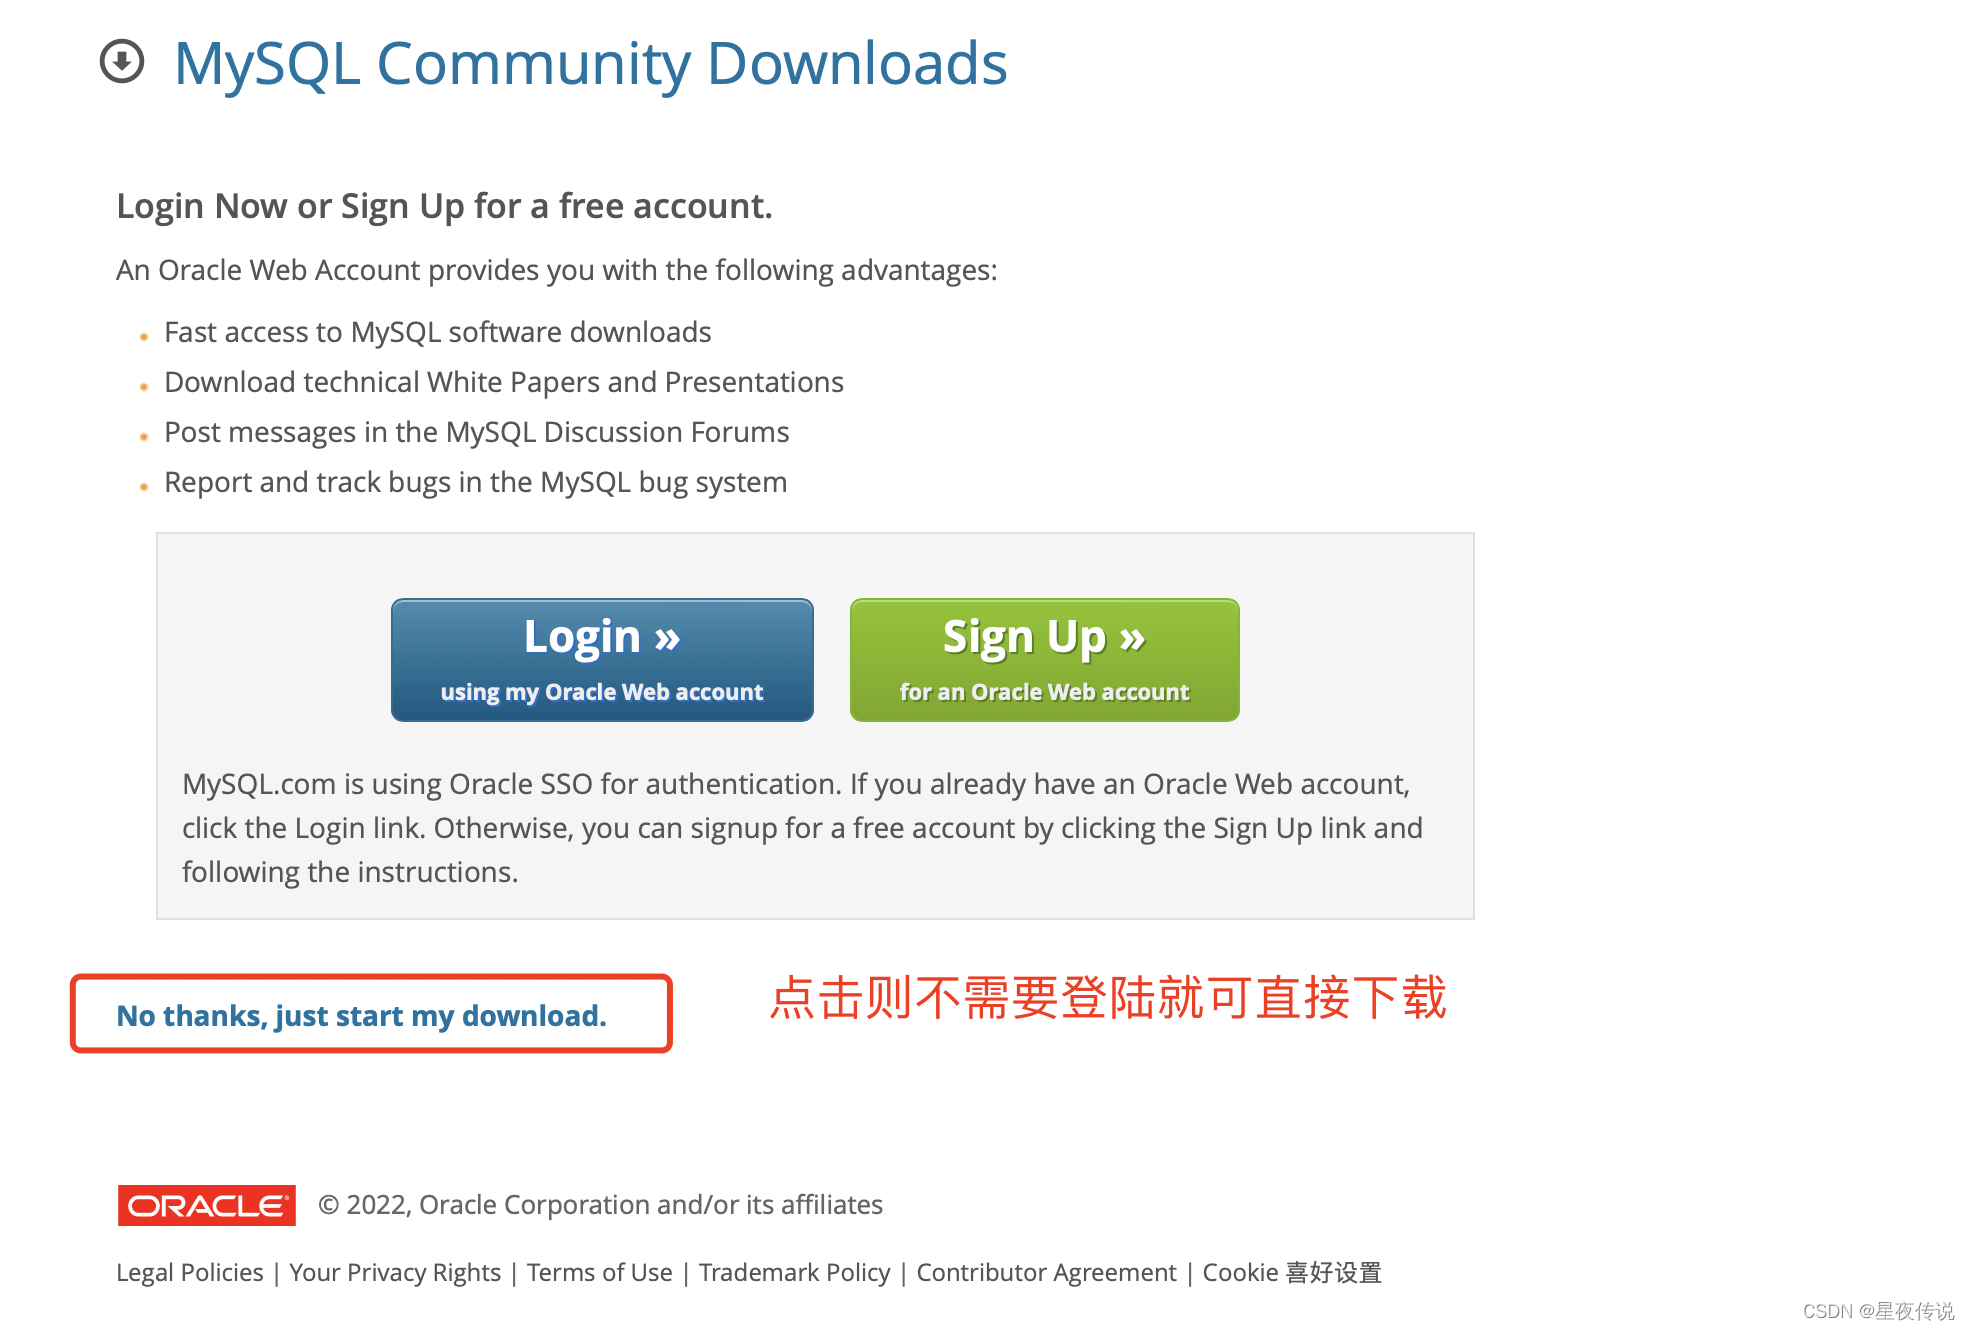
3,下载完成,解压双击运行pkg即可,按照步骤执行即可
常见问题
执行mysql显示command not found: mysql
这是由于没有将mysql指令加入到命令行窗口中的原因
解决方法:
cd ~ 切换到用户目录
输入vim .bash_profile 打开命令行配置文件
输入export PATH=$PATH:/usr/local/mysql/bin
保存文件
运行source ~/.bash_profile加载配置文件
此时就可以顺利使用MySQL了
如果中途又遇到其它问题,可下方留言


 581
581

 被折叠的 条评论
为什么被折叠?
被折叠的 条评论
为什么被折叠?
 到【灌水乐园】发言


