


在使用c++开发webrtc程序的时候,libdatachannel库可以极其方便的帮我们完成sdp握手处理过程,libdatachannel官方自带了一个streamer示例,下面介绍如何将其正常的运行起来。
一、环境介绍
我这里是使用mingw64+vscode的方式来运行的,需要提前在mingw64下面编译libdatachannel库,见我的上一篇文章,其他的就都不需要了。
c_cpp_properties.json
{
	"configurations": [
		{
			"name": "Win32",
			"includePath": [
				"${workspaceFolder}/**",
				"D:/msys64/mingw64/include/**",
				"D:/msys64/mingw64/lib/gcc/x86_64-w64-mingw32/14.2.0/include/**"
			],
			"defines": ["_DEBUG", "UNICODE", "_UNICODE"],
			"compilerPath": "D:/msys64/mingw64/bin/g++.exe",
			"cStandard": "c17",
			"cppStandard": "c++17",
			"intelliSenseMode": "windows-gcc-x64",
			"configurationProvider": "ms-vscode.cmake-tools",
			"browse": {
				"path": [
					"${workspaceFolder}",
					"D:/msys64/mingw64/include",
					"D:/msys64/mingw64/lib"
				],
				"limitSymbolsToIncludedHeaders": true,
				"databaseFilename": "${workspaceFolder}/.vscode/browse.vc.db"
			}
		}
	],
	"version": 4
}
tasks.json
{
	"version": "2.0.0",
	"tasks": [
		{
			"label": "构建项目",
			"type": "shell",
			"command": "d:\\msys64\\mingw64\\bin\\cmake.exe",
			"args": [
				"--build",
				"${workspaceFolder}/build",
				"--config",
				"Debug"
			],
			"group": {
				"kind": "build",
				"isDefault": true
			},
			"presentation": {
				"echo": true,
				"reveal": "always",
				"focus": false,
				"panel": "shared",
				"showReuseMessage": true,
				"clear": false
			},
			"problemMatcher": "$gcc"
		},
		{
			"label": "配置项目",
			"type": "shell",
			"command": "d:\\msys64\\mingw64\\bin\\cmake.exe",
			"args": [
				"-S",
				"${workspaceFolder}",
				"-B",
				"${workspaceFolder}/build",
				"-G",
				"MinGW Makefiles",
				"-DCMAKE_BUILD_TYPE=Debug",
				"-DCMAKE_PREFIX_PATH=D:/msys64/mingw64",
				"-DCMAKE_LIBRARY_PATH=D:/msys64/mingw64/lib",
				"-DCMAKE_INCLUDE_PATH=D:/msys64/mingw64/include"
			],
			"presentation": {
				"echo": true,
				"reveal": "always",
				"focus": false,
				"panel": "shared",
				"showReuseMessage": true,
				"clear": false
			},
			"problemMatcher": "$gcc"
		},
		{
			"label": "清理项目",
			"type": "shell",
			"command": "d:\\msys64\\mingw64\\bin\\cmake.exe",
			"args": [
				"--build",
				"${workspaceFolder}/build",
				"--target",
				"clean"
			],
			"presentation": {
				"echo": true,
				"reveal": "always",
				"focus": false,
				"panel": "shared",
				"showReuseMessage": true,
				"clear": false
			},
			"problemMatcher": "$gcc"
		},
		{
			"label": "重置并重新配置",
			"type": "shell",
			"command": "cmd.exe",
			"args": [
				"/C",
				"if exist ${workspaceFolder}\\build rmdir /S /Q ${workspaceFolder}\\build && mkdir ${workspaceFolder}\\build && d:\\msys64\\mingw64\\bin\\cmake.exe -S ${workspaceFolder} -B ${workspaceFolder}/build -G \"MinGW Makefiles\" -DCMAKE_BUILD_TYPE=Debug -DCMAKE_PREFIX_PATH=D:/msys64/mingw64 -DCMAKE_LIBRARY_PATH=D:/msys64/mingw64/lib -DCMAKE_INCLUDE_PATH=D:/msys64/mingw64/include"
			],
			"presentation": {
				"echo": true,
				"reveal": "always",
				"focus": false,
				"panel": "shared",
				"showReuseMessage": true,
				"clear": false
			},
			"problemMatcher": "$gcc"
		}
	]
}
launch.json
{
	// Use IntelliSense to learn about possible attributes.
	// Hover to view descriptions of existing attributes.
	// For more information, visit: https://go.microsoft.com/fwlink/?linkid=830387
	"version": "0.2.0",
	"configurations": [
		{
			"name": "调试 streamer",
			"type": "cppdbg",
			"request": "launch",
			"program": "${workspaceFolder}/build/streamer.exe",
			"args": [],
			"stopAtEntry": false,
			"cwd": "${workspaceFolder}",
			"environment": [],
			"externalConsole": false,
			"MIMode": "gdb",
			"miDebuggerPath": "d:\\msys64\\mingw64\\bin\\gdb.exe",
			"setupCommands": [
				{
					"description": "为 gdb 启用整齐打印",
					"text": "-enable-pretty-printing",
					"ignoreFailures": true
				},
				{
					"description": "将反汇编风格设置为 Intel",
					"text": "-gdb-set disassembly-flavor intel",
					"ignoreFailures": true
				}
			],
			"preLaunchTask": "构建项目"
		}
	]
}
二、CMakeLists.txt的修改
官方示例内自带的CMake配置参数文件在我的编译环境下需要修改一下,因为我这边是vscode+mingw,
cmake_minimum_required(VERSION 3.7)
if(POLICY CMP0079)
	cmake_policy(SET CMP0079 NEW)
endif()

# 添加项目名称
project(streamer)

# 添加MinGW库路径
list(APPEND CMAKE_PREFIX_PATH "D:/msys64/mingw64")

set(STREAMER_SOURCES
	main.cpp
	dispatchqueue.cpp
	dispatchqueue.hpp
	h264fileparser.cpp
	h264fileparser.hpp
	helpers.cpp
	helpers.hpp
	opusfileparser.cpp
	opusfileparser.hpp
	fileparser.cpp
	fileparser.hpp
	stream.cpp
	stream.hpp
	ArgParser.cpp
	ArgParser.hpp
)

set(STREAMER_UWP_RESOURCES
	uwp/Logo.png
	uwp/package.appxManifest
	uwp/SmallLogo.png
	uwp/SmallLogo44x44.png
	uwp/SplashScreen.png
	uwp/StoreLogo.png
	uwp/Windows_TemporaryKey.pfx
)


if(CMAKE_SYSTEM_NAME STREQUAL "WindowsStore")
	add_executable(streamer ${STREAMER_SOURCES} ${STREAMER_UWP_RESOURCES})
else()
	add_executable(streamer ${STREAMER_SOURCES})
endif()

set_target_properties(streamer PROPERTIES
	CXX_STANDARD 17
	OUTPUT_NAME streamer)

set_target_properties(streamer PROPERTIES
	XCODE_ATTRIBUTE_PRODUCT_BUNDLE_IDENTIFIER com.github.paullouisageneau.libdatachannel.examples.streamer)

# 添加头文件搜索路径
include_directories(
	"D:/msys64/mingw64/include"
)

# 添加库文件搜索路径
link_directories(
	"D:/msys64/mingw64/lib"
)

find_package(Threads REQUIRED)

# 查找 LibDataChannel 包
find_package(LibDataChannel REQUIRED)


# 直接链接 libdatachannel.dll.a 文件和所有可能需要的依赖库
target_link_libraries(streamer
    LibDataChannel::LibDataChannel

	Threads::Threads
)
# nlohmann_json 是仅头文件的库,不需要链接

# 在 Windows 平台上链接所有可能需要的系统库
if(WIN32)
	target_link_libraries(streamer
		ws2_32
		Kernel32
		gnutls
		nettle
		hogweed
		gmp
	)
endif()

if(MSVC)
	add_custom_command(TARGET streamer POST_BUILD
		COMMAND ${CMAKE_COMMAND} -E copy_if_different
		"$<TARGET_FILE_DIR:datachannel>/datachannel.dll"
		$<TARGET_FILE_DIR:streamer>
	)
endif()
三、源码修改
使用共享库方式可以编译成功,但是链接的时候提示找不到符号,可以直接修改代码里面的定义改成直接使用数字值的方式来解决:
	// create RTP configuration
	auto rtpConfig = make_shared<RtpPacketizationConfig>(ssrc, cname, payloadType, 90000);

	// create RTP configuration
	auto rtpConfig = make_shared<RtpPacketizationConfig>(ssrc, cname, payloadType, 48000);
四、准备运行环境
需要通过Python先启动一个信令服务器,启动方式为
cd D:\cpp\libdatachannel\examples\signaling-server-python

C:\python3\python.exe signaling-server.py
五、修正对h264文件的访问路径
我是直接修改的代码里面的
const string defaultRootDirectory = "D:\\cpp\\libdatachannel\\examples\\streamer\\samples\\";
六、开始编译运行
STUN server is stun:stun.l.google.com:19302
The local ID is: server
URL is ws://127.0.0.1:8000/server
Waiting for signaling to be connected...
WebSocket connected, signaling ready
Enter to exit
开浏览器打开index.html文件,点击start,正常的话就可以看到播放的视频和听到声音了
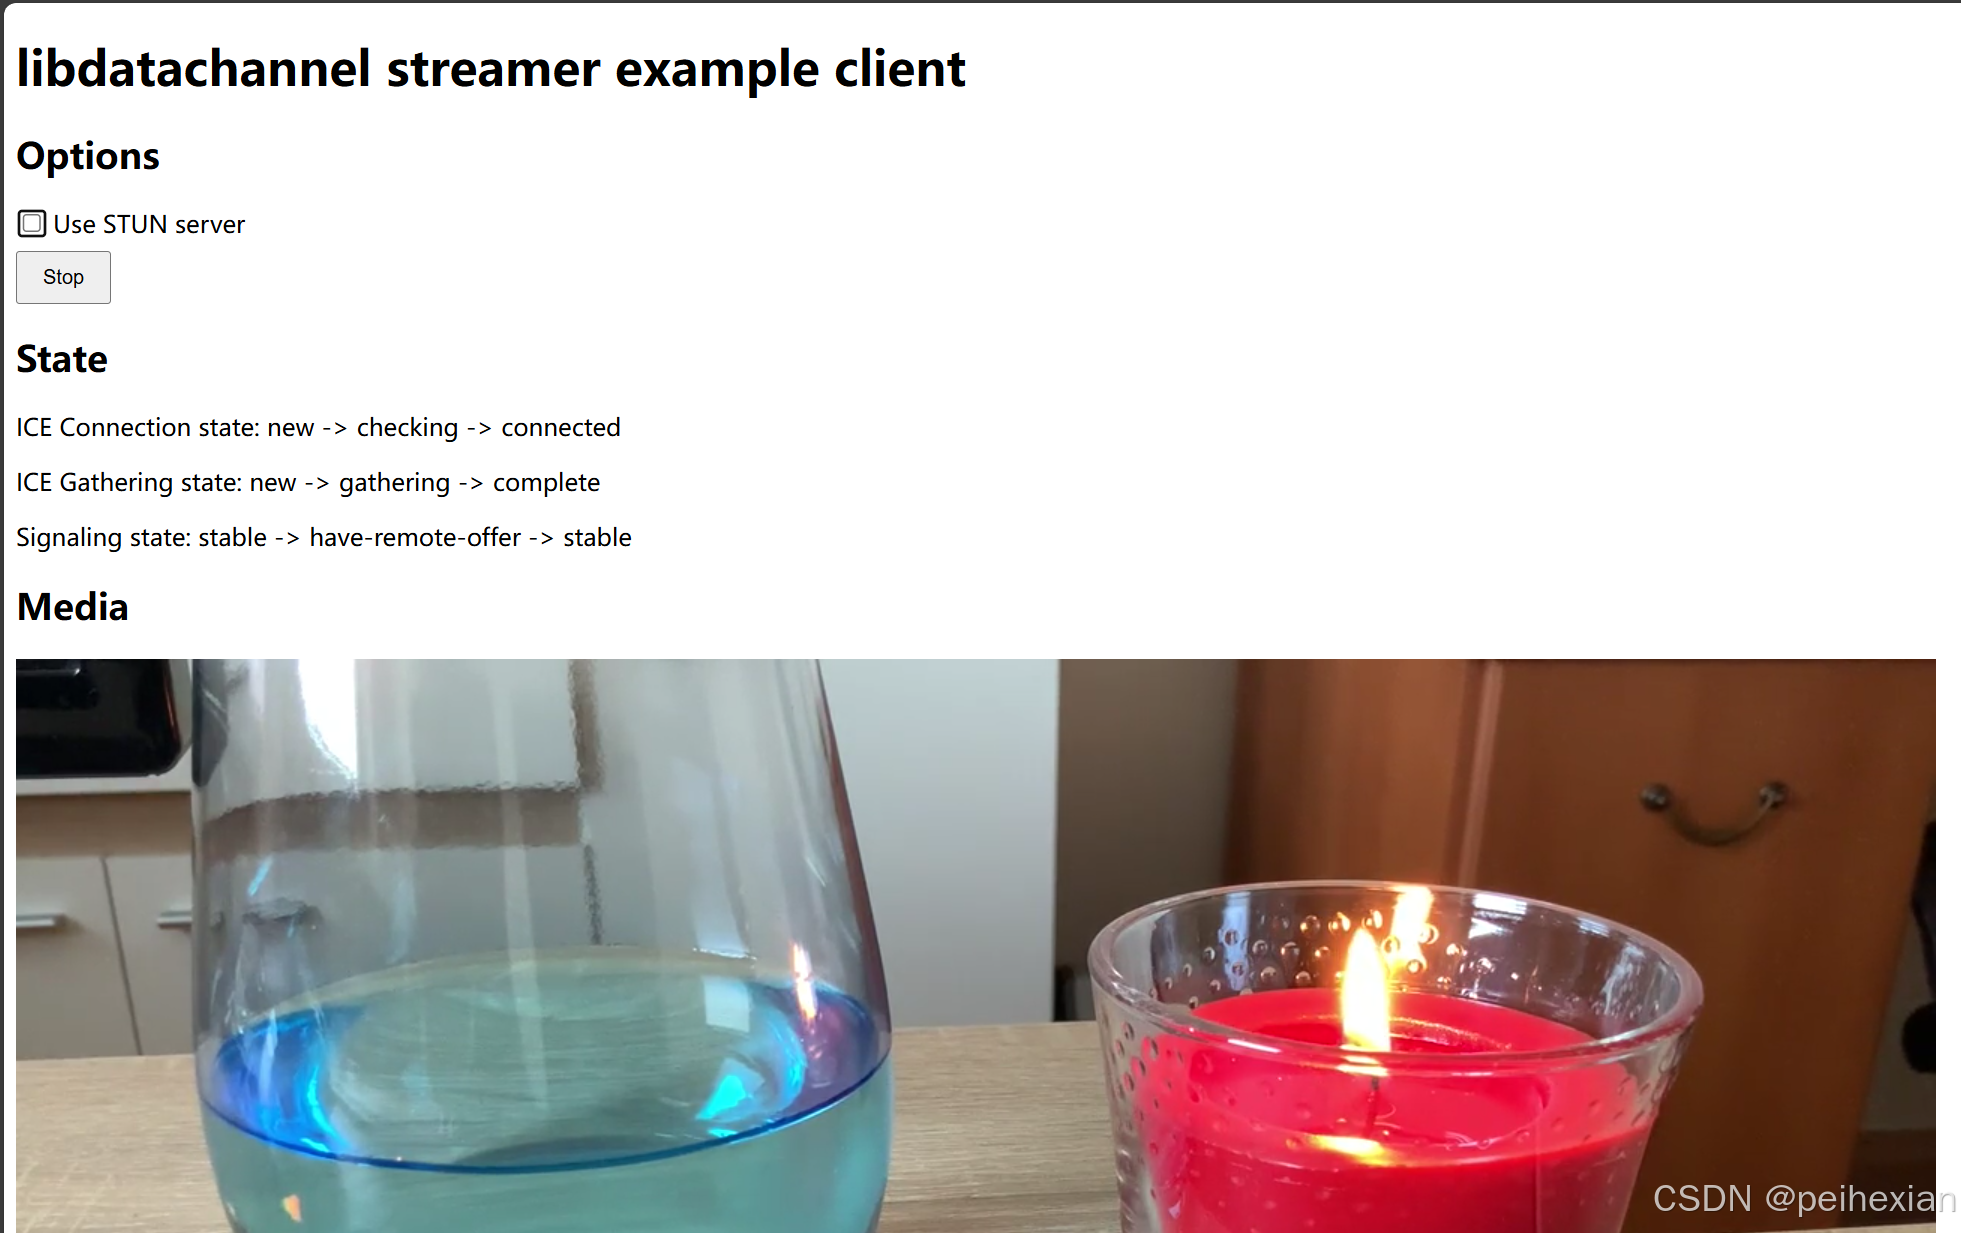
同时控制台也可以看到在不停的发送数据给浏览器:
Message from 45LrcnzgjD received: Pong 78504
Sending audio sample with size: 160 to 45LrcnzgjD
Sending audio sample with size: 160 to 45LrcnzgjD
Sending video sample with size: 4754 to 45LrcnzgjD
Sending audio sample with size: 160 to 45LrcnzgjD
Sending audio sample with size: 160 to 45LrcnzgjD
Sending video sample with size: 4113 to 45LrcnzgjD
Sending audio sample with size: 160 to 45LrcnzgjD
Sending video sample with size: 7099 to 45LrcnzgjD
Sending audio sample with size: 160 to 45LrcnzgjD
Sending audio sample with size: 160 to 45LrcnzgjD
Sending video sample with size: 4136 to 45LrcnzgjD
Sending audio sample with size: 160 to 45LrcnzgjD
Sending audio sample with size: 160 to 45LrcnzgjD
Sending video sample with size: 6431 to 45LrcnzgjD
Sending audio sample with size: 160 to 45LrcnzgjD
Sending video sample with size: 3928 to 45LrcnzgjD
Sending audio sample with size: 160 to 45LrcnzgjD
Sending audio sample with size: 160 to 45LrcnzgjD
Sending video sample with size: 5538 to 45LrcnzgjD


 1041
1041

 被折叠的 条评论
为什么被折叠?
被折叠的 条评论
为什么被折叠?
 到【灌水乐园】发言


