


 该示例展示了如何在SpringBoot应用中配置WebSocket,以便在用户登录后,后端能根据用户ID定时发送消息到前端进行展示。通过使用ConcurrentHashMap和CopyOnWriteArraySet管理用户连接,确保线程安全,并通过@Scheduled注解实现定时任务来广播消息。

说明
如标题,举例需求场景:
前端与后端websocket连接上后,多用户登录,后端根据不同用户定时发消息给前端用于展示
代码实现
1、
<dependency>
            <groupId>org.springframework.boot</groupId>
            <artifactId>spring-boot-starter-websocket</artifactId>
        </dependency>
2、
import org.springframework.context.annotation.Bean;
import org.springframework.stereotype.Component;
import org.springframework.web.socket.server.standard.ServerEndpointExporter;

@Component
public class WebSocketConfig {

    @Bean
    public ServerEndpointExporter serverEndpointExporter(){
        return new ServerEndpointExporter();
    }

}
3、
import lombok.extern.slf4j.Slf4j;
import org.springframework.stereotype.Component;

import javax.websocket.OnClose;
import javax.websocket.OnError;
import javax.websocket.OnMessage;
import javax.websocket.OnOpen;
import javax.websocket.Session;
import javax.websocket.server.PathParam;
import javax.websocket.server.ServerEndpoint;
import java.io.IOException;
import java.util.Enumeration;
import java.util.LinkedList;
import java.util.List;
import java.util.concurrent.ConcurrentHashMap;
import java.util.concurrent.CopyOnWriteArraySet;


// 交给IOC容器
@Component
// 如果去掉/{userId} 那就是不分用户 给连接上的用户统一发送消息
@ServerEndpoint("/websocket/{userId}")
@Slf4j
public class WebSocketService {


    // 这里用ConcurrentHashMap 因为他是一个线程安全的Map
    private static ConcurrentHashMap<String, CopyOnWriteArraySet<WebSocketService>> userwebSocketMap = new ConcurrentHashMap<>();

    private static ConcurrentHashMap<String, Integer> count = new ConcurrentHashMap<>();

    private String userId;


    /*
     * 与某个客户端的连接会话,需要通过它来给客户端发送数据
     */
    private Session session;

    /**
     * 连接建立成功调用的方法
     *
     * @param session 可选的参数。session为与某个客户端的连接会话,需要通过它来给客户端发送数据
     */
    @OnOpen
    public void onOpen(Session session, @PathParam("userId") final String userId) {
        this.session = session;
        this.userId = userId;
        System.out.println("session:" + session);
        System.out.println("userId:" + userId);
        if (!exitUser(userId)) {
            initUserInfo(userId);
        } else {
            CopyOnWriteArraySet<WebSocketService> webSocketServiceSet = getUserSocketSet(userId);
            webSocketServiceSet.add(this);
            userCountIncrease(userId);
        }
        System.out.println("有" + userId + "新连接加入!当前在线人数为" + getCurrUserCount(userId));
    }


    /**
     * 连接关闭调用的方法
     */
    @OnClose
    public void onClose() {
        CopyOnWriteArraySet<WebSocketService> webSocketServiceSet = userwebSocketMap.get(userId);
        //从set中删除
        webSocketServiceSet.remove(this);
        //在线数减1
        userCountDecrement(userId);
        System.out.println("有一连接关闭!当前在线人数为" + getCurrUserCount(userId));
    }

    /**
     * 收到客户端消息后调用的方法
     *
     * @param message 客户端发送过来的消息
     * @param session 可选的参数
     */
    @OnMessage
    public void onMessage(String message, Session session) {
        CopyOnWriteArraySet<WebSocketService> webSocketSet = userwebSocketMap.get(userId);
        System.out.println("来自客户端" + userId + "的消息:" + message);
        //群发消息
        for (WebSocketService item : webSocketSet) {
            try {
                item.sendMessage(message);
            } catch (IOException e) {
                e.printStackTrace();
                continue;
            }
        }

    }


    /**
     * 发生错误时调用
     *
     * @param session
     * @param error
     */
    @OnError
    public void onError(Session session, Throwable error) {
        System.out.println("发生错误");
        error.printStackTrace();
    }


    /**
     * 这个方法与上面几个方法不一样。没有用注解,是根据自己需要添加的方法。
     *
     * @param message
     * @throws IOException
     */

    public void sendMessage(String message) throws IOException {
        System.out.println("服务端推送" + userId + "的消息:" + message);
        this.session.getAsyncRemote().sendText(message);
    }


    /**
     * 这个方法与上面几个方法不一样。没有用注解,是根据自己需要添加的方法。   我是在有代办消息时 调用此接口 向指定用户发送消息
     *
     * @param message
     * @throws IOException
     */

    public void sendMessage(String userId, String message) throws IOException {
        System.out.println("服务端推送" + userId + "的消息:" + message);
        CopyOnWriteArraySet<WebSocketService> webSocketSet = userwebSocketMap.get(userId);
        //群发消息
        for (WebSocketService item : webSocketSet) {
            try {
                item.session.getBasicRemote().sendText(message);
            } catch (IOException e) {
                e.printStackTrace();
                continue;
            }
        }
    }

    public void sendOpenAllUserMessage(List<String> userIds, String message) {
        for (String userId : userIds) {
            CopyOnWriteArraySet<WebSocketService> webSocketSet = userwebSocketMap.get(userId);
            //群发消息
            for (WebSocketService item : webSocketSet) {
                try {
                    item.session.getBasicRemote().sendText(message);
                } catch (IOException e) {
                    e.printStackTrace();
                    continue;
                }
            }
        }
    }


    public boolean exitUser(String userId) {
        return userwebSocketMap.containsKey(userId);
    }

    public CopyOnWriteArraySet<WebSocketService> getUserSocketSet(String userId) {
        return userwebSocketMap.get(userId);
    }

    public void userCountIncrease(String userId) {
        if (count.containsKey(userId)) {
            count.put(userId, count.get(userId) + 1);
        }
    }


    public void userCountDecrement(String userId) {
        if (count.containsKey(userId)) {
            count.put(userId, count.get(userId) - 1);
        }
    }

    public void removeUserConunt(String userId) {
        count.remove(userId);
    }

    public Integer getCurrUserCount(String userId) {
        return count.get(userId);
    }

    private void initUserInfo(String userId) {
        CopyOnWriteArraySet<WebSocketService> webSocketServiceSet = new CopyOnWriteArraySet<WebSocketService>();
        webSocketServiceSet.add(this);
        userwebSocketMap.put(userId, webSocketServiceSet);
        count.put(userId, 1);
    }

    public List<String> getAllUser() {
        List<String> allUser = new LinkedList<>();
        Enumeration<String> keys = userwebSocketMap.keys();
        while (keys.hasMoreElements()) {
            String key = keys.nextElement();
            allUser.add(key);
        }
        return allUser;
    }

}
4、
import com.lq.demo1.service.WebSocketService;
import lombok.extern.slf4j.Slf4j;
import org.springframework.beans.factory.annotation.Autowired;
import org.springframework.context.annotation.Configuration;
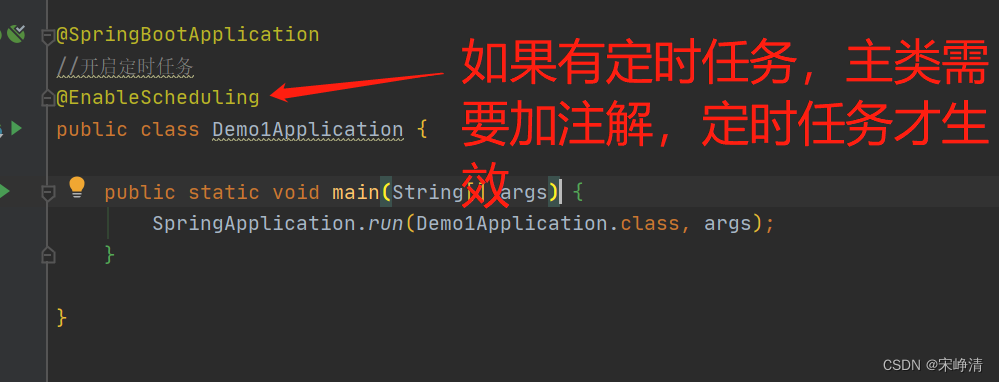
import org.springframework.scheduling.annotation.EnableScheduling;
import org.springframework.scheduling.annotation.Scheduled;
import java.util.List;
@EnableScheduling
@Configuration
@Slf4j
public class TaskTimer {
@Autowired
private WebSocketService webSocketService;
@Scheduled(cron = "0/10 * * * * ?")
public void cleanToken() {
//10s推送一次
List<String> allUser = webSocketService.getAllUser();
//自己可以定义不同用户发送的信息,这里不做演示了
webSocketService.sendOpenAllUserMessage(allUser, "告警!");
}
}
@EnableScheduling
然后把项目启动,打开在线调试websocket连接
路径格式为:ws://localhost:8081/websocket/1
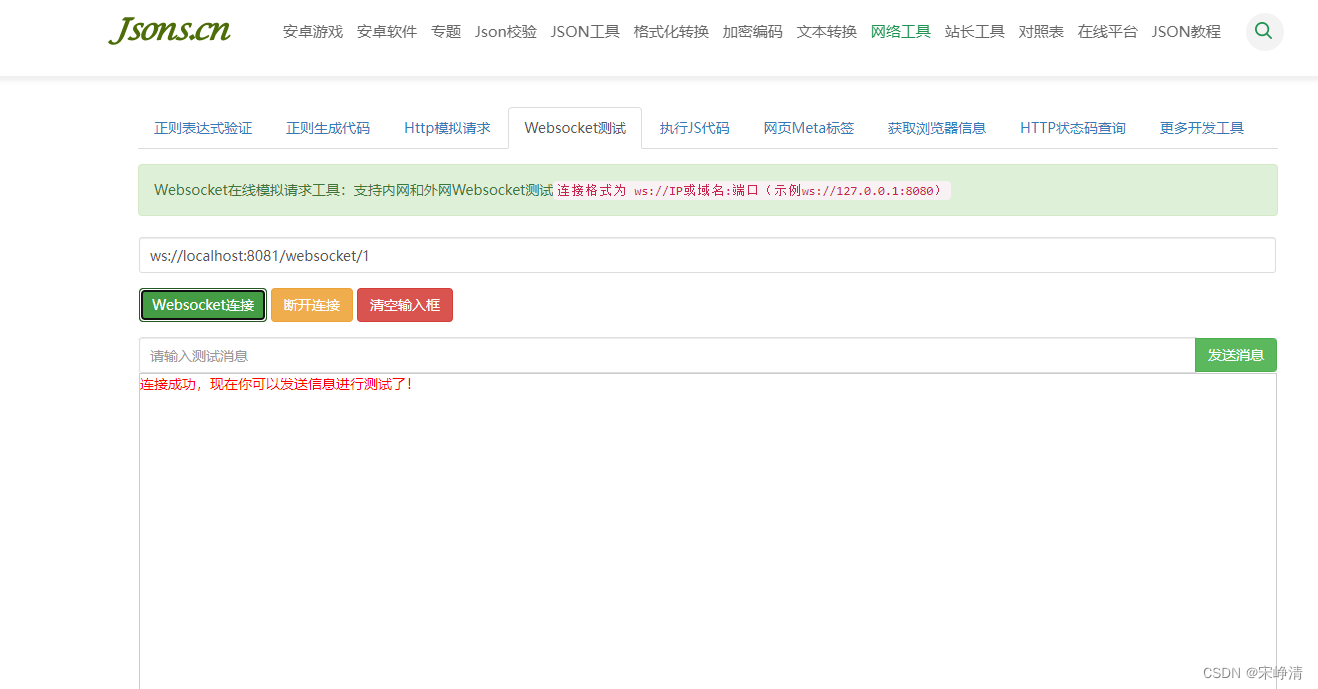
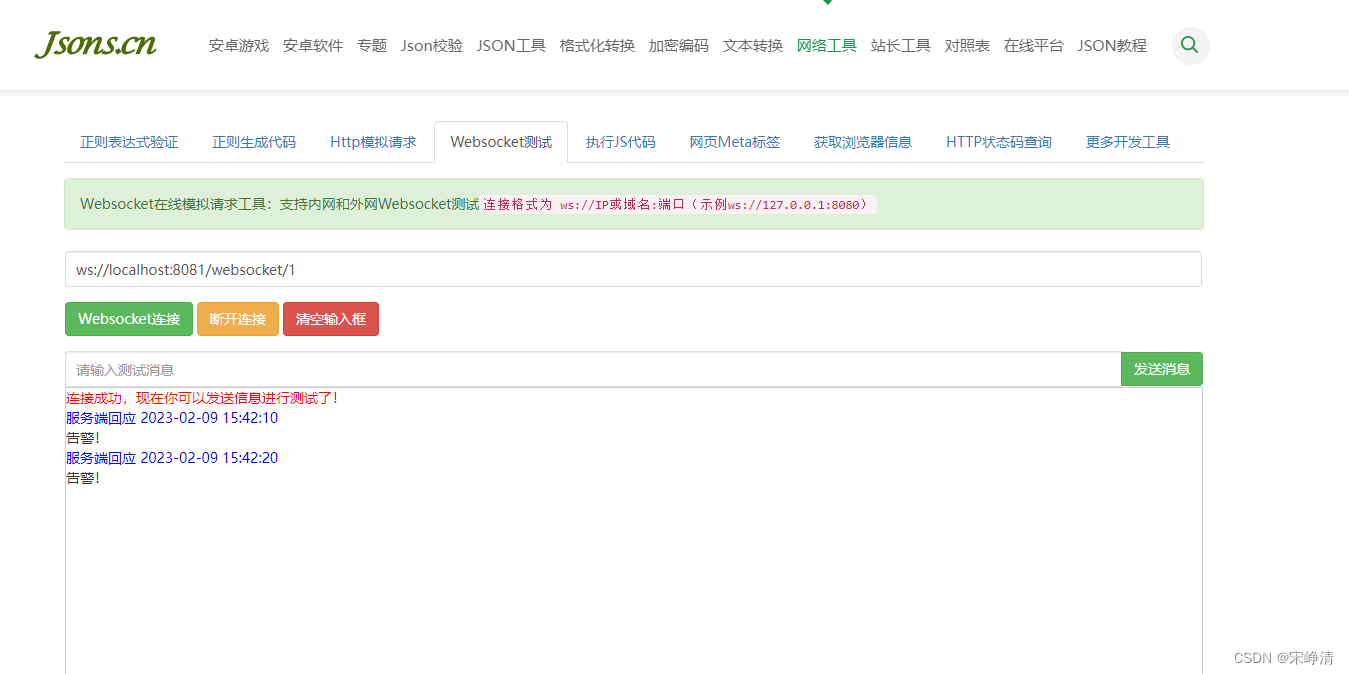
成功展示,也可以搞多个窗口,发送内容一致
就先说到这
\color{#008B8B}{ 就先说到这}
就先说到这
在下
A
p
o
l
l
o
\color{#008B8B}{在下Apollo}
在下Apollo
一个爱分享
J
a
v
a
、生活的小人物,
\color{#008B8B}{一个爱分享Java、生活的小人物,}
一个爱分享Java、生活的小人物,
咱们来日方长,有缘江湖再见,告辞!
\color{#008B8B}{咱们来日方长,有缘江湖再见,告辞!}
咱们来日方长,有缘江湖再见,告辞!


 926
926

 被折叠的 条评论
为什么被折叠?
被折叠的 条评论
为什么被折叠?
 到【灌水乐园】发言


