


最近在接手vue项目的需求,因为之前一直在做react的需求,日常的vue练习也少了很多,导致现在接手vue项目,很多关于vue的知识点基本上忘得干干净净了。但是好在有基础,重新学也会很快掌握。分享这个过程中的一些复习内容。
本篇分享【状态管理】相关的内容。
一、状态管理概述
状态管理用于解决 Vue 应用中组件间的数据共享问题,尤其适合以下场景:
- 多个组件需要共享同一数据
- 不同组件需要修改同一份数据
- 跨层级组件间的通信
Vuex 作为 Vue 官方推荐的状态管理库已有多年历史,而 Pinia 则是 Vuex 团队在 Vue 3 时代推出的新方案,目前已成为 Vue 3 项目的官方推荐。
二、Vuex 4.x 的使用方法
Vuex 4 专为 Vue 3 设计,保留了 Vuex 的核心概念,但做了适配 Composition API 的改进。
1. 安装与配置
npm install vuex@4
创建 store/index.js:
import { createStore } from 'vuex'

export default createStore({
  state() {
    return {
      count: 0,
      message: 'Hello from Vuex'
    }
  },
  mutations: {
    increment(state) {
      state.count++
    },
    updateMessage(state, newMessage) {
      state.message = newMessage
    }
  },
  actions: {
    async updateMessageAsync(context, newMessage) {
      // 模拟API请求
      await new Promise(resolve => setTimeout(resolve, 500))
      context.commit('updateMessage', newMessage)
    }
  },
  getters: {
    doubleCount(state) {
      return state.count * 2
    }
  }
})
在 main.js 中引入:
import { createApp } from 'vue'
import App from './App.vue'
import store from './store'

createApp(App)
  .use(store)
  .mount('#app')
2. 核心概念
- State:存储应用状态的数据源
- Mutations:唯一可以修改 state 的同步函数
- Actions:处理异步操作,通过 commit 调用 mutations
- Getters:从 state 派生出的计算属性
3. 组件中使用
src/component/VuexPage1.vue
<template>
  <div class="vuex-page1">
    <h2>Vuex Page 1</h2>
    <p>Count from store: {{ $store.state.count }}</p>
    <p>Double Count: {{ $store.getters.doubleCount }}</p>
    <p>Message: {{ $store.state.message }}</p>

    <button @click="$store.commit('decrement')">Decrement</button>
    <button @click="$store.dispatch('increment')">Increment (via action)</button>
    <button @click="updateMessage">Change Message</button>
  </div>
</template>

<script setup>
import { useStore } from 'vuex'

// 获取store实例
const store = useStore()

// 组件方法
const updateMessage = () => {
  store.commit('updateMessage', 'Updated from Vuex Page 1')
}
</script>

<style scoped>
.vuex-page1 {
  padding: 20px;
  border: 1px solid #42b983;
  margin: 10px;
  background-color: #f0fdf4;
}

button {
  margin: 0 5px;
  padding: 5px 10px;
  cursor: pointer;
}
</style>
src/component/VuexPage2.vue
<template>
  <div class="vuex-page2">
    <h2>Vuex Page 2</h2>
    <p>Count from store: {{ $store.state.count }}</p>
    <p>Double Count: {{ $store.getters.doubleCount }}</p>
    <p>Message: {{ $store.state.message }}</p>

    <button @click="$store.commit('increment')">Increment</button>
    <button @click="$store.commit('reset')">Reset Count</button>
    <button @click="updateMessageAsync">Change Message (Async)</button>
  </div>
</template>

<script setup>
import { useStore } from 'vuex'

// 获取store实例
const store = useStore()

// 组件方法
const updateMessageAsync = () => {
  store.dispatch('updateMessageAsync', 'Updated from Vuex Page 2 (Async)')
}
</script>

<style scoped>
.vuex-page2 {
  padding: 20px;
  border: 1px solid #3498db;
  margin: 10px;
  background-color: #f0f7ff;
}

button {
  margin: 0 5px;
  padding: 5px 10px;
  cursor: pointer;
}
</style>
App.vue
<template>
  <div id="app">
    <h1>Vuex Store Test</h1>
    <VuexPage1 />
    <VuexPage2 />
  </div>
</template>

<script setup>
import VuexPage1 from './components/VuexPage1.vue'
import VuexPage2 from './components/VuexPage2.vue'
</script>

<style>
#app {
  font-family: Avenir, Helvetica, Arial, sans-serif;
  -webkit-font-smoothing: antialiased;
  -moz-osx-font-smoothing: grayscale;
  text-align: center;
  color: #2c3e50;
  margin-top: 60px;
}
</style>
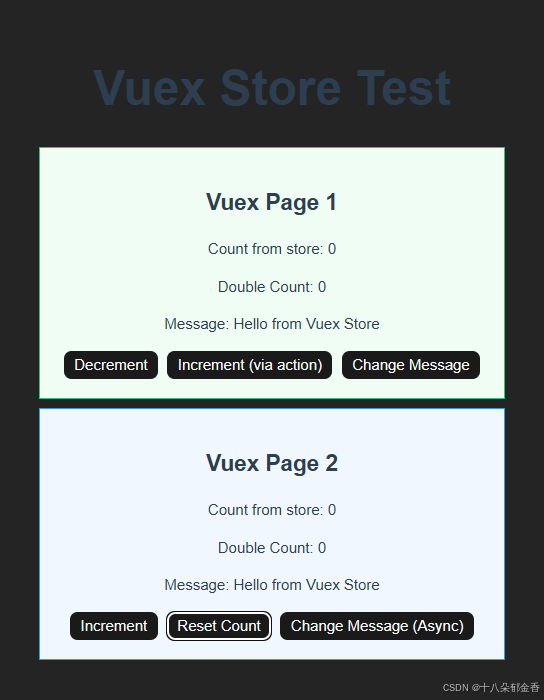
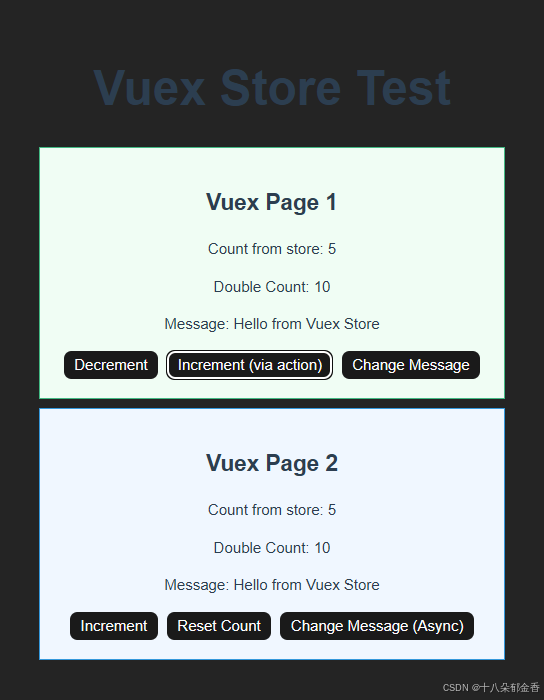
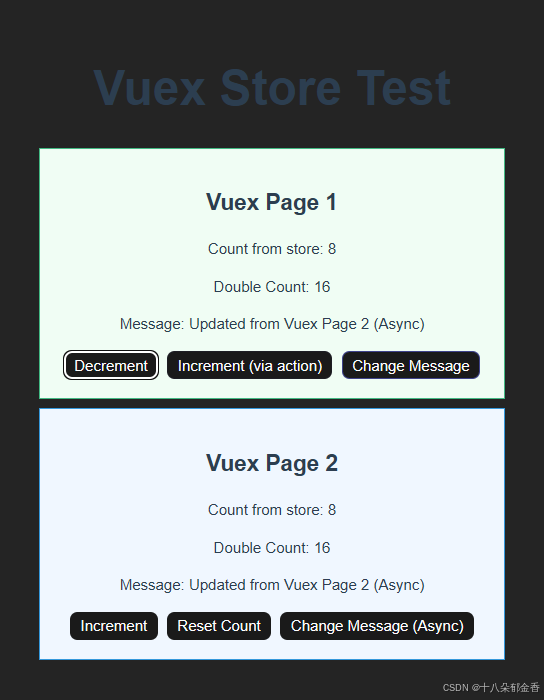
4.效果展示
Decrement:减一操作
Increment:加一操作
Change Message:改成状态库中message的值
Increment (via action): “通过 action 方式(实现的)递增”
两种修改状态的方式:
- 直接通过 mutation 修改(
$store.commit('increment'))- 通过 action 间接修改(
$store.dispatch('increment'),然后在 action 内部再调用 mutation)Change Message (Async):异步
三、Pinia 的使用方法
Pinia 是 Vuex 的继任者,简化了状态管理的写法,天然支持 TypeScript,更符合 Vue 3 的 Composition API 风格。
1. 安装与配置
npm install pinia
创建 store/index.js:
import { createPinia } from 'pinia'
export default createPinia()
创建 store/counterStore.js:
import { defineStore } from 'pinia'

export const useCounterStore = defineStore('counter', {
  state: () => ({
    count: 0,
    message: 'Hello from Pinia'
  }),
  actions: {
    increment() {
      this.count++
    },
    async updateMessageAsync(newMessage) {
      await new Promise(resolve => setTimeout(resolve, 500))
      this.message = newMessage
    }
  },
  getters: {
    doubleCount() {
      return this.count * 2
    }
  }
})
在 main.js 中引入:
import { createApp } from 'vue'
import App from './App.vue'
import store from './store'

createApp(App)
  .use(store)
  .mount('#app')
2. 核心概念
- Store:每个 store 都是一个独立的模块
- State:存储状态的数据源
- Actions:可以包含同步和异步操作,直接修改 state
- Getters:计算属性,基于 state 派生
3. 组件中使用
src/component/Page1.vue
<template>
  <div class="page1">
    <h2>Page 1</h2>
    <p>Count from store: {{ counterStore.count }}</p>
    <p>Message: {{ counterStore.message }}</p>

    <button @click="counterStore.increment">Increment</button>
    <button @click="counterStore.decrement">Decrement</button>
    <button @click="counterStore.changeMultiplier(5)">changeMultiplier</button>
    <button @click="beMultiplier">beMultiplier</button>
    <button @click="changeMessage">Change Message</button>
  </div>
</template>

<script setup>
import { useCounterStore } from '../store/counterStore'

// 获取store实例
const counterStore = useCounterStore()

// 组件方法
const changeMessage = () => {
  counterStore.updateMessage('Updated from Page 1')
}
const beMultiplier=()=>{
  counterStore.beMultipliedBy(4)
}
</script>

<style scoped>
.page1 {
  padding: 20px;
  border: 1px solid #ccc;
  margin: 10px;
}

button {
  margin: 0 5px;
  padding: 5px 10px;
}
</style>
src/component/Page2.vue
<template>
  <div class="page2">
    <h2>Page 2</h2>
    <p>Count from store: {{ counterStore.count }}</p>
    <p>Message: {{ counterStore.message }}</p>

    <button @click="counterStore.increment">Increment</button>
    <button @click="counterStore.reset">Reset Count</button>
    <button @click="changeMessage">Change Message</button>
  </div>
</template>

<script setup>
import { useCounterStore } from '../store/counterStore'

// 获取store实例
const counterStore = useCounterStore()

// 组件方法
const changeMessage = () => {
  counterStore.updateMessage('Updated from Page 2')
}
</script>

<style scoped>
.page2 {
  padding: 20px;
  border: 1px solid #666;
  margin: 10px;
  background-color: #f5f5f5;
}

button {
  margin: 0 5px;
  padding: 5px 10px;
}
</style>
App.vue
<template>
  <div id="app">
    <h1>Pinia Store Test</h1>
    <Page1 />
    <Page2 />
  </div>
</template>

<script setup>
import Page1 from './components/Page1.vue'
import Page2 from './components/Page2.vue'
</script>

<style>
#app {
  font-family: Avenir, Helvetica, Arial, sans-serif;
  -webkit-font-smoothing: antialiased;
  -moz-osx-font-smoothing: grayscale;
  text-align: center;
  color: #2c3e50;
  margin-top: 60px;
}
</style>
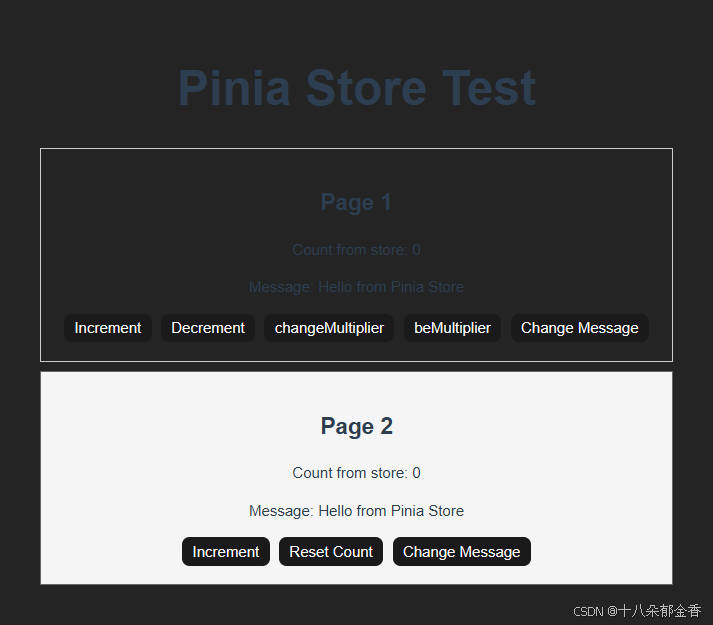
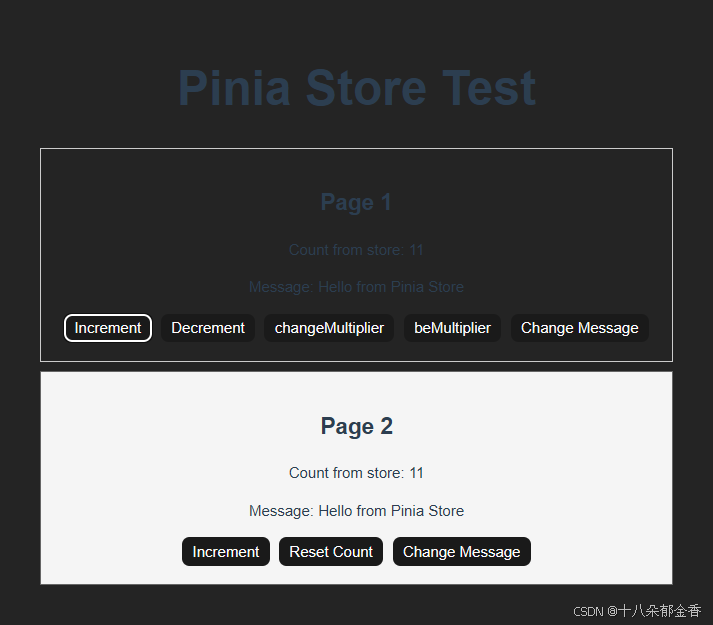
4. 效果展示

四、Pinia 与 Vuex 的核心区别
| 特性 | Vuex 4 | Pinia |
|---|---|---|
| 模块化 | 需要通过 modules 创建模块 | 每个 store 都是独立模块,天然支持模块化 |
| 状态修改 | 必须通过 mutations | 直接在 actions 中修改,或直接修改 state |
| 异步操作 | 需要在 actions 中处理 | 可以在 actions 中直接处理 |
| TypeScript 支持 | 有限,需要额外类型定义 | 原生支持,类型推断更友好 |
| 代码简洁性 | 较繁琐,需要 commit/dispatch 区分 | 更简洁,直接调用方法 |
| 开发者工具支持 | 支持 | 支持,且有更好的时间线追踪 |
| 插件系统 | 丰富 | 兼容 Vuex 的插件,且有新的插件系统 |
五、如何选择
-
新项目:优先选择 Pinia,它是 Vue 官方推荐的最新方案,API 更简洁,TypeScript 支持更好。
-
已有 Vuex 项目:
- 若项目稳定运行,无需急于迁移
- 若进行重大重构,可考虑迁移到 Pinia
- Vuex 4 仍会维护,但不会有新功能
-
团队因素:如果团队已熟悉 Vuex,且项目复杂度不高,继续使用 Vuex 也是合理选择。
六、总结
Pinia 和 Vuex 都是优秀的 Vue 状态管理方案,它们解决的核心问题相同,但实现方式有所不同。
Vuex 作为成熟的状态管理库,有着完善的生态和社区支持,适合需要严格规范状态修改流程的大型项目。而 Pinia 则代表了未来的发展方向,它简化了状态管理的写法,提供了更好的开发体验和 TypeScript 支持。


 被折叠的 条评论
为什么被折叠?
被折叠的 条评论
为什么被折叠?
 到【灌水乐园】发言


