


🚀 欢迎来到我的优快云博客:Optimistic _ chen
✨ 一名热爱技术与分享的全栈开发者,在这里记录成长,专注分享编程技术与实战经验,助力你的技术成长之路,与你共同进步!
🚀我的专栏推荐:
| 专栏 | 内容特色 | 适合人群 |
|---|---|---|
| 🔥C语言从入门到精通 | 系统讲解基础语法、指针、内存管理、项目实战 | 零基础新手、考研党、复习 |
| 🔥Java基础语法 | 系统解释了基础语法、类与对象、继承 | Java初学者 |
| 🔥Java核心技术 | 面向对象、集合框架、多线程、网络编程、新特性解析 | 有一定语法基础的开发者 |
| 🔥Java EE 进阶实战 | Servlet、JSP、SpringBoot、MyBatis、项目案例拆解 | 想快速入门Java Web开发的同学 |
| 🔥Java数据结构与算法 | 图解数据结构、LeetCode刷题解析、大厂面试算法题 | 面试备战、算法爱好者、计算机专业学生 |
🚀我的承诺:
✅ 文章配套代码:每篇技术文章都提供完整的可运行代码示例
✅ 持续更新:专栏内容定期更新,紧跟技术趋势
✅ 答疑交流:欢迎在文章评论区留言讨论,我会及时回复(支持互粉)
🚀 关注我,解锁更多技术干货!
⏳ 每天进步一点点,未来惊艳所有人!✍️ 持续更新中,记得⭐收藏关注⭐不迷路 ✨
📌 标签:#技术博客 #编程学习 #Java #C语言 #算法 #程序员
文章目录
前言
前面的学习中,我们了解到web应用程序分为三层:Controller、Service、Dao(数据访问层),今天我们会讲到一个新的概念:Mapper层。它们两个都是持久层中用于处理数据访问的概念。
注意:Mapper 是 MyBatis 中的一个术语,指的是用于描述如何映射数据库中的数据到 Java 对象的接口。每一个 Mapper 接口对应一个数据操作接口。
Dao 是一个更通用的设计模式,用于封装与数据存储交互的逻辑。在Java中,通常指的是数据访问对象。
其实,Mapper 通常与 MyBatis 等 ORM 框架结合使用。DAO 是一个更通用的概念,可以用于任何形式的数据访问,包括直接 JDBC 操作、使用 ORM 框架等
Mybatis
什么是Mybatis?
MyBatis 是一款优秀的持久层框架,它支持自定义 SQL、存储过程以及高级映射。MyBatis 免除了几乎所有的 JDBC 代码以及设置参数和获取结果集的工作。MyBatis 可以通过简单的 XML 或注解来配置和映射原始类型、接口和 Java POJO(Plain Old Java Objects,普通老式 Java 对象)为数据库中的记录。
简单来说MyBatis是更简单完成程序和数据库交互的框架,也就是更简单的操作和读取数据库的⼯具。
准备工作
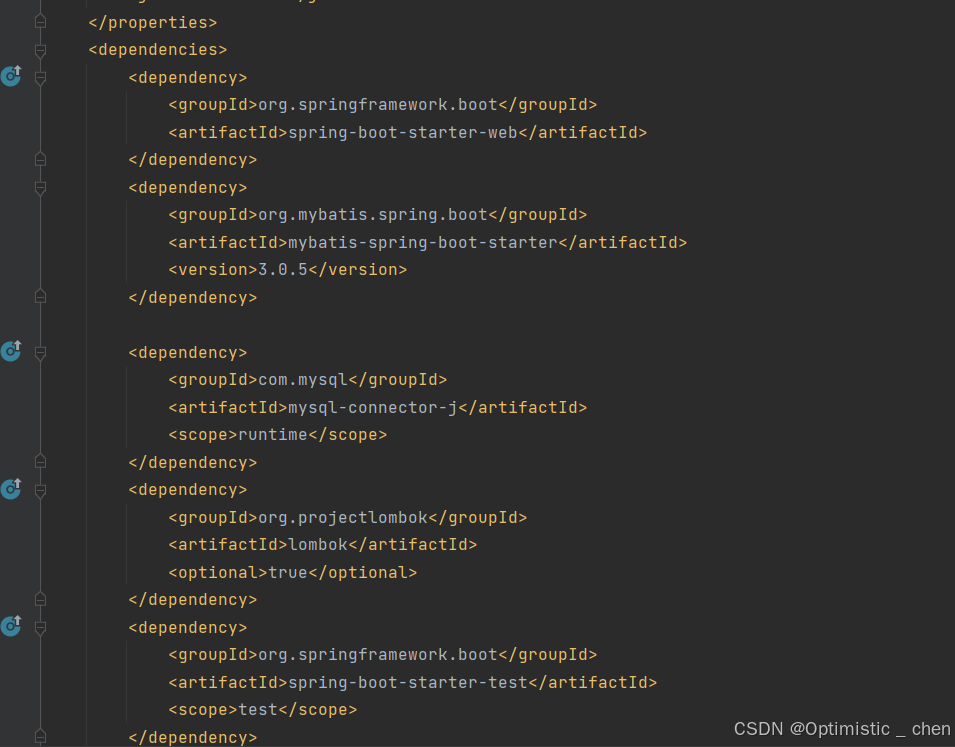
项⽬⼯程创建完成后,在pom.xml⽂件中,导⼊Mybatis依赖和MySQL驱动依赖(注意版本兼容哦)
MySQL创建用户表
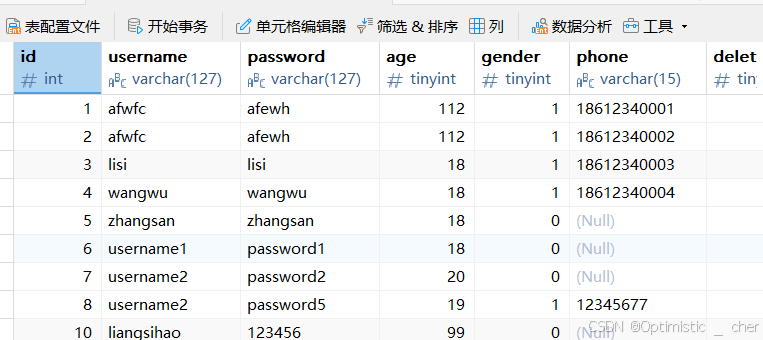
创建对应的实体类:实体类的属性名与表中的字段名⼀⼀对应
import java.util.Date;

public class UserInfo {
    private Integer id;

    private String username;

    private String password;

    private Byte age;

    private Byte gender;

    private String phone;

    private Byte deleteFlag;

    private Date createTime;

    private Date updateTime;
 }
配置数据库连接:MyBatis中要连接数据库
spring:
  application:
    name: mybatis-demo
  # 数据库连接配置
  datasource:
    url: jdbc:mysql://127.0.0.1:3306/your_name?characterEncoding=utf8&useSSL=false
    username: your root
    password: your root
    driver-class-name: com.mysql.cj.jdbc.Driver
创建持久层接口UserInfoMapper
import com.zc.mybatis.model.UserInfo;
import org.apache.ibatis.annotations.*;

import java.util.List;
@Mapper//Mybaits注解
public interface UserInfoMapper {
      @Select("select * from user_info")
      List<UserInfo> selectAll();
}
测试接口:
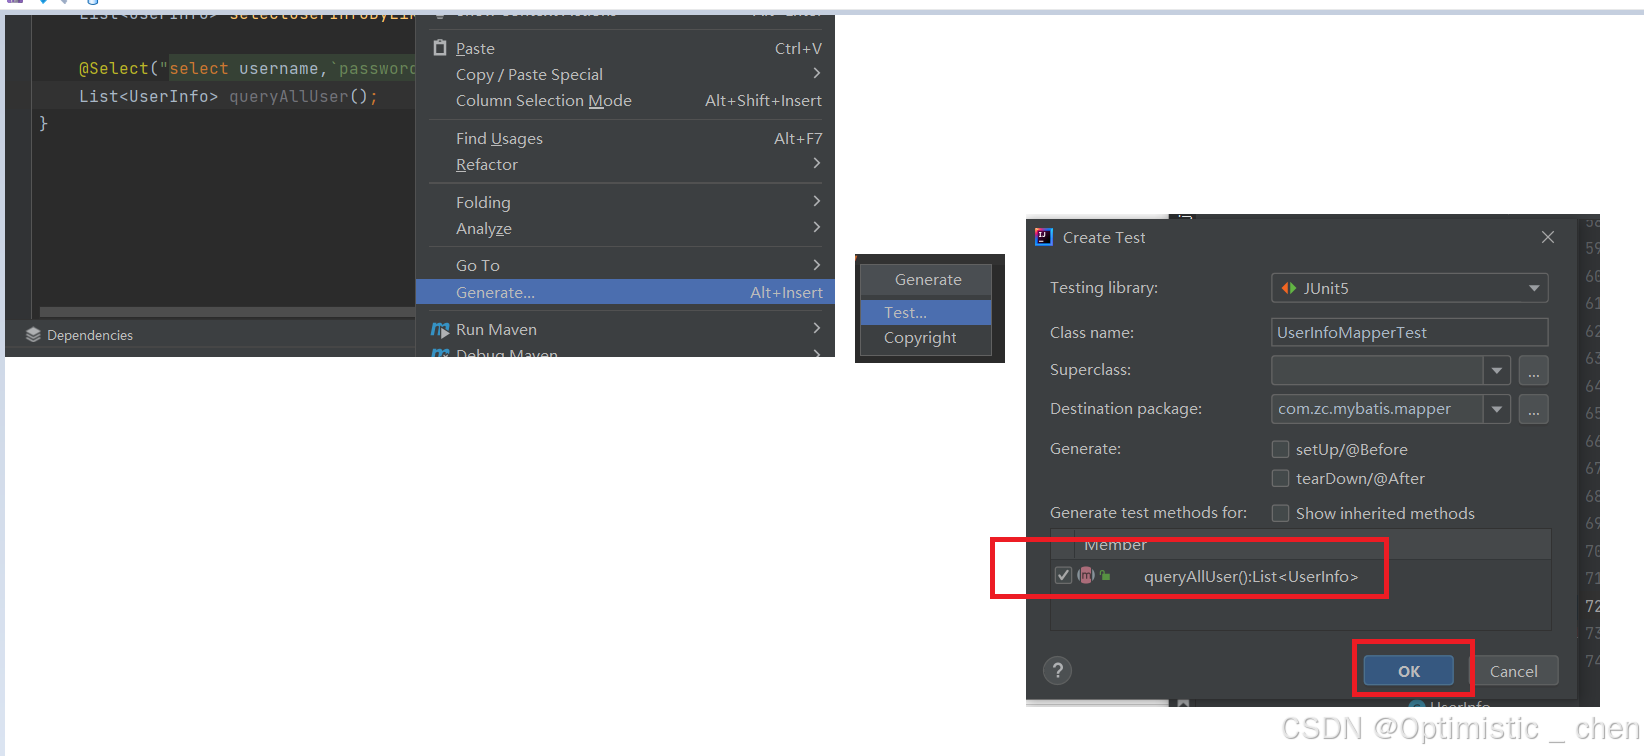
@SpringBootTest//自动加载测试环境
class UserInfoMapperTest {
    @Autowired
    private UserInfoMapper userInfoMapper;

    @Test
    void selectAll() {
        System.out.println(userInfoMapper.selectAll());
    }
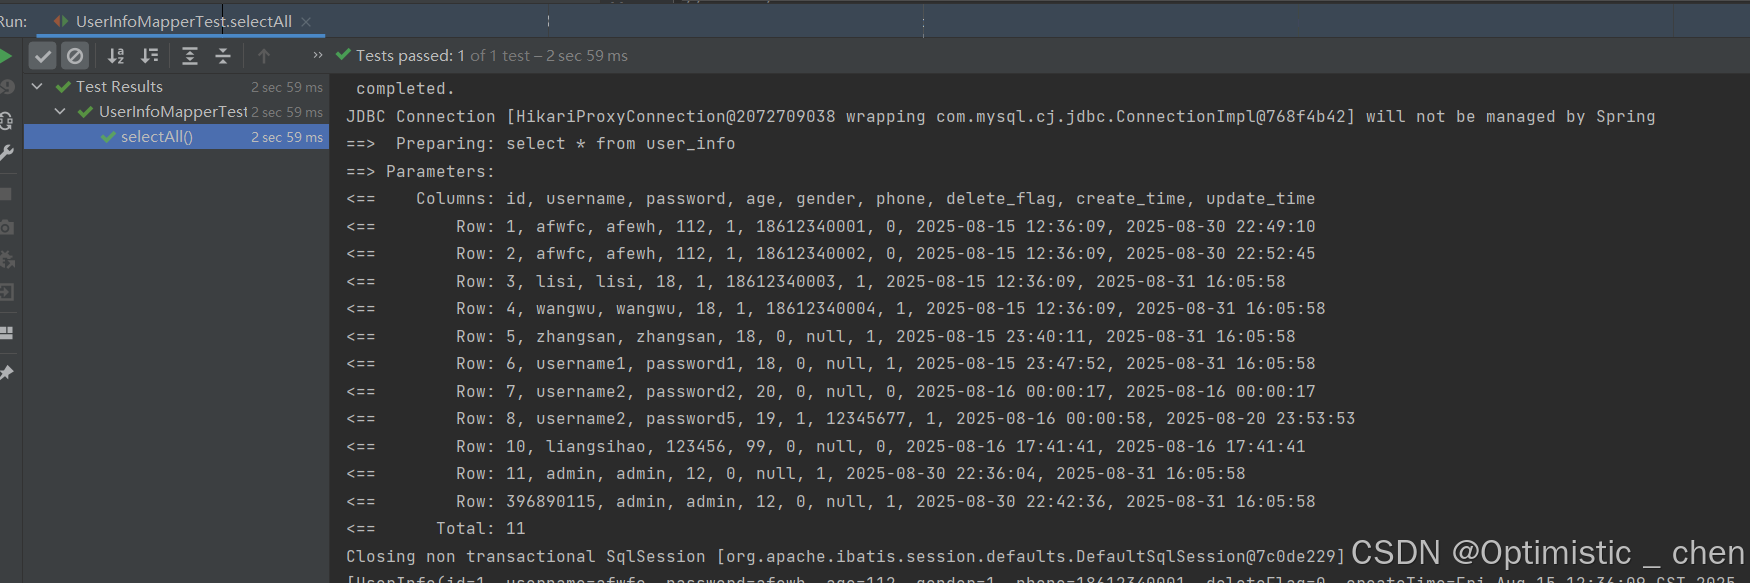
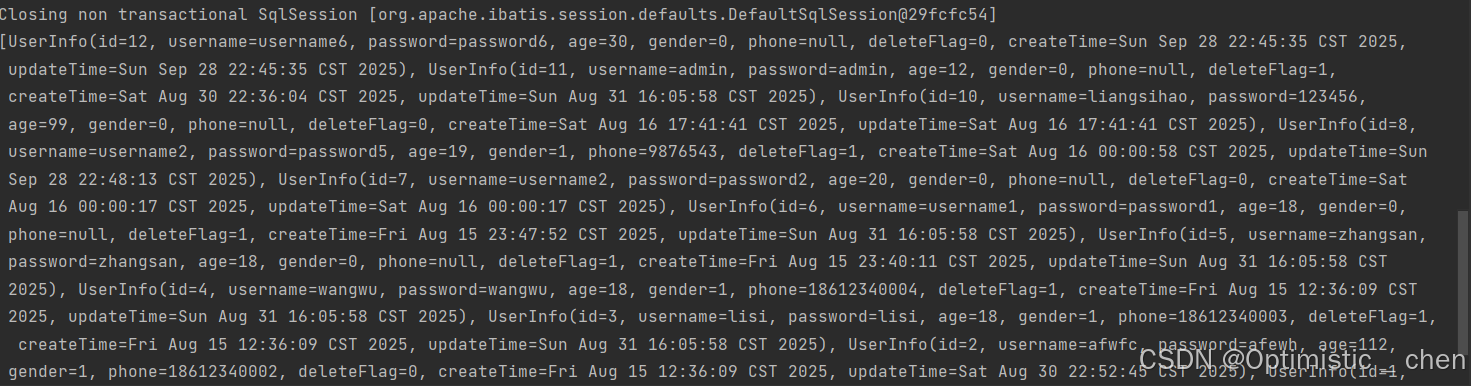
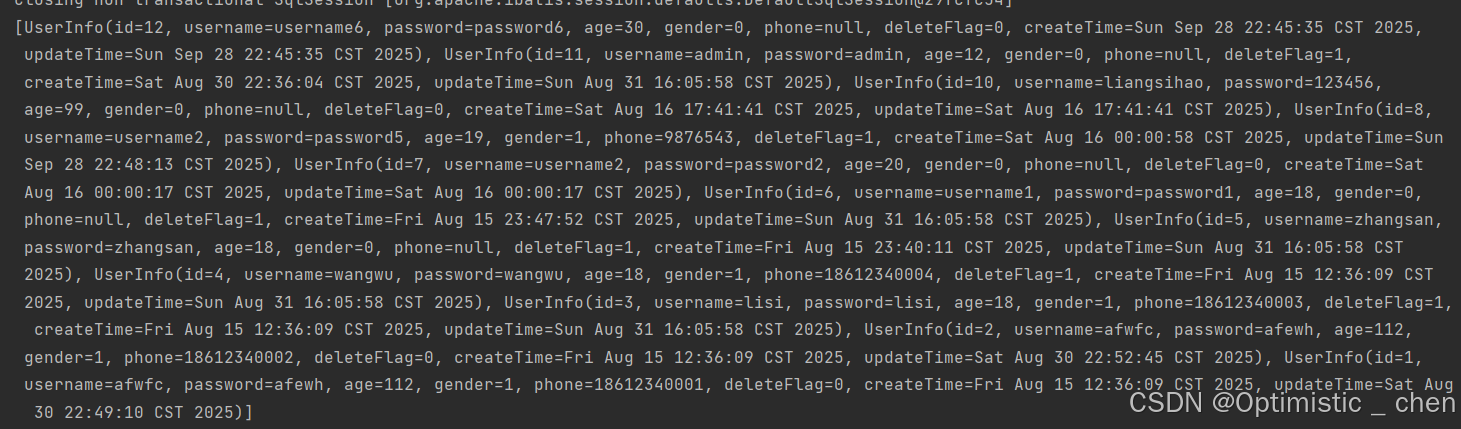
测试结果
Mybatis基础操作(注解)
打印日志,查看sql语句的执行结果,在配置文件中进行配置
mybatis:
  configuration:  #配置打印 Mybatis 日志
    log-impl: org.apache.ibatis.logging.stdout.StdOutImpl
参数传递
如果需要查找id=4的用户,对应的sql语句就是:select*from user_info where id=4
import com.zc.mybatis.model.UserInfo;
import org.apache.ibatis.annotations.*;

import java.util.List;
@Mapper//Mybaits注解
public interface UserInfoMapper {
      @Select("select * from user_info where id=4")
      UserInfo selectAllById();
}

但是这样的话,只能查找id=4的数据,不符合查询合理性,所以需要我们把参数变为动态的数值。
import com.zc.mybatis.model.UserInfo;
import org.apache.ibatis.annotations.*;

import java.util.List;
@Mapper//Mybaits注解
public interface UserInfoMapper {
      @Select("select * from user_info where id=#{id}")
      UserInfo selectAllById(Integer id);
}
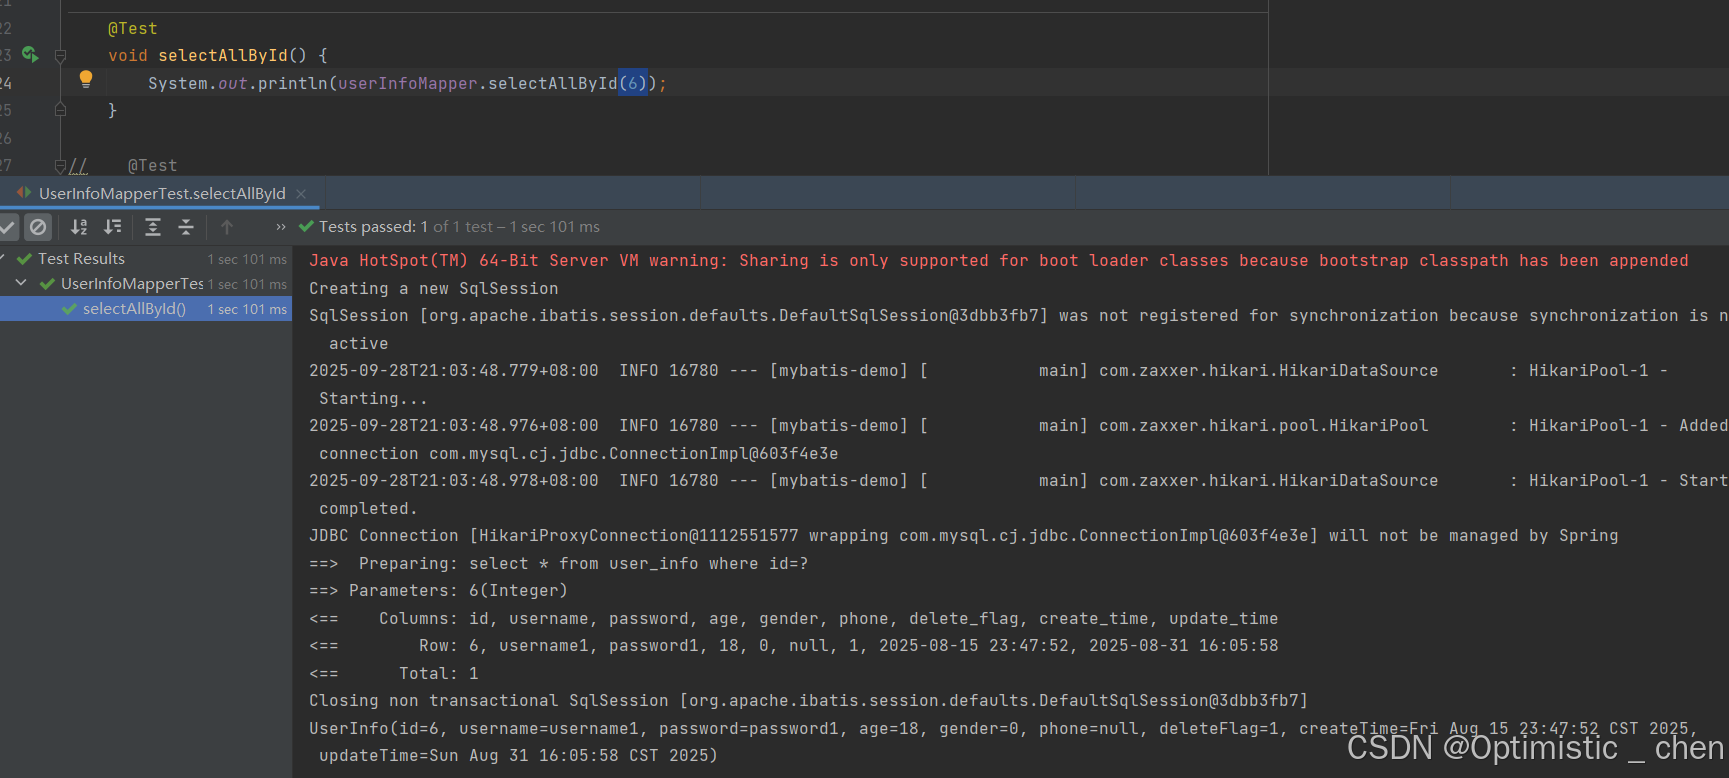
注意:可以使用@Param注解,设置参数的别名;但是#{…}里面的属性名必须和@Param设置的一样
      @Select("select * from user_info where id=#{userid}")
      UserInfo selectAllById(@Param("userid") Integer id);
增(Insert)
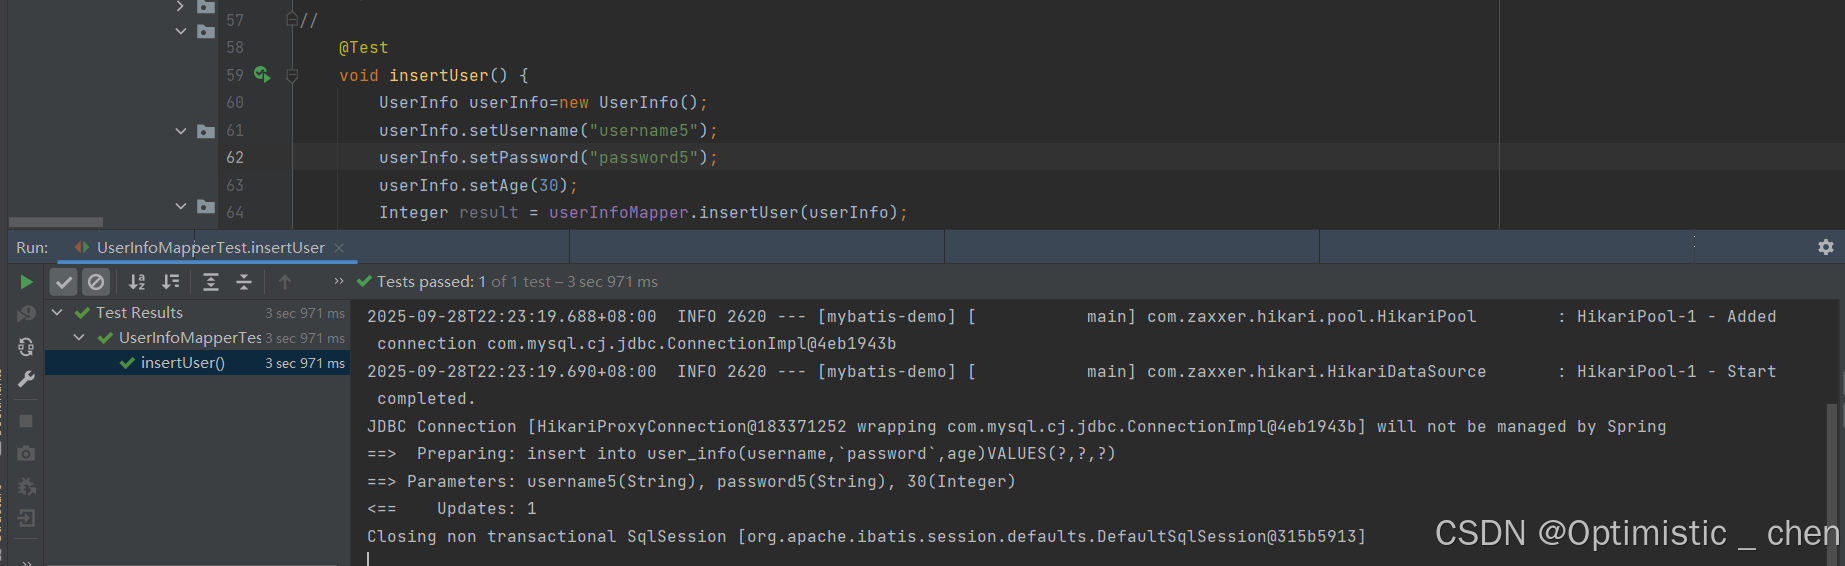
把SQL中的常量换成动态的参数
    @Insert("insert into user_info(username,`password`,age)VALUES(#{username},#{password},#{age})")
    Integer insertUser(UserInfo userInfo);
直接使用UserInfo对象的属性名获取参数
但是此时数据插入后,观察数据库id没有按照自增,而是一个不知名数,想要拿到自增id,需要在Mapper接口方法上添加一个Options的注解。
//    //获取自增id
    @Options(useGeneratedKeys = true,keyProperty = "id")
    @Insert("insert into user_info(username,`password`,age)VALUES(#{username},#{password},#{age})")
    Integer insertUser(UserInfo userInfo);

此时发现它在上一个id的基础上+1了。
删(Delete)
    @Delete("delete from user_info where id=#{id}")
    Integer deleteUser(Integer id);
测试
    @Test
    void deleteUser() {
        userInfoMapper.deleteUser(396890117);
    }

改(Update)
参数绑定
delete_flag = 使用参数中的 deleteFlag 值(#{deleteFlag}):从 UserInfo 对象的 deleteFlag 属性获取值
Mapper接口
    @Update("update user_info set delete_flag=#{deleteFlag},phone=#{phone} where id=#{id}")
    Integer updateUser(UserInfo userInfo);
测试Test
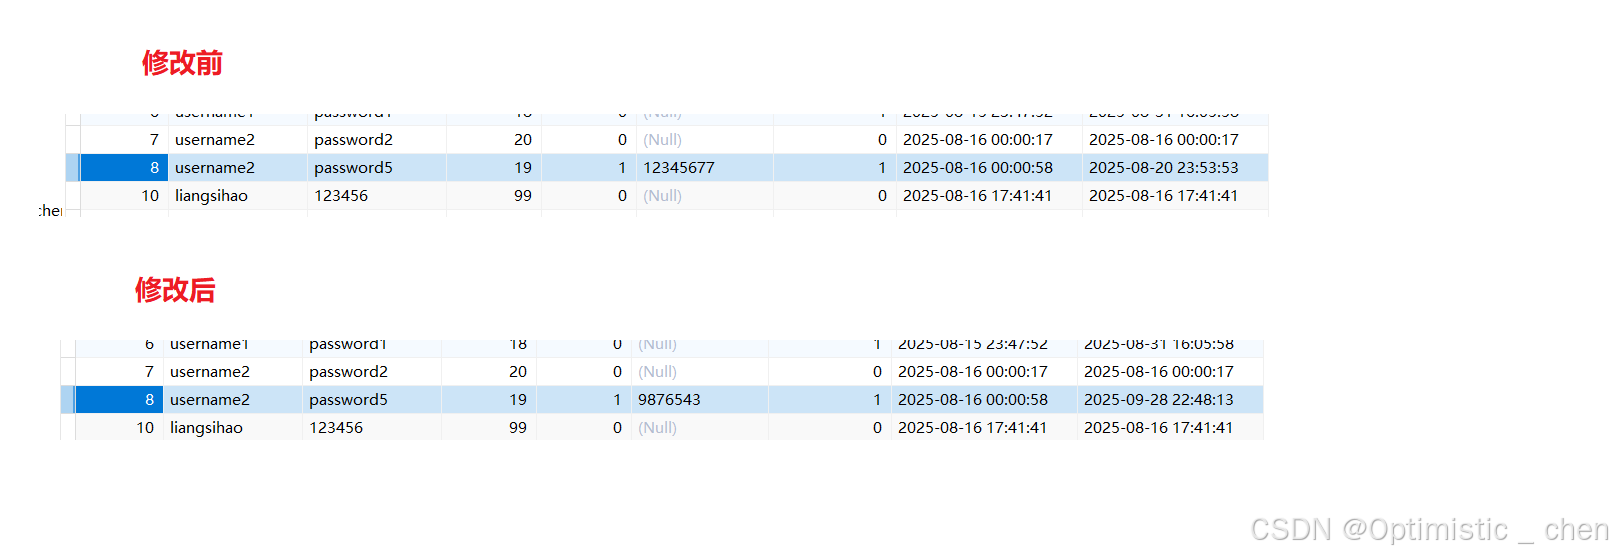
    @Test
    void updateUser() {
        UserInfo userInfo=new UserInfo();
        userInfo.setId(8);
        userInfo.setDeleteFlag(1);
        userInfo.setPhone("9876543");
        userInfoMapper.updateUser(userInfo);
    }
查(Select)
查询的时候,如果方法使用对象接收返回结果,查出来一条数据自动赋值给对象;如果使用List < UserInfo > 接收返回结果,查出来一条或者多条时,也会自动赋值给List。
但是查询返回多条,但是使用UserInfo接收,MyBatis就会报错。
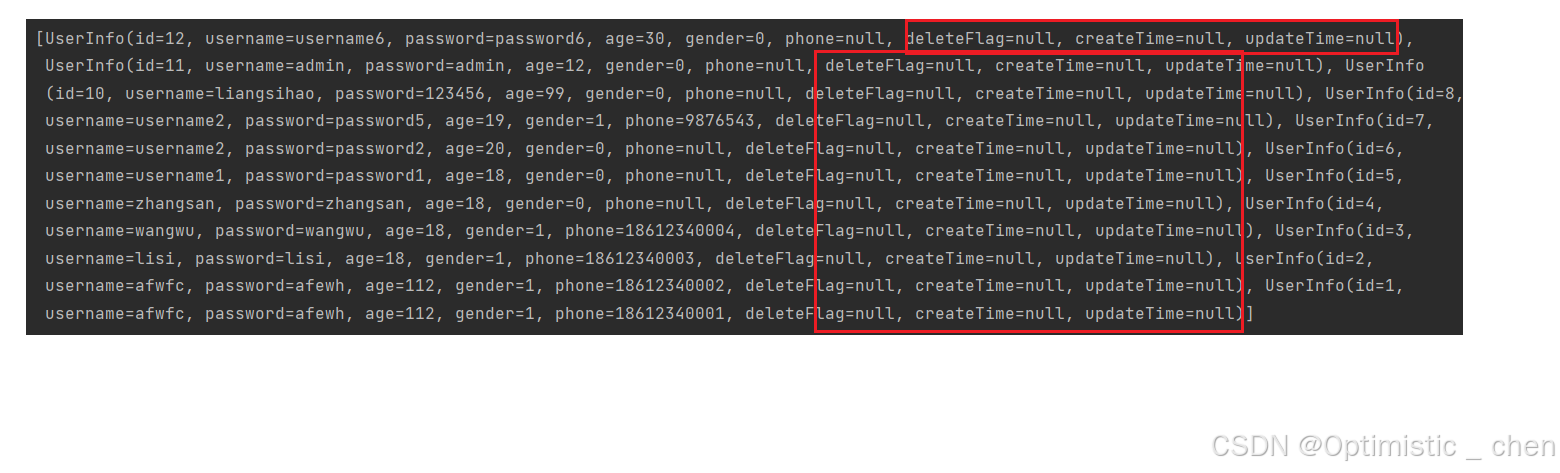
结果显示,有几个属性没有赋值,因为它们的属性名与字段名不同,这需要我们去解决,下面有三个方法:
起别名
Mapper接口:
@Select("select id, username, `password`, age, gender, phone, delete_flag as deleteFlag, "
+"create_time as createTime, update_time as updateTime from user_info")
List<UserInfo> selectAll();
结果映射
      @Select("select id, username, `password`, age, gender, phone, delete_flag, create_time, update_time from user_info")
      @Results({
            @Result(column = "delete_flag",property = "deleteFlag"),
            @Result(column = "create_time",property = "createTime"),
            @Result(column = "update_time",property = "updateTime")
      })
      List<UserInfo> selectAll();
Result plus版:如果其他sql也想使用这个映射关系,给这个Result定义一个名称
 @Select("select id, username, `password`, age, gender, phone, delete_flag, create_time, update_time from user_info")
      @Results(id = "resultMap",value = {
            @Result(column = "delete_flag",property = "deleteFlag"),
            @Result(column = "create_time",property = "createTime"),
            @Result(column = "update_time",property = "updateTime")
      })
      List<UserInfo> selectAll();

    @ResultMap(value="resultMap")//使用映射关系
    @Select("select * from user_info where id=#{id}")
    UserInfo selectAllById( Integer id);
使用配置驼峰转换
通常数据库列使⽤蛇形命名法进⾏命名(下划线分割各个单词),⽽Java属性⼀般遵循驼峰命名法约定。
为了在这两种命名方式之间启动自动映射,配置文件中:
mybatis:
  configuration:  #配置打印 Mybatis 日志
    log-impl: org.apache.ibatis.logging.stdout.StdOutImpl
    map-underscore-to-camel-case: true #蛇形转换为驼峰
MyBatis XML配置文件
前面我们使用注解的方法操作数据库,但是MyBatis还可以使用XML的方法实现较为复杂的SQL功能。
首先,我们需要设置数据库连接和MyBatis的XML文件配置
mybatis:
  configuration:  #配置打印 Mybatis 日志
    log-impl: org.apache.ibatis.logging.stdout.StdOutImpl
    map-underscore-to-camel-case: true #蛇形转换为驼峰
  # 配置mybatis xml 的文件路径
  mapper-locations: classpath:mapper/**.xml
XML基础操作
mapper接口:
import java.util.List;

@Mapper
public interface UserInfoMapperXML {
    List<UserInfo> selectAll();
}
实现mapper接口的xml格式:
<?xml version="1.0" encoding="UTF-8"?>
<!DOCTYPE mapper PUBLIC "-//mybatis.org//DTD Mapper 3.0//EN"
"http://mybatis.org/dtd/mybatis-3-mapper.dtd">
<mapper namespace="com.example.demo.mapper.UserInfoMapper">
    <select id="selectAll" resultType="com.zc.mybatis.model.UserInfo">
        select * from user_info
    </select>
</mapper>
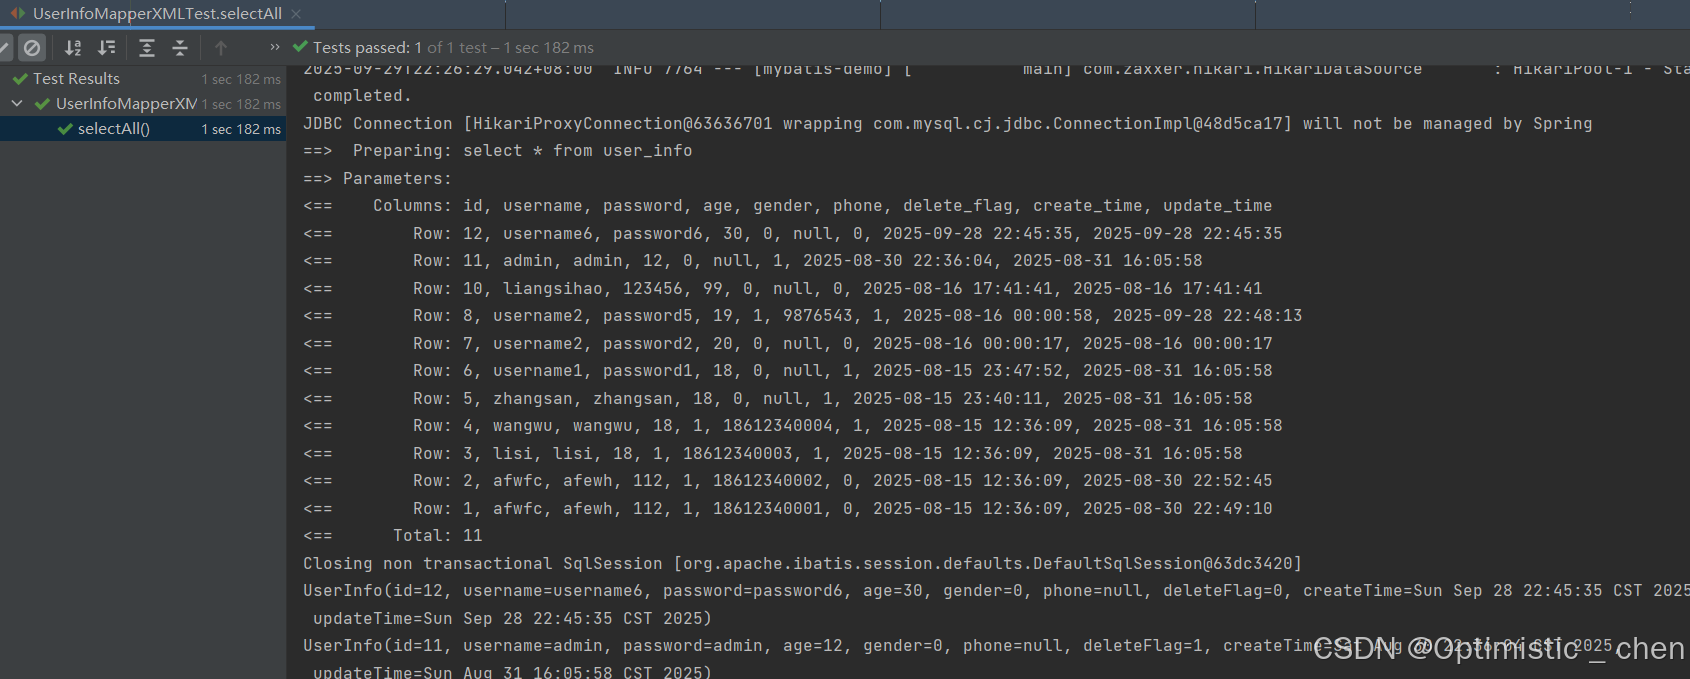
测试结果:
增(Insert)
UserInfoMapper接口:
import com.zc.genertor.model.UserInfo;
import java.util.List;

public interface UserInfoMapper {

    int insert(UserInfo record);

}
UserInfoMapper.xml实现:
  <insert id="insertUser" >
  insert into userinfo (username, `password`, age, gender, phone) values
  (#{username}, #{password}, #{age},#{gender},#{phone})
  </insert>
此时要注意,我们增加了一行数据,该行数据应该返回自增id,前面使用注解方法@Options,现在在UserInfoMapper.xml中设置useGenerateKeys和keyProperty属性
<insert id="insertUser" useGeneratedKeys="true" keyProperty="id">
 insert into user_info (username, `password`, age, gender, phone) values
 (#{username}, #{password}, #{age},#{gender},#{phone})
 </insert>
删(Delete)
UserInfoMapper接口:
Integer deleteUser(Integer id);
UserInfoMapper.xml实现接口:
    <delete id="deleteUser">
        delete from user_info where id=#{id}
    </delete>
改(Update)
UserInfoMapper接口:
Integer updateUser(String password,Integer age,Integer id);
UserInfoMapper.xml实现接口:
<update id="updateUser">
        update user_info set password=#{password},age=#{age} where id=#{id}
</update>
查(Select)
UserInfoMapper.xml实现接口:
<select id="selectAll" resultType="com.zc.mybatis.model.UserInfo">
    select id, username,`password`, age, gender, phone, delete_flag,
    create_time, update_time from user_info
</select>
查看结果:
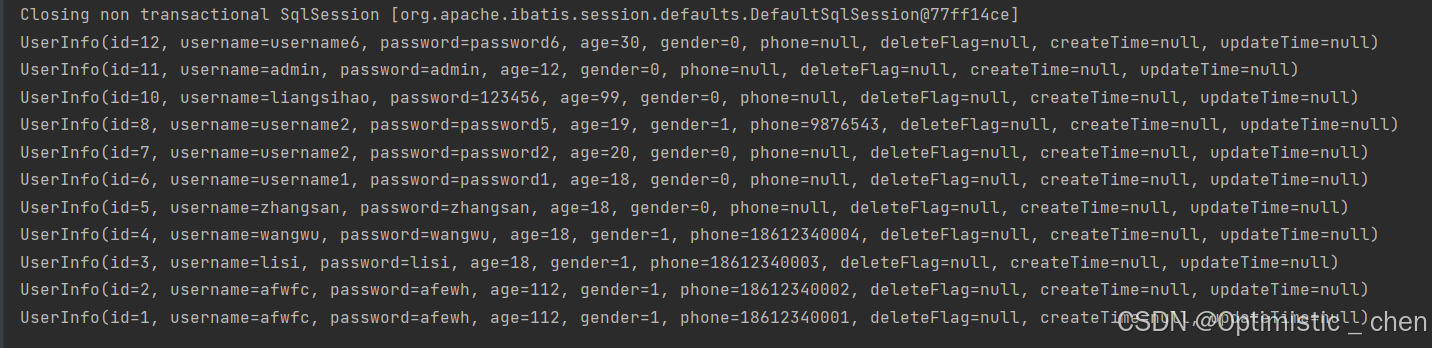
再次出现了属性未赋值的情况,解决方法和注解类似:起别名、结果映射、驼峰命名三种方法。只有结果映射方法需要重新写,其他两种方法照搬即可。
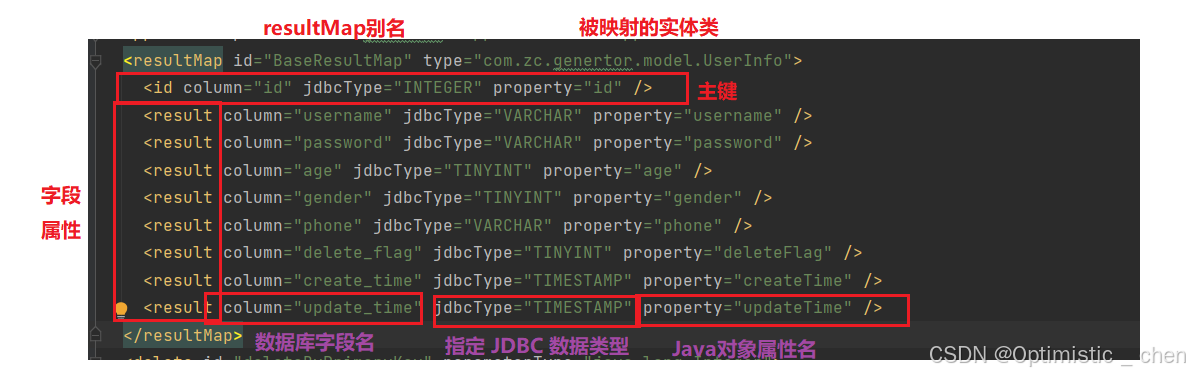
注解里面使用@Results注解,xml使用resultMap标签。
<resultMap id="BaseResultMap" type="com.zc.genertor.model.UserInfo">
    <id column="id" jdbcType="INTEGER" property="id" />
    <result column="username" jdbcType="VARCHAR" property="username" />
    <result column="password" jdbcType="VARCHAR" property="password" />
    <result column="age" jdbcType="TINYINT" property="age" />
    <result column="gender" jdbcType="TINYINT" property="gender" />
    <result column="phone" jdbcType="VARCHAR" property="phone" />
    <result column="delete_flag" jdbcType="TINYINT" property="deleteFlag" />
    <result column="create_time" jdbcType="TIMESTAMP" property="createTime" />
    <result column="update_time" jdbcType="TIMESTAMP" property="updateTime" />
  </resultMap>
完结撒花!🎉
如果这篇博客对你有帮助,不妨点个赞支持一下吧!👍
你的鼓励是我创作的最大动力~
✨ 想获取更多干货? 欢迎关注我的专栏 → optimistic_chen
📌 收藏本文,下次需要时不迷路!
我们下期再见!💫 持续更新中……
悄悄说:点击主页有更多精彩内容哦~ 😊


 1699
1699


 到【灌水乐园】发言


