


文章预览
前言
WebSocket是一种在单个TCP连接上进行全双工通信的协议。WebSocket通信协议于2011年被IETF定为标准RFC 6455,并由RFC7936补充规范。WebSocket API也被W3C定为标准。
WebSocket使得客户端和服务器之间的数据交换变得更加简单,允许服务端主动向客户端推送数据。在WebSocket API中,浏览器和服务器只需要完成一次握手,两者之间就直接可以创建持久性的连接,并进行双向数据传输。
一、使用WebSocket
创建一个文件夹
初始化环境
npm init -y
安装websocket库
npm install websocket
websocket的github地址https://github.com/theturtle32/WebSocket-Node
二、模拟场景一
客户端发送消息给服务端,服务端再返回消息给客户端
2.1、index.js模拟服务端
var Websocket  = require('websocket').server
var http = require('http')

// 建立服务,绑定端口
var httpServer = http.createServer().listen(8080,function(){
    console.log('http://127.0.0.1:8080')

})

// 建立服务
var wsServer = new Websocket({
    httpServer:httpServer,
    autoAcceptConnections:false
})

//给接收的请求绑定事件
wsServer.on('request',function(request){
    //接受请求
    var connection = request.accept()
    // 给接收到的消息绑定事件
    connection.on('message',function(msg){
        console.log("接收的消息:"+JSON.stringify(msg))

        // 返回接收到的消息给客户端
        connection.send("我已经接收到了你的消息"+msg.utf8Data)
    })
})
2.2、index.html模拟客户端
<!DOCTYPE html>
<html lang="en">
<head>
    <meta charset="UTF-8">
    <meta http-equiv="X-UA-Compatible" content="IE=edge">
    <meta name="viewport" content="width=device-width, initial-scale=1.0">
    <title>客户端</title>
</head>
<body>
    <div id="msg"></div>
    <input type="text" id="text">
    <input type="button" value="发送" onclick="send()">

    <script>
        // 新建连接
        var websocket = new WebSocket('ws://127.0.0.1:8080')
        //链接状态
        // 1已经建立连接
        // 2连接正在关闭
        // 3连接已经关闭
        console.log(websocket.readyState)    //这时未建立连接
        websocket.onopen = function(){     //已经建立连接
            console.log(websocket.readyState)
        }

        // 发送消息
        function send(){
            var text = document.getElementById('text').value
            websocket.send(text)
        }

        // 监听服务器的推送
        websocket.onmessage = function(back){
            console.log(back)
        }
    </script>

</body>
</html>
2.3、测试
客户端

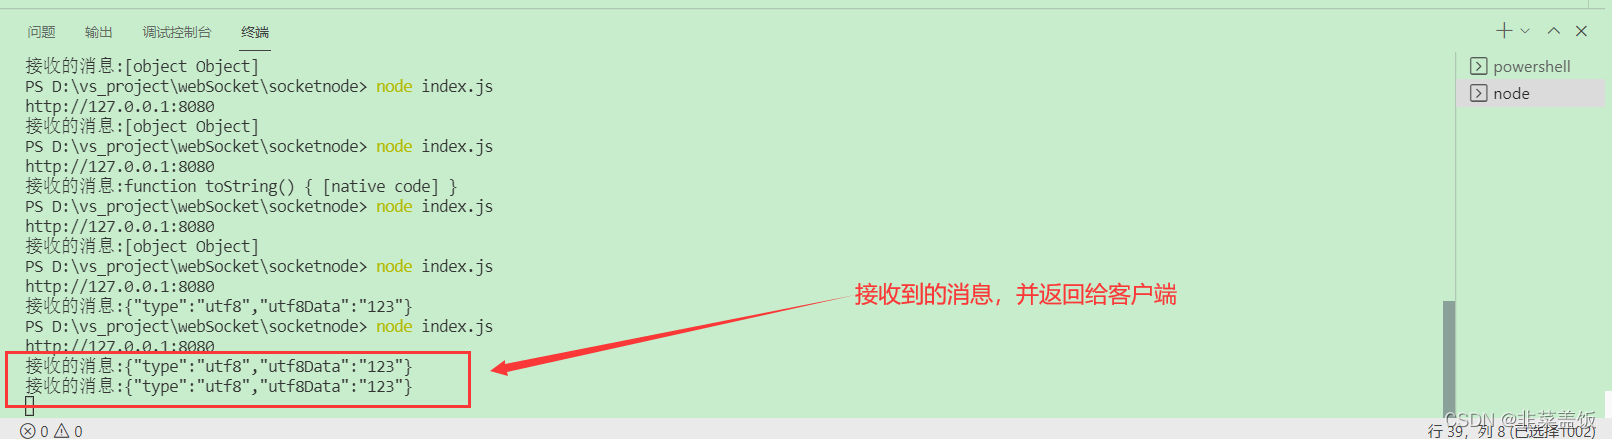
服务端
三、模拟场景二
两个客户端进行通信
这里采用简单的方式,直接循环每一个已经建立的连接。给每一个连接都发一次消息,如果想要精确的只发送一个人,可以将每一个连接进行标识,发送消息时根据准确的标识来发送就可以精确的只发送一个客户端了
3.1、index.js模拟服务端
var Websocket  = require('websocket').server
var http = require('http')

// 建立服务,绑定端口
var httpServer = http.createServer().listen(8080,function(){
    console.log('http://127.0.0.1:8080')

})

// 建立服务
var wsServer = new Websocket({
    httpServer:httpServer,
    autoAcceptConnections:false
})

/**
 * 这里使用简单的数组进行连接
 * 在实际开发过程中可以使用数据库、redis这些存放链接
 */
var conns = []

//给接收的请求绑定事件
wsServer.on('request',function(request){
    //接受请求
    var connection = request.accept()
    conns.push(connection)
    // 给接收到的消息绑定事件
    connection.on('message',function(msg){
        console.log("接收的消息:"+JSON.stringify(msg))

       for (let i = 0; i < conns.length; i++) {
          conns[i].send("返回过来的消息:"+msg.utf8Data)
       }
    })
})
3.2、index.html模拟客户端
<!DOCTYPE html>
<html lang="en">
<head>
    <meta charset="UTF-8">
    <meta http-equiv="X-UA-Compatible" content="IE=edge">
    <meta name="viewport" content="width=device-width, initial-scale=1.0">
    <title>客户端</title>
</head>
<body>
    <div id="msg"></div>
    <input type="text" id="text">
    <input type="button" value="发送" onclick="send()">

    <script>
        // 新建连接
        var websocket = new WebSocket('ws://127.0.0.1:8080')
        //链接状态
        // 1已经建立连接
        // 2连接正在关闭
        // 3连接已经关闭
        console.log(websocket.readyState)    //这时未建立连接
        websocket.onopen = function(){     //已经建立连接
            console.log(websocket.readyState)
        }

        // 发送消息
        function send(){
            var text = document.getElementById('text').value
            websocket.send(text)
        }

        // 监听服务器的推送
        websocket.onmessage = function(back){
            console.log(back)
        }
    </script>

</body>
</html>
3.3、测试
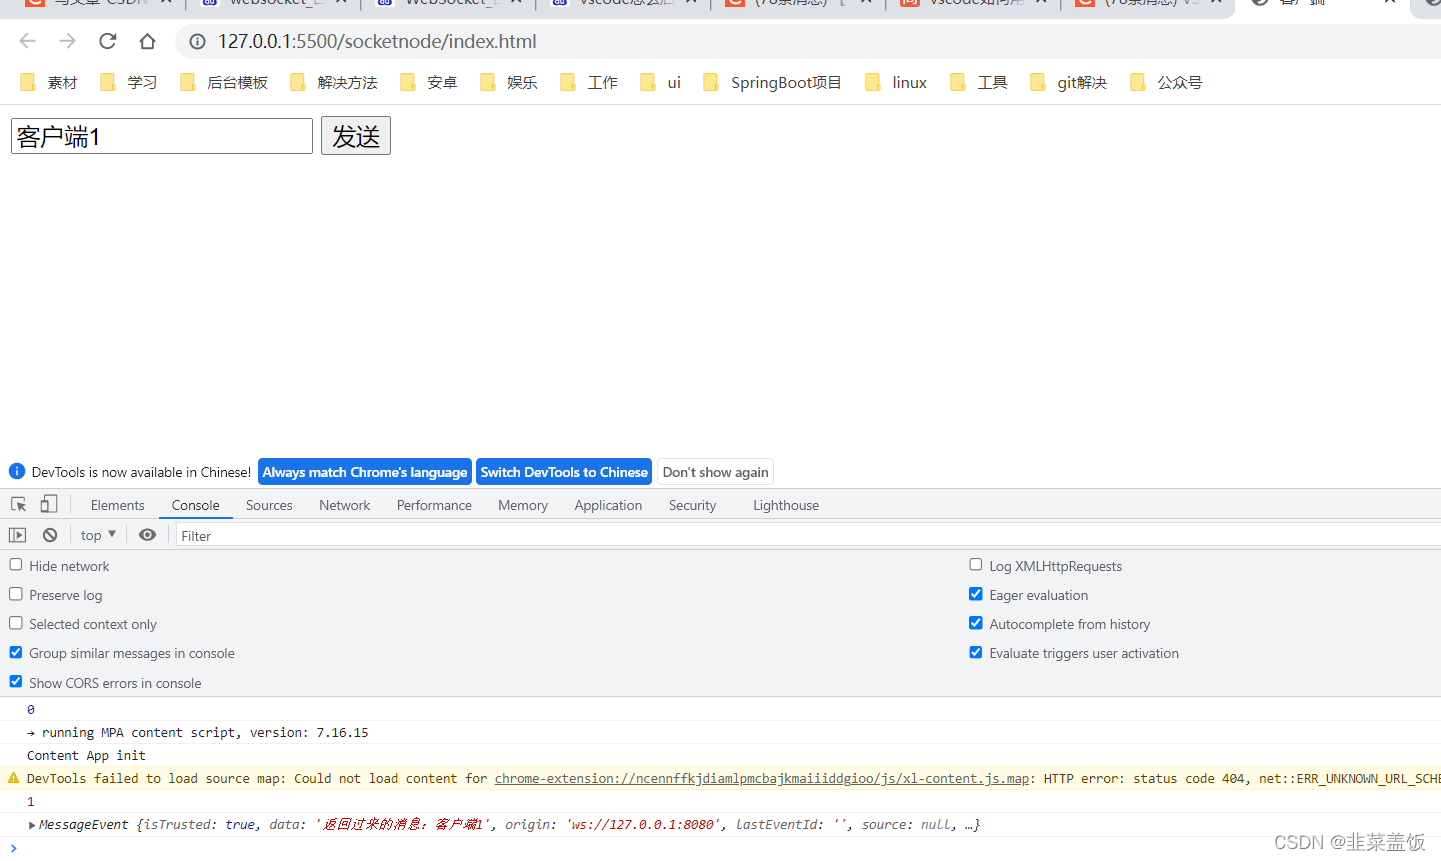
客户端1发送
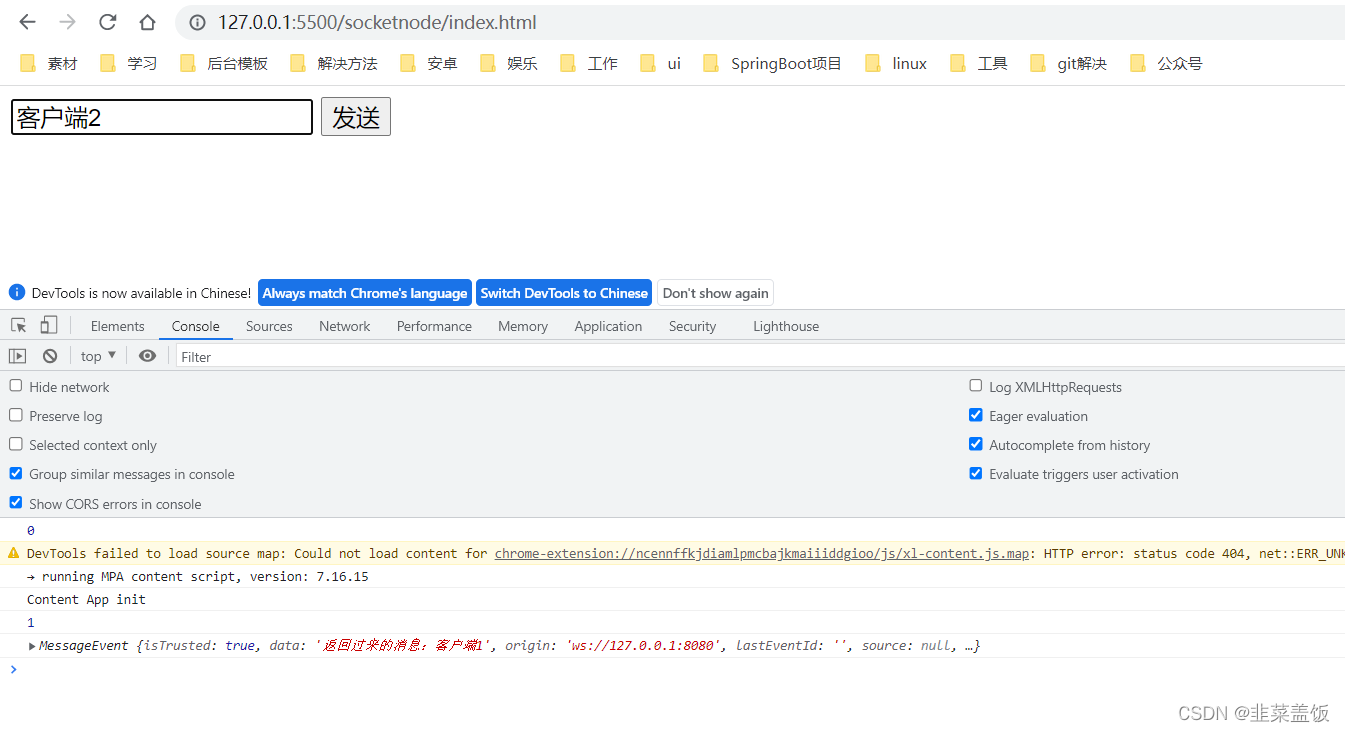
客户端2接收到消息


 233
233

 被折叠的 条评论
为什么被折叠?
被折叠的 条评论
为什么被折叠?
 到【灌水乐园】发言


