


 本文介绍了一种Spring整合Mybatis的方法,通过使用MapperFactoryBean来实现。具体步骤包括配置数据源、创建实体类、定义映射接口及其实现文件、配置Mybatis及Spring的相关配置文件等。
一、Spring整合Mybatis的几种方式
目前了解到的Spring整合Mybatis的方式共有5种:
- 采用数据映射器(MapperFactoryBean)的方式
- 采用接口org.apache.ibatis.session.SqlSession的实现类org.mybatis.spring.SqlSessionTemplate
- 采用抽象类org.mybatis.spring.support.SqlSessionDaoSupport提供SqlSession
- 采用MapperScannerConfigurer 配置整合
- TKmybatis(非官方)
本文介绍第一种方式。
二、MapperFactoryBean整合Mybatis
1. 数据源
自备数据源,本文数据源如下:

2. 创建实体类
创建实体类product.java
package com.li.pojo;

import java.util.Date;

public class product {
    private String id;//主键
    private String productNum;//编号 唯一
    private String productName;//名称
    private String cityName;//出发城市
    private Date departureTime;//出发时间
    private String departureTimeStr;//出发时间的str
    private double productPrice;//价格
    private Integer productStatus;//状态

    public String getId() {
        return id;
    }

    public void setId(String id) {
        this.id = id;
    }

    public String getProductNum() {
        return productNum;
    }

    public void setProductNum(String productNum) {
        this.productNum = productNum;
    }

    public String getProductName() {
        return productName;
    }

    public void setProductName(String productName) {
        this.productName = productName;
    }

    public String getCityName() {
        return cityName;
    }

    public void setCityName(String cityName) {
        this.cityName = cityName;
    }

    public Date getDepartureTime() {
        return departureTime;
    }

    public void setDepartureTime(Date departureTime) {
        this.departureTime = departureTime;
    }

    public String getDepartureTimeStr() {
        return departureTimeStr;
    }

    public void setDepartureTimeStr(String departureTimeStr) {
        this.departureTimeStr = departureTimeStr;
    }

    public double getProductPrice() {
        return productPrice;
    }

    public void setProductPrice(double productPrice) {
        this.productPrice = productPrice;
    }

    public Integer getProductStatus() {
        return productStatus;
    }

    public void setProductStatus(Integer productStatus) {
        this.productStatus = productStatus;
    }

    @Override
    public String toString() {
        return "product{" +
                "id='" + id + '\'' +
                ", productNum='" + productNum + '\'' +
                ", productName='" + productName + '\'' +
                ", cityName='" + cityName + '\'' +
                ", departureTime=" + departureTime +
                ", departureTimeStr='" + departureTimeStr + '\'' +
                ", productPrice=" + productPrice +
                ", productStatus=" + productStatus +
                '}';
    }
}
3. 创建映射接口
创建实体类映射接口productMapper.java,里面有我们想要的实现的抽象方法。
package com.li.dao;

import com.li.pojo.product;

import java.util.List;

public interface productMapper {
    public product find();
}
4. 创建Mapper文件
创建接口类映射的Mapper文件productMapperImpl.xml,并在Mapper文件中写入数据库查询语句。
<?xml version="1.0" encoding="UTF-8" ?>
<!DOCTYPE mapper PUBLIC "-//mybatis.org//DTD Mapper 3.0//EN" "http://mybatis.org/dtd/mybatis-3-mapper.dtd">

<mapper namespace="com.li.dao.productMapper">
    <select id="find" resultType="com.li.pojo.product">
        select * from product where cityName = "广州"
    </select>
</mapper>
5. 配置Mybatis-config.xml文件
以上步骤是单独使用Mybatis时都需要进行的操作,下面开始是与单独使用Myabtis不同之处。配置Mybatis-config.xml文件,在单独使用Mybatis时,需要配置数据库连接,但是由于要与Spring整合,Spring接管了数据库,在Mybatis-config中只需要写类的别名和引用的Mapper即可。
<?xml version="1.0" encoding="UTF-8" ?>
<!DOCTYPE configuration
        PUBLIC "-//mybatis.org//DTD Config 3.0//EN"
        "http://mybatis.org/dtd/mybatis-3-config.dtd">
<configuration>

    <typeAliases>
        <package name="com.li.pojo"/>
    </typeAliases>
    <mappers>
        <!-- 添加映射文件到Mybatis的全局配置文件中 -->
        <mapper resource="productMapperImpl.xml" />
    </mappers>
</configuration>
6. 配置Spring-config文件
将于数据库相关的配置放在了Spring配置文件中
<?xml version="1.0" encoding="UTF-8"?>
<beans xmlns="http://www.springframework.org/schema/beans"
xmlns:xsi="http://www.w3.org/2001/XMLSchema-instance"
xmlns:p="http://www.springframework.org/schema/p"
xmlns:aop="http://www.springframework.org/schema/aop"
xmlns:context="http://www.springframework.org/schema/context"
xmlns:tx="http://www.springframework.org/schema/tx"
xsi:schemaLocation="http://www.springframework.org/schema/beans
http://www.springframework.org/schema/beans/spring-beans.xsd
http://www.springframework.org/schema/context
http://www.springframework.org/schema/context/spring-context-4.2.xsd
http://www.springframework.org/schema/aop
http://www.springframework.org/schema/aop/spring-aop-4.3.xsd
http://www.springframework.org/schema/tx
http://www.springframework.org/schema/tx/spring-tx-4.3.xsd">
<!--数据库连接池-->
<bean id="dataSource" class="org.springframework.jdbc.datasource.DriverManagerDataSource">
<property name="driverClassName" value="com.mysql.cj.jdbc.Driver"/>
<property name="url" value="jdbc:mysql://localhost:3306/ssm?useSSL=true&useUnicode=true&characterEncoding=UTF-8&serverTimezone=UTC"/>
<property name="username" value="root"/>
<property name="password" value="123456"/>
</bean>
<!--配置SqlSessionFactory-->
<bean id="sqlSessionFactory" class="org.mybatis.spring.SqlSessionFactoryBean">
<property name="dataSource" ref="dataSource"/>
<!--关联Mybatis-->
<property name="configLocation" value="classpath:mybatis-config.xml"/>
</bean>
<bean id="productMapper" class="org.mybatis.spring.mapper.MapperFactoryBean">
<property name="mapperInterface" value="com.li.dao.productMapper"/>
<property name="sqlSessionFactory" ref="sqlSessionFactory"/>
</bean>
<!--<bean id="sqlsessionTemplate" class="org.mybatis.spring.SqlSessionTemplate">-->
<!--<constructor-arg index="0" ref="sqlSessionFactory" />-->
<!--</bean>-->
</beans>
7. 测试
以上配置完成后,编写测试文件如下:
import com.li.dao.productMapper;
import org.junit.Test;
import org.springframework.context.ApplicationContext;
import org.springframework.context.support.ClassPathXmlApplicationContext;
import com.li.pojo.product;

public class TestDemo {


    @Test
    public void getPorductService(){
        ApplicationContext applicationContext = new ClassPathXmlApplicationContext("applicationContext.xml");
        productMapper findAll = (productMapper)applicationContext.getBean("productMapper");

        product all = findAll.find();
        System.out.println(all);
    }

}
成功查询出

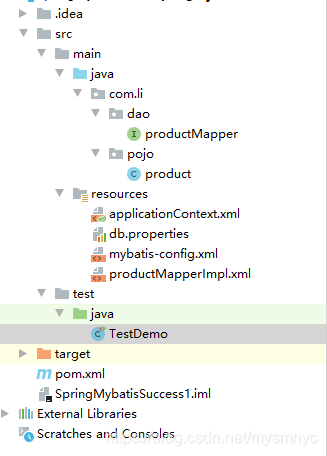
8. 工程目录


 3919
3919

 被折叠的 条评论
为什么被折叠?
被折叠的 条评论
为什么被折叠?
 到【灌水乐园】发言


