


介绍
Nginx (engine x) 是一个高性能的 HTTP 和 反向代理服务,也是一个IMAP/POP3/SMTP服务。
Nginx是一款轻量级的Web 服务器/反向代理服务器及电子邮件(IMAP/POP3)代理服务器,并在一个BSD-like 协议下发行。
在高连接并发的情况下,Nginx是Apache服务器不错的替代品。
优点
Nginx 是一个高性能的 Web 和反向代理服务器, 它具有有很多非常优越的特性:
-
作为 Web 服务器:相比 Apache,Nginx 使用更少的资源,支持更多的并发连接。
-
作为负载均衡服务器: Nginx 用 C 编写。
-
作为邮件代理服务器:Nginx 同时也是一个非常优秀的邮件代理服务器。
-
Nginx 安装非常的简单,配置文件 非常简洁(还能够支持perl语法),Bugs非常少的服务器。
Nginx安装部署和配置管理
1.安装运行环境
yum install -y zlib zlib-devel openssl openssl-devel pcre pcer-devel wget httpd-tools vim gcc gcc-c++2.下载源代码
nginx官方网站:nginx news![]() http://nginx.org阿里nginx网站:The Tengine Web Server
http://nginx.org阿里nginx网站:The Tengine Web Server![]() http://tengine.taobao.org
http://tengine.taobao.org
wget https://tengine.taobao.org/download/tengine-2.4.1.tar.gz #阿里下载源3.解压源码压缩包
[root@localhost tmp]# tar zxvf tengine-2.4.1.tar.gz
cd tengine-2.4.1
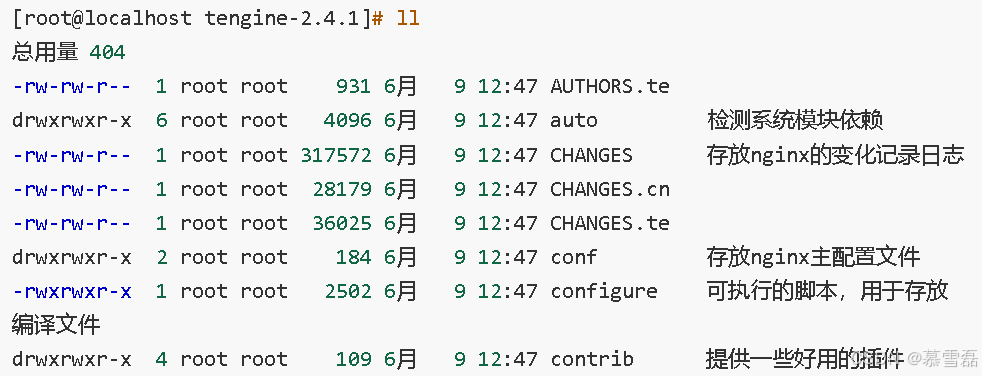
4.执行编译脚本,配置信息
[root@localhost tengine-2.4.1]# ./configure --prefix=/tmp/tngx --with-http_ssl_module --with-http_flv_module --with-http_gzip_static_module --with-http_stub_status_module --with-threads --with-file-aio
5.编译安装
[root@localhost tengine-2.4.1]# make && make install

6.开启nginx
进入sbin目录下
[root@localhost sbin]# ./nginx #开启nginx[root@localhost sbin]# ./nginx -s stop #关闭nginx
[root@localhost sbin]# ./nginx -s reload #平滑重启
7.浏览器访问
输入地址 http://虚拟机ip

注意保证防火墙关闭
Nginx命令
[root@localhost /]# nginx -h
Tengine version: Tengine/2.4.1
nginx version: nginx/1.22.1
Usage: nginx [-?hvVtTq] [-s signal] [-p prefix]
             [-e filename] [-c filename] [-g directives]

Options:
  -?,-h         : this help  #输出帮助文档
  -v            : show version and exit  #查看nginx的版本
  -V            : show version and configure options then exit #查看版本和nginx的配置选项
  -t            : test configuration and exit  #测试 配置文件的 正确性
  -T            : test configuration, dump it and exit  #测试配置文件,并显示配置文件(这个命令可以快速查看配置文件)
  -q            : suppress non-error messages during configuration testing #测试配置文件,但是只显示错误信息
  -s signal     : send signal to a master process: stop, quit, reopen, reload
  #发送信号,stop 强制关闭  quit平滑关闭 reopen重新记录日志  reload重读配置文件
  -p prefix     : set prefix path (default: /tmp/tngx/) #设置 前缀
  -e filename   : set error log file (default: logs/error.log) #设置报错日志文件
  -c filename   : set configuration file (default: conf/nginx.conf)  #设置配置文件
  -g directives : set global directives out of configuration file  #附加配置文件路径

  -m            : show all modules and exit  #展示所有模块
  -l            : show all directives and exit  #展示目录
查看当前nginx进程

Nginx信号传递
实现配置文件重读--以gsc用户开启nginx工作进程
查看当前nginx进程
[root@localhost /]# ps aux | grep nginx
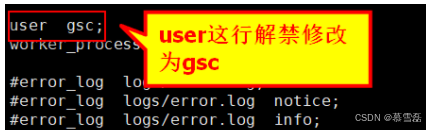
发现当前工作进程由nobody开启创建gsc用户
[root@localhost /]# useradd gsc
修改nginx配置文件,位置在 nginx目录/conf/nginx.conf

测试

让nginx重读配置文件
[root@localhost /]# nginx -s reload
重新查看进程

信号传递原理
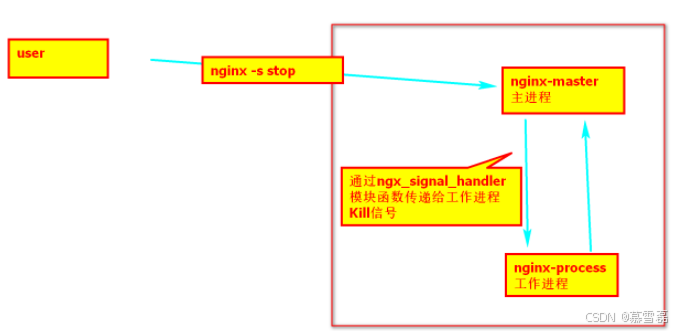
nginx -s 参数对应的信号
参数 信号 作用
stop TERM 强制关闭nginx
null INT 强制关闭整个nginx服务
quit QUIT 平缓关闭整个nginx服务
reopen USR1 重新打开日志记录
reload HUB 重新读取配置,平滑退出旧的配置
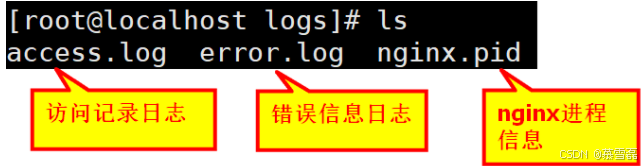
Nginx日志文件
nginx日志默认存放在 ningx包下的logs文件中,也可以在配置文件中手动配置,配置 文件存放在nginx的conf包下的nginx.conf
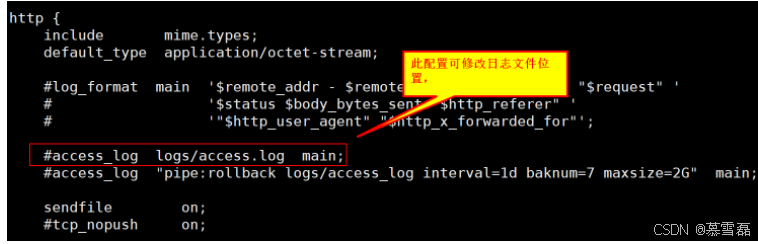

可以修改成自己设置目录下,检测 重启

发现没有自己设置目录需要自己创建
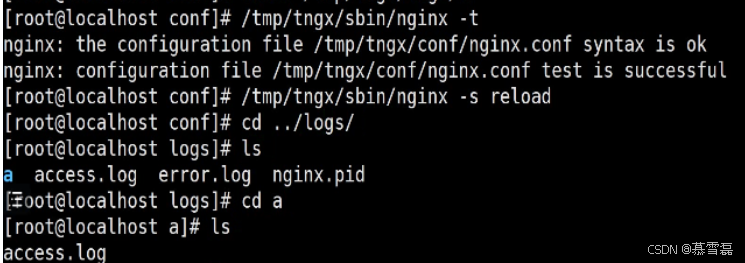
1.nginx日志分割
Nginx自带日志会每天覆盖,不能查看以前日志,下面进行解决。
#将原日志文件重命名
[root@localhost logs]# mv access.log "access.log_$(date +"%Y-%m-%d")"#使nginx重新加载
[root@localhost logs]# /tmp/tngx/sbin/nginx -s reopen
2.自动日志切割
编写日志分割脚本
#!/bin/bash
logs_path="/tmp/tngx/logs/"
mkdir -p ${logs_path}$(date -d "yesterday" +"%Y")/$(date -d "yesterday" +"%m")
mv ${logs_path}access.log ${logs_path}$(date -d "yesterday" +"%Y")/$(date -d "yesterday" +"%m")/access_$(date -d "yesterday" +"%Y-%m-%d").log

kill -USR1 `cat /tmp/tngx/logs/nginx.pid`
3.执行脚本
[root@localhost 11]# bash /opt/cut_nginx_log.sh
4.设置定时执行
[root@localhost 11]# crontab -e
0 0 * * * /bin/bash /opt/cut_nginx_log.sh # 设置每天零点执行


 6241
6241

 被折叠的 条评论
为什么被折叠?
被折叠的 条评论
为什么被折叠?
 到【灌水乐园】发言


