


 本文详细介绍ActiveMQ的安装与使用,包括其高可用、集群容错、持久化及Spring/SpringBoot整合等内容。通过实例演示了生产者、消费者的工作流程,并深入探讨了JMS规范下的消息可靠性保证机制。
ActiveMQ
扩展出:
API 接受发送
MQ 的高可用
MQ 的集群容错配置
MQ 的持久化
延时发送
签收机制
Spring/SpringBoot 整合
等
// MQ 都需要满足的技术
MQ  :   消息中间件/消息队列

为什么要使用 MQ ?
解决了耦合调用、异步模型、抵御洪峰流量,保护了主业务,消峰。
二、安装ActiveMQ
docker环境下安装
[root@linksys ~]# docker pull docker.io/webcenter/activemq
Using default tag: latest
latest: Pulling from webcenter/activemq
7dcf5a444392: Pull complete
9eebba75a87f: Pull complete
1f0440d87cc7: Pull complete
dacd0555c1b4: Pull complete
b0f19aa05a94: Pull complete
4796f64423b2: Pull complete
5d994b710cb9: Pull complete
313a84c05d3c: Pull complete
1d6a562461f1: Pull complete
e25558998b21: Pull complete
1423ae5a1b0b: Pull complete
8d4e082d1ca6: Pull complete
098d68aaa4ae: Pull complete
Digest: sha256:35015988c4047a2ab1888466f5aae30420f7addde4c467e5db9ae64eea6b47b0
Status: Downloaded newer image for webcenter/activemq:latest
docker.io/webcenter/activemq:latest
[root@linksys ~]# docker images
REPOSITORY           TAG                 IMAGE ID            CREATED             SIZE
rabbitmq             3-management        6bd1749b8197        5 days ago          181MB
redis                latest              dcf9ec9265e0        3 weeks ago         98.2MB
mysql                5.7                 1e4405fe1ea9        3 weeks ago         437MB
mysql                latest              d435eee2caa5        3 weeks ago         456MB
zookeeper            latest              c91a7d13d4d9        3 weeks ago         224MB
zookeeper            3.4.11              56d414270ae3        23 months ago       146MB
webcenter/activemq   latest              3af156432993        2 years ago         422MB
[root@linksys ~]# docker run -d --name myactivemq -p 61616:61616 -p 8161:8161 docker.io/webcenter/activemq:latest
cd7d9ddc9eb4c5dd71b4f2ab4550f440d38712ae9771e7ec43593f5e95816dfb
[root@linksys ~]# docker ps
CONTAINER ID        IMAGE                       COMMAND                  CREATED             STATUS              PORTS                                                                                        NAMES
cd7d9ddc9eb4        webcenter/activemq:latest   "/app/run.sh"            12 seconds ago      Up 5 seconds        1883/tcp, 5672/tcp, 0.0.0.0:8161->8161/tcp, 61613-61614/tcp, 0.0.0.0:61616->61616/tcp        myactivemq
9a6326796d82        6bd1749b8197                "docker-entrypoint.s…"   18 minutes ago      Up 18 minutes       4369/tcp, 5671/tcp, 0.0.0.0:5672->5672/tcp, 15671/tcp, 25672/tcp, 0.0.0.0:15672->15672/tcp   myrabbitmq
db45a1221e3e        redis                       "docker-entrypoint.s…"   24 hours ago        Up 24 hours         0.0.0.0:6379->6379/tcp                                                                       myredis
1b742f19c17b        1e4405fe1ea9                "docker-entrypoint.s…"   11 days ago         Up 11 days          0.0.0.0:3306->3306/tcp, 33060/tcp                                                            mysql01
7c68f08db2cf        c91a7d13d4d9                "/docker-entrypoint.…"   2 weeks ago         Up 2 weeks          2888/tcp, 3888/tcp, 0.0.0.0:2181->2181/tcp, 8080/tcp                                         zk01
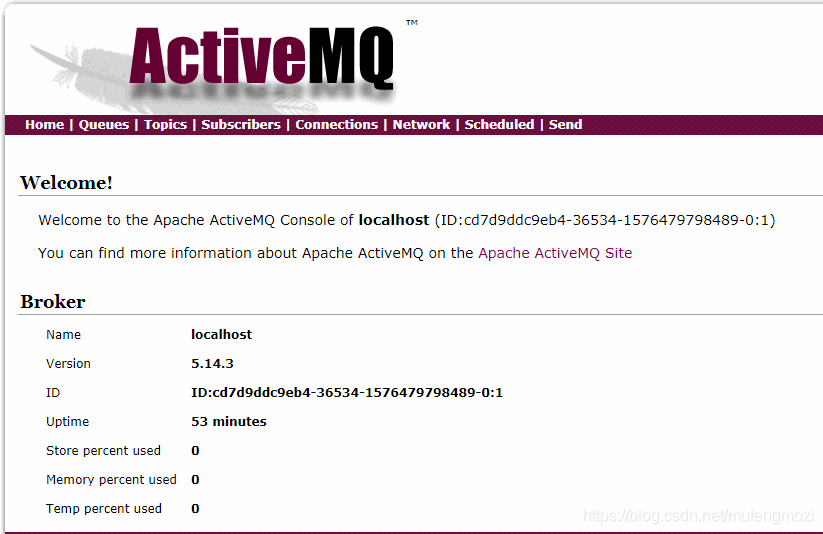
看到这个页面说明ok了。端口号8161
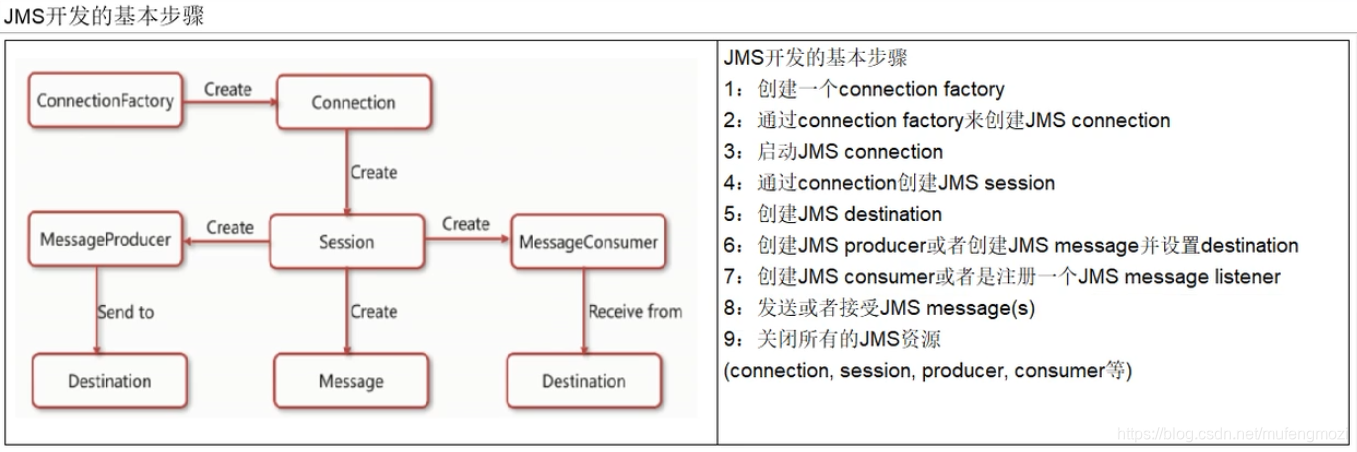
JMS : Java 消息中间件的服务接口规范,activemq 之上是 mq , 而 mq 之上是JMS 定义的消息规范 。 activemq 是mq 技术的一种理论实现(与之相类似的实现还有 Kafka RabbitMQ RockitMQ ),而 JMS 是更上一级的规范。
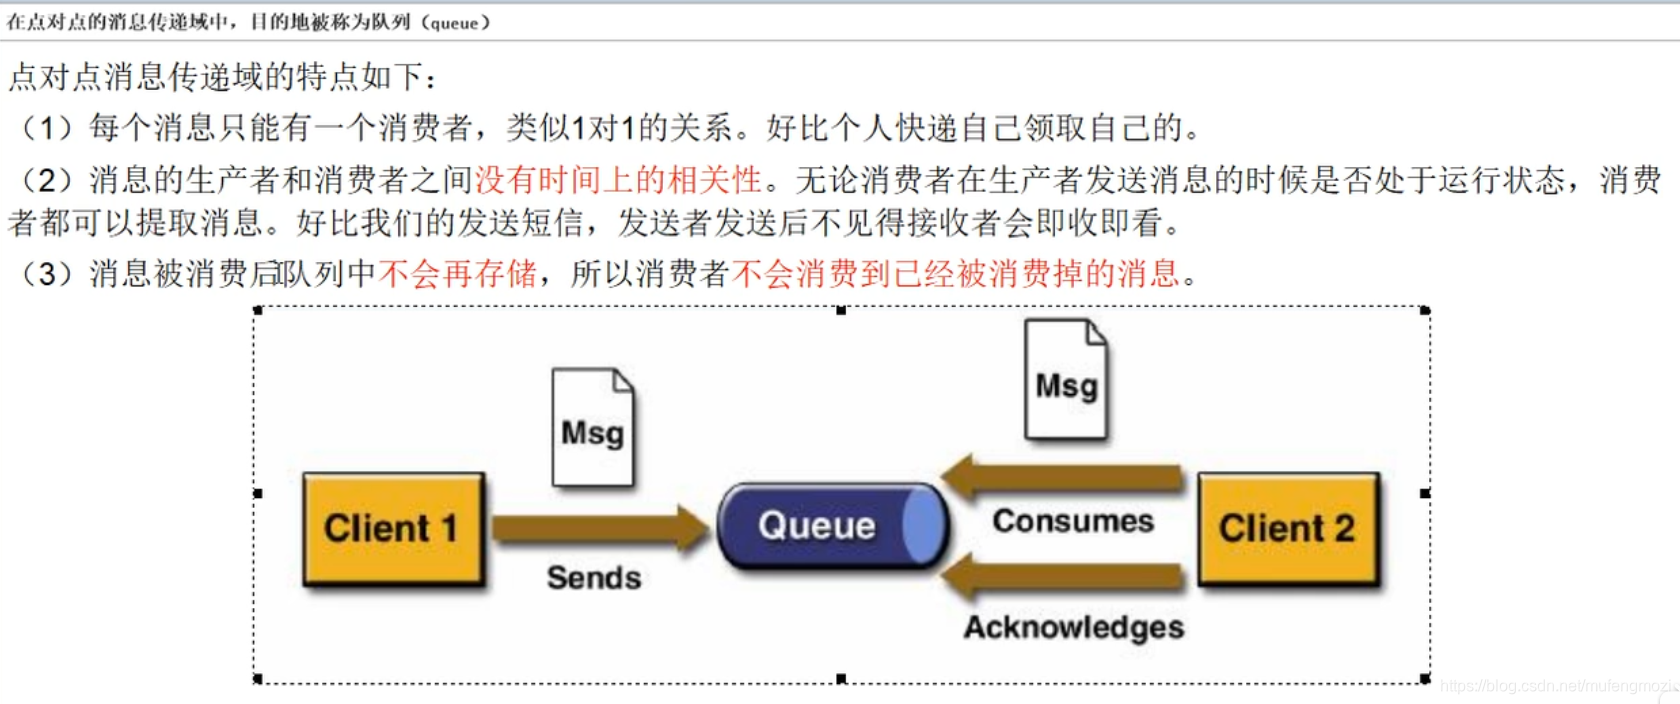
demo 初试 一个简单的生产者消费者(点对点)
生产者
package com.example;
import org.apache.activemq.ActiveMQConnectionFactory;
import javax.jms.*;
public class activemqDemo {
public static final String ACTIVEMQ_URL = "tcp://47.56.162.48:61616";
public static final String QUEUE_NAME = "queue01";
public static void main(String[] args) throws Exception{
// 1 按照给定的url创建连接工程,这个构造器采用默认的用户名密码
ActiveMQConnectionFactory activeMQConnectionFactory = new ActiveMQConnectionFactory(ACTIVEMQ_URL);
// 2 通过连接工厂连接 connection 和 启动
javax.jms.Connection connection = activeMQConnectionFactory.createConnection();
// 启动
connection.start();
// 3 创建回话 session
// 两个参数,第一个事务, 第二个签收
Session session = connection.createSession(false, Session.AUTO_ACKNOWLEDGE);
// 4 创建目的地 (两种 : 队列/主题 这里用队列)
Queue queue = session.createQueue(QUEUE_NAME);
// 5 创建消息的生产者
MessageProducer messageProducer = session.createProducer(queue);
// 6 通过messageProducer 生产 3 条 消息发送到消息队列中
for (int i = 1; i < 4 ; i++) {
// 7 创建字消息
TextMessage textMessage = session.createTextMessage("msg--" + i);
// 8 通过messageProducer发布消息
messageProducer.send(textMessage);
}
// 9 关闭资源
messageProducer.close();
session.close();
connection.close();
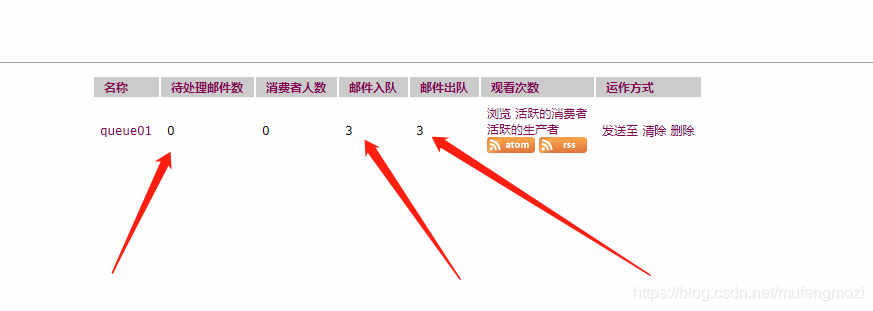
System.out.println(" **** 消息发送到MQ完成 ****");
}
}

消费者
package com.example;
import org.apache.activemq.ActiveMQConnectionFactory;
import javax.jms.MessageConsumer;
import javax.jms.Queue;
import javax.jms.Session;
import javax.jms.TextMessage;
public class activemqCusDemo {
public static final String ACTIVEMQ_URL = "tcp://47.56.162.48:61616";
public static final String QUEUE_NAME = "queue01";
public static void main(String[] args) throws Exception{
// 1 按照给定的url创建连接工程,这个构造器采用默认的用户名密码
ActiveMQConnectionFactory activeMQConnectionFactory = new ActiveMQConnectionFactory(ACTIVEMQ_URL);
// 2 通过连接工厂连接 connection 和 启动
javax.jms.Connection connection = activeMQConnectionFactory.createConnection();
// 启动
connection.start();
// 3 创建回话 session
// 两个参数,第一个事务, 第二个签收
Session session = connection.createSession(false, Session.AUTO_ACKNOWLEDGE);
// 4 创建目的地 (两种 : 队列/主题 这里用队列)
Queue queue = session.createQueue(QUEUE_NAME);
// 5 创建消息的消费者
MessageConsumer messageConsumer = session.createConsumer(queue);
while(true){
// 这里是 TextMessage 是因为消息发送者是 TextMessage , 接受处理的
// 也应该是这个类型的消息
TextMessage message = (TextMessage)messageConsumer.receive();
if (null != message){
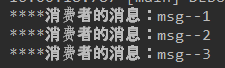
System.out.println("****消费者的消息:"+message.getText());
}else {
break;
}
}
messageConsumer.close();
session.close();
connection.close();
}
}
循环获取到了所有的消息
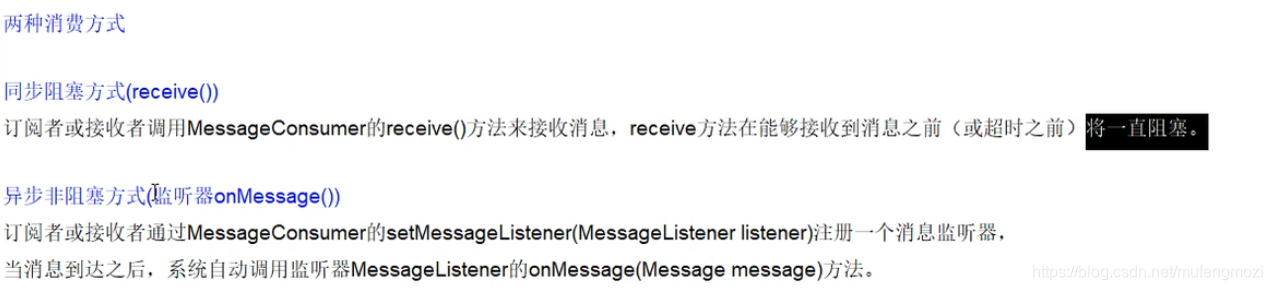
消费者监听模式
 // 通过监听的方式来消费消息
  // 通过异步非阻塞的方式消费消息
  // 通过messageConsumer 的setMessageListener 注册一个监听器,
  // 当有消息发送来时,系统自动调用MessageListener 的 onMessage 方法处理消息
messageConsumer.setMessageListener(new MessageListener() {
            @Override
            public void onMessage(Message message) {
                if(null!=message&&message instanceof TextMessage)
                {
                    TextMessage textMessage = (TextMessage)message;
                    try {
                        System.out.println("****消费者的消息:"+textMessage.getText());
                    }catch (JMSException e) {
                        e.printStackTrace();
                    }
                }
            }
        });
        System.in.read();
        messageConsumer.close();
        session.close();
        connection.close();
先要有订阅者,生产者才有意义。负载均衡。两个消费者的话就一人一个,
总结
三、JMS
1.JAVAEE 是一套使用Java 进行企业级开发的13 个核心规范工业标准 , 包括:
JDBC 数据库连接
JNDI Java的命名和目录接口
EJB Enterprise java bean
RMI 远程方法调用 一般使用TCP/IP 协议
Java IDL 接口定义语言
JSP
Servlet
XML
JMS Java 消息服务java message service
JTA
JTS
JavaMail
JAF
5 个主要的消息头
消息头
JMSDestination 头在哪儿
JMSDeliveryMode 是持久还是非持久
JMSExpiration 过期时间,默认永久
JMSPriority 优先级,默认是4 有0~9 ,5-9 是紧急的,0-4 是普通的
JMSMessageId 唯一的消息ID
消息体;封装具体的消息数据
5 种消息体格式:
5种消息体
TextMessage 普通字符串消息,包含一个String
Mapmessage Map 类型的消息, k-> String v -> Java 基本类型
BytesMessage 二进制数组消息,包含一个byte[]
StreamMessage Java 数据流消息,用标准流操作来顺序的填充读取
ObjectMessage 对象消息,包含一个可序列化的Java 对象****
发送和接收的消息类型必须一致
setXXXProprtity
消息属性:识别、去重、重点标注
2. 如何保证消息的可靠性
JMS 可靠性:Persistent 持久性 、 事务 、 Acknowledge 签收
// 在队列为目的地的时候持久化消息
messageProducer.setDeliveryMode(DeliveryMode.PERSISTENT);

// 队列为目的地的非持久化消息
messageProducer.setDeliveryMode(DeliveryMode.NON_PERSISTENT);
持久化的消息,服务器宕机后消息依旧存在,只是没有入队,当服务器再次启动,消息任就会被消费。
但是非持久化的消息,服务器宕机后消息永远丢失。 而当你没有注明是否是持久化还是非持久化时,默认是持久化的消息。
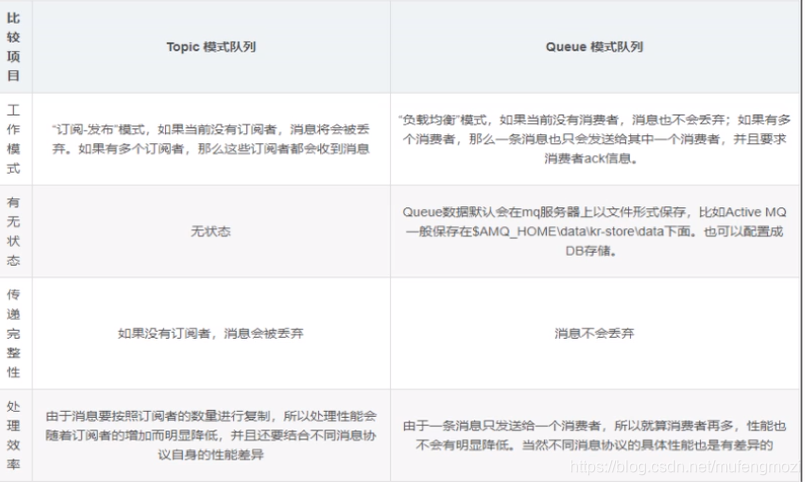
对于目的地为主题(topic)来说,默认就是非持久化的,让主题的订阅支持化的意义在于:对于订阅了公众号的人来说,当用户手机关机,在开机后任就可以接受到关注公众号之前发送的消息
持久化消费者
 ……    // 前面代码相同,不复制了
        conection.setClientID("zzz");//确认订阅者
        Topic topic = session.createTopic(TOPIC_NAME);
        TopicSubscriber topicSubscriber = session.createDurableSubscriber(topic,"remark...");

         // 5 发布订阅
        connection.start();

        Message message = topicSubscriber.receive();// 一直等
         while (null != message){
             TextMessage textMessage = (TextMessage)message;
             System.out.println(" 收到的持久化 topic :"+textMessage.getText());
             message = topicSubscriber.receive(3000L);    // 等1秒后meesage 为空,跳出循环,控制台关闭
         }
   ……
持久化生产者
 ……
        MessageProducer messageProducer = session.createProducer(topic);
        // 6 通过messageProducer 生产 3 条 消息发送到消息队列中

        // 设置持久化topic 在启动
        messageProducer.setDeliveryMode(DeliveryMode.PERSISTENT);
        connection.start();
        for (int i = 1; i < 4 ; i++) {
            // 7  创建字消息
            TextMessage textMessage = session.createTextMessage("topic_name--" + i);
            // 8  通过messageProducer发布消息
            messageProducer.send(textMessage);

            MapMessage mapMessage = session.createMapMessage();
            //    mapMessage.setString("k1","v1");
            //     messageProducer.send(mapMessage);
        }
        // 9 关闭资源
      ……
事务
createSession的第一个参数为true 为开启事务,开启事务之后必须在将消息提交,才可以在队列中看到消息
Session session = connection.createSession(true, Session.AUTO_ACKNOWLEDGE);
提交:
session.commit();
事务开启的意义在于,如果对于多条必须同批次传输的消息,可以使用事务,如果一条传输失败,可以将事务回滚,再次传输,保证数据的完整性。
对于消息消费者来说,开启事务的话,可以避免消息被多次消费,以及后台和服务器数据的不一致性。
举个例子:
如果消息消费的 createSession 设置为 ture ,但是没有 commit ,此时就会造成非常严重的后果,那就是在后台看来消息已经被消费,但是对于服务器来说并没有接收到消息被消费,此时就有可能被多次消费。
Acknowledge 签收 (俗称ack)
非事务 :
Session.AUTO_ACKNOWLEDGE      自动签收,默认

Session.CLIENT_ACKNOWLEDGE     手动签收
手动签收需要acknowledge
textMessage.acknowledge();
而对于开启事务时,设置手动签收和自动签收没有多大的意义,都默认自动签收,也就是说事务的优先级更高一些。
但是开启事务没有commit 任就会重复消费
小知识: broker
broker 就是实现了用代码形式启动 ActiveMQ 将 MQ 内嵌到 Java 代码中,可以随时启动,节省资源,提高了可靠性。
就是将 MQ 服务器作为了 Java 对象
把小型 activemq 服务器嵌入到 java 代码: 不在使用linux 的服务器
<dependency>
  <groupId>com.fasterxml.jackson.core</groupId>
  <artifactId>jackson-databind</artifactId>
  <version>2.9.5</version>
</dependency>
public class Embebroker {
    public static void main(String[] args) throws Exception {
        // broker 服务
        BrokerService brokerService = new BrokerService();
        // 把小型 activemq 服务器嵌入到 java 代码
        brokerService.setUseJmx(true);
        // 原本的是 192.……  是linux 上的服务器,而这里是本地windows 的小型mq 服务器
        brokerService.addConnector("tcp://localhost:61616");
        brokerService.start();
    }
}
SpringBoot结合ActiveMQ
<dependencies>
        <dependency>
            <groupId>org.springframework.boot</groupId>
            <artifactId>spring-boot-starter-activemq</artifactId>
        </dependency>
        <dependency>
            <groupId>org.springframework.boot</groupId>
            <artifactId>spring-boot-starter-web</artifactId>
        </dependency>

        <dependency>
            <groupId>org.projectlombok</groupId>
            <artifactId>lombok</artifactId>
            <optional>true</optional>
        </dependency>
        <dependency>
            <groupId>org.springframework.boot</groupId>
            <artifactId>spring-boot-starter-test</artifactId>
            <scope>test</scope>
            <exclusions>
                <exclusion>
                    <groupId>org.junit.vintage</groupId>
                    <artifactId>junit-vintage-engine</artifactId>
                </exclusion>
            </exclusions>
        </dependency>
        <dependency>
            <groupId>org.springframework.boot</groupId>
            <artifactId>spring-boot-configuration-processor</artifactId>
            <optional>true</optional>
        </dependency>
        <dependency>
            <groupId>junit</groupId>
            <artifactId>junit</artifactId>
            <scope>test</scope>
        </dependency>
    </dependencies>
server:
  port: 8080

spring:
  activemq:
    broker-url: tcp://47.56.162.48:61616
    user: admin
    password: admin
  jms:
    pub-sub-domain: false  #false=queue true=topic


myqueue: boot-active-queue
package com.example.activemqdemo.config;

import org.apache.activemq.command.ActiveMQQueue;
import org.springframework.beans.factory.annotation.Value;
import org.springframework.context.annotation.Bean;
import org.springframework.jms.annotation.EnableJms;
import org.springframework.stereotype.Component;

import javax.jms.Queue;

@EnableJms
@Component
public class ConfigBean {

    @Value("${myqueue}")
    private String myQueue;

    @Bean
    public Queue queue()
    {
        return new ActiveMQQueue(myQueue);
    }
}


 231
231

 被折叠的 条评论
为什么被折叠?
被折叠的 条评论
为什么被折叠?
 到【灌水乐园】发言


