


 博客介绍了Spring代理业务开发流程,包括添加jar包支持、新建业务类模拟核心业务、设置代理类进行通知、编写启动与控制器类,还进行了访问测试。指出业务方法经代理会增强,可选择CGLIB或JDK动态代理,同时要注意组件扫描注解的使用。
1 添加jar包支持
		<dependency>
		    <groupId>org.aspectj</groupId>
		    <artifactId>aspectjweaver</artifactId>
		</dependency>
2 新建业务类,模拟完成核心业务
package com.zfh.demo.component;

import org.springframework.stereotype.Component;

@Component
public class SaleServiceImpl {

	public void saleService() {
		System.out.println("这里是核心业务的模拟方法,即要代理的销售业务方法");
	}
}
3 周边业务方法模拟,即代理类,将在核心业务之前,之后进行通知设置
要特别注意切点表达式的写法
package com.zfh.demo.aspect;

import org.aspectj.lang.annotation.After;
import org.aspectj.lang.annotation.Aspect;
import org.aspectj.lang.annotation.Before;
import org.springframework.stereotype.Component;

@Aspect
@Component
public class ProxyService {

	@Before("execution(* com.zfh.demo.component.*ServiceImpl.*(..))")
	public void before() {
		System.out.println("业务方法调用之前执行...");
	}

	@After("execution(* com.zfh.demo.component.*ServiceImpl.*(..))")
	public void after() {
		System.out.println("业务方法调用之后执行...");
	}
}
4 编写启动类和控制器类,在同一个类中完成,见注解
package com.zfh.demo;

import org.springframework.beans.factory.annotation.Autowired;
import org.springframework.boot.autoconfigure.SpringBootApplication;
import org.springframework.boot.builder.SpringApplicationBuilder;
import org.springframework.web.bind.annotation.GetMapping;
import org.springframework.web.bind.annotation.RestController;

import com.zfh.demo.component.SaleServiceImpl;

@SpringBootApplication
@RestController
public class ProxyAppTest {

	public static void main(String[] args) {
		new SpringApplicationBuilder(ProxyAppTest.class).properties(
				"spring.aop.proxy-target-class=true").run(args);
	}

	@Autowired
	SaleServiceImpl saleService;

	@GetMapping("/sale")
	public String saleService() {
		saleService.saleService();
		System.out.println("SaleServiceImpl的class:"+saleService.getClass());
		return "AOP测试完成,请查看控制器输出...";
	}


}
5 访问与测试
http://localhost:8080/sale
访问结果:
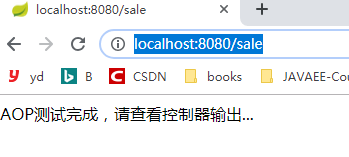
控制台下的输出是:
业务方法调用之前执行...
这里是核心业务的模拟方法,即要代理的销售业务方法
业务方法调用之后执行...
SaleServiceImpl的class:class com.zfh.demo.component.SaleServiceImpl$$EnhancerBySpringCGLIB$$784a0eaf
6 小结
可以看出,业务方法经过代理后,就会增强
输出的代理类为经过CGLIB处理的类。
这里,用了一个
new SpringApplicationBuilder(ProxyAppTest.class).properties(
				"spring.aop.proxy-target-class=true").run(args);
配置,这个配置为true时,就是启动CGLIB代理。如果为false,则启动的是JDK动态代理,即接口代理。
另外,这里用到了@Component注解,需要注意的是,一定要让这些组件让Application能够扫描到。
而@SpringBootApplication注解,则已经默认包含了@ComponentScan注解,主要用于扫描检测使用了上面的注解的组件,并把它们注册到Spring容器中去。


 6555
6555

 被折叠的 条评论
为什么被折叠?
被折叠的 条评论
为什么被折叠?
 到【灌水乐园】发言


