<template>
<view>
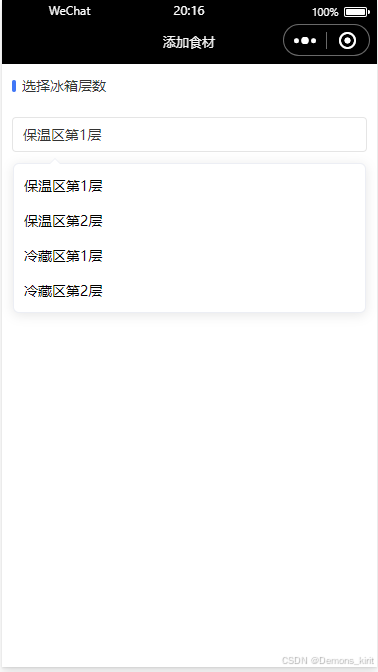
<uni-section title="选择冰箱层数" type="line">
<view class="select-box">
<uni-data-select
v-model="selectedLocationId"
:localdata="locations"
@change="onRefrigeratorChange"
>
</uni-data-select>
</view>
</uni-section>
</view>
</template>
<script setup>
import { ref, onMounted } from 'vue'
// 引入组件
import uniSection from "@dcloudio/uni-ui/lib/uni-section/uni-section.vue";
import uniDataSelect from "@dcloudio/uni-ui/lib/uni-data-select/uni-data-select.vue";
// 注册变量
const locations = ref([]); // 存储冰箱层数信息
const selectedLocationId = ref(''); // 选中的层数ID
const fridgeId = ref(''); // 冰箱ID
// 模拟API请求函数,获取冰箱层数信息
const fetchFridgeLocations = async (fridgeId) => {
// 替换为你的实际API请求
const response = await uni.request({
url: `http://localhost:8082/cookieAdmin/query/${fridgeId}`,
method: 'GET',
});
// 将数据赋值给 locations
locations.value = response.data.map(item => ({
value: item.locationId,
text: item.locationName
}));
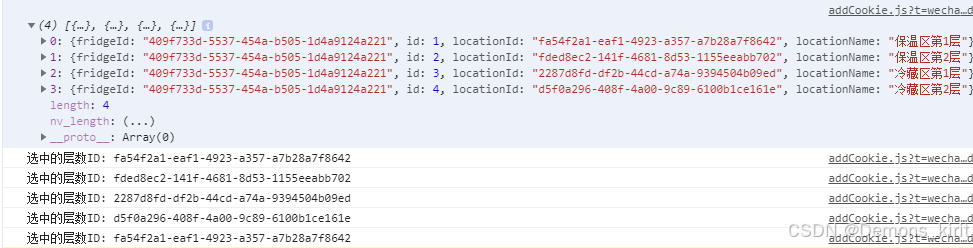
console.log(response.data)
};
onMounted(() => {
const pages = getCurrentPages();
const currentPage = pages[pages.length - 1];
const options = currentPage.options;
fridgeId.value = options.fridgeId;
// 获取冰箱层数信息
fetchFridgeLocations(fridgeId.value);
});
// 处理下拉框选项变更
const onRefrigeratorChange = () => {
console.log('选中的层数ID:', selectedLocationId.value);
};
</script>
<script>
export default {
components: {
uniSection, // 注册组件
uniDataSelect
}
}
</script>
<style>
.select-box {
margin: 10px;
}
</style>


 2165
2165

 被折叠的 条评论
为什么被折叠?
被折叠的 条评论
为什么被折叠?
 到【灌水乐园】发言


