


 Apache httpd是HTTP服务器程序,常在类Unix系统和Windows作为服务运行。本文涵盖httpd-2.2和2.4版本,介绍其特性、基础、配置、虚拟主机设置以及HTTPS配置。httpd-2.4新增了模块,并强调了2.4版本默认拒绝所有主机访问的安全设定。此外,还讨论了MPM切换、访问控制、虚拟主机的三种配置以及SSL证书的类型和配置。
1.httpd简介
httpd是Apache超文本传输协议(HTTP)服务器的主程序。被设计为一个独立运行的后台进程,它会建立一个处理请求的子进程或线程的池。
通常,httpd不应该被直接调用,而应该在类Unix系统中由apachectl调用,在Windows中作为服务运行。
2. httpd版本
本文主要介绍httpd的两大版本,httpd-2.2和httpd-2.4。
- CentOS6系列的版本默认提供的是httpd-2.2版本的rpm包
- CentOS7系列的版本默认提供的是httpd-2.4版本的rpm包
2.1 httpd的特性
httpd有很多特性,下面就分别来说说httpd-2.2版本和httpd-2.4版本各自的特性。
| 版本 | 特性 |
| 2.2 | 事先创建进程 |
| 2.4 | httpd-2.4的新特性: |
| 工作模型 | 工作方式 |
| prefork | 多进程模型,预先生成进程,一个请求用一个进程响应 |
| worker | 基于线程工作,一个请求用一个线程响应(启动多个进程,每个进程生成多个线程) |
| event | 基于事件的驱动,一个进程处理多个请求 |
2.2 httpd-2.4新增的模块
httpd-2.4在之前的版本基础上新增了几大模块,下面就几个常用的来介绍一下。
| 模块 | 功能 |
| mod_proxy_fcgi | 反向代理时支持apache服务器后端协议的模块 |
| mod_ratelimit | 提供速率限制功能的模块 |
| mod_remoteip | 基于ip的访问控制机制被改变,不再支持使用Order,Deny,Allow来做基于IP的访问控制 |
3. httpd基础
3.1 httpd自带的工具程序
| 工具 | 功能 |
| htpasswd | basic认证基于文件实现时,用到的帐号密码生成工具 |
| apachectl | httpd自带的服务控制脚本,支持start,stop,restart |
| apxs | 由httpd-devel包提供的,扩展httpd使用第三方模块的工具 |
| rotatelogs | 日志滚动工具 |
| suexec | 访问某些有特殊权限配置的资源时,临时切换至指定用户运行的工具 |
| ab | apache benchmark,httpd的压力测试工具 |
3.2 rpm包安装的httpd程序环境
| 文件/目录 | 对应的功能 |
| /var/log/httpd/access.log | 访问日志 |
| /var/log/httpd/error_log | 错误日志 |
| /var/www/html/ | 站点文档目录 |
| /usr/lib64/httpd/modules/ | 模块文件路径 |
| /etc/httpd/conf/httpd.conf | 主配置文件 |
| /etc/httpd/conf.modules.d/*.conf | 模块配置文件 |
| /etc/httpd/conf.d/*.conf | 辅助配置文件 |
mpm:以DSO机制提供,配置文件为/etc/httpd/conf.modules.d/00-mpm.conf
3.3 web相关的命令
3.3.1 curl命令
curl是基于URL语法在命令行方式下工作的文件传输工具,它支持FTP,FTPS,HTTP,HTTPS,GOPHER,TELNET,DICT,FILE及LDAP等协议。
curl支持以下功能:
- https认证
- http的POST/PUT等方法
- ftp上传
- kerberos认证
- http上传
- 代理服务器
- cookies
- 用户名/密码认证
- 下载文件断点续传
- socks5代理服务器
- 通过http代理服务器上传文件到ftp服务器
//语法:curl [options] [URL ...]
//常用的options:
    -A/--user-agent <string>    //设置用户代理发送给服务器
    -basic              //使用Http基本认证
    --tcp-nodelay       //使用TCP_NODELAY选项
    -e/--referer <URL>      //来源网址
    --cacert <file>     //CA证书(SSL)
    --compressed        //要求返回时压缩的格式
    -H/--header <line>  //自定义请求首部信息传递给服务器
    -I/--head           //只显示响应报文首部信息
    --limit-rate <rate>     //设置传输速度
    -u/--user <user[:password]>     //设置服务器的用户和密码
    -0/--http1      //使用http 1.0版本,默认使用1.1版本。这个选项是数字0而不是字母o
    -o/--output     //把输出写到文件中
    -#/--progress-bar       //进度条显示当前的传送状态

//通过curl下载文件
[root@Server-side ~]# ls
[root@Server-side ~]# curl -o myblog.html http://blog.51cto.com/itchentao
  % Total    % Received % Xferd  Average Speed   Time    Time     Time  Current
                                 Dload  Upload   Total   Spent    Left  Speed
100 67025    0 67025    0     0  87248      0 --:--:-- --:--:-- --:--:-- 87385
[root@Server-side ~]# ls
myblog.html
3.3.2 httpd命令
//语法:httpd [options]
//常用的options:
    -l      //查看静态编译的模块,列出核心中编译了哪些模块。 \
            //它不会列出使用LoadModule指令动态加载的模块
    -M      //输出一个已经启用的模块列表,包括静态编译在服务 \
            //器中的模块和作为DSO动态加载的模块
    -v      //显示httpd的版本,然后退出
    -V      //显示httpd和apr/apr-util的版本和编译参数,然后退出
    -X      //以调试模式运行httpd。仅启动一个工作进程,并且 \
            //服务器不与控制台脱离
    -t      //检查配置文件是否有语法错误
//下载
[root@Server-side ~]# yum install httpd

//演示
[root@Server-side ~]# httpd -l
Compiled in modules:
  core.c
  mod_so.c
  http_core.c

[root@Server-side ~]# httpd -M
AH00558: httpd: Could not reliably determine the server's fully qualified domain name, using fe80::b8a2:7b6a:8fe4:51cd. Set the 'ServerName' directive globally to suppress this message
Loaded Modules:
 core_module (static)
 so_module (static)
 http_module (static)
 access_compat_module (shared)
 actions_module (shared)
 alias_module (shared)
 ......
 ......

[root@Server-side ~]# httpd -v
Server version: Apache/2.4.37 (centos)
Server built:   Apr  6 2022 14:54:37

[root@Server-side ~]# httpd -V
Server version: Apache/2.4.37 (centos)
Server built:   Apr  6 2022 14:54:37
Server's Module Magic Number: 20120211:83
Server loaded:  APR 1.6.3, APR-UTIL 1.6.1
Compiled using: APR 1.6.3, APR-UTIL 1.6.1
Architecture:   64-bit
Server MPM:     event
  threaded:     yes (fixed thread count)
    forked:     yes (variable process count)
Server compiled with....
 -D APR_HAS_SENDFILE
 -D APR_HAS_MMAP
 -D APR_HAVE_IPV6 (IPv4-mapped addresses enabled)
 -D APR_USE_SYSVSEM_SERIALIZE
 -D APR_USE_PTHREAD_SERIALIZE
 -D SINGLE_LISTEN_UNSERIALIZED_ACCEPT
 -D APR_HAS_OTHER_CHILD
 -D AP_HAVE_RELIABLE_PIPED_LOGS
 -D DYNAMIC_MODULE_LIMIT=256
 -D HTTPD_ROOT="/etc/httpd"
 -D SUEXEC_BIN="/usr/sbin/suexec"
 -D DEFAULT_PIDLOG="run/httpd.pid"
 -D DEFAULT_SCOREBOARD="logs/apache_runtime_status"
 -D DEFAULT_ERRORLOG="logs/error_log"
 -D AP_TYPES_CONFIG_FILE="conf/mime.types"
 -D SERVER_CONFIG_FILE="conf/httpd.conf"
4. 编译安装httpd-2.4
httpd依赖于apr-1.4+,apr-util-1.4+,[apr-icon]
apr:apache portable runtime
//安装开发环境
[root@Server-side ~]# yum groups mark install "Development Tools"

//创建用户
[root@Server-side ~]# groupadd -r apache
[root@Server-side ~]# useradd -r -g apache apache
[root@Server-side ~]# id apache
uid=299(apache) gid=299(apache) groups=299(apache)

//下载依赖包
[root@Server-side ~]# yum -y install openssl-devel pcre-devel expat-devel libtool
Loaded plugins: product-id, search-disabled-repos, subscription-manager
This system is not registered with an entitlement server. You can use subscription-manager to register.
Resolving Dependencies
--> Running transaction check
---> Package openssl-devel.x86_64 1:1.0.2k-12.el7 will be installed
--> Processing Dependency: openssl-libs(x86-64) = 1:1.0.2k-12.el7 for package: 1:openssl-devel-1.0.2k-12.el7.x86_64
......
......
  libselinux-utils.x86_64 0:2.5-12.el7          libsepol.x86_64 0:2.5-8.1.el7
  libss.x86_64 0:1.42.9-12.el7_5                openssl.x86_64 1:1.0.2k-12.el7
  openssl-libs.x86_64 1:1.0.2k-12.el7

Complete!


//下载并安装apr-1.4+和apr-util-1.4+
[root@Server-side ~]# cd /usr/src/
[root@Server-side src]# wget https://dlcdn.apache.org//apr/apr-1.7.0.tar.gz
[root@Server-side src]# wget https://dlcdn.apache.org//apr/apr-util-1.6.1.tar.gz

//进行解压
[root@Server-side src]# ls
apr-1.7.0.tar.gz  apr-util-1.6.1.tar.gz  debug  kernels
[root@Server-side src]# tar xf apr-1.7.0.tar.gz
[root@Server-side src]# tar xf apr-util-1.6.1.tar.gz
[root@Server-side src]# ls
apr-1.7.0  apr-1.7.0.tar.gz  apr-util-1.6.1  apr-util-1.6.1.tar.gz  debug  kernels
[root@Server-side src]# cd apr-1.7.0/
[root@Server-side apr-1.7.0]# vim configure
        cfgfile=${ofile}T
    trap "$RM \"$cfgfile\"; exit 1" 1 2 15
#    $RM "$cfgfile"					//将这一行进注释

[root@Server-side apr-1.7.0]# ./configure --prefix=/usr/local/apr
配置过程略...
[root@Server-side apr-1.7.0]# make && make install
编译安装过程略...

[root@Server-side apr-1.7.0]# cd /usr/src/apr-util-1.6.1
[root@Server-side apr-util-1.6.1]#  ./configure --prefix=/usr/local/apr-util --with-apr=/usr/local/apr
配置过程略...
[root@Server-side apr-util-1.6.1]#  make && make install
编译安装过程略...

//编译安装httpd
[root@Server-side ~]# wget https://dlcdn.apache.org/httpd/httpd-2.4.54.tar.gz

//进行解压配置安装
[root@Server-side ~]# ls
anaconda-ks.cfg  Gin-A  httpd-2.4.54.tar.gz
[root@Server-side ~]# tar xf httpd-2.4.54.tar.gz
[root@Server-side ~]# cd httpd-2.4.54/
[root@Server-side httpd-2.4.54]# ./configure --prefix=/usr/local/apache \
 --sysconfdir=/etc/httpd24 \
 --enable-so \
 --enable-ssl \
 --enable-cgi \
 --enable-rewrite \
 --with-zlib \
 --with-pcre \
 --with-apr=/usr/local/apr \
 --with-apr-util=/usr/local/apr-util/ \
 --enable-modules=most \
 --enable-mpms-shared=all \
 --with-mpm=prefork
...
[root@Server-side httpd-2.4.54]# echo $?
0

[root@Server-side httpd-2.4.54]# make && make install
编译安装过程略...
5. httpd常用配置
切换使用MPM(编辑/etc/httpd/conf.modules.d/00-mpm.conf文件):
//LoadModule mpm_NAME_module modules/mod_mpm_NAME.so
//NAME有三种,分别是:
    prefork
    event
    worker


[root@Server-side ~]# cd /etc/httpd/conf.modules.d/
[root@Server-side conf.modules.d]# ls
00-base.conf  00-mpm.conf       00-systemd.conf  10-proxy_h2.conf
00-dav.conf   00-optional.conf  01-cgi.conf      README
00-lua.conf   00-proxy.conf     10-h2.conf
[root@Server-side conf.modules.d]# tail -n 5  00-mpm.conf
# event MPM: A variant of the worker MPM with the goal of consuming
# threads only for connections with active processing
# See: http://httpd.apache.org/docs/2.4/mod/event.html
#
LoadModule mpm_event_module modules/mod_mpm_event.so
访问控制法则:
| 法则 | 功能 |
| Require all granted | 允许所有主机访问 |
| Require all deny | 拒绝所有主机访问 |
| Require ip IPADDR | 授权指定来源地址的主机访问 |
| Require not ip IPADDR | 拒绝指定来源地址的主机访问 |
| Require host HOSTNAME | 授权指定来源主机名的主机访问 |
| Require not host HOSTNAME | 拒绝指定来源主机名的主机访问 |
| IPADDR的类型 | HOSTNAME的类型 |
| IP:192.168.1.1 | FQDN:特定主机的全名 |
注意:httpd-2.4版本默认是拒绝所有主机访问的,所以安装以后必须做显示授权访问
示例:
<Directory /var/www/html/www>
    <RequireAll>
        Require not ip 192.168.1.20
        Require all granted
    </RequireAll>
</Directory>
6.三种常用配置
实例:不允许物理主机访问 允许其他主机访问
//创建测试文件
[root@Server-side ~]# cd /var/www/html/
[root@Server-side html]# mkdir Gin
[root@Server-side html]# cd Gin/
[root@Server-side Gin]# echo "Gin-Kin" >>  index.html

//配置文件权限
[root@Server-side ~]# vim /etc/httpd/conf/httpd.conf
<Directory "/var/www/html/Gin">
    <RequireAll>
        Require not ip 192.168.22.1		//禁止物理主机IP
        Require all granted
    </RequireAll>
</Directory>
[root@Server-side ~]# httpd -t
Syntax OK
[root@Server-side ~]# systemctl restart httpd
[root@Server-side ~]# curl http://192.168.22.112/Gin/index.html
Gin-Kin
具体效果:

实例:不允许虚拟主机访问 允许其他主机访问
[root@Server-side ~]# vim /etc/httpd/conf/httpd.conf
<Directory "/var/www/html/Gin">
    <RequireAll>
        Require not ip 192.168.22.112		//虚拟主机IP
        Require all granted
    </RequireAll>
</Directory>

[root@Server-side ~]# httpd -t
Syntax OK
[root@Server-side ~]# systemctl restart httpd
[root@Server-side ~]# curl http://192.168.22.112/Gin/index.html
<!DOCTYPE HTML PUBLIC "-//IETF//DTD HTML 2.0//EN">
<html><head>
<title>403 Forbidden</title>
</head><body>
<h1>Forbidden</h1>
<p>You don't have permission to access this resource.</p>
</body></html>
具体效果:

实例:只允许单个主机访问
[root@Server-side ~]# vim /etc/httpd/conf/httpd.conf
<Directory "/var/www/html/Gin">
    <RequireAll>
        Require ip 192.168.22.112
    </RequireAll>
</Directory>
[root@Server-side ~]# httpd -t
Syntax OK
[root@Server-side ~]# systemctl restart httpd
[root@Server-side ~]# !curl
curl http://192.168.22.112/Gin/index.html
Gin-Kin
具体演示:

7.httpd配置虚拟主机
虚拟主机主分为三类:(对应不同的情况)
- 相同IP不同端口
- 不同IP相同端口
- 相同IP相同端口
//  配置前查找虚拟主机文件
[root@Server-side ~]# find / -name *vhosts.conf
/usr/share/doc/httpd/httpd-vhosts.conf

//将查找到的虚拟主机配置文件 复制到/etc/httpd/conf.d/中
[root@Server-side conf.d]# cp /usr/share/doc/httpd/httpd-vhosts.conf .
[root@Server-side conf.d]# ls
autoindex.conf  httpd-vhosts.conf  README  userdir.conf  welcome.conf

//创建相应的测试文件
[root@Server-side ~]# cd /var/www/html/
[root@Server-side html]# mkdir gin kin
[root@Server-side html]# ls
gin  kin
[root@Server-side html]# ls gin/
jspvz
[root@Server-side html]# ls kin/
html5-mario
具体配置:
第一种情况:
相同IP不同端口
//修改/etc/httpd/conf.d/目录下的虚拟主机配置文件
[root@Server-side conf.d]# vim httpd-vhosts.conf
[root@Server-side conf.d]# cat httpd-vhosts.conf
......
# VirtualHost example:
# Almost any Apache directive may go into a VirtualHost container.
# The first VirtualHost section is used for all requests that do not
# match a ServerName or ServerAlias in any <VirtualHost> block.
#
<VirtualHost *:80>
    DocumentRoot "/var/www/html/gin"
    ServerName www.gin.com
    ErrorLog "/var/log/httpd/www.gin.com-error_log"
    CustomLog "/var/log/httpd/www.gin.com-access_log" common
</VirtualHost>

Listen 81
<VirtualHost *:81>
    DocumentRoot "/var/www/html/Kin"
    ServerName www.kin.com
    ErrorLog "/var/log/httpd/www.kin.com-error_log"
    CustomLog "/var/log/httpd/www.kin.com-access_log" common
</VirtualHost>

//检查语法
[root@Server-side ~]# httpd -t
Syntax OK
[root@Server-side ~]# systemctl restart httpd


第二种情况:
//临时添加IP
[root@Server-side ~]# ip addr add 192.168.22.113/24 dev ens33
[root@Server-side ~]# ip a
1: lo: <LOOPBACK,UP,LOWER_UP> mtu 65536 qdisc noqueue state UNKNOWN group default qlen 1000
    link/loopback 00:00:00:00:00:00 brd 00:00:00:00:00:00
    inet 127.0.0.1/8 scope host lo
       valid_lft forever preferred_lft forever
    inet6 ::1/128 scope host
       valid_lft forever preferred_lft forever
2: ens33: <BROADCAST,MULTICAST,UP,LOWER_UP> mtu 1500 qdisc fq_codel state UP group default qlen 1000
    link/ether 00:0c:29:ce:46:5a brd ff:ff:ff:ff:ff:ff
    inet 192.168.22.112/24 brd 192.168.22.255 scope global dynamic noprefixroute ens33
       valid_lft 1428sec preferred_lft 1428sec
    inet 192.168.22.113/24 scope global secondary ens33
       valid_lft forever preferred_lft forever
    inet6 fe80::b8a2:7b6a:8fe4:51cd/64 scope link noprefixroute
       valid_lft forever preferred_lft forever

//更改配置文件
[root@Server-side ~]# vim /etc/httpd/conf.d/httpd-vhosts.conf
[root@Server-side ~]# cat /etc/httpd/conf.d/httpd-vhosts.conf
......
#
# VirtualHost example:
# Almost any Apache directive may go into a VirtualHost container.
# The first VirtualHost section is used for all requests that do not
# match a ServerName or ServerAlias in any <VirtualHost> block.
#
<VirtualHost 192.168.22.112:80>
    DocumentRoot "/var/www/html/gin"
    ServerName www.gin.com
    ErrorLog "/var/log/httpd/www.gin.com-error_log"
    CustomLog "/var/log/httpd/www.gin.com-access_log" common
</VirtualHost>

<VirtualHost 192.168.22.113:80>
    DocumentRoot "/var/www/html/kin"
    ServerName www.kin.com
    ErrorLog "/var/log/httpd/www.kin.com-error_log"
    CustomLog "/var/log/httpd/www.kin.com-access_log" common
</VirtualHost>

//检查语法重启
[root@Server-side ~]# httpd -t
Syntax OK
[root@Server-side ~]# systemctl restart httpd


第三种情况:
//修改配置文件
[root@Server-side ~]# vim /etc/httpd/conf.d/httpd-vhosts.conf
[root@Server-side ~]# cat /etc/httpd/conf.d/httpd-vhosts.conf
......
#
# VirtualHost example:
# Almost any Apache directive may go into a VirtualHost container.
# The first VirtualHost section is used for all requests that do not
# match a ServerName or ServerAlias in any <VirtualHost> block.
#
<VirtualHost *:80>
    DocumentRoot "/var/www/html/gin"
    ServerName www.gin.com
    ErrorLog "/var/log/httpd/www.gin.com-error_log"
    CustomLog "/var/log/httpd/www.gin.com-access_log" common
</VirtualHost>

<VirtualHost *:80>
    DocumentRoot "/var/www/html/kin"
    ServerName www.kin.com
    ErrorLog "/var/log/httpd/www.kin.com-error_log"
    CustomLog "/var/log/httpd/www.kin.com-access_log" common
</VirtualHost>

//检查语法 重启
[root@Server-side ~]# httpd -t
Syntax OK
[root@Server-side ~]# systemctl restart httpd

//Linux添加本地域名解析
[root@Server-side ~]# vim /etc/hosts
[root@Server-side ~]# cat /etc/hosts
127.0.0.1   localhost localhost.localdomain localhost4 localhost4.localdomain4
::1         localhost localhost.localdomain localhost6 localhost6.localdomain6
192.168.22.112 www.gin.com
192.168.22.112 www.kin.com

//测试
[root@Server-side ~]# curl www.gin.com
Here is gin
[root@Server-side ~]# curl www.kin.com
Here is kin
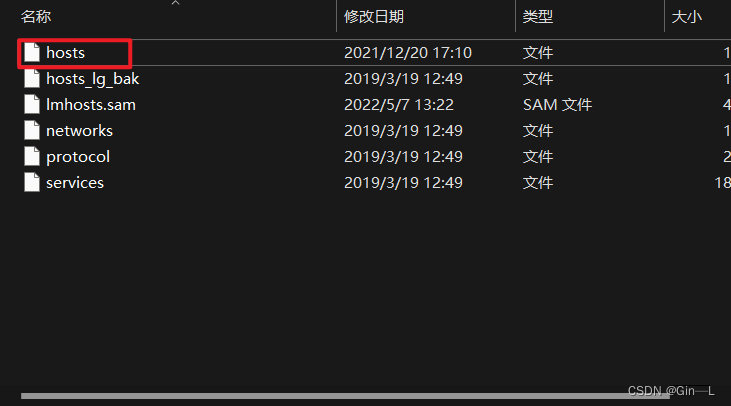
windows添加域名解析:
修改文件地址:C:\Windows\System32\drivers\etc
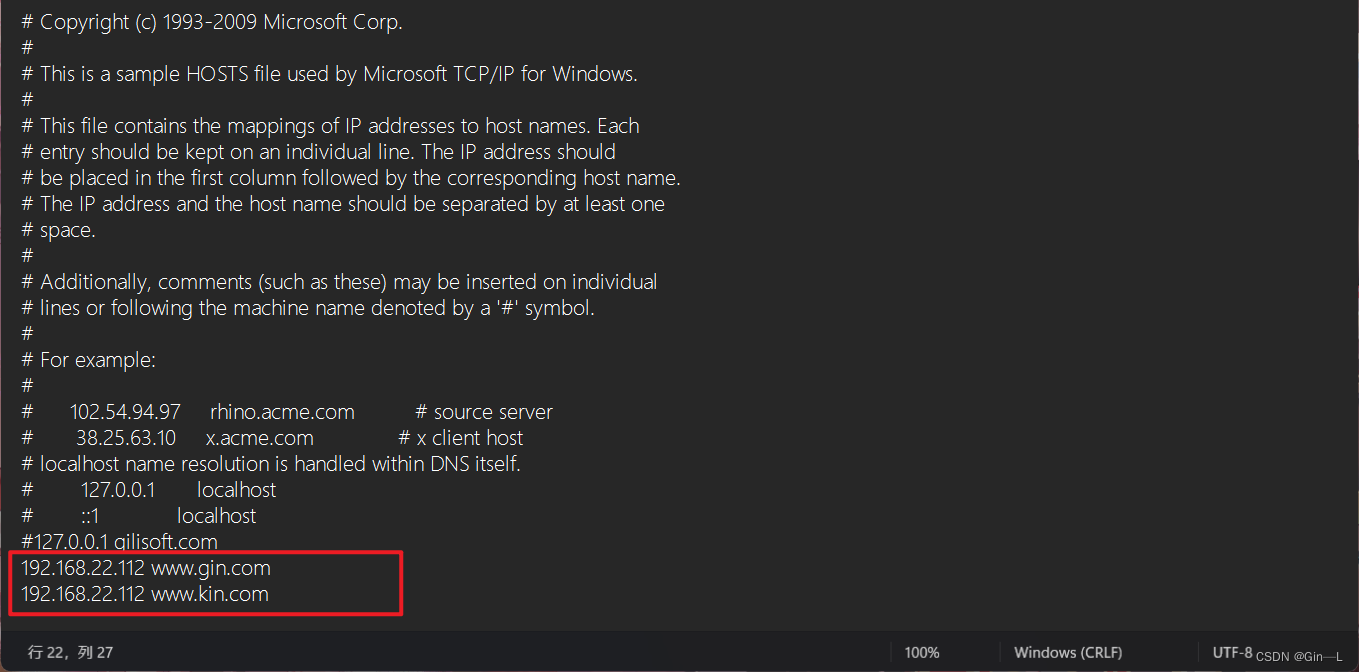
测试:


8.https的配置
HTTPS (全称:Hyper Text Transfer Protocol over SecureSocket Layer),是以安全为目标的HTTP 通道,在HTTP的基础上通过传输加密和身份认证保证了传输过程的安全性 。HTTPS HTTP 的基础下加入SSL,HTTPS 的安全基础是 SSL,因此加密的详细内容就需要 SSL。HTTPS 存在不同于 HTTP 的默认端口及一个加密/身份验证层(在 HTTP与 TCP 之间)。这个系统提供了身份验证与加密通讯方法。
mod_ssl模块:
这个模块提供了使用安全套接字层 (SSL v2/v3)和传输层安全 (TLS v1)协议实现高强度加密传输的功能。 它由mod_ssl项目的作者Ralf S. Engeschall贡献,而mod_ssl最早是基于Ben Laurie的工作开发的。
证书的类型:
单域名SSL证书:根据字面意思很好理解的,就是仅保护一个域名的普通SSL证书,可以是顶级域名也可以是二级域名。
多域名SSL证书:也是和字面意思一样,就是可以同时保护多个域名,不管是主域名还是子域名都行,一般可保护2~250个域名,当你有新的域名需要保护时,随时可以添加,如果超过保护数量是需要支付一定的添加费用的,但是比起重新申请一张SSL证书要划算的多,而且还节省了重新审核的时间。
通配符SSL证书:它是能够保护一个域名以及该域名的所有下一级域名,有范围上的限制,但是没有数量上的限制,适合拥有大量二级域名的用户。
DVSSL证书:亦是域名验证型证书,申请该证书时,CA(证书颁发机构)只需审核域名的所有权即可,整个流程非常简单,无需人工,由系统自动完成。所以时间上是比较快的,一般10分钟左右就能签发,而且价格比较便宜,相对来说等级也是比较低的,适合个人网站及小型组织或企业网站。
OVSSL证书:这个是企业验证型,比DV证书的验证要求要高一些。它不仅需要验证域名的所有权,还需要验证企业身份,验证是需提供企业信息和公司营业执照扫描件等资料,都是通过人工审核的,一般需要3-5个工作日才能颁发,价格也相对较高一些,但是安全等级大大的提高了,适合一般组织或中小型企业网站。
EVSSL证书:这是目前业界最高安全级别的证书,功能比前两位都强大。如果用户安装了此证书,浏览器不仅会显示绿色的地址栏及https前缀和安全锁的标志,而且还会显示企业名,这个不仅看上去就很高大上,而且真的更安全。当然了,EVSSL证书审核也是最严格的,需要提供企业信息和公司营业执照扫描件等资料以及邓白氏或者律师意见信,CA机构会人工验证组织和电话信息,一般3-7个工作日才能颁发,价格也是相对比较高的,适用于在线交易网站、大型企业或金融、银行等组织。
————————————————
版权声明:本文为优快云博主「zhongjieyuming」的原创文章,遵循CC 4.0 BY-SA版权协议,转载请附上原文出处链接及本声明。
原文链接:https://blog.youkuaiyun.com/zhongjieyuming/article/details/123663360
ssl的相应配置:
//下载yum -y install openssl

//生成证书  这里生成的是私钥
[root@Server-side ~]# mkdir /etc/httpd/ssl
[root@Server-side ~]# cd /etc/httpd/ssl
[root@Server-side ssl]# openssl genrsa -out server.key 2048
Generating RSA private key, 2048 bit long modulus (2 primes)
.................+++++
.................................................................+++++
e is 65537 (0x010001)

//生成证书请求文件
[root@Server-side ssl]# openssl req -new -key server.key -out server.csr
You are about to be asked to enter information that will be incorporated
into your certificate request.
What you are about to enter is what is called a Distinguished Name or a DN.
There are quite a few fields but you can leave some blank
For some fields there will be a default value,
If you enter '.', the field will be left blank.
-----
Country Name (2 letter code) [XX]:cn                           //国家
State or Province Name (full name) []:hb                      //省份
Locality Name (eg, city) [Default City]:wh                   //城市
Organization Name (eg, company) [Default Company Ltd]:lf    //公司名称
Organizational Unit Name (eg, section) []:tc        //职位
Common Name (eg, your name or your server's hostname) []:www.gin.com   //域名
Email Address []:gin@234                //邮箱

Please enter the following 'extra' attributes
to be sent with your certificate request
A challenge password []:                //密码 可以不要
An optional company name []:            //公司名称

//生成证书crt
[root@Server-side ssl]# openssl x509 -req -days 365 -in server.csr -signkey server.key -out server.crt
Signature ok
subject=C = cn, ST = hb, L = wh, O = lf, OU = tc, CN = www.gin.com, emailAddress = gin@234
Getting Private key

//安装mod_ssl模块
[root@Server-side ~]# yum -y install mod_ssl

//修改配置文件
[root@Server-side ~]# vim /etc/httpd/conf.d/ssl.conf
<VirtualHost 192.168.22.112:443>
DocumentRoot "/var/www/html/gin"
ServerName www.gin.com:443

SSLCertificateFile /etc/httpd/ssl/server.crt
SSLCertificateKeyFile /etc/httpd/ssl/server.key

//重启服务
[root@Server-side ~]# systemctl restart httpd

//注意这时候没用完全搞定 还需要https重定向
进行http重定向至https:
//修改配置文件 在首行添加
[root@Server-side ~]# vim /etc/httpd/conf.d/ssl.conf

<VirtualHost 192.168.22.112:80>
    RewriteEngine on
    RewriteCond %{HTTPS} off
    RewriteRule ^(.*)$ https://www.gin.com$1 [L,R]
</VirtualHost>
#
# When we also provide SSL we have to listen to the
# standard HTTPS port in addition.
#
Listen 443 https
......

//重启服务
[root@Server-side ~]# httpd -t
Syntax OK
[root@Server-side ~]# systemctl restart httpd


 被折叠的 条评论
为什么被折叠?
被折叠的 条评论
为什么被折叠?
 到【灌水乐园】发言


