


 本文介绍了Java中的守护线程、死锁现象及其避免方法,线程间的通信机制(wait(),notify()),以及生产者消费者模式和单例模式在多线程环境中的应用。通过实例展示了如何处理并发问题和优化线程管理。
1. 守护线程
1.1 概述
每个程序运行时,都会有一个守护线程同步启动,用于监听我们的正常程序
当主线程执行完之后,守护线程也就没有存在的价值了,因为没有工作可做,此时,JVM就会关机.守护线程终止
我们可以通过 线程对象.setDaemon(true) 来把某个线程设置为守护线程(必须在启动之前设置)
1.2 使用
public class Thread_01_SetDaemon {
	public static void main(String[] args) throws InterruptedException {
		for (int i = 0; i < 10; i++) {
			Thread t = new Thread(new DaemonThread());
			t.setDaemon(true);
			t.start();
			System.out.println("main : " + i);
			Thread.sleep(500);
		}
	}
}
class DaemonThread implements Runnable{
	@Override
	public void run() {
		int i = 1;
		while (true) {
			System.out.println("t1 : " + ++i);
			try {
				Thread.sleep(100);
			} catch (InterruptedException e) {
				e.printStackTrace();
			}
		}
	}
}
2. 死锁
2.1 概述
死锁 : 死锁就是在程序执行过程中,都遇到了对方进入加锁的方法中,导致大家都访问不了
原理 :
1 某个线程执行完成,需要 先后 嵌套 锁定 执行两个对象,同时 在这个过程中,先锁定第一个对象,再锁定第二个对象
2 另外一个线程执行完成,需要 先后 嵌套 锁定 执行两个对象,同时在这个过程中,先锁定第二个对象,再锁定第一个对象
3 在第一个线程,锁定第一个对象后,要去锁定第二个对象时,发现第二个对象已经被锁定,只能等待
4 第二个线程,锁定第二个对象后要去锁定第一个对象时,发现第一个对象已经被锁定,只能等待
2.2 代码实现
public class Thread_02_DeadLock {
	public static void main(String[] args) {
		Object o1 = new Object();
	    Object o2 = new Object();
	    Thread t1 = new Thread(new T1(o1,o2));
	    Thread t2 = new Thread(new T2(o1,o2));
	    t1.setName("t1");
	    t2.setName("t2");
	    t1.start();
	    t2.start();
	}
}
class T1 implements Runnable{
	Object o1;
	Object o2;

	public T1(Object o1, Object o2) {
		super();
		this.o1 = o1;
		this.o2 = o2;
	}

	@Override
	public void run() {
		synchronized (o1) {
			System.out.println(Thread.currentThread().getName() + "已锁定o1");
			// 加睡眠,一定出现死锁
			try {
				Thread.sleep(200);
			} catch (InterruptedException e) {
				e.printStackTrace();
			}
			synchronized (o2) {
				System.out.println(Thread.currentThread().getName() + "已锁定o2");
			}
		}
	}
}
class T2 implements Runnable{
	Object o1;
	Object o2;

	public T2(Object o1, Object o2) {
		super();
		this.o1 = o1;
		this.o2 = o2;
	}

	@Override
	public void run() {
		synchronized (o2) {
			System.out.println(Thread.currentThread().getName() + "已锁定o2");
			try {
				Thread.sleep(200);
			} catch (InterruptedException e) {
				e.printStackTrace();
			}
			synchronized (o1) {
				System.out.println(Thread.currentThread().getName() + "已锁定o1");
			}
		}
	}
}
3. 线程通信
3.1 概述
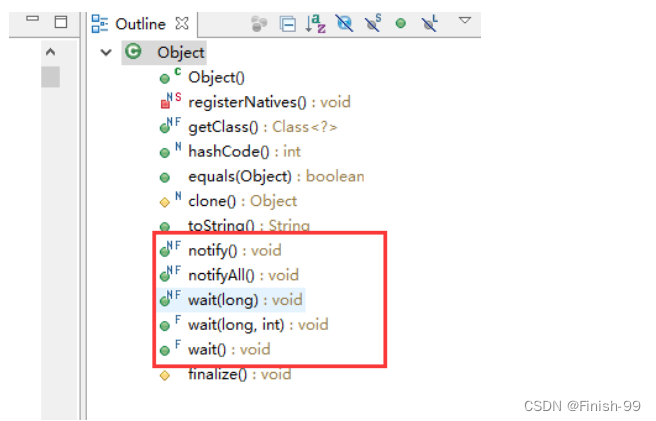
Object中的方法
wait() : 让该线程进入等待状态(挂起状态),当被唤醒后,进入就绪状态,然后呢再次执行时,紧接着之前挂起的地方继续执行
无参 或 传入参数0 都表示不会自动唤醒,只能被叫醒(notify,notifyAll)
也可以传入long类型的值,代表毫秒数,到指定毫秒数之后,自动唤醒
wait和sleep的区别 : sleep 不会交出锁,依然占用锁,其他线程无法进入,wait会交出锁,其他线程可以进去
notify() : 随机唤醒一个在该对象上等待的一个条线程,让别的线程去执行
notifyAll() : 唤醒所有在该对象上等待的线程
以上方法 必须用在成员方法中且,该方法必须加锁(synchronized)
3.2 使用方法
public class Thread_03_Wait {
	public static void main(String[] args) {
		Num num = new Num();
		Thread t1 = new Thread(new print0dd(num));
		Thread t2 = new Thread(new printEven(num));
		t1.start();
		t2.start();

	}
}
// 业务类
class Num{
	private int count =1;
	// 打印奇数的方法
	public synchronized void print0dd(){
		System.out.println(Thread.currentThread().getName() + "-->" + count);
		count++;
		// 唤醒所有等待的线程
		this.notifyAll();
		try {
			// 让当前线程进入等待,会交出锁
			this.wait();
		} catch (InterruptedException e) {
			e.printStackTrace();
		}
	}
	// 打印偶数的方法
	public synchronized void printEven() {
		System.out.println(Thread.currentThread().getName() + "-->" + count);
		count++;
		// 唤醒所有等待的线程
		this.notify();
		try {
			// 让当前线程进入等待,会交出锁
			this.wait();
		} catch (InterruptedException e) {
			e.printStackTrace();
		}
	}
}
// 打印奇数的线程
class print0dd implements Runnable{
	private Num num;

	public print0dd(Num num) {
		super();
		this.num = num;
	}

	@Override
	public void run() {
		while (true) {
			try {
				Thread.sleep(1000);
			} catch (InterruptedException e) {
				e.printStackTrace();
			}
			num.print0dd();
		}
	}
}
// 打印偶数的线程
class printEven implements Runnable{
	private Num num;

	public printEven(Num num) {
		super();
		this.num = num;
	}

	@Override
	public void run() {
		while (true) {
			try {
				Thread.sleep(1000);
			} catch (InterruptedException e) {
				e.printStackTrace();
			}
			num.printEven();
		}
	}
}
3.3 生产者和消费者
生产者消费者模式是通过一个容器来解决生产者和消费者的强耦合问题。生产者和消费者彼此之间不直接通讯,而通过阻塞队列来进行通讯
所以生产者生产完数据之后不用等待消费者处理
直接扔给阻塞队列,消费者不找生产者要数据,而是直接从阻塞队列里取,阻塞队列就相当于一个缓冲区,平衡了生产者和消费者的处理能力。
优点 : 解耦
public class Thread_04_Producer {
	public static void main(String[] args) {
		SynStack synStack = new SynStack();
		Thread t1 = new Thread(new Producer(synStack));
		Thread t2 = new Thread(new Consumer(synStack));
		t1.start();
		t2.start();
	}
}
// 生产者线程
class Producer implements Runnable{
	private SynStack ss;
	public Producer(SynStack ss){
		this.ss=ss;
	}
	@Override
	public void run() {
		for (int i = 0; i < 20; i++) {
			ss.push((char)('a'+i));
		}
	}
}
// 消费者线程
class Consumer implements Runnable{
	private SynStack ss;
	public Consumer(SynStack ss){
		this.ss=ss;
	}
	@Override
	public void run() {
		for (int i = 0; i < 20; i++) {
			ss.pop();
			try {
				Thread.sleep(500);
			} catch (InterruptedException e) {
				e.printStackTrace();
			}
		}
	}
}
class SynStack{
	// 缓冲区
	char[] data = new char[6];
	// 保存个数
	int count = 0;
	// 生产者:库存满了就停止生产
	public synchronized void push(char ch) {
		// 判断库存是否满了
		if (count >= data.length) {
			try {
				// 如果满了则进入等待并交出锁
				this.wait();
			} catch (InterruptedException e) {
				e.printStackTrace();
			}
		}
		// 当库存为0时,说明消费者已经进入等待状态,那么就唤醒生产者
		if (count == 0) {
			this.notifyAll();
		}
		// 生产数据到库存
		data[count] = ch;
		count++;
		System.out.println("生产了" + ch + "剩余" + count + "件商品");
	}
//消费者 : 没有库存了就停止消费
	public synchronized void pop(){
		// 判断是否还有库存
		if (count == 0) {
			try {
				// 如果没有库存则进入等待
				this.wait();
			} catch (InterruptedException e) {
				e.printStackTrace();
			}
		}
		// 判断生产者是否进入等待,唤醒消费者
		if (count == 6) {
			this.notifyAll();
		}
		count--;
		char ch = data[count];
		System.out.println("消费了"+ch+",剩余"+count+"件商品");
	}
}
4. 单例模式
4.1 概述
懒汉模式 在多线程环境下可能出现问题,所以一般采用双重校验+代码块锁机制来解决处理
volatile : 防止指令重排
4.2 使用方法
public class Singleton_03 {
	private Singleton_03() {
	}
	// volatile : 防止指令重排
	private volatile static Singleton_03 s = null;

	// public synchronized static Singleton_03 getInstance() {
	public static Singleton_03 getInstance() {
		if (s == null) {
			synchronized (Singleton_03.class) {
				if (s == null) {
					s = new Singleton_03();
				}
			}
		}
		return s;
	}
}


 被折叠的 条评论
为什么被折叠?
被折叠的 条评论
为什么被折叠?
 到【灌水乐园】发言


